In Angular, components communicate to each other to share data such as object, string, number, array, or HTML.
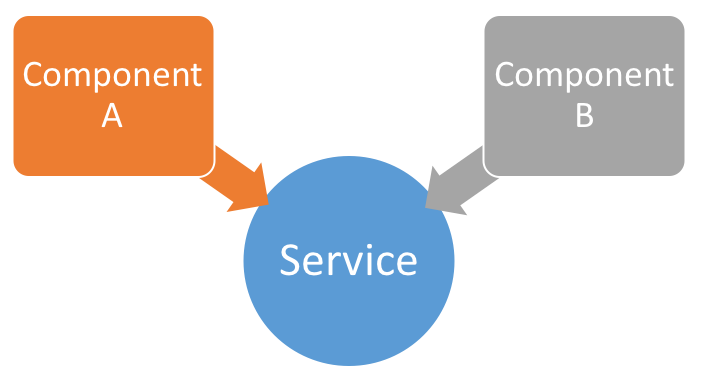
To understand component communication, first, we need to understand relationship between components. For example, when two components are not related to each other, they communicate through an Angular service.

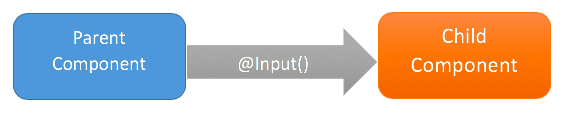
When you use a component inside another component, you create a component hierarchy. The component being used inside another component is known as the child component and the enclosing component is known as the parent component. As shown in the image below, in context of AppComponent, app-child is a child component and AppComponent is a parent component.
import { Component } from '@angular/core';

@Component({
  selector: 'app-root',
  template: `
  <h1>Hello {{message}}</h1>
  <app-child></app-child> //child component
  `,
})
export class AppComponent { //parent component

  message = 'I am Parent';

}
Parent and child components can communicate to each other in following ways:
@Input()@Output()Temp Ref VariableViewChildContentChild

When components are not related to each other, they communicate using services. Otherwise, they communicate using one of the various options depending on the communication criteria. Let’s explore all the options one by one.
@Input
You can pass data from a parent component to a child component using the @Input decorator. Data could be of any form such as the primitive type’s string, number, object, array, etc.
To understand use of @Input, let’s create a component:
import { Component } from '@angular/core';

@Component({
    selector: 'app-child',
    template: `<h2>Hi {{greetMessage}}</h2>`
})
export class AppChildComponent {

    greetMessage = 'I am Child';

}
Use the AppChild component inside AppComponent:
@Component({
  selector: 'app-root',
  template: `
  <h1>Hello {{message}}</h1>
  <app-child></app-child>
  `,
})
export class AppComponent {
  message = 'I am Parent';
}
AppComponent is using AppChildComponent, so AppComponent is the parent component and AppChildComponent is the child component. To pass data, the @Input decorator uses the child component properties. To do this, we’ll need to modify child AppChildComponent as shown in the listing below:
import { Component, Input, OnInit } from '@angular/core';

@Component({
    selector: 'app-child',
    template: `<h2>Hi {{greetMessage}}</h2>`
})
export class AppChildComponent implements OnInit {
    @Input() greetMessage: string;
    constructor() {

    }
    ngOnInit() {

    }
}
As you notice, we have modified the greetMessage property with the @Input() decorator. So essentially, in the child component, we have decorated the greetMessage property with the @Input() decorator so that value of the greetMessage property can be set from the parent component. Next, let’s modify the parent component AppComponent to pass data to the child component.
import { Component } from '@angular/core';

@Component({
  selector: 'app-root',
  template: `
  <h1>Hello {{message}}</h1>
  <appchild [greetMessage]="childmessage"></appchild>
  `,
})
export class AppComponent {

  message = 'I am Parent';
  childmessage = 'I am passed from Parent to child component';

}
From the parent component, we are setting the value of the child component’s property greetMessage. To pass a value to the child component, we need to pass the child component property inside a square bracket and set its value to any property of the parent component. We are passing the value of the childmessage property from the parent component to the greetMessage property of the child component.
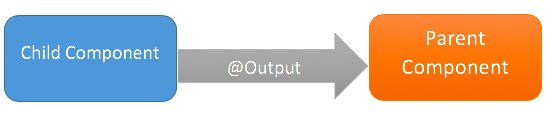
@Output
You can emit the event from the child component to the parent component using the @Output decorator.
Temp Ref Variable
Angular is based on a one-directional data flow and does not have two-way data binding. So, we use @Output in a component to emit an event to another component. Let’s modify AppChildComponent as shown in the listing below:
import { Component, Input, EventEmitter, Output } from '@angular/core';

@Component({
    selector: 'app-child',
    template: `<button (click)="handleclick()">Click me</button> `
})
export class AppChildComponent {

    handleclick() {

        console.log('hey I am  clicked in child');
    }
}
There is a button in the AppChildComponent template calling the function handleclick. Let’s use the app-child component inside the AppComponent as shown in the listing below:
import { Component, OnInit } from '@angular/core';
@Component({
    selector: 'app-root',
    template: `<app-child></app-child>`
})
export class AppComponent implements OnInit {
    ngOnInit() {
    }
}
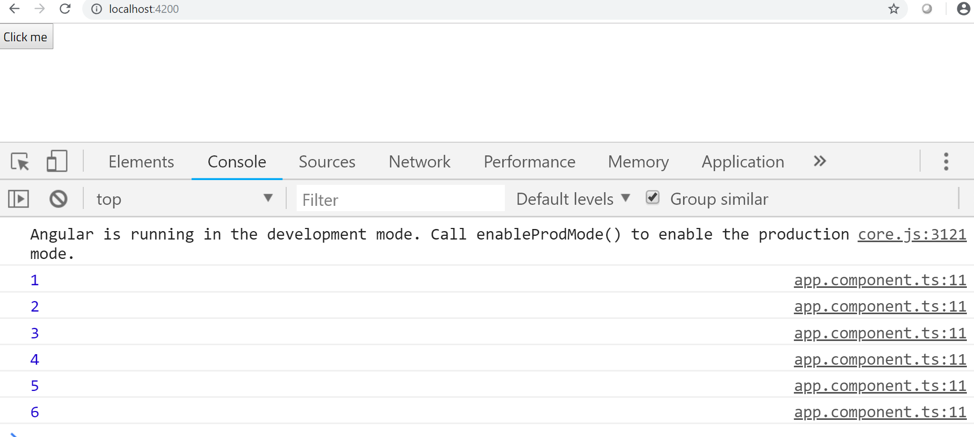
Here, we’re using AppChildComponent inside AppComponent, thereby creating a parent/child kind of relationship in which AppComponent is the parent and AppChildComponent is the child. When we run the application, we’ll see this message in the browser console:
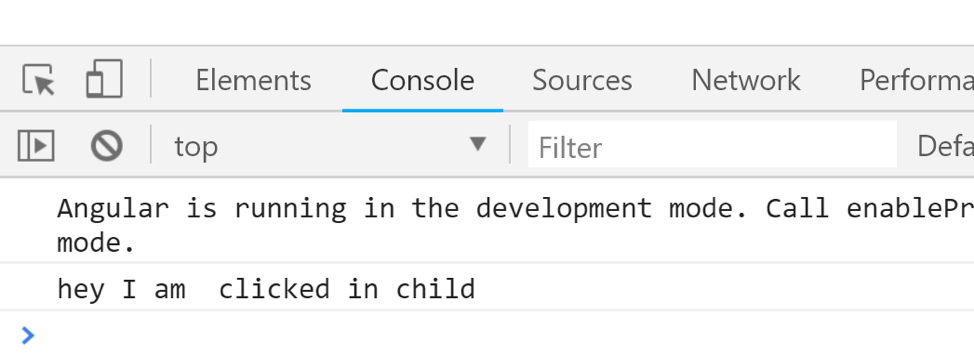
So far, it’s very simple to use event binding to get the button to call the function in the component. Now, let’s tweak the requirement a bit. What if you want to execute a function of AppComponent on the click event of a button inside AppChildComponent?
To do this, you will have to emit the button-click event from AppChildComponent. Import EventEmitter and output from @angular/core.
Here, we are going to emit an event and pass a parameter to the event. Modify AppChildComponent as shown in next code listing:
import { Component, EventEmitter, Output } from '@angular/core';
@Component({
    selector: 'app-child',
    template: `<button (click)="valueChanged()">Click me</button> `
})
export class AppChildComponent {
    @Output() valueChange = new EventEmitter();
    counter = 0;
    valueChanged() {

        this.counter = this.counter + 1;
        this.valueChange.emit(this.counter);
    }
}
We performed the following tasks in the AppChildComponent class:
- Created a variable called counter that will be passed as the parameter of the emitted event.
- Created an
EventEmitter valueChange that will be emitted to the parent component.
- Created a function named
valueChanged(). This function is called on the click event of the button, and inside the function, the event valueChange is emitted.
- While emitting the
valueChange event, the value of the counter is passed as a parameter.
In the parent component AppComponent, the child component AppChildComponent can be used as shown in the listing below:
import { Component, OnInit } from '@angular/core';
@Component({
    selector: 'app-root',
    template: `<app-child (valueChange)='displayCounter($event)'></app-child>`
})
export class AppComponent implements OnInit {
    ngOnInit() {
    }
    displayCounter(count) {
        console.log(count);
    }
}
Right now, we are performing the following tasks in the AppComponent class:
- Using
<app-child> in the template.
- In the
<app-child> element, using event binding to use the valueChange event.
- Calling the
displayCounter function on the valueChange event.
- In the
displayCounter function, printing the value of the counter passed from the AppChildComponent.
As you can see, the function of AppComponent is called upon the click event of the button placed on the AppChildComponent. This is can be done with @Output and EventEmitter. When you run the application and click the button, you can see the value of the counter in the browser console. Each time you click on the button, the counter value is increased by 1.