SketchFlow is a great tool for prototyping the application. We have already seen the components of the SketchFlow Application and how to create a new project. We will now start to prototype the application.
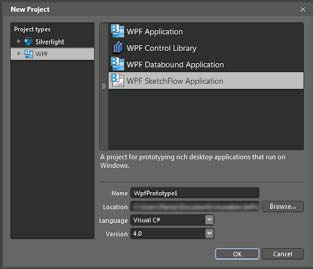
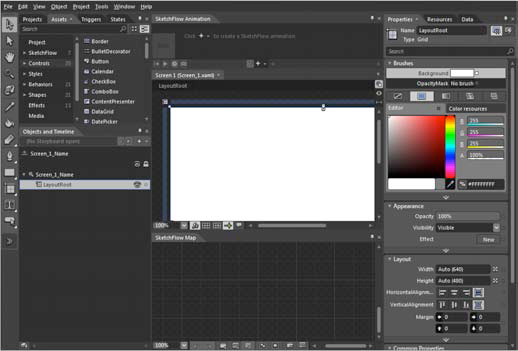
Start a new SketchFlow WPF project. By default SketchFlow starts with many panels open. We may not be using all of these panels so it is recommended to keep only the following panels open: Artboard, SketchFlowMap Panel, Properties Panel, Projects Panel, States Panel.
If you require other panels later you can always open them using the Windows Menu.
 If you get to a point where you have made mistakes on all of the open panels and are confused, you can always revert back to the SketchFlow’s default workspace by pressing Ctrl+Shift+R or by selecting “Reset Current Workspace” from the Windows Menu.
Creating Screens
In the SketchFlow Map Pane you will see a node named Screen1. Right click on it and rename it as “Welcome Screen.”
Double click on the Welcome Screen node, this will select the Welcome screen page in the artboard and allow you to draw the contents you want in the welcome screen.
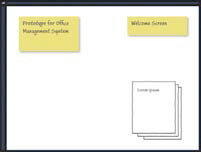
Hover over the welcome screen node and click on the “Create a connected screen” node. This will create a new node, name it “Login”. Double click on login to select the “Login Screen”.
Select the “Objects and Timeline Panel” and click on the root component, in this case it is UserControl named “Login_Name”. In the properties panel enter Height and Width as 300 px. This will resize the Login Panel.
From the left side tools panel click on the Assets button  it will open the following panel
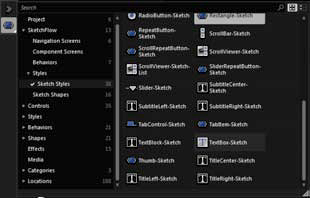
From under the Sketch Styles select TextBox Sketch to draw the TextBox. The Login Screen will look like this.
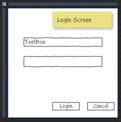
Login Screen
Just as we created the Login Node from the Welcome Node, create the “Main Screen” node from the Login Node. Double click on the new node to select the screen.
From the “Main Screen” node create three more screen nodes and name them: Consent Application Form, Purchase Order Form, Help, Messaging System.
Now, the basic structure for our prototype is ready.
A navigation menu has to be created which will allow us to move around the screens.
Double click on the “Main Screen” node to select it. On the artboard create a rectangle and three buttons as shown below:

Navigation Component Screen
In the Objects & Timeline panel select the three buttons and rectangle that we have created, right click on the selection and click on the “Make Into Component Screen” option as shown below.
Enter the name of the new Component Screen as “Menu”, Blend will create a separate screen with the items you had selected. On the SketchFlow map, the Component Screen node is shown in green.
When you hover over the component node in SketchFlow Map you get a similar menu as the normal screen node. This component screen we just created is to be shown in the consent Application, Purchase Order & Help screen.
Drag the green component screen node over the consent form to link it. Once the link is established, the menu element will be visible on the consent form screen. Similarly, drag the green node over the PO and Help nodes.
The messaging system will pass on the approval or denial of the request to the main screen of the user. So, a flow from the messaging system to the Main screen has to be created. From the messaging system menu drag the option “connect an existing screen” to the main screen.
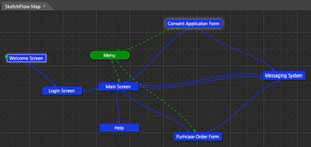
SketchFlow Map
Creating Contents in the Screens
Create content in the MainScreen, Consent Application, PO, Help and Messaging System. The dummy content on each screen gives the client a rough idea of how the application will look.
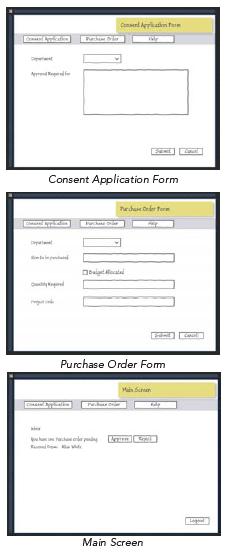
Creating Flow Between the Components
Select the welcome screen. In the Objects & Timeline Panel, right click on the root element “Layout Root” and under the option “Navigate to” select “Login Screen”.
Select the Login Screen and create a navigation Link on the “Login“ button to the “Main Screen”. Similarly navigation flow can be created for all the remaining screens.
Under the “Project Panel” double click and select the Component Screen “Menu”, Right click on the “Consent Application” Button to go to the Consent Application Form, similarly click on the PO Button and the Help button to go to respective screens.
 Since the Menu is a Component Screen the navigation flow will apply in the screens where it is used.
The navigation of the “Submit” button in the Consent & PO Screens is linked to the Messaging Form and the “Cancel” button is linked to the Main Screen.
Sending the Prototype for Feedback
After the completion of the Prototype, we send it to the client for his comments. Under the File Menu click on the “Package SketchFlow Project” option. Enter the Folder location where you want the package to be exported. The packaged project is sent to the client for review.
When the client executes the application sent to them they see the “SketchFlow Player”
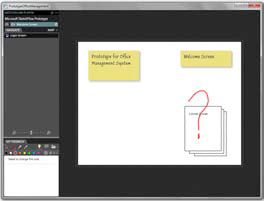
SketchFlow Player
The player allows the client to navigate through the application. They can provide their response using the feedback panel. The ink feedback allows drawing over the screen, and respective text feedback can be typed in the feedback panel. To send feedback, click on “Feedback Options Button”
From the opened menu select “Export Feedback”. It will ask for the Author information and location to save the feedback file to. Save the feedback file (client will send this file to developer team).
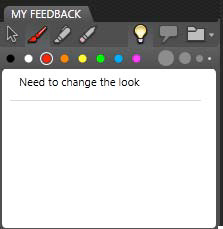
Reviewing the Feedback

Once the developer team receives the feedback file, it can be loaded into the prototype project. Open the “SketchFlow Feedback Panel”. If it is not open click on the “SketchFlow Feedback” option under the “Windows” Menu.
Click on the Add button to load the feedback file sent by the client. Once the feedback file is loaded you can see the details in the Panel.
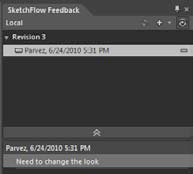
SketchFlowMap will show a small yellow bulb over the node on which the feedback is given

Node with Feedback
The developer team can watch the ink input by clicking on the eye icon in the SketchFlow Feedback Panel.
Multiple feedbacks from different members of Client Team can be loaded together.
The developer team incorporates the feedback from the design team and sends a new export of the SketchFlow player. Client reviews the new build. Once this iteration is complete the developer team is ready to start work on the Pilot Project.

 The basic goal of application prototyping is to understand the client’s needs clearly and get their approval before proceeding with the main application.
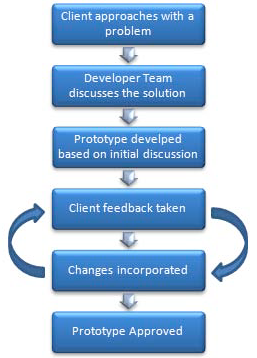
 Prototyping is an important component of application development; if the client’s requirements are not properly interpreted, you risk wasting time and money.
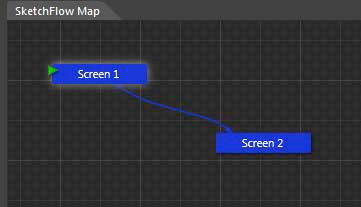


 of the node selected
 Start dragging to create a new navigation connection. An arrow will appear following the mouse pointer. This arrow has to be dragged to the screen where you want to make the connection.
 To remove the flow map connection right click the connection and click remove.
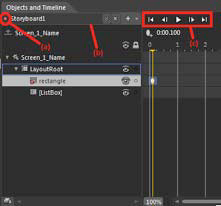
 There might be confusion on what is the most effective way to change the property of an object on the artboard or in the properties panel. It depends on the requirement. If you wish to fit in an object on the artboard it would be better if you use the object handle and mouse to arrange it on the artboard. If you want a specific height and width of a control you can do it by selecting the object on the artboard and modifying the properties in the properties panel.
 If you get to a point where you have made mistakes on all of the open panels and are confused, you can always revert back to the SketchFlow’s default workspace by pressing Ctrl+Shift+R or by selecting “Reset Current Workspace” from the Windows Menu.
 it will open the following panel


 Since the Menu is a Component Screen the navigation flow will apply in the screens where it is used.


