Each of the platforms supported by PhoneGap has its own Getting Started guide. Since these guides are very platform specific, readers are encouraged to visit the main documentation listing (http://docs.phonegap.com/en/2.5.0/guide_getting-started_index.md.html#Getting%20Started%20Guides) and select the guide for their platform.
In general, the process involves getting the SDK for your platform and then downloading the PhoneGap SDK. In some cases, like Android, other tools are required, like Apache Ant. In other cases, you need to purchase a developer program membership before you can use PhoneGap with that platform (iOS is an example of that).
Once you've finished the installation procedure for your frameworks of choice, projects can be created at the command line. For this reference guide we will make use of the Cordova command line program. While not part of the PhoneGap SDK, it is fully compatible with PhoneGap projects and can be used with the downloaded SDK. Here is an example
In the example above, a new project will be created in a subdirectory called somedir, using the ID of org.sample.test, and using an application named test. Both the ID and application name values are optional. The directory will contain the following folders:

For now, just concern yourself with the platforms and www folder. The platforms folder will contain a platform-specific install of whatever device types you want to support. So for example, if you wanted to build an app for iOS and Android, there would be two folders underneath it. Since you just created the project this will be empty at first. The www folder is the actual HTML, JavaScript, CSS, and related assets for your application. This is where you will edit your code. The cordova command line will handle copying your files into the appropriate platform directories. To go ahead and add support for iOS and Android, you would type:
By default, the www folder already contains some basic assets, so you can immediately test out your project by first building it:
And then passing it to the emulator:
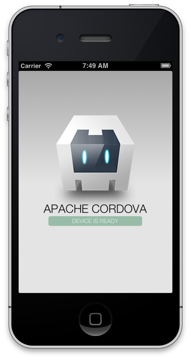
Here's the default application running in the iOS emulator:
Using PhoneGap's Features
Now that you know how to create a project, build it, and deploy it to a simulator, how do you actually make use of PhoneGap's features?
Each PhoneGap project ships with a JavaScript file, cordova.js, that provides hooks to native device features not normally available to web pages on the device. The file, cordova.js, will not be present in the www folder you just created. Yet you can see it included by the default index.html file:
How does this work? When you create a build, the command line tool will copy your HTML, JS, and other assets into the platform folder and automatically include the proper cordova.js file for each unique platform.
The next step is crucial. When your application starts up, it will not be ready to use any special devices features. Instead, it must wait for the application to initialize those hooks and listen for an event called deviceready. Here's a simple example of that in action:
Once the deviceready event is fired, you can then use any of the PhoneGap features your application requires.
Using the Camera
As an example of using the PhoneGap API, let's build a simple application that makes use of the device camera. First, let's begin with some simple HTML.
In order to make the button a bit easier to use, we've added a simple CSS file to make it fatter:
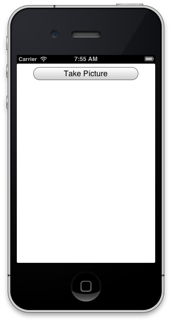
Here is how it looks in the iOS Simulator:
Now that we've got the layout built, let's look at the code.
The file begins with a simple event handler for the deviceready event. PhoneGap will fire this automatically when it is safe to use device APIs.
In the beginCamera function you can see the call to navigator.camera.getPicture. The first two arguments are a success and error handler respectively. The third argument is a set of options that let you customize how the camera will be used. In our example, we've specified a quality of 50, a destination type of a file uri, and a target width and height of 350 pixels.
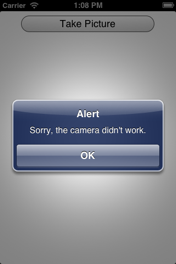
The cameraError function makes use of another part of the PhoneGap API, the notification feature. If the user's device doesn't have a camera (or something else goes wrong), this notification will be displayed.
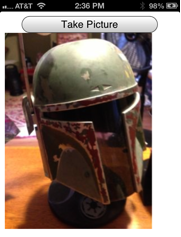
The cameraSuccess handler is fired after a picture is selected. Since we elected to have a FILE_URI sent, we can simply use that in our DOM. We select the image and assign the URI to the src attribute.
Camera API Overview
| Method |
Description |
| navigator.camera.getPicture(success handler, error handler, options) |
Main method for getting picture data. It also supports getting a picture from the user’s existing collection of photos. Other options include desired quality and size as well as encoding type. |
| navigator.camera.cleanup |
A utility to remove photos that may exist in the application’s temporary directory. |
Using the Connection API
Another useful feature of the PhoneGap API is the Connection API. PhoneGap apps run locally on a device. Technically, they do not need to be online to perform their tasks. In this code snippet, we inspect the connection device connection status as well as listen for changes:
By using a little bit of code your application can then intelligently respond to changes in the device's connection to the Internet. You can even check the strength of the connection. This would be useful for deciding if it makes sense to stream large files.
Connection Object Values
The following is a list of each constant available in the navigator.network.connection object:
- Connection.UNKNOWN
- Connection.ETHERNET
- Connection.WIFI
- Connection.CELL_2G
- Connection.CELL_3G
- Connection.CELL_4G
- Connection.CELL
- Connection.NONE
Using the Device API
Another useful feature is the Device API. While not exactly an API, the device object returns values for the name, platform, version, model, as well as the currently running version of PhoneGap. If your code needs to do something slightly different for iOS versus Android, this is what you would use.
Device Object Values
The following is a list of each constant available in the device object:
- device.name
- device.cordova
- device.platform
- device.uuid
- device.version
- device.model

