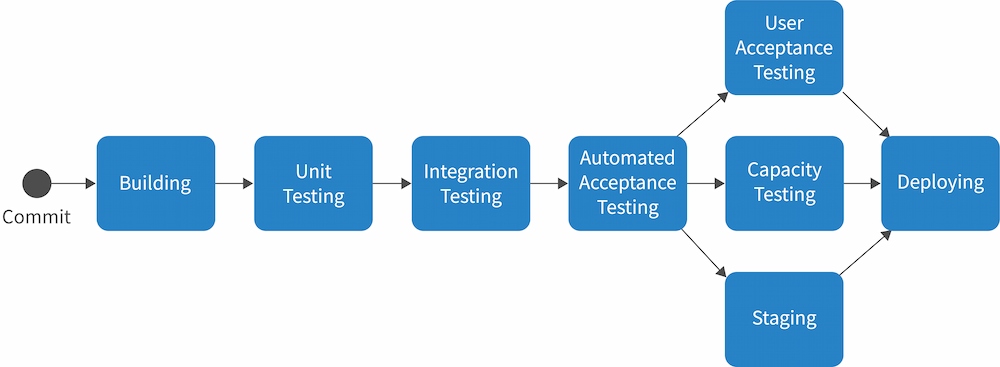
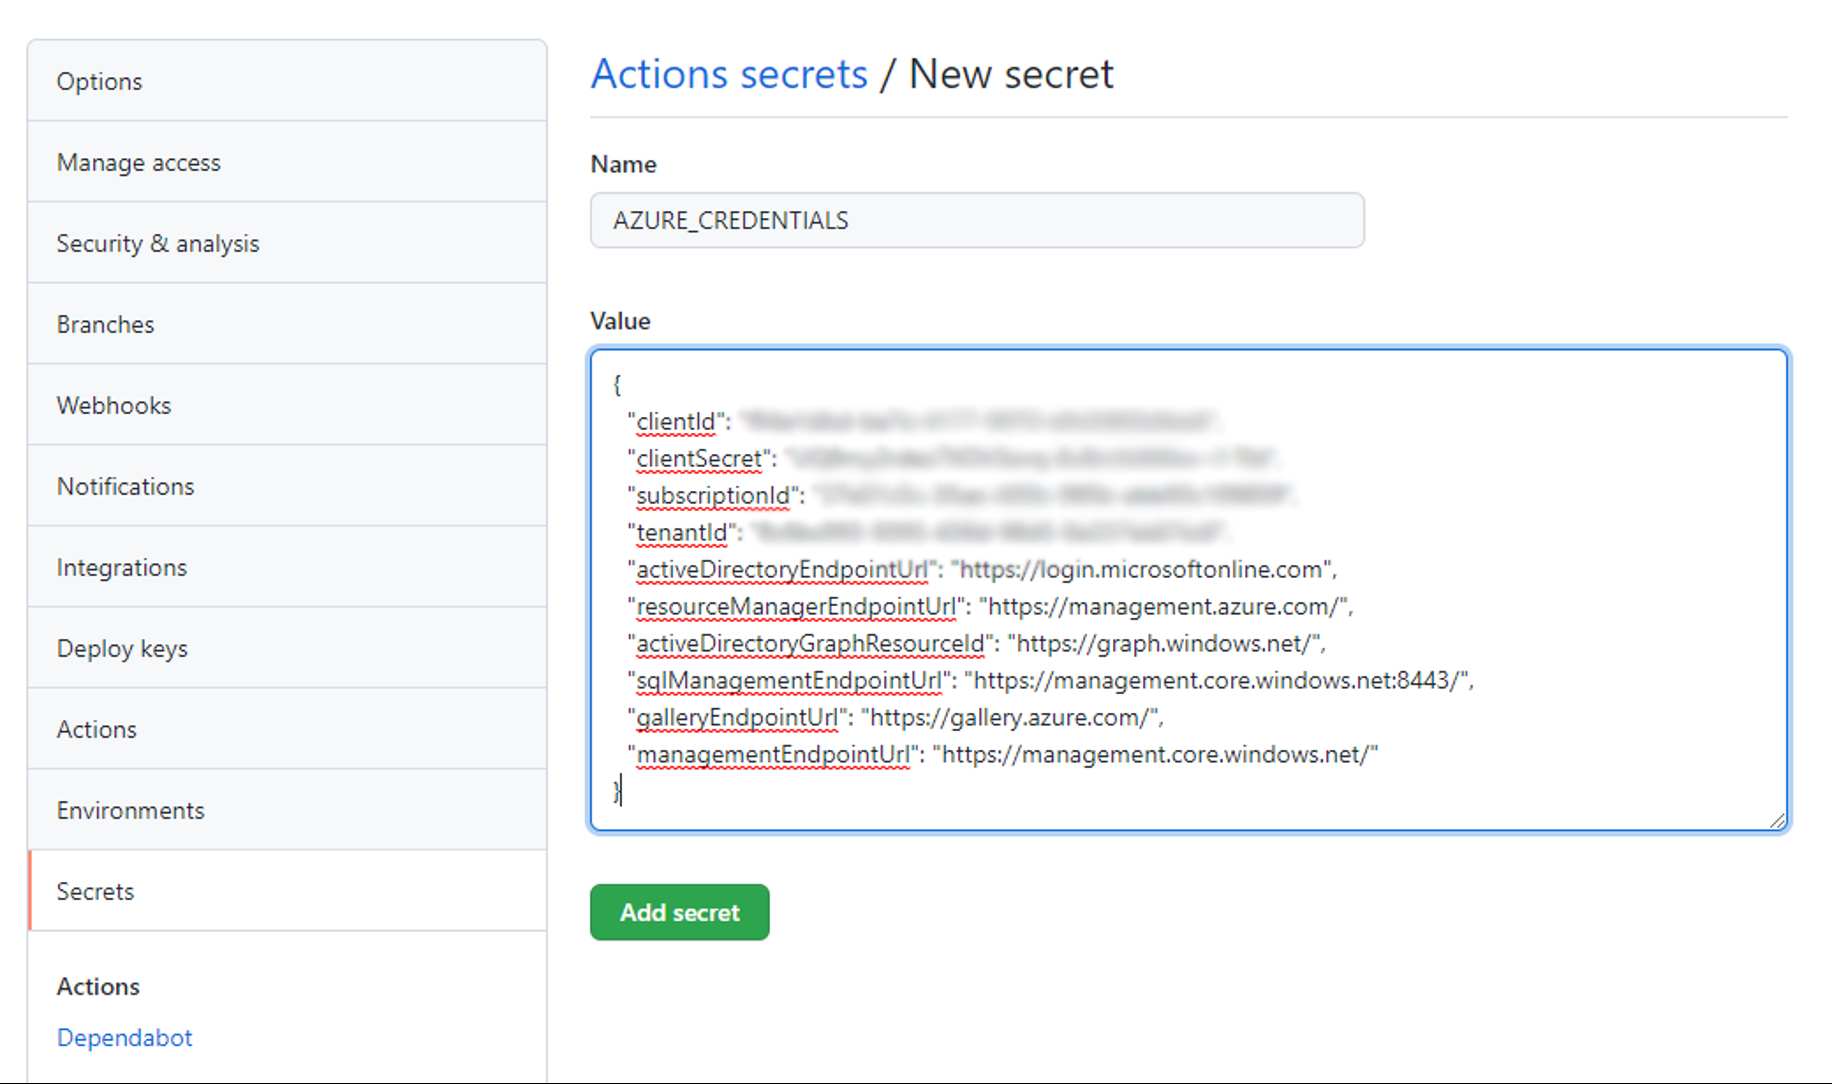
GitHub hosts more than 200 million repositories, and for 11 years since its inception, developers were only able to create CI/CD pipelines using third-party tools, such as Travis CI and CircleCI. This external process changed in November of 2019, when GitHub announced the launch of GitHub Actions. GitHub Actions is a CI/CD tool that is incorporated directly into every GitHub repository, utilizing text-based configuration files that reside directly within the repository.
The root concept in GitHub Actions is a workflow, or a series of automated procedures. In practice, a workflow is similar to a pipeline and allows developers to configure a series of stages that can be executed each time a specific event is triggered. Every repository can have any number of workflows, and each workflow is composed of the following components:
| Component |
Description |
| Job |
A set of steps that are executed on the same runner By default, if a workflow has more than one job, the jobs are executed in parallel, but jobs can be configured to run in series by declaring that one job depends on another. If job B depends on job A, job B will only execute if job A completes successfully. |
| Step |
A task that is composed of one or more shell commands or actions All steps from a job are executed on the same runner, and therefore, can share data with one another. |
| Action |
A prepackaged set of procedures that can be executed within a step There are numerous actions already available through the GitHub community that perform common tasks, such as checking out code or uploading artifacts. |
| Event |
A stimulus that triggers the execution of a workflow One of the most common events is a user checking in code to a repository. |
| Runner |
A server that executes jobs on a specific Operating System (OS) or platform Runners can either be hosted by GitHub or on standalone servers. |
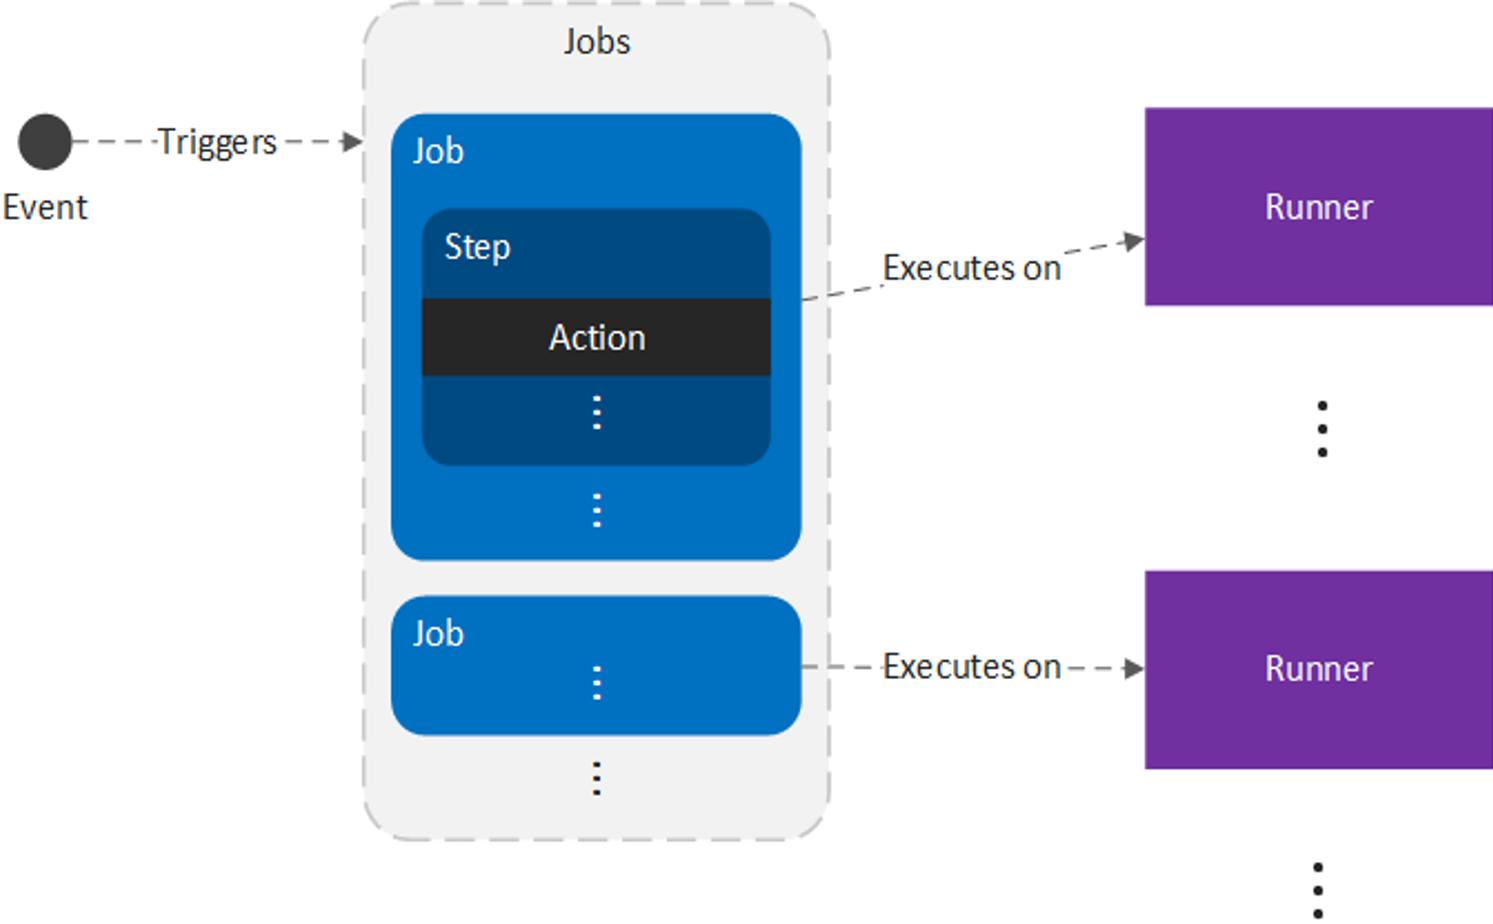
The relationship between these components is illustrated below:
In practice, workflows are more generalized than a CD pipeline, but they are closely related:
- Workflows = pipelines
- Jobs = stages
- Steps = the series of procedures that make up a stage
Example Workflow
To demonstrate a workflow, we can create a small project with several tests. For this example, we will use the dzone-github-actions-refcard-example project. This project runs a Representational State Transfer (REST) Application Programming Interface (API) application that responds with a "Hello, world!" message from the /hello endpoint and has a single test to ensure that the response body of the endpoint is correct. To clone the repository, execute the following commands:
Once the project is ready, we can build a new workflow by creating a .yml file in the .github/workflows/ directory of our GitHub repository — for instance, .github/workflows/example.yml. We can then configure our workflow to check out our repository and run our tests using the mvn test command by adding the following to our example.yml file:
This configuration is broken up into three main parts:
name – an optional name of the workflow.on – the trigger that executes the workflow — in this case, when a commit is pushed to the repository, denoted by push. The full syntax for the on field is documented in the Workflow syntax for GitHub Actions page.jobs – the jobs that make up the workflow.
The jobs field contains two jobs: build and unit-test.
build is the job used to build our project. Note that the name build does not have any special significance and any name can be used. The runs-on field signifies the OS and environment that the job will execute on, such as the latest version of Ubuntu (denoted by ubuntu-latest). The stepsfield denotes the steps of the job. In this case, there are three steps:
1. Checking out the repository – checks out the code in the repository using the Checkout action. Since we do not know the state of the runner that will execute each job, we first have to check out our repository before we can access our code. We can select any of the available actions to run with the uses field. See the Workflow Syntax page for more information.
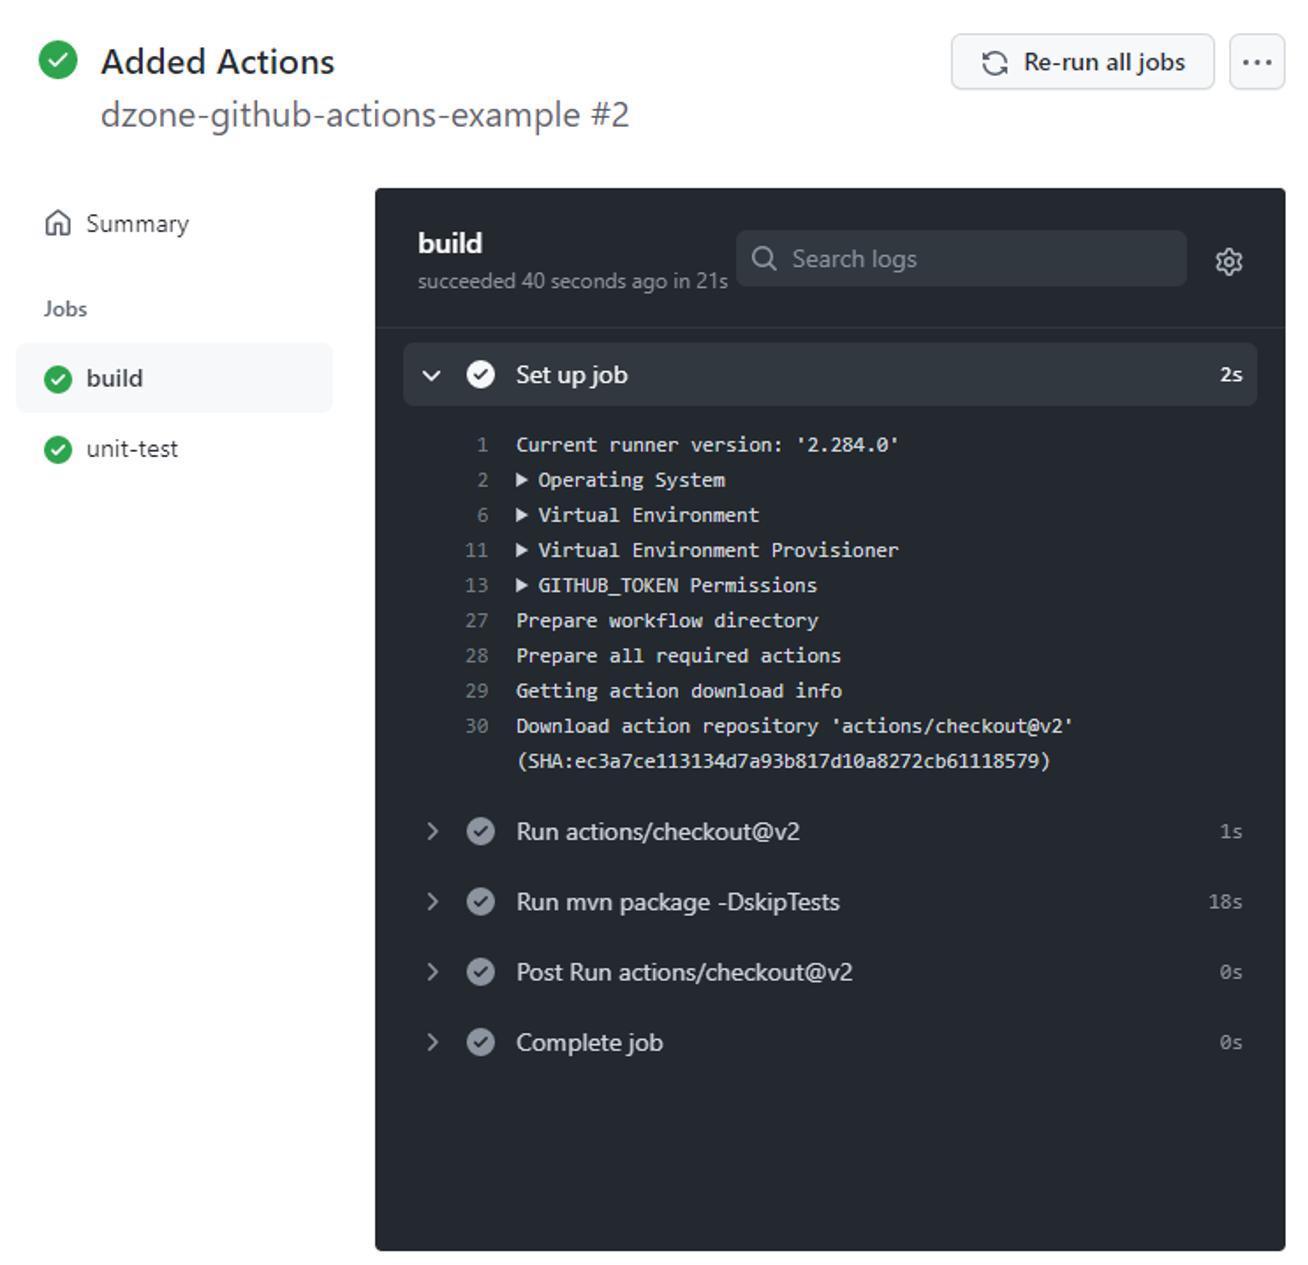
2. Building the repository – we execute a shell command — in this case, mvn package -DskipTests — using the run field. This command packages our application into a Jar file without running the tests (which will be executed in a subsequent job). If needed, we can also run multiple shell commands using the pipe character. For example, we can echo Running a build and then execute the build as follows:
3. Upload artifacts – As we will see later, we will need access to the JAR file (our executable) created in this job. To store it for later, we upload the JAR artifact using the upload-artifact action, assigning the name of the uploaded artifact (so we can reference it later) using the name field and specifying the path of the artifact using the path field. See the upload artifacts documentation for more information.
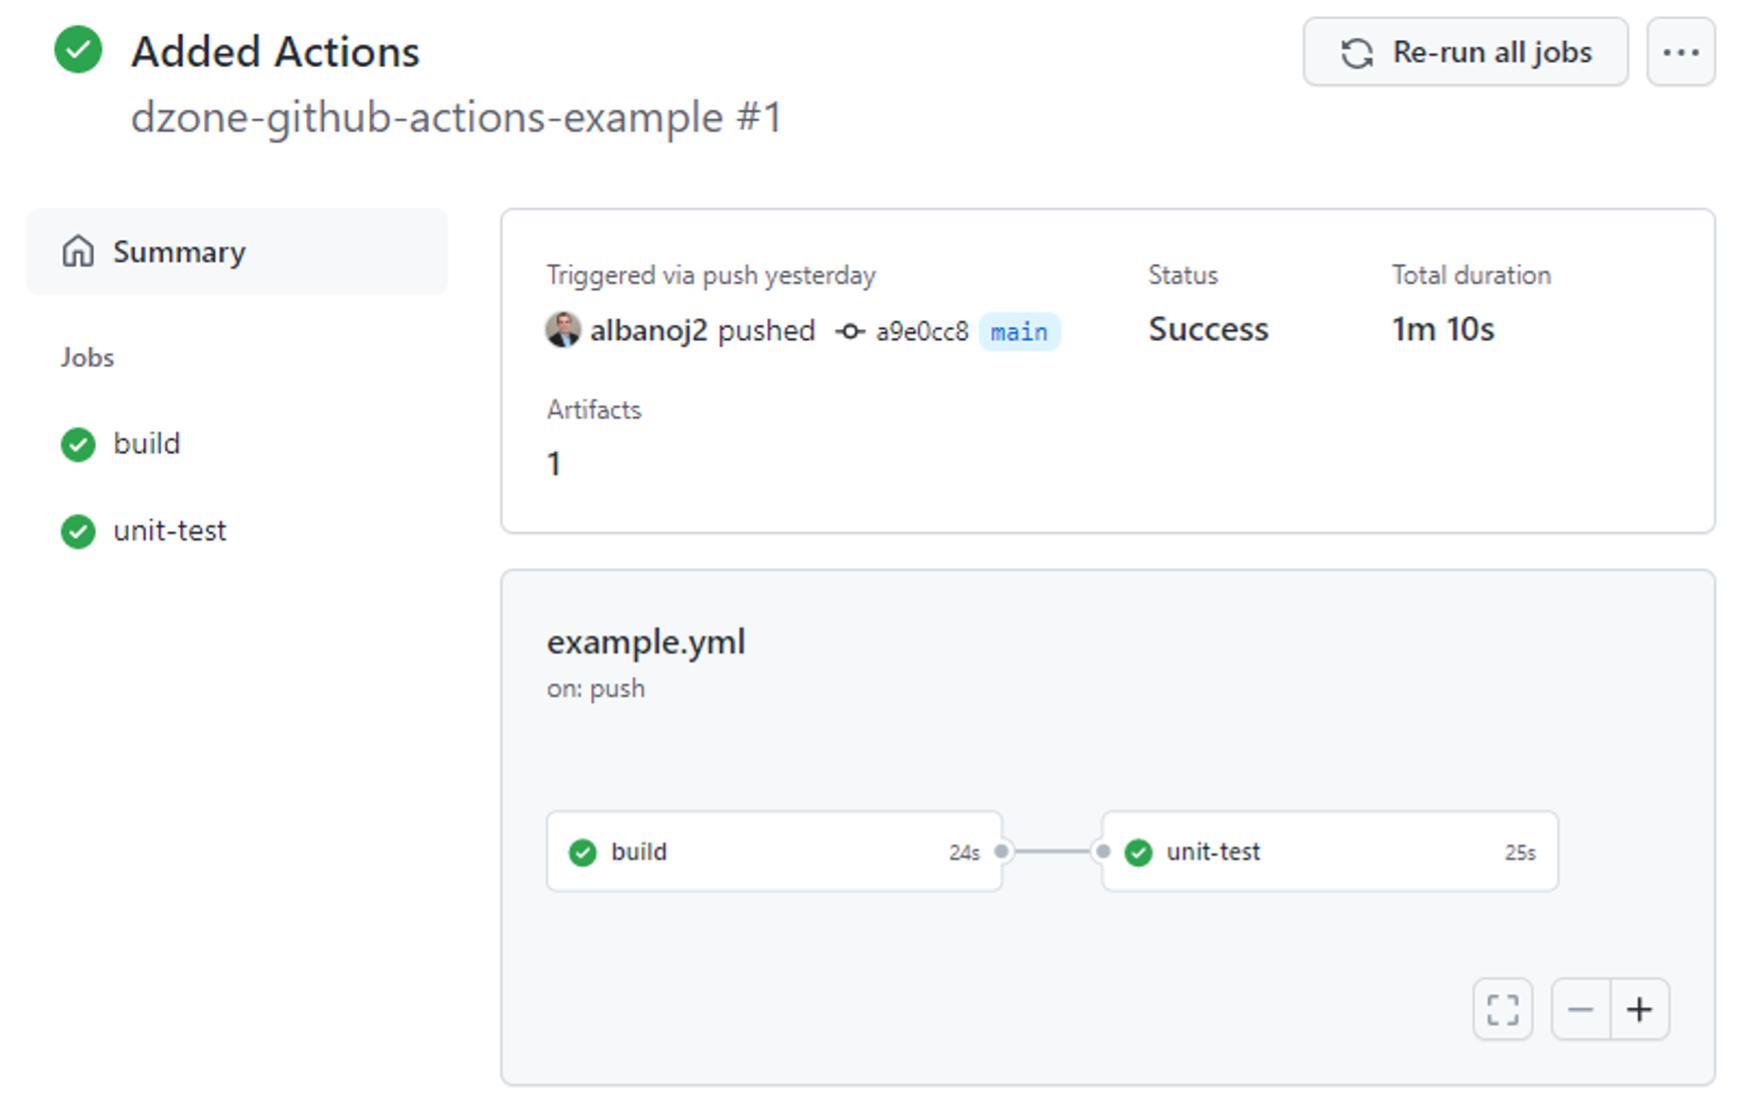
unit-test is the job used to run our unit tests. This job is similar to our build job, but instead of running the mvn package -DskipTests command, we run the mvn test command. In addition, we also add the needs field, whose value is simply the name of the job that our unit-test depends on. In our case, we specify that our unit-test job depends on our build job using needs: build. With this relationship configured, our unit-test job will only execute once the build job successfully completes. See the Workflow Syntax page for more information.
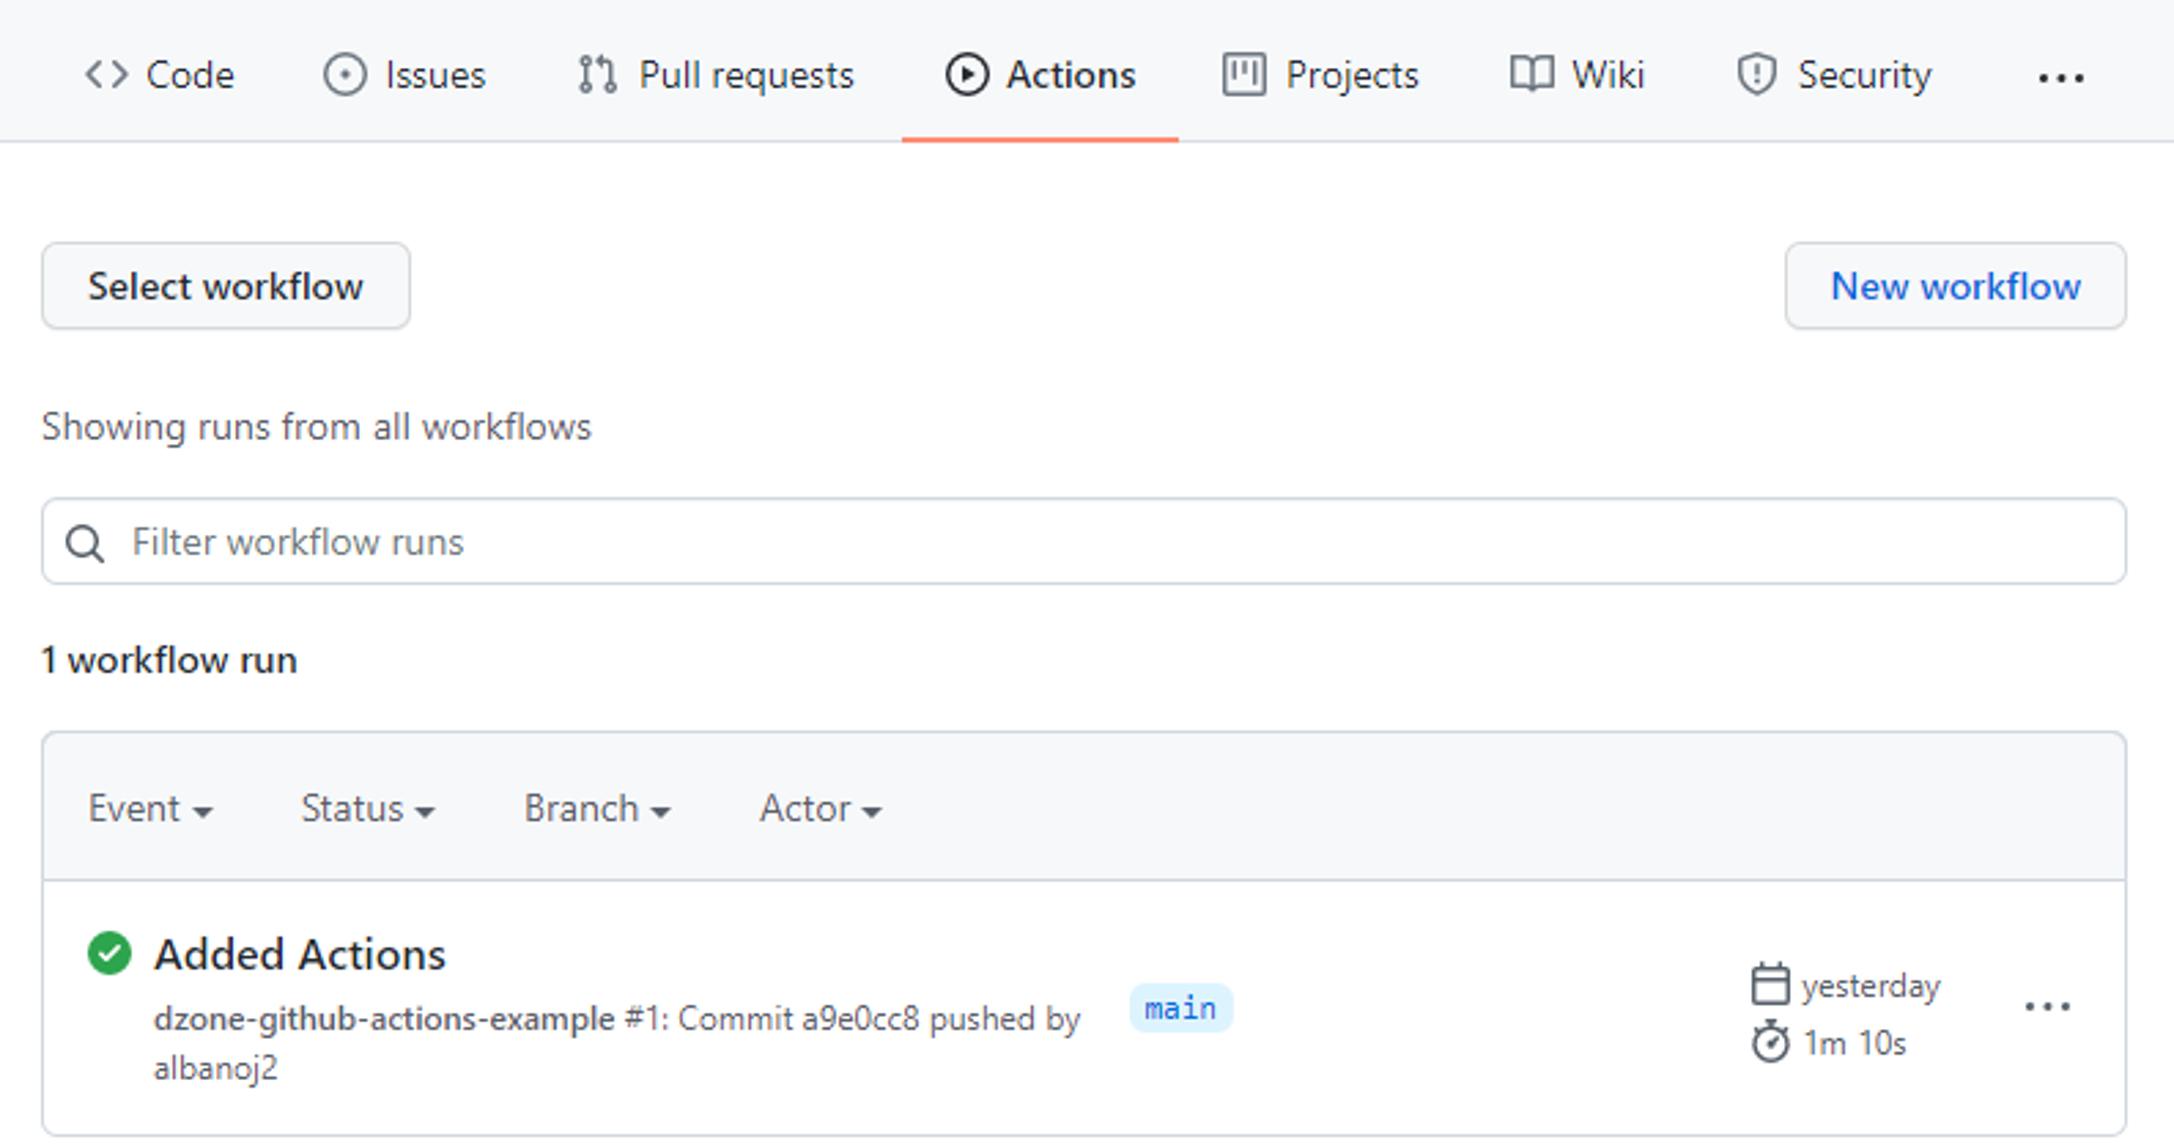
When we commit this example.yml file, GitHub recognizes that a workflow has been configured and executes our workflow. If we click the Actions tab in our GitHub repository, we can see all workflow runs that correspond to our commits:
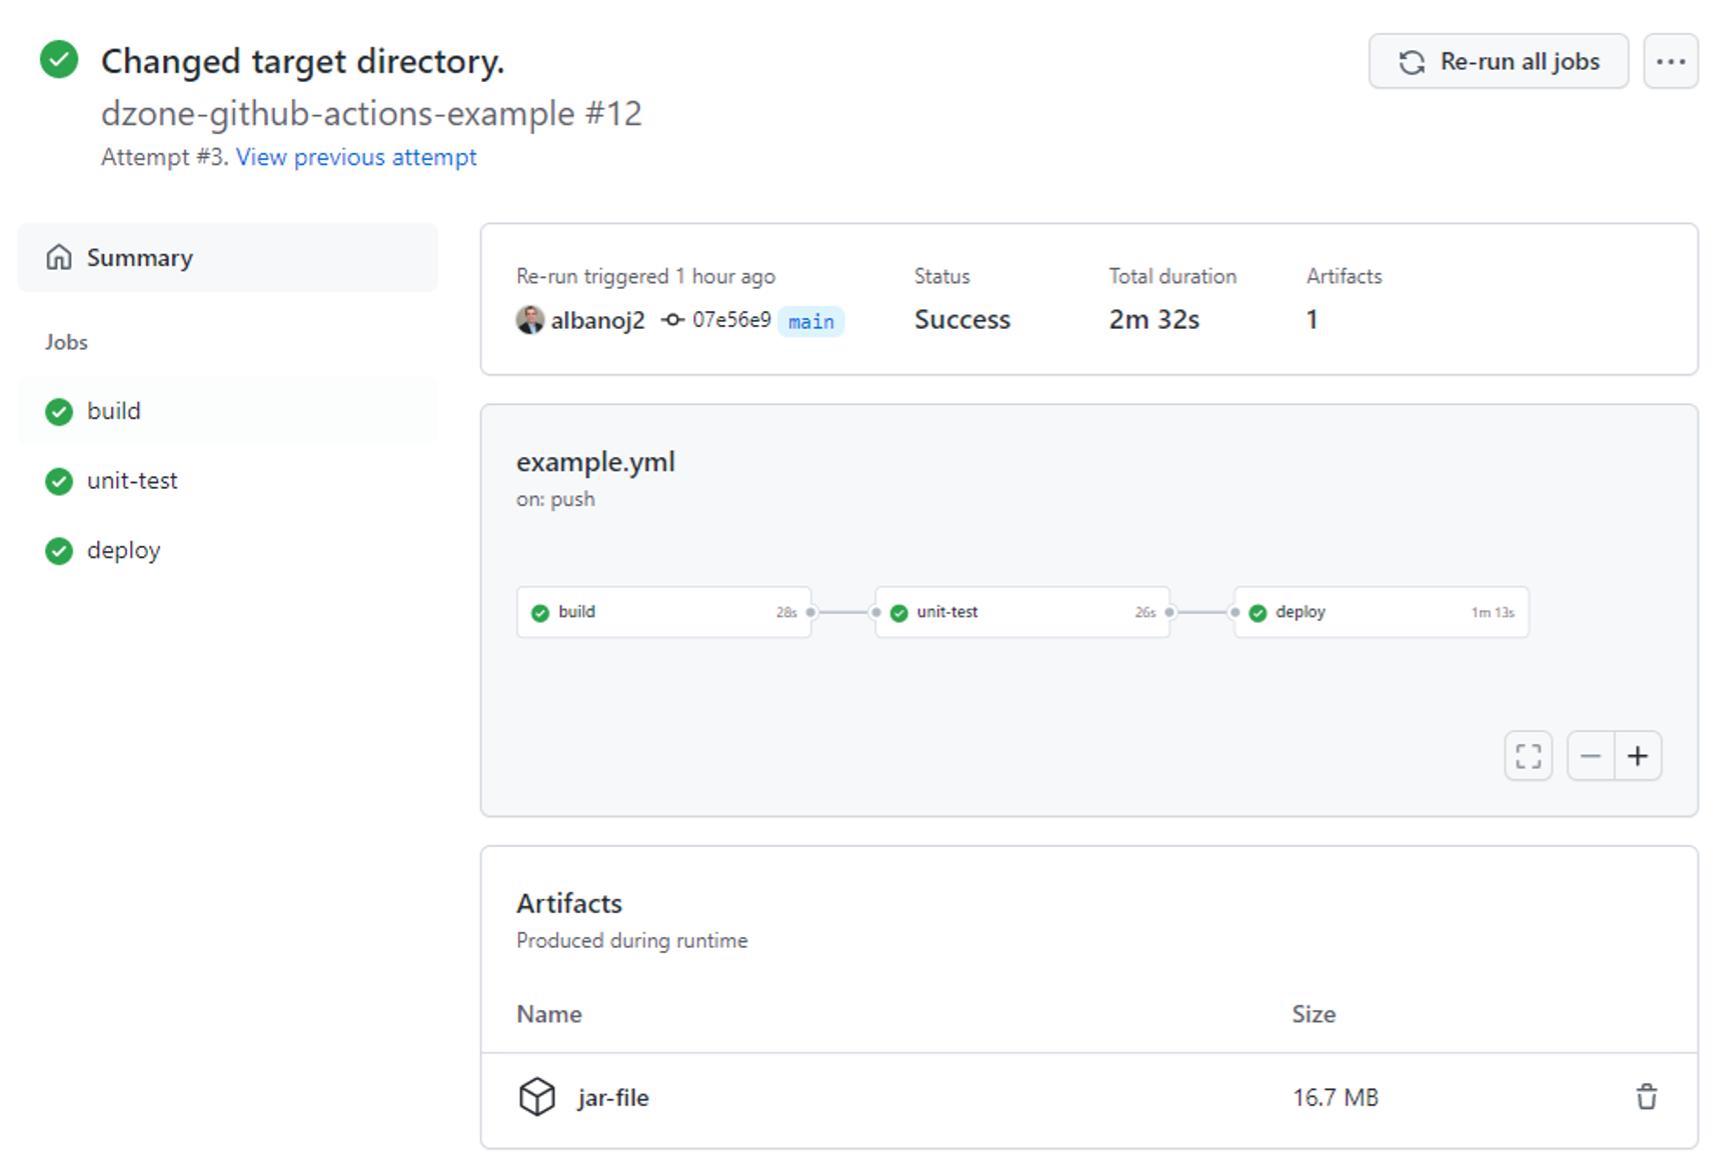
If we click on a workflow run — here, Added Actions — we can see the status of our pipeline for that run along with status and duration information:
Lastly, if we click on the build job, we can see the log output that corresponds to the execution of our build job in our Added Actions commit:
Although the syntax for a GitHub Actions workflow is simple, it provides the mechanisms necessary to create sophisticated pipelines and execute nearly any procedures that we need to satisfy our business objectives.

