Every RPA project is required to go through a set of stages during its journey. These stages are often called the lifecycle of an RPA project. Each step handles different aspects of the automation solution — discovery, build, manage, run, engage, and measure. Let’s look at each stage to better understand the activities performed and what technologies help to best complete the assigned tasks.
Discovery
Identifying the best processes to automate, optimize, and standardize usually consumes a lot of resources and time. However, the power of science and AI makes discovery processes more efficient. The knowledge and experience of the employees combined with AI enable the organization to come up with a holistic 360-degree view of all the processes.
There are many tools that users can use to record the process steps and analyze the recorded information to generate insights. Especially, the results generated by such process and task mining tools can be easily transformed into decisions to prioritize and identify the automation potential of the current processes. Further, the insights provided to the RPA Center of Excellence (CoE) team can solve process inefficiencies by introducing the right kind of standardization where necessary.
Build
The world of RPA today is moving towards the concept of having a robot for everyone. Hence, irrespective of an individual's background, they should be able to build and manage their robots. Today, there are low-code platforms for people with different levels of coding skills. Such development tools allow users to build scalable, adjustable, and intelligent automation solutions using a simple drag-and-drop canvas and dashboards.
With the introduction of RPA, every technology company found ways to build components that allow easy interaction with its platforms. Apart from the tools, there are many readily available components, code snippets, and code templates available online for users to download and use free of charge. Users can easily use such components by plugging them into their solution to interact with multiple software applications effectively.
Artificial intelligence is also a topic that we can't exclude when building automation solutions. Integrating AI, ML, and other NLP capabilities with RPA workflows is now just a couple of clicks away. RPA platforms have built-in AI capabilities, which we can easily configure and train to use in our automation workflows to perform any complex activity. This approach has allowed business users to easily combine their workflows with AI to perform more complicated actions, while technical users can use the same or build their own.
Manage
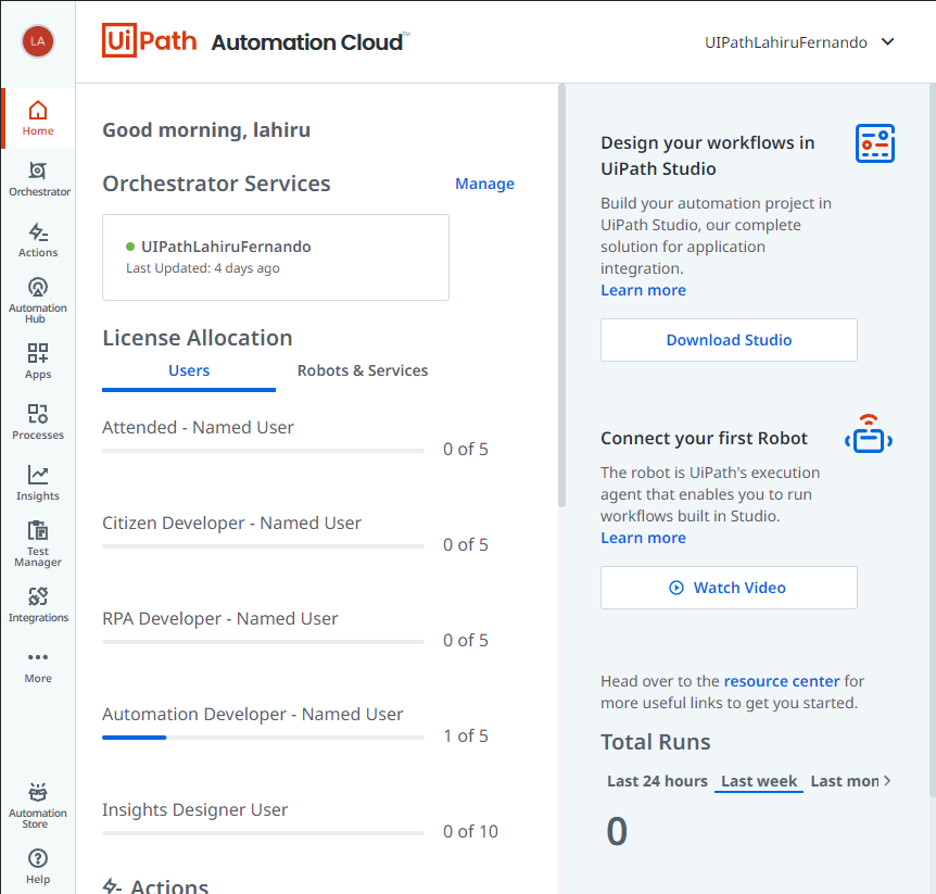
As we manage our team, managing the virtual workforce is an essential aspect of the journey. Managing the virtual workforce usually includes centralized deployments, processes scheduling, automation workflows, checking for errors and inefficiencies, and scalability. Orchestration also enables global information management, such as credentials, globally used configuration values, etc., for better tracking and management. Such features provide a single centralized interface to apply changes to all automation solutions with just a click.
Run
Virtual assistants execute your processes in any way you like — attended, unattended, or in a hybrid model. The flexibility offered by RPA technologies enables the virtual workforce to take up multiple background processes while executing foreground processes (which interact with UI elements). The attended robots work in the same machine as the user, helping their daily activities by conducting repetitive work simultaneously without interruptions. The unattended robots primarily work on backend processes that don't require any human involvement.
Engage
Automation isn't just about automating repetitive activities. Robots today are also capable of interacting with people as chatbots to understand user requirements and act accordingly. The power of AI and NLP enables robots to perform human-like conversations with users and collaborate to optimize the entire process from start to finish.
Today, automation platforms are configurable to monitor and communicate with web or mobile applications where robots can bring in exceptions and approvals to an employee to keep meaningful work flowing. This concept enables users to work on value-added activities while the robots work behind the scenes to bring required data to the screen as soon as the user needs it. An excellent example of using such apps is in a call center environment. Whenever a user receives a call, the robot captures the customer information either by listening and understanding the language or by automating specific inputs that bring in the required data to the app screen. This reduces the time involved for the operator to search and extract the required information from different applications.
Measure
Embedded analytical capabilities of RPA platforms enable users to define KPIs and track the ROI of the automation program through different reporting platforms. Performance dashboards built on data generated by the robots allow process owners, CoE leads, and management to monitor the performance of their digital workforce.
Govern
Governance usually wraps around all stages described above to better control the quality of the automation solution. Quality control mechanisms may vary from organization to organization as they have their own best practices and standards, depending on the requirements. However, it's vital to have a governance model around all stages to ensure consistency across the organization.
Though every automation solution has a lifecycle, it doesn't ensure that we always build the most efficient solution for the process. Identifying the best procedures to automate requires a good level of research and understanding of the goal and process. Let’s have a look at some important considerations when deciding on automation.
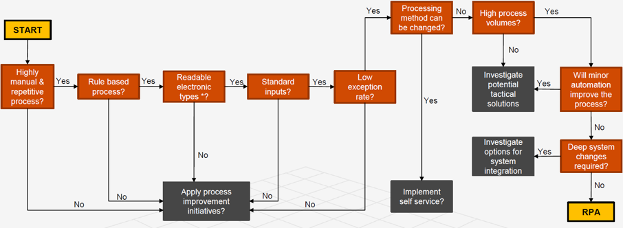 The figure shows that any process with repetitive manual activities, rule-based decisions, electronic input, and high exception rates aren't good candidates for automation. Such processes should undergo process improvements before applying automation. Further, we also need to consider any changes in the process and applications involved. Any expected changes require evaluation and reassessment before considering automation. However, any process that passes through all the criteria mentioned above is a good fit for automation.