A Guide to Installing Kali Linux
Kali Linux is the number one Linux distribution for cybersecurity. Learn how to get up and running here.
Join the DZone community and get the full member experience.
Join For FreeIf you are pursuing a career in information security, one of the most important things is to have a security-focused operating system. A suitable OS helps you in performing time-consuming and tedious tasks efficiently. Currently, there are countless Linux-based OSs, but Kali Linux is arguably one of the best choices. It is used by cybersecurity experts for penetration testing, ethical hacking, and network security assessments. In this article, we will take a look at how to install Kali Linux.
Let’s get started!
What is Kali Linux?
Kali Linux is the industry’s leading Linux distribution in penetration testing, ethical hacking, and security auditing.
When it comes to penetration testing, hacking, and offensive Linux distributions, one of the first things to be mentioned is Kali Linux. The software comes pre-packaged with a variety of different command line hacking tools geared towards various information security tasks, such as penetration testing, network security, computer forensics, and application security. Basically, Kali Linux is the ultimate OS for ethical hackers and is widely-recognized in all parts of the world, even among Windows users who may not even know what Linux is.
So, what makes Kali Linux a preferable choice when compared to other Linux distributions like Parrot Security, Backbox, Blackarch, and many others?
Why Do People Use Kali Linux?
Kali Linux is the most preferred operating system to perform various information security tasks due to the following reasons:
- It offers more than 600 penetration testing tools from various fields of security and forensics
- It's completely customizable, so if you are not comfortable with current Kali Linux features, you can customize Kali Linux the way you want
- Though penetration tools tend to be written in English, Kali provides multilingual support
- It supports a wide range of wireless devices
- Comes with the custom kernel, patched for injections
- Developed in a secure environment
- It’s a free and open source software
So, because of these reasons, Kali Linux is the most popular OS used by cyber security experts all over the world. If you want to get into the world of cyber security and ethical hacking, learning how to install Kali Linux is the first step.
Let’s start with our Kali Linux Installation!
Installing Kali Linux
Kali Linux installation is a fairly simple process and you have multiple installation options. The most-preferred methods include:
- Installing Kali Linux by making a Kali (Linux) bootable USB drive
- Kali Linux hard disk install
- Using virtualization software, such as VMware or VirtualBox
- Dual booting Kali Linux with the operating system
While you have multiple options to choose from, in this article, we will learn how to install Kali Linux using virtualization software. Following these steps, you can set up your machine with all the tools you need to perform a comprehensive penetration test.
Installation Requirements
- Minimum 20 GB of free space in your hard drive is recommended.
- At least 4 GB of ram is recommended when using VMware or VirtualBox
- CD-DVD Drive / USB Support
Getting Started with Installation
Step 1: Install VMware
In order to run Kali Linux, we will need some sort of virtualization software first. While there are many options to choose from, such as Oracle’s VirtualBox, I prefer using VMware. Once the installation is done, launch VMware from your applications folder.
Step 2: Download Kali Linux and Check Image Integrity
To download Kali Linux, you can go to the official download page and select the one that best suits your needs from there. In addition, on the download page, you will find a bunch of hexadecimal numbers. And those are not there for fun. Kali Linux is intended to be used for security-related tasks. So, you need to check the integrity of the image you download.
You should check the SHA-256 fingerprint of the file and compare it with the one provided on the download site.
Step 3: Launch a New Virtual Machine
On the VMware Workstation Pro homepage, click on "Create a New Virtual Machine," choose the Kali Linux iso file, select the guest operating system, and configure virtual machine details (here, Kali Linux). Start the virtual machine by selecting the Kali Linux VM, and then clicking on the green “Power On” button.
The machine will start up!
Installation Procedure
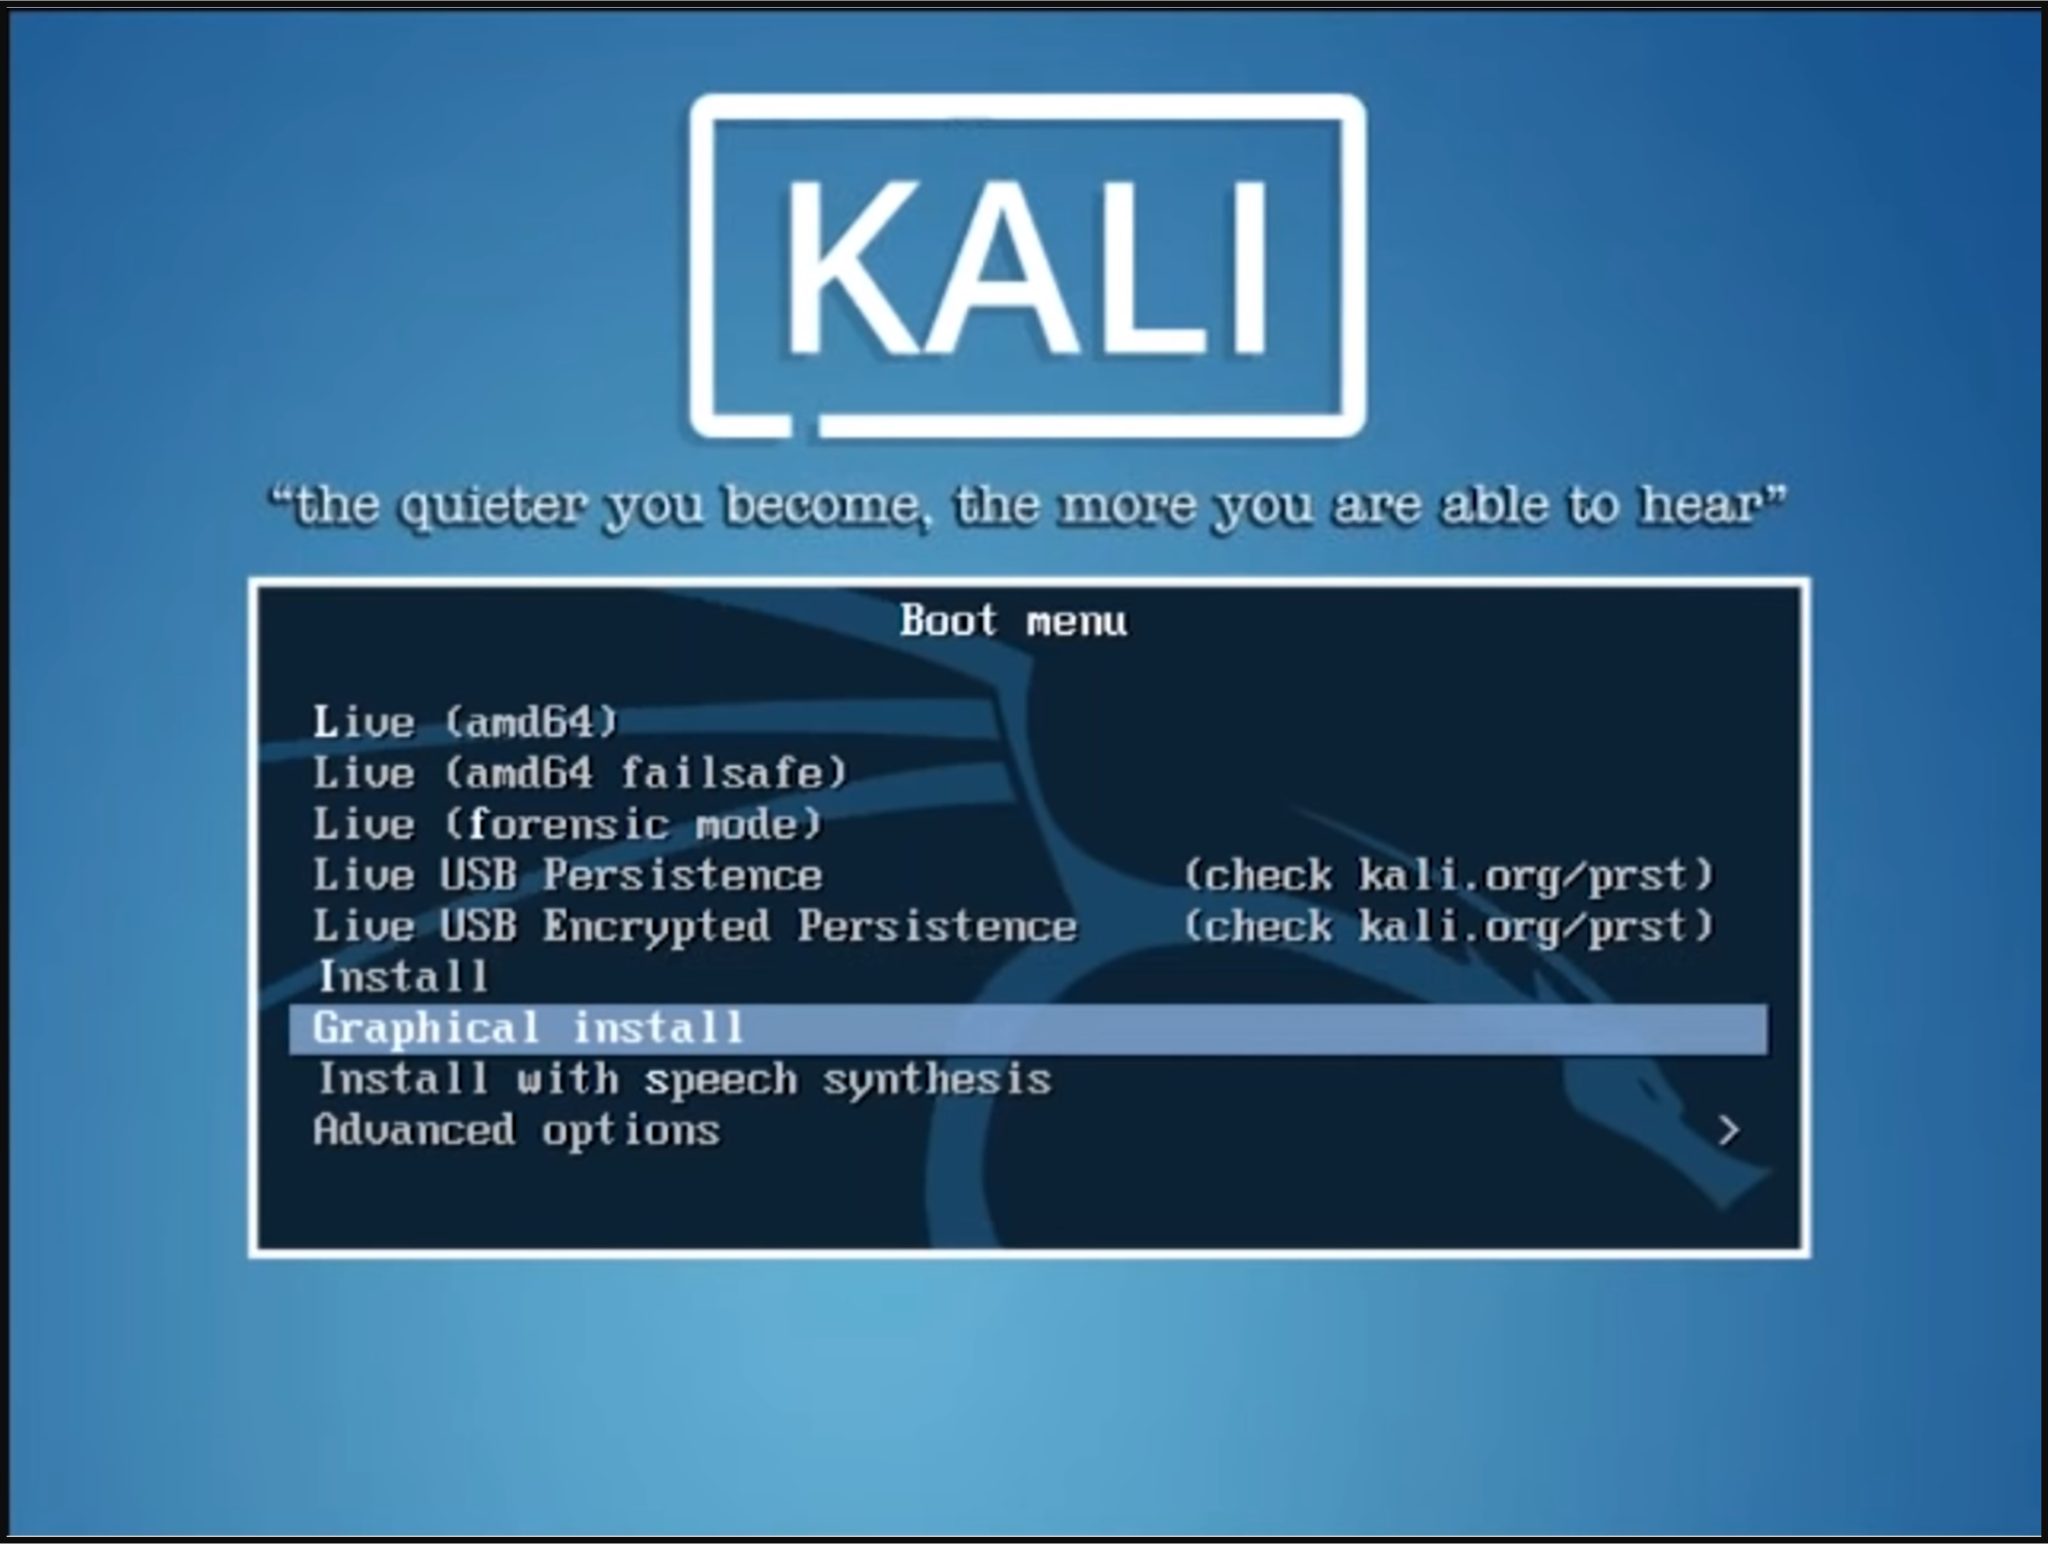
Once the machine is powered up, you will be prompted to select your preferred installation mode in the GRUB menu. Select graphical install and continue.
The next couple of screens will ask you to select local information such as your preferred language, your country location, and keyboard layout.

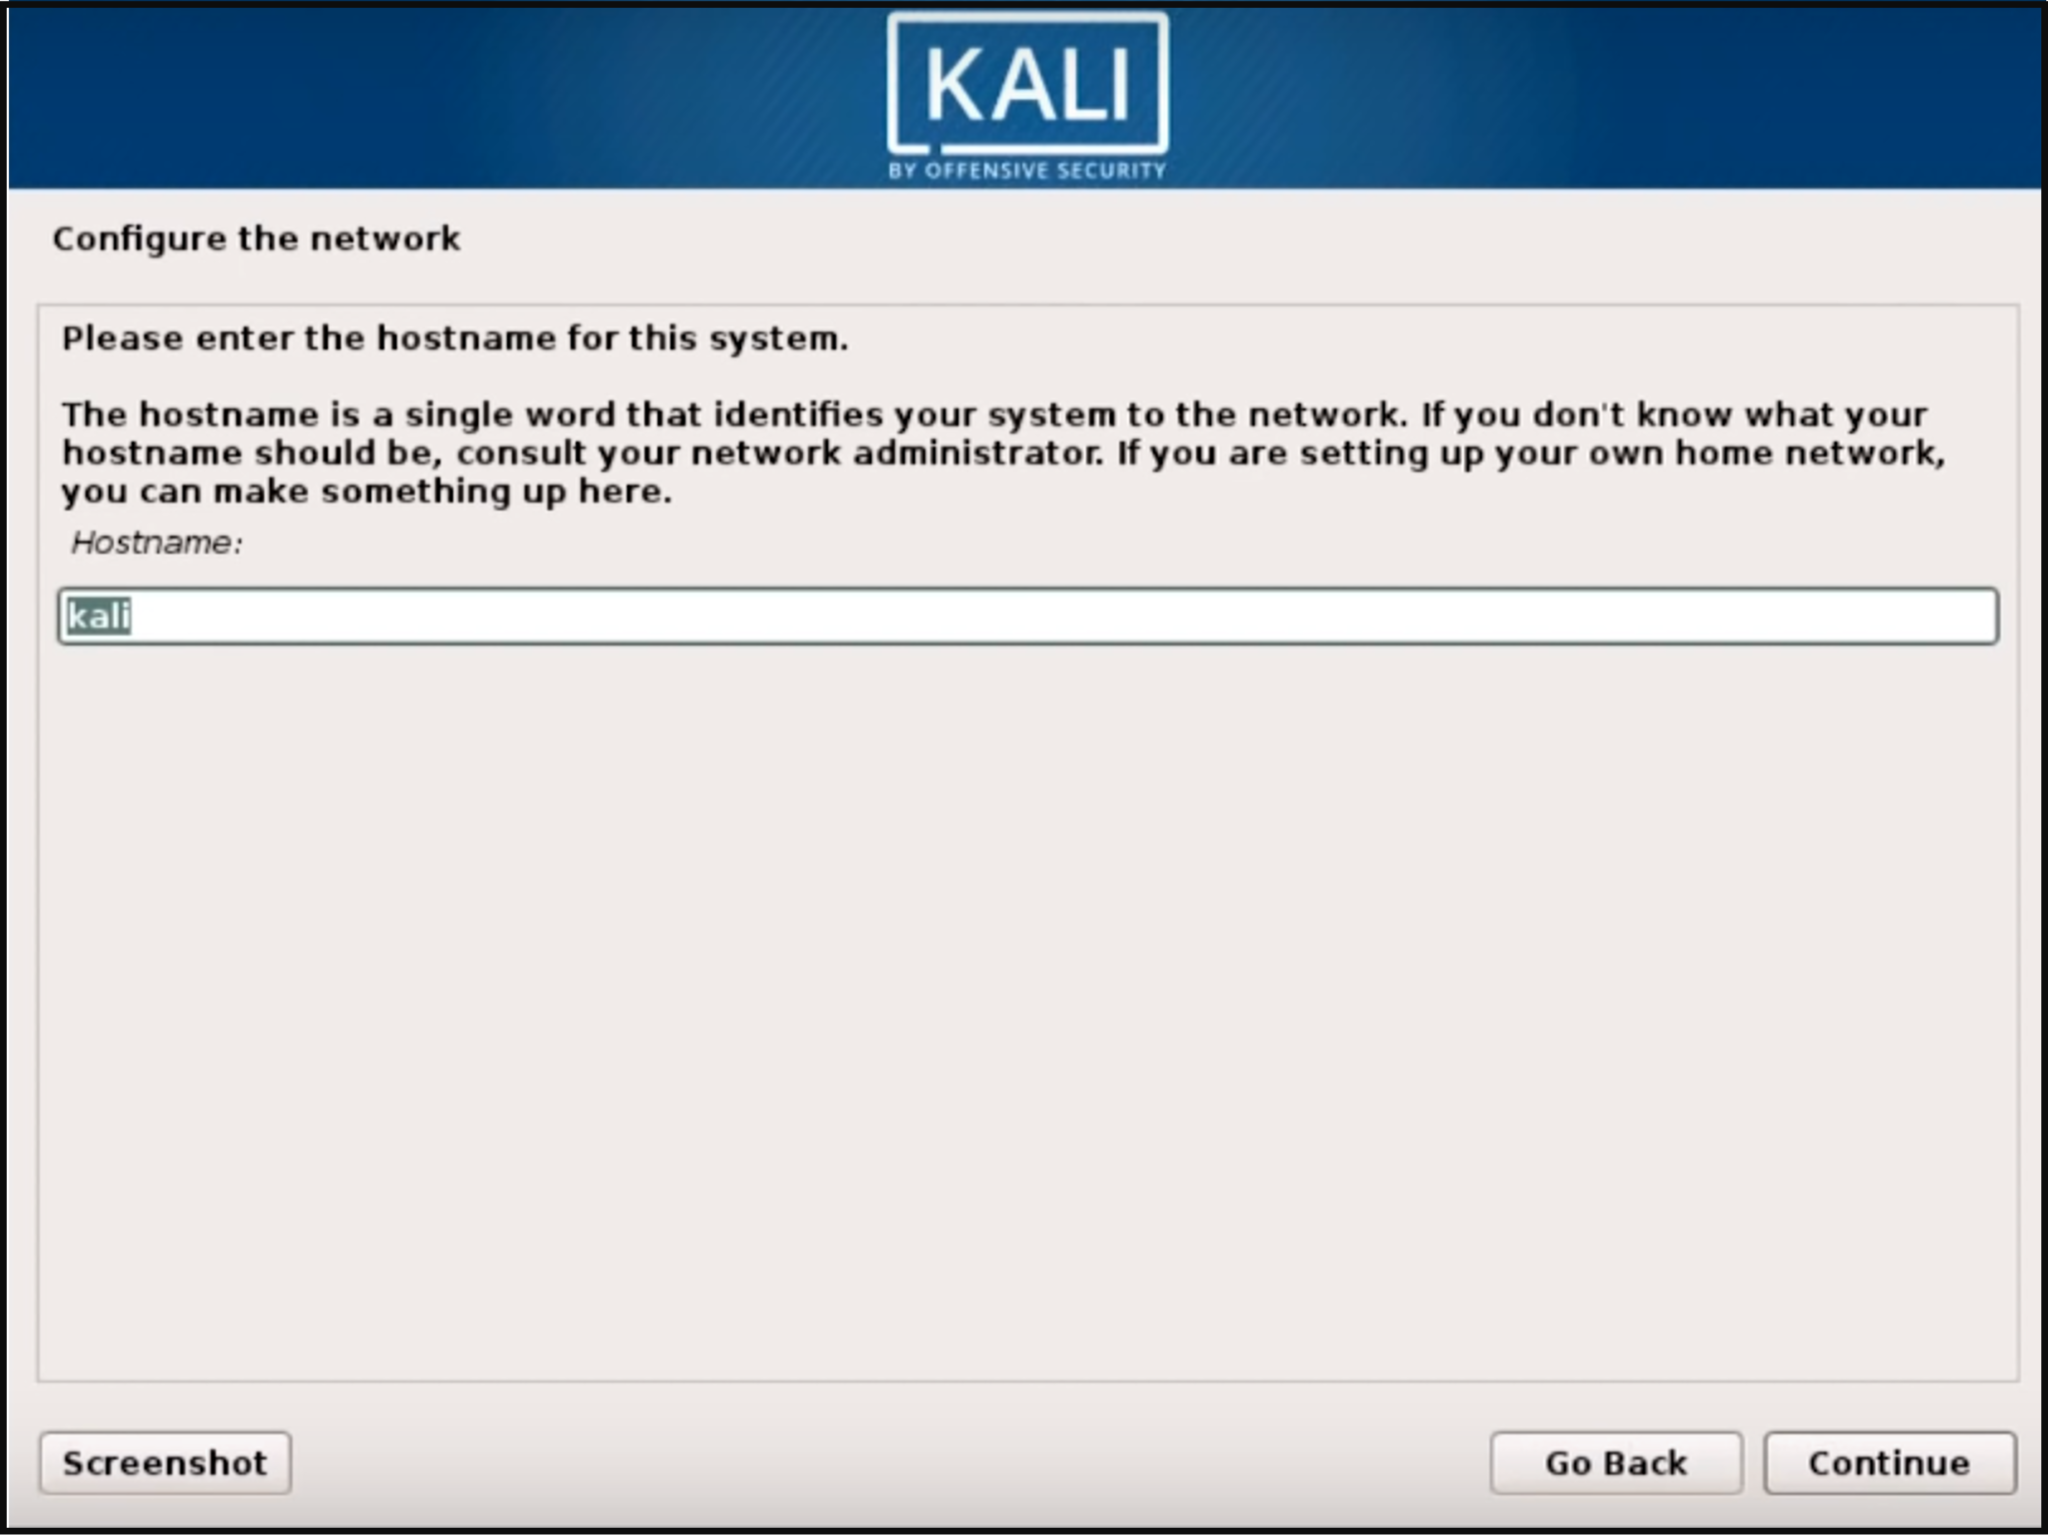
Once through the local information, the loader will automatically install some additional components and configure your network related settings. Then the installer will prompt for a hostname and domain for this installation. Provide appropriate information for the environment and continue installing.
Set a password for your Kali Linux machine and hit continue. Do not forget this password.

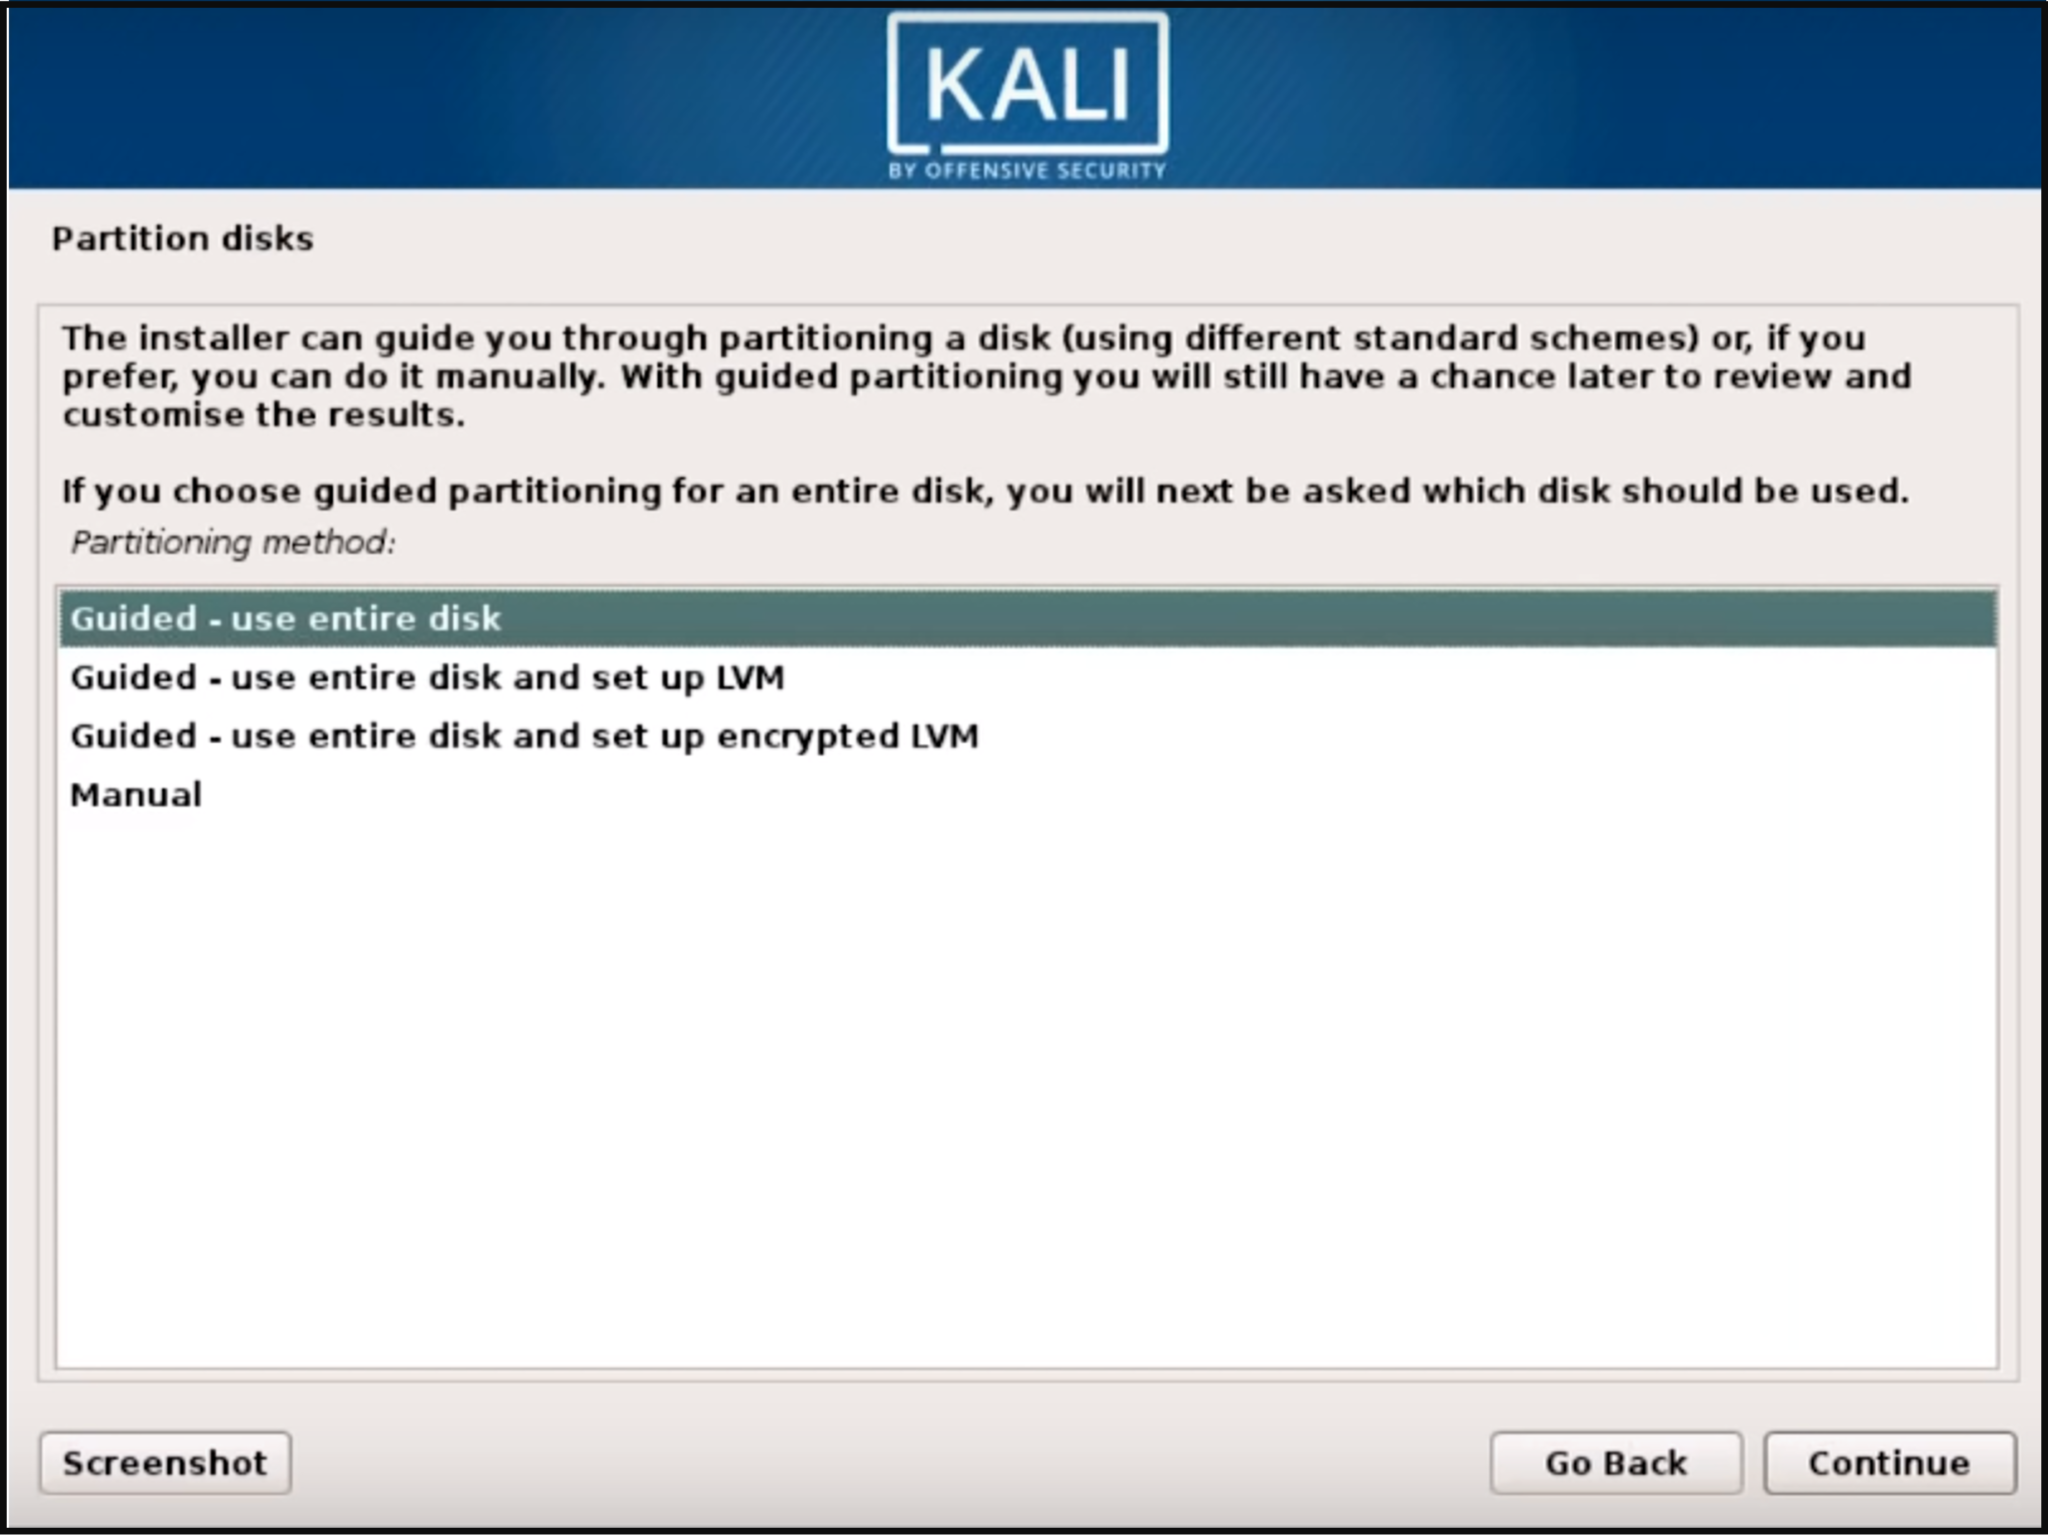
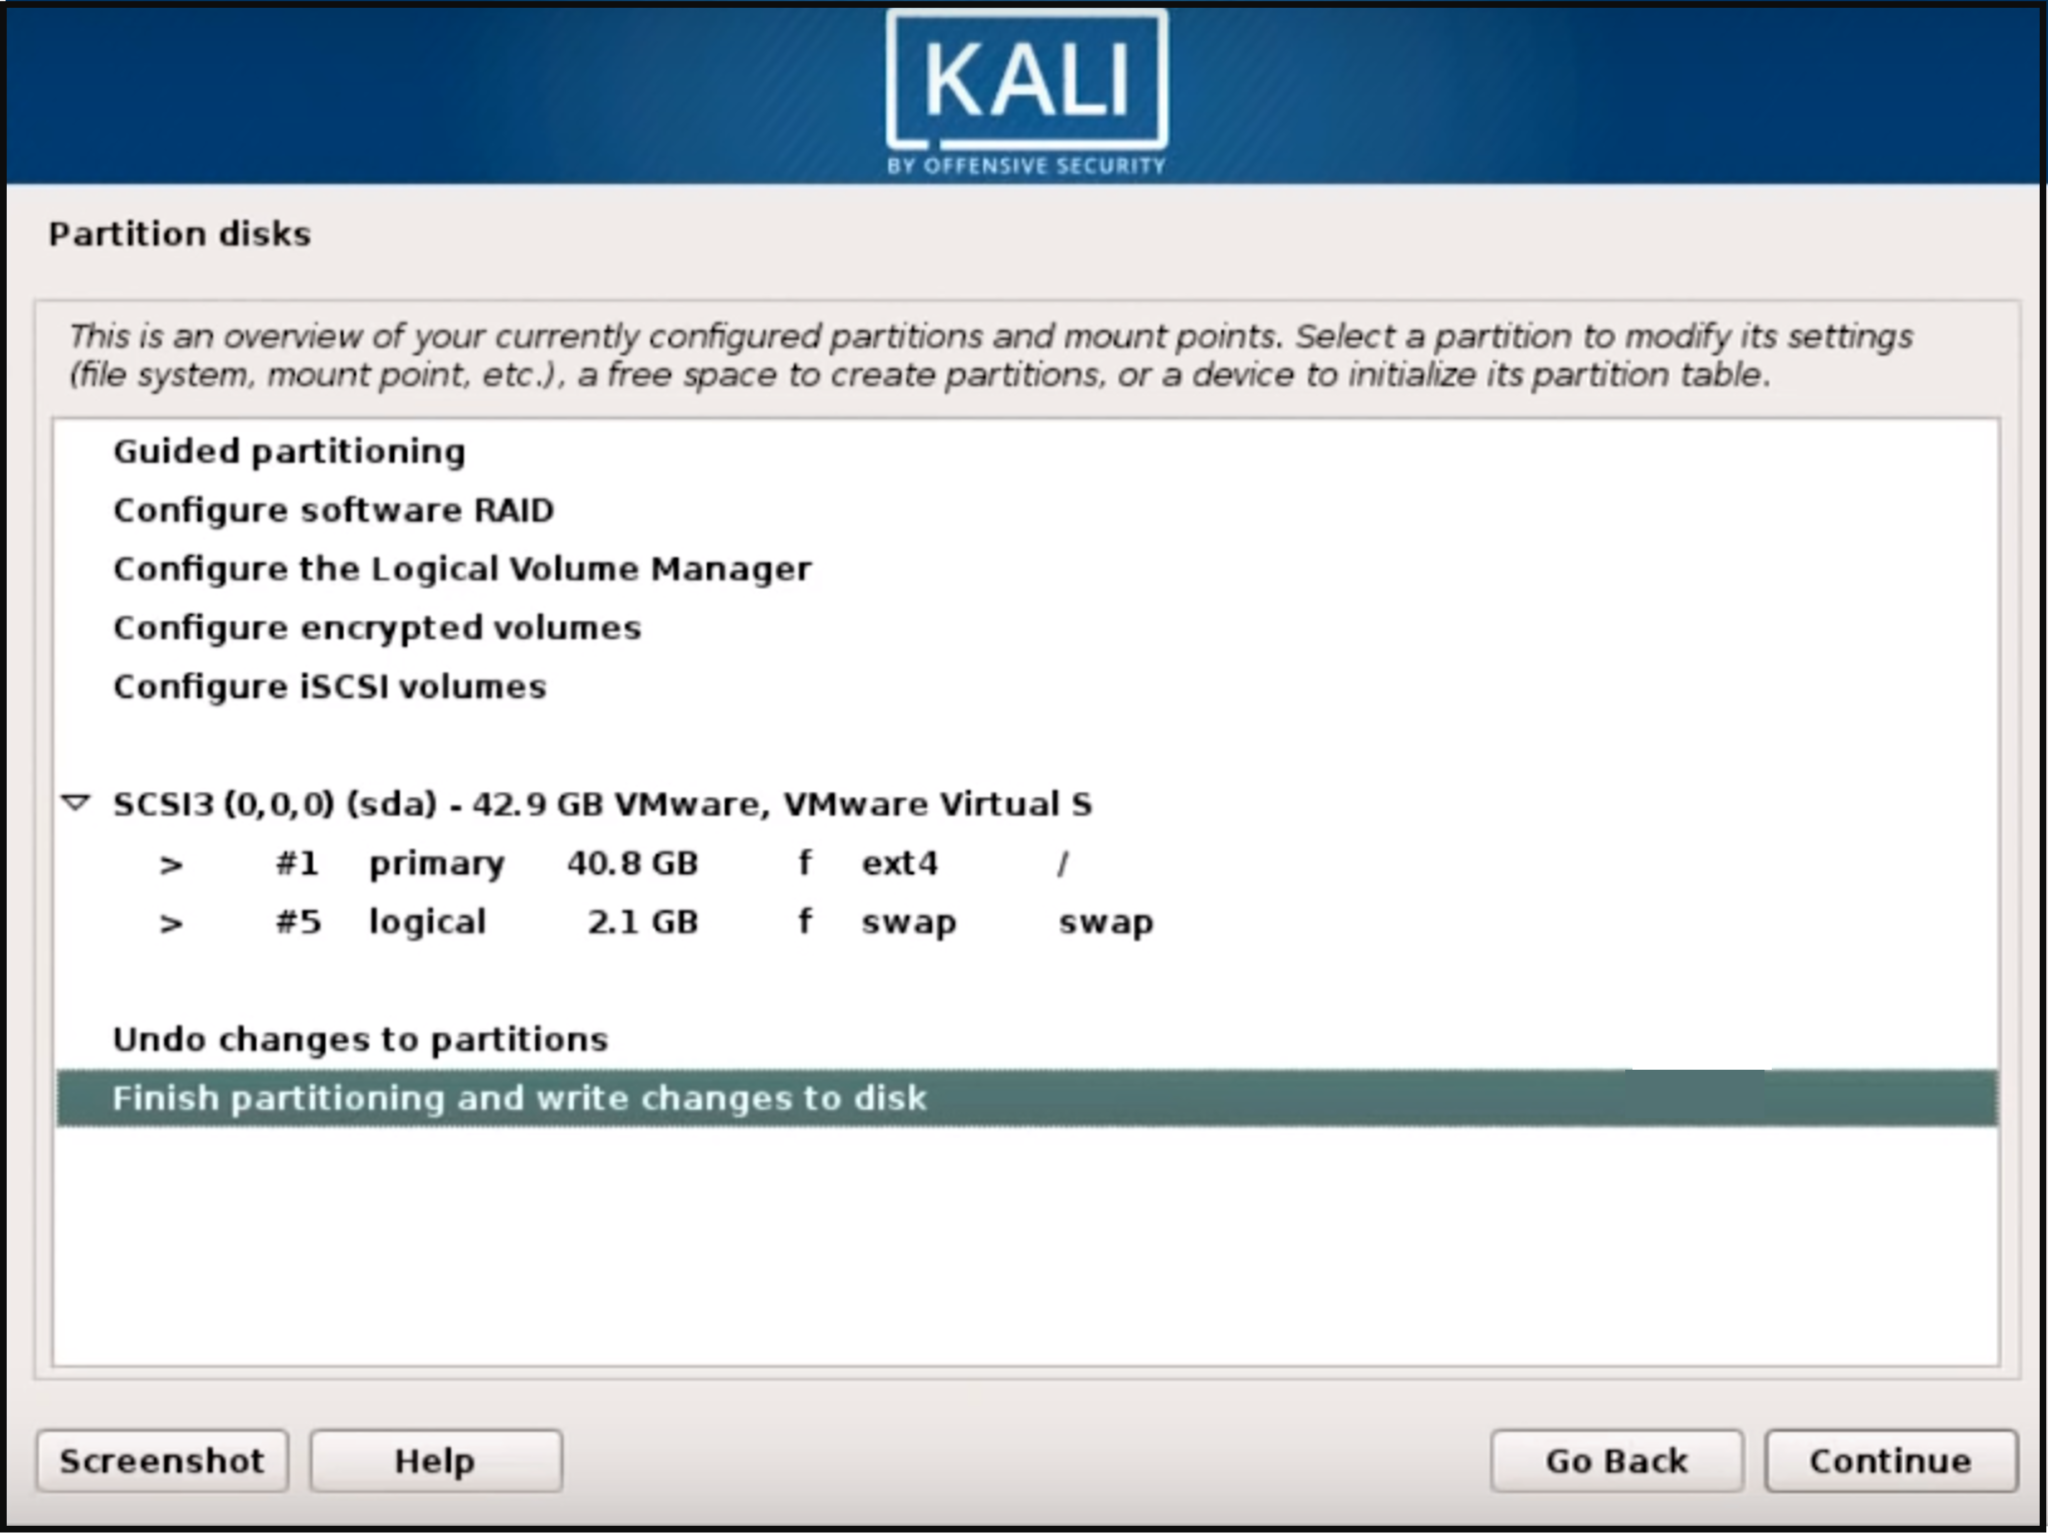
After the password is set, the installer will prompt you to set the time zone and then pauses at the disk partitioning. The installer will now provide you four choices about the partitions of the disk. The easiest option for you is to use "Guided – Use Entire Disk." Experienced users can use the “Manual” partitioning method for more granular configuration options.
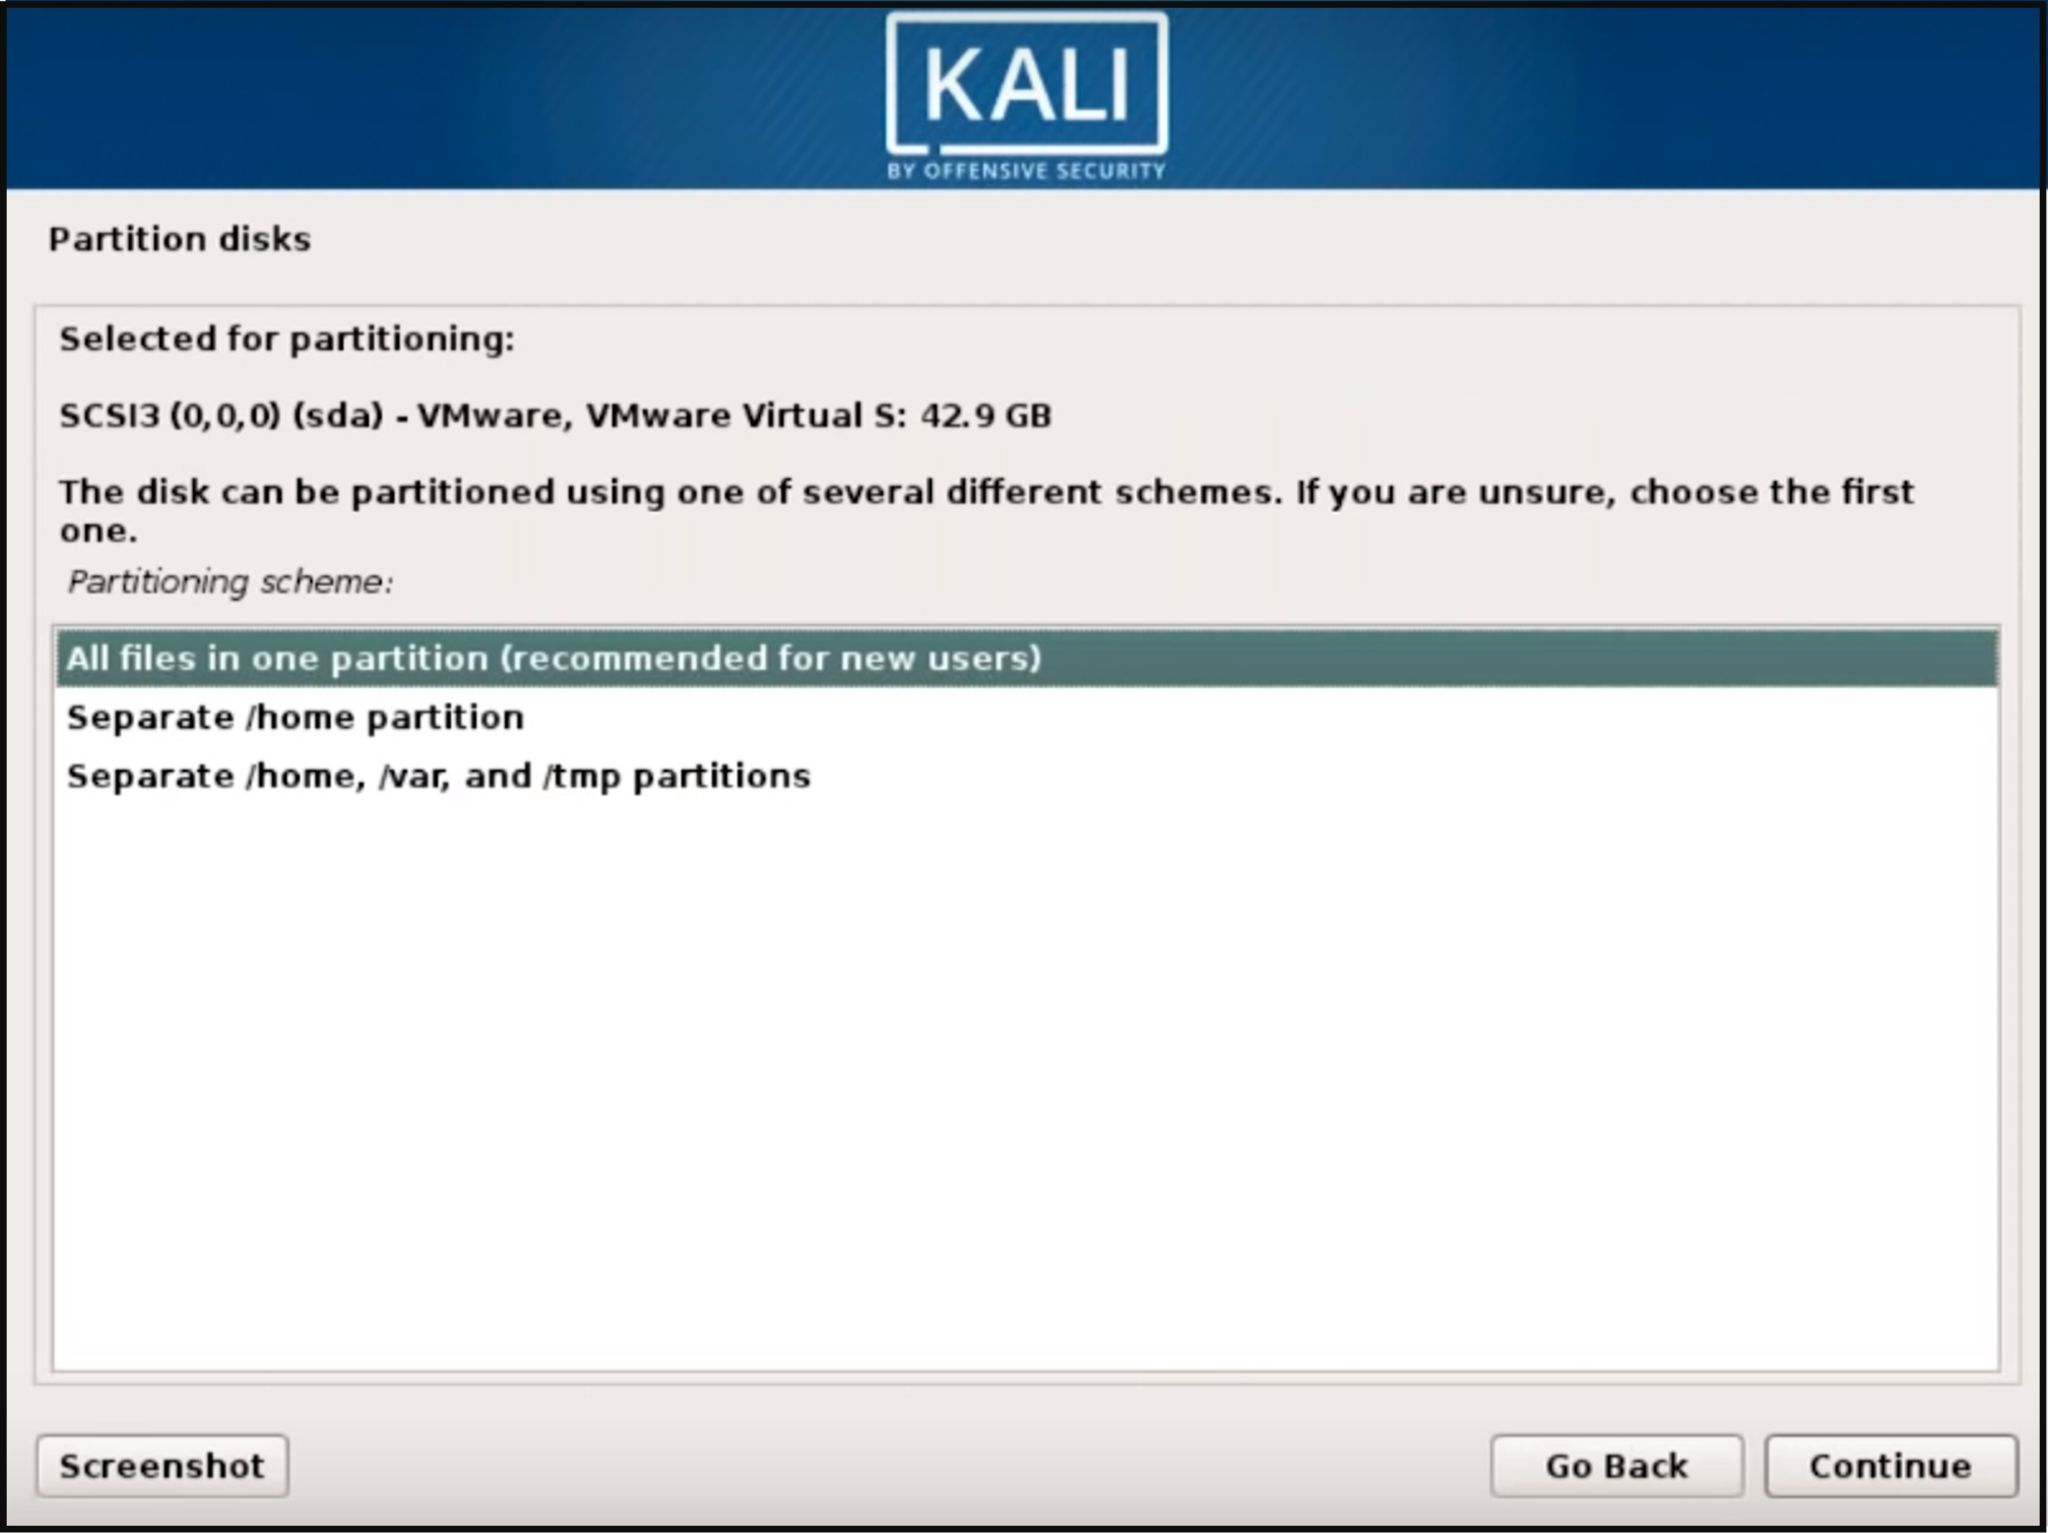
Select the partitioning disk (the recommended option is all files in one partition for new users) and then click on "Continue."
Confirm all changes to be made to the disk on the host machine. Be aware that if you continue it will erase data on the disk.
Once you confirm the partition changes, the installer will run through the process of installing the files. Let it install the system automatically, which may take a couple of moments.
Once the necessary files are installed, the system will ask you if you want to set up a network mirror to obtain future pieces of software and updates. Be sure to enable this functionality if you wish to use the Kali repositories.
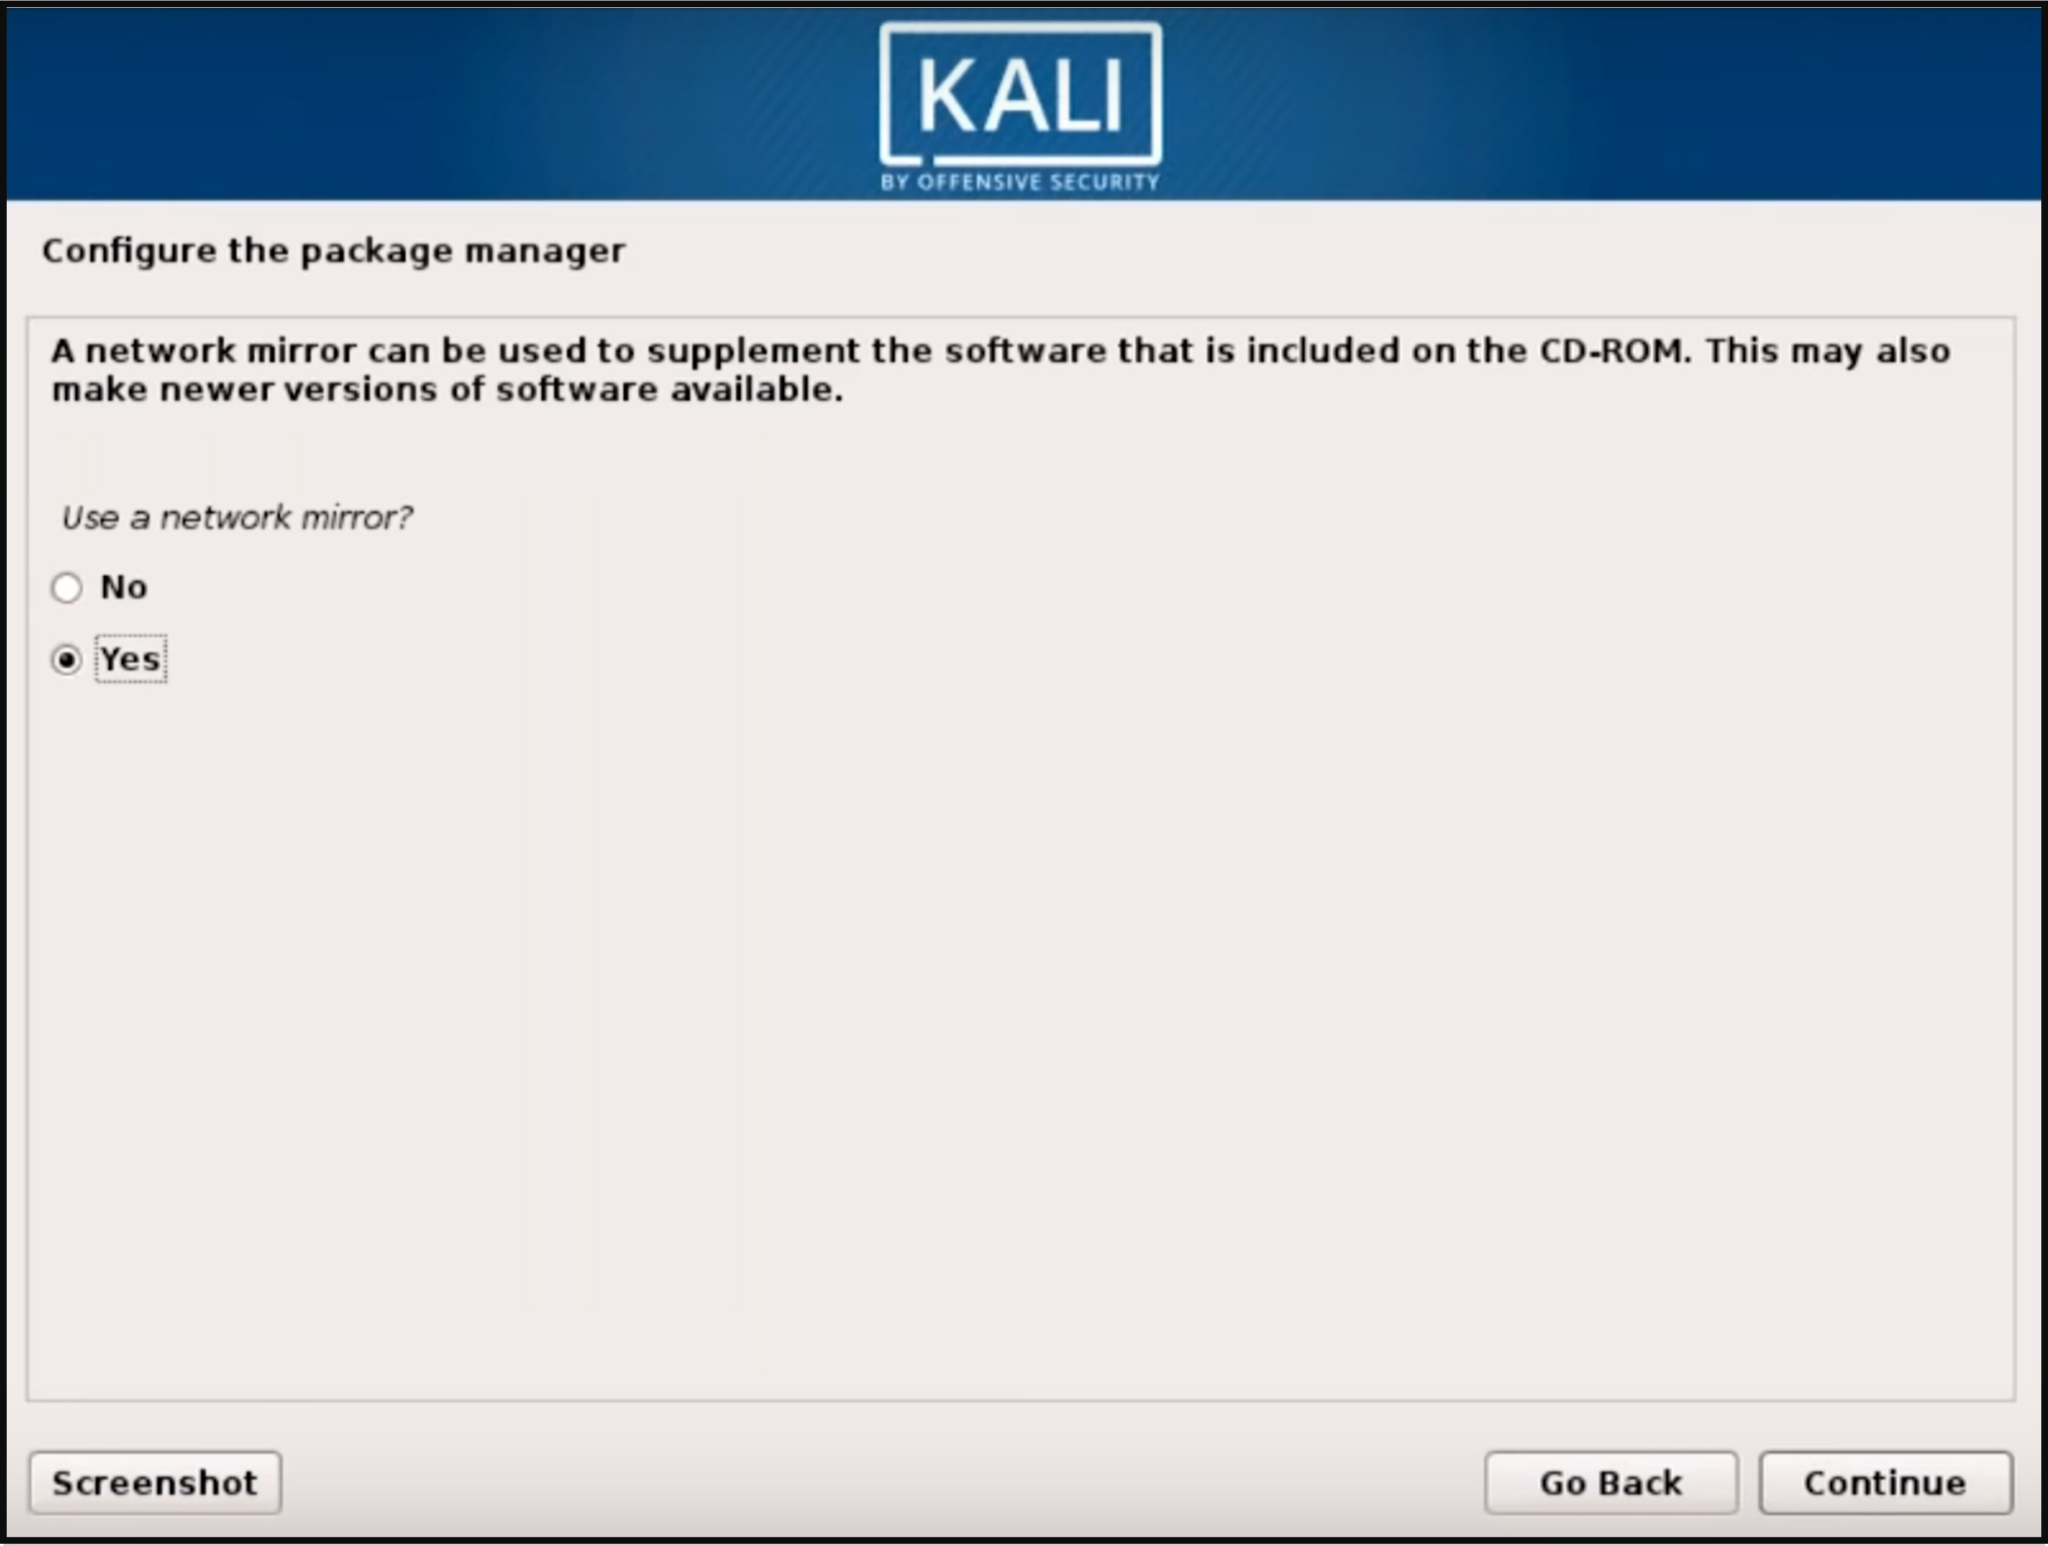
Let it configure the package manager related files then…
Next, you will be asked to install the GRUB boot loader. Select "Yes" and pick the device to write the necessary boot loader information to the hard drive which is required to boot Kali.
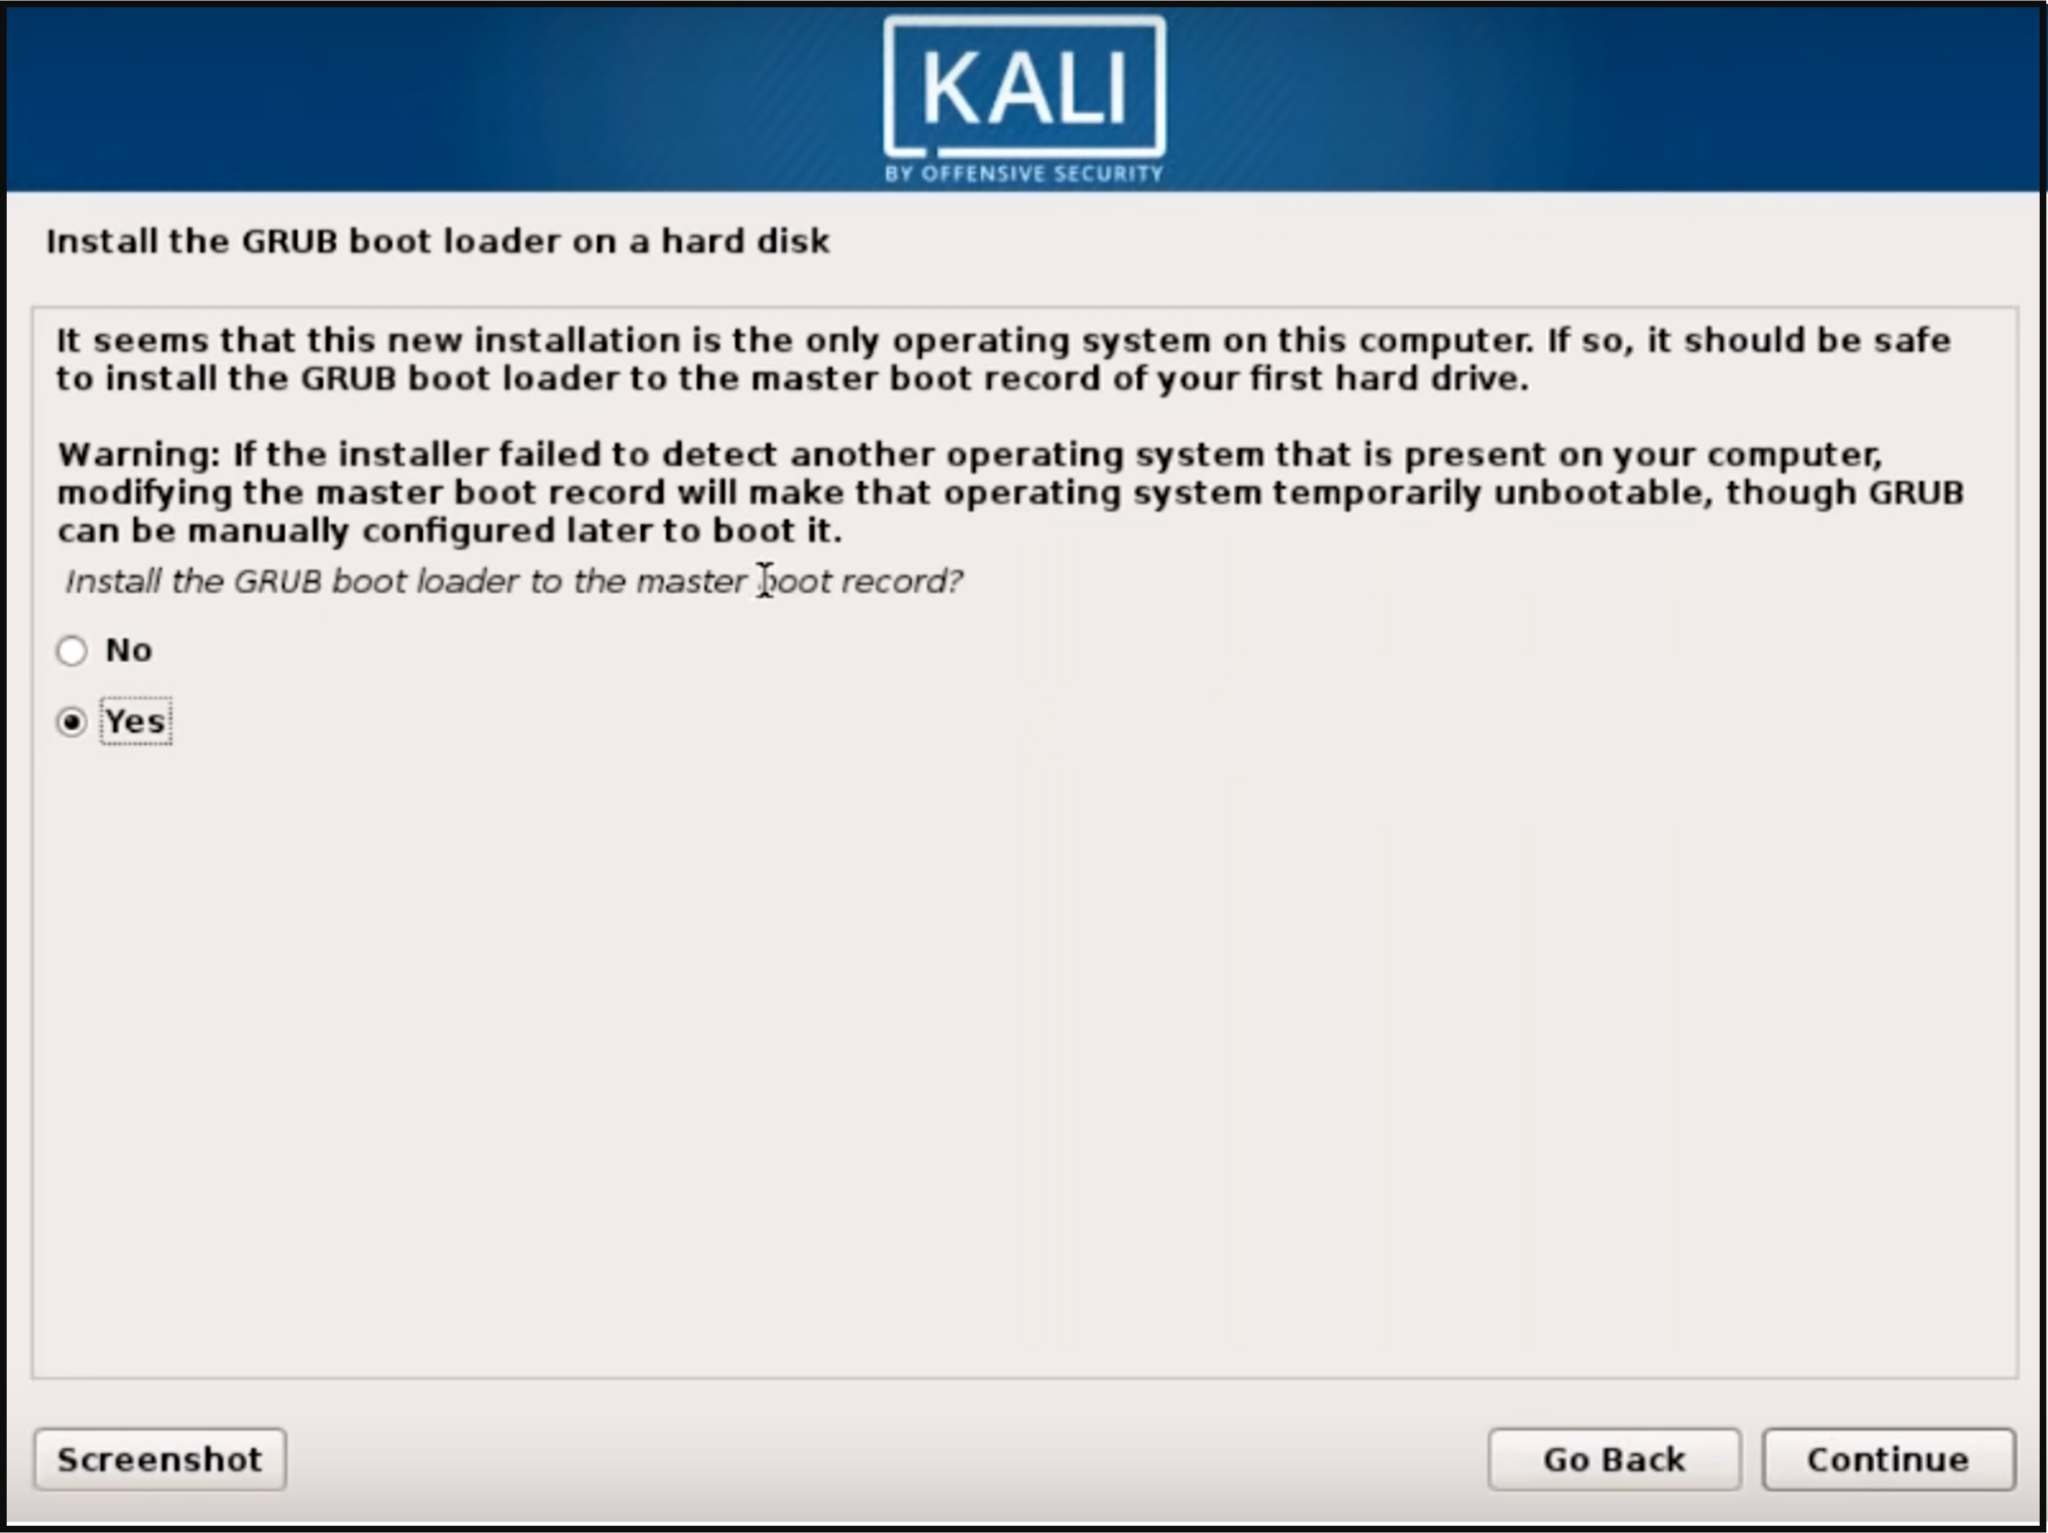
Once the installer finishes installing GRUB to the disk, click on "Continue" to finish the installation; it will install some final stage files.
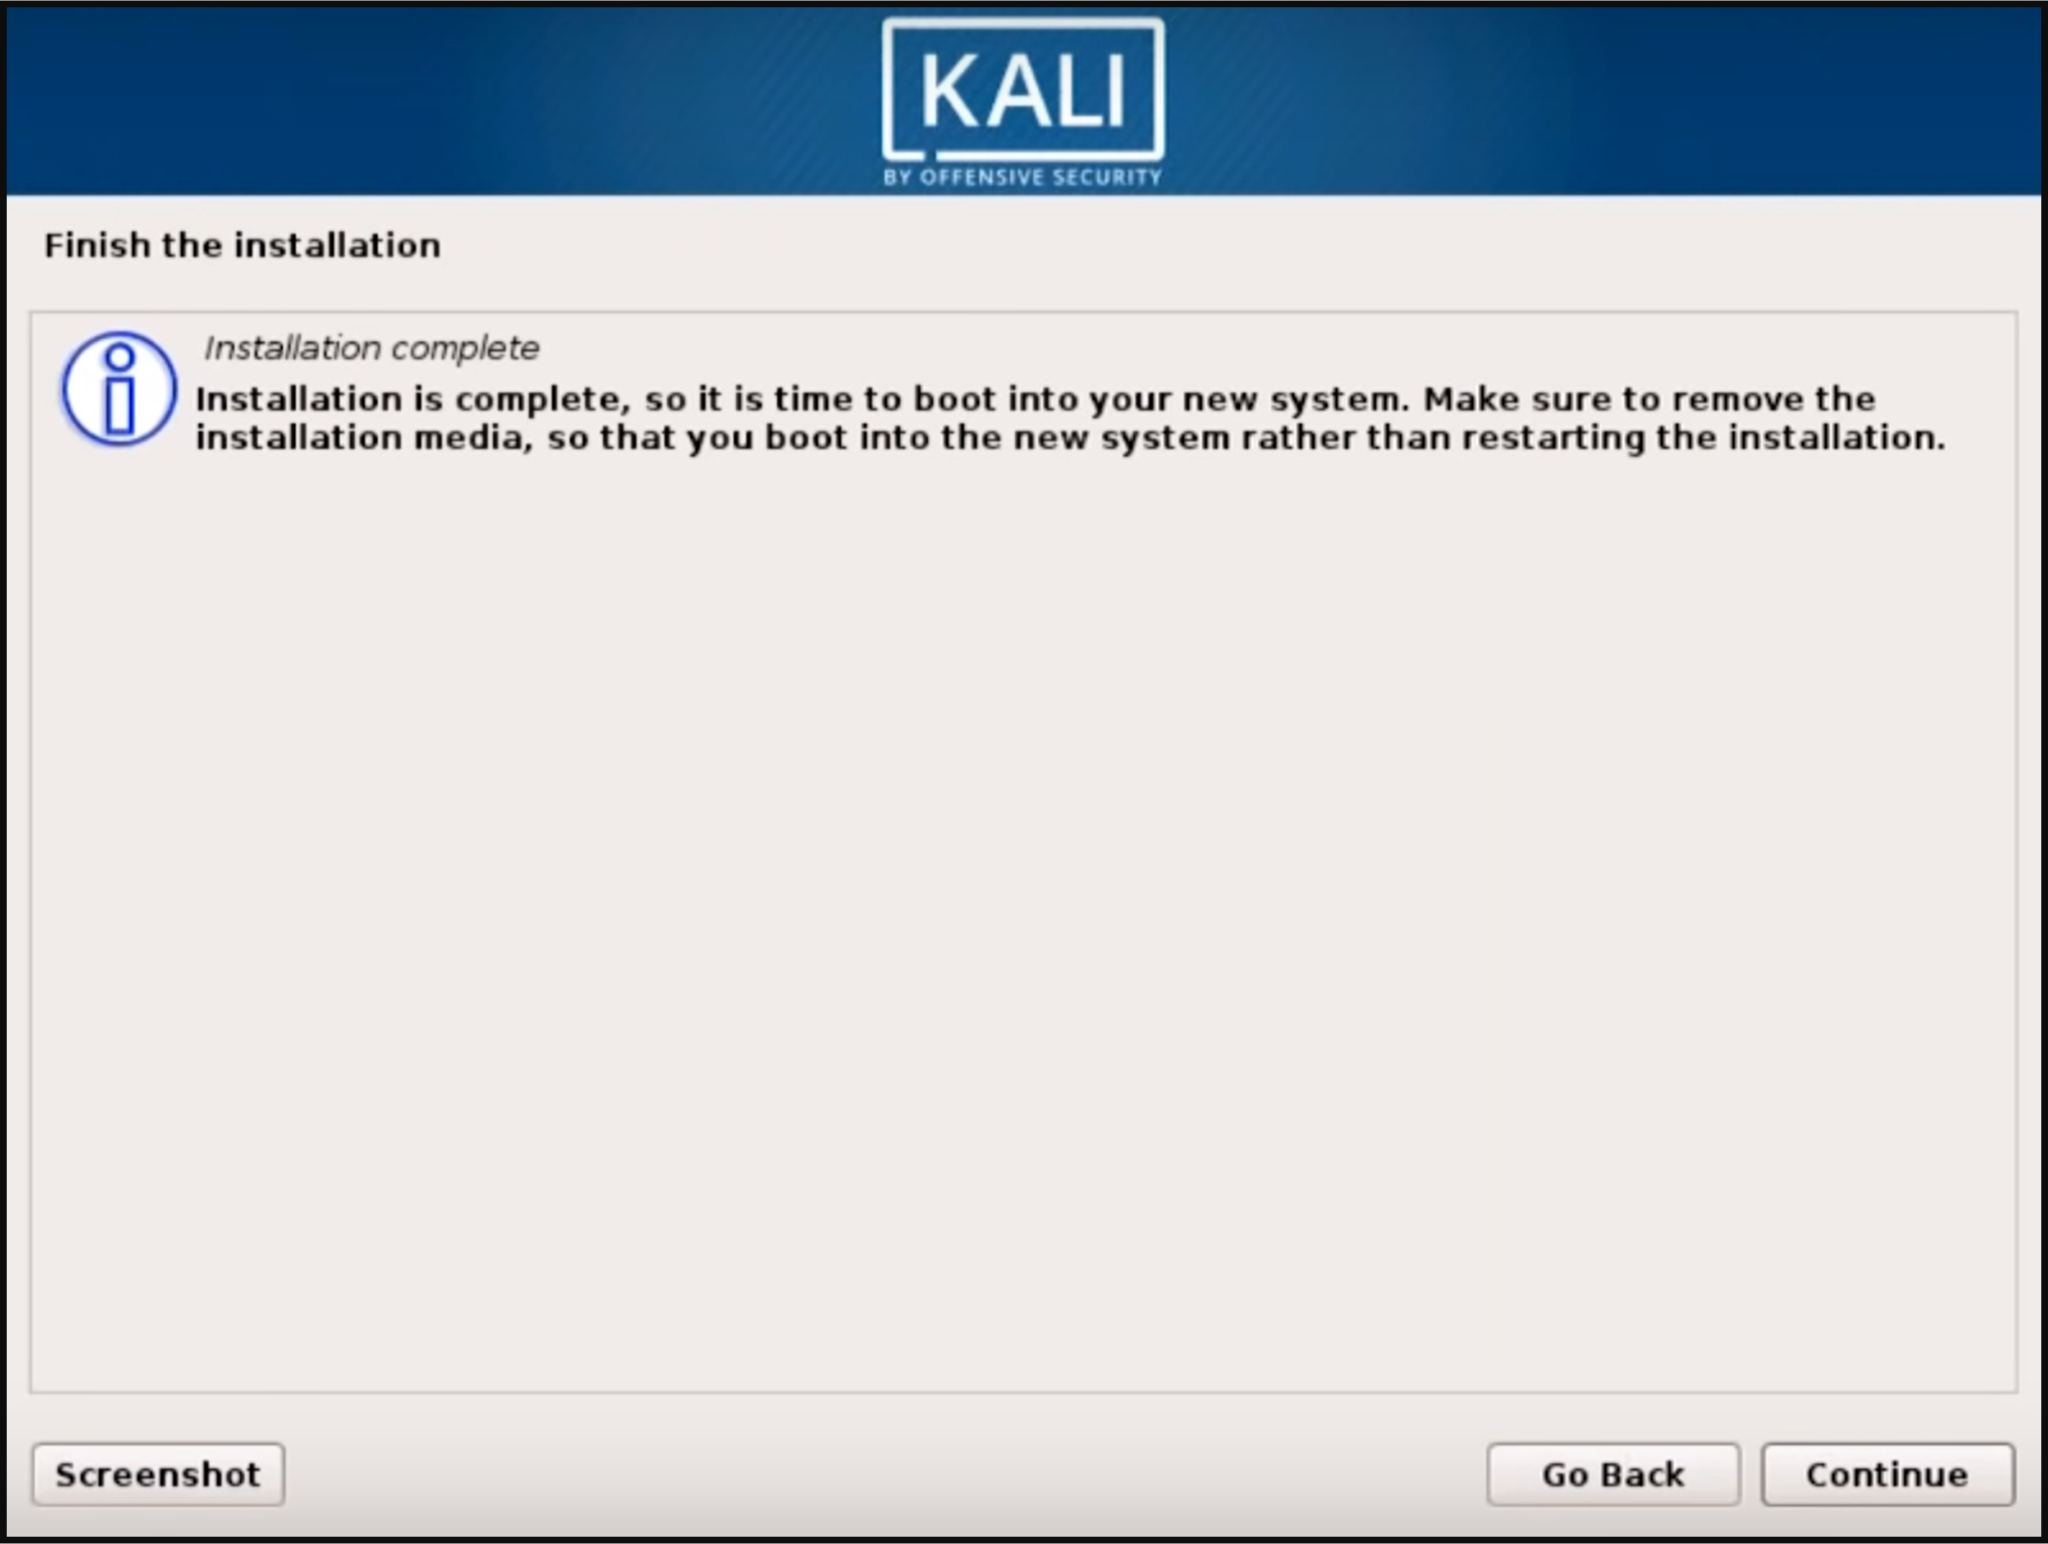
By this point, Kali is successfully installed and you are ready to begin your journey exploring Kali Linux!
Published at DZone with permission of Archana Choudhary. See the original article here.
Opinions expressed by DZone contributors are their own.
Comments