Create a Simple Maven 3 Plugin
This quick walkthrough will teach you how to create a quick and easy Maven 3 plugin, with some general best practices to keep in mind along the way.
Join the DZone community and get the full member experience.
Join For FreeIn this article, I am going to explain how to create a simple "hello world" Maven plugin. I am not going to cover the testing part of the plugin, aside from seeing if it works, as that deserves another article.
Things You Need
Before you put your hands on the code, please make sure that you have Maven (>3) installed on your system. It can be downloaded from here.
Create the Plugin Project
We are going to create a simple Maven plugin project using the already provided archetype. I am using IntelliJ IDE for this purpose. Please check out the screenshot below,
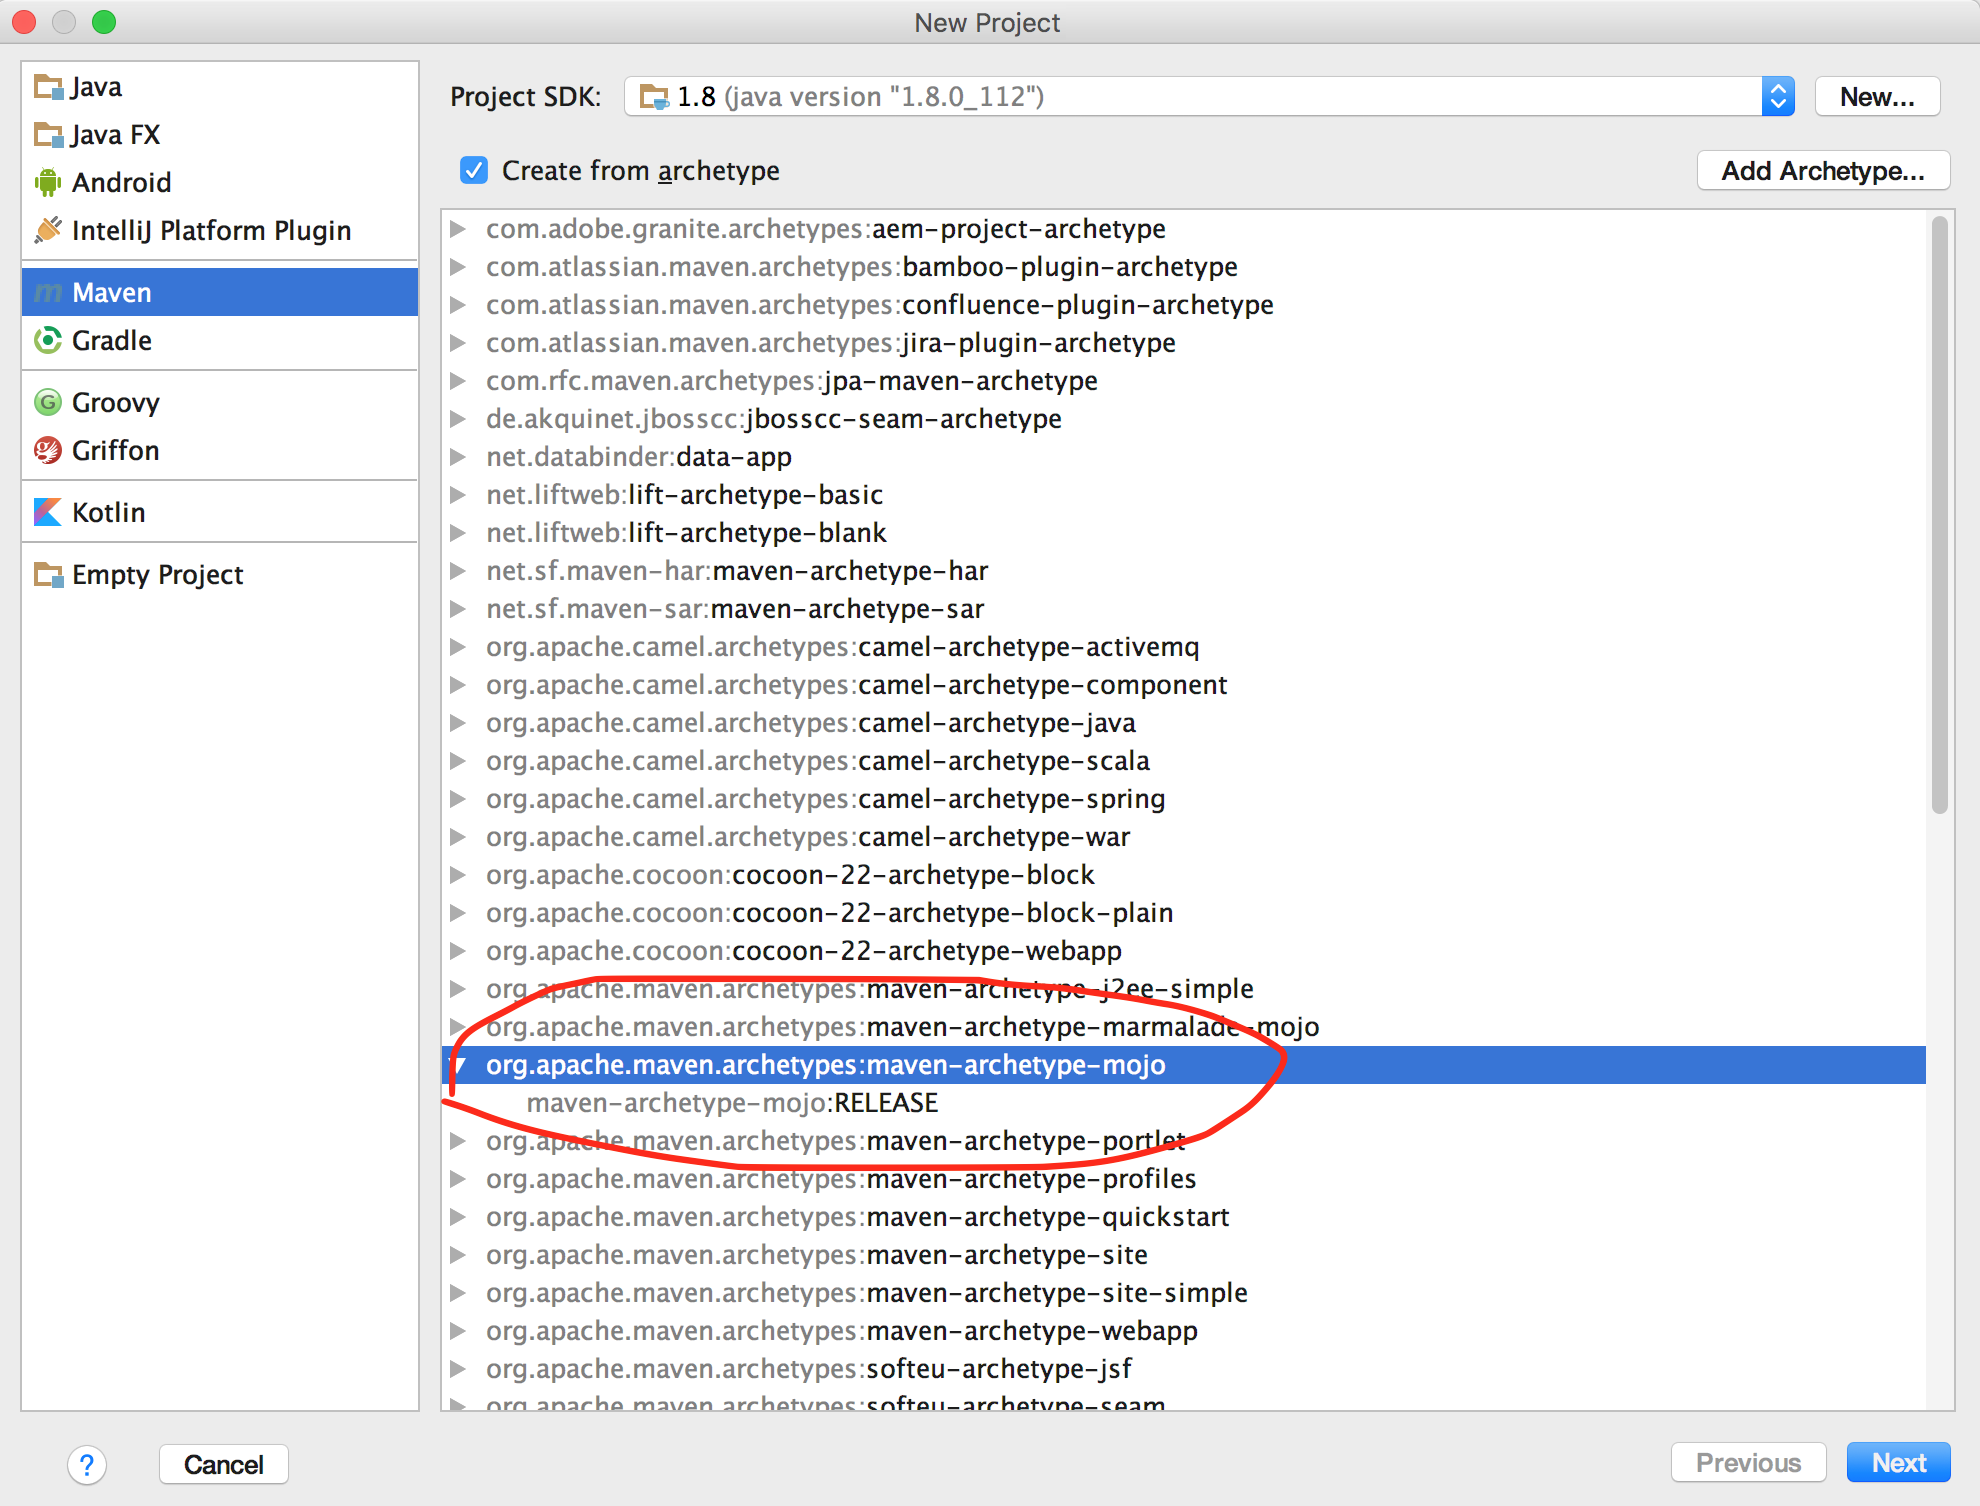
I have named the project as myfirst-maven-plugin. As per Maven, it's better to follow the naming conventions provided by them. For example,
maven-${prefix}-plugin: This naming convention is restricted to the plugins developed by Maven.
${prefix}-maven-plugin: We can use this convention to create our custom plugins.
The importance of using the correct naming convention will be discussed shortly.
Project Structure
The project structure is very simple, as shown below:
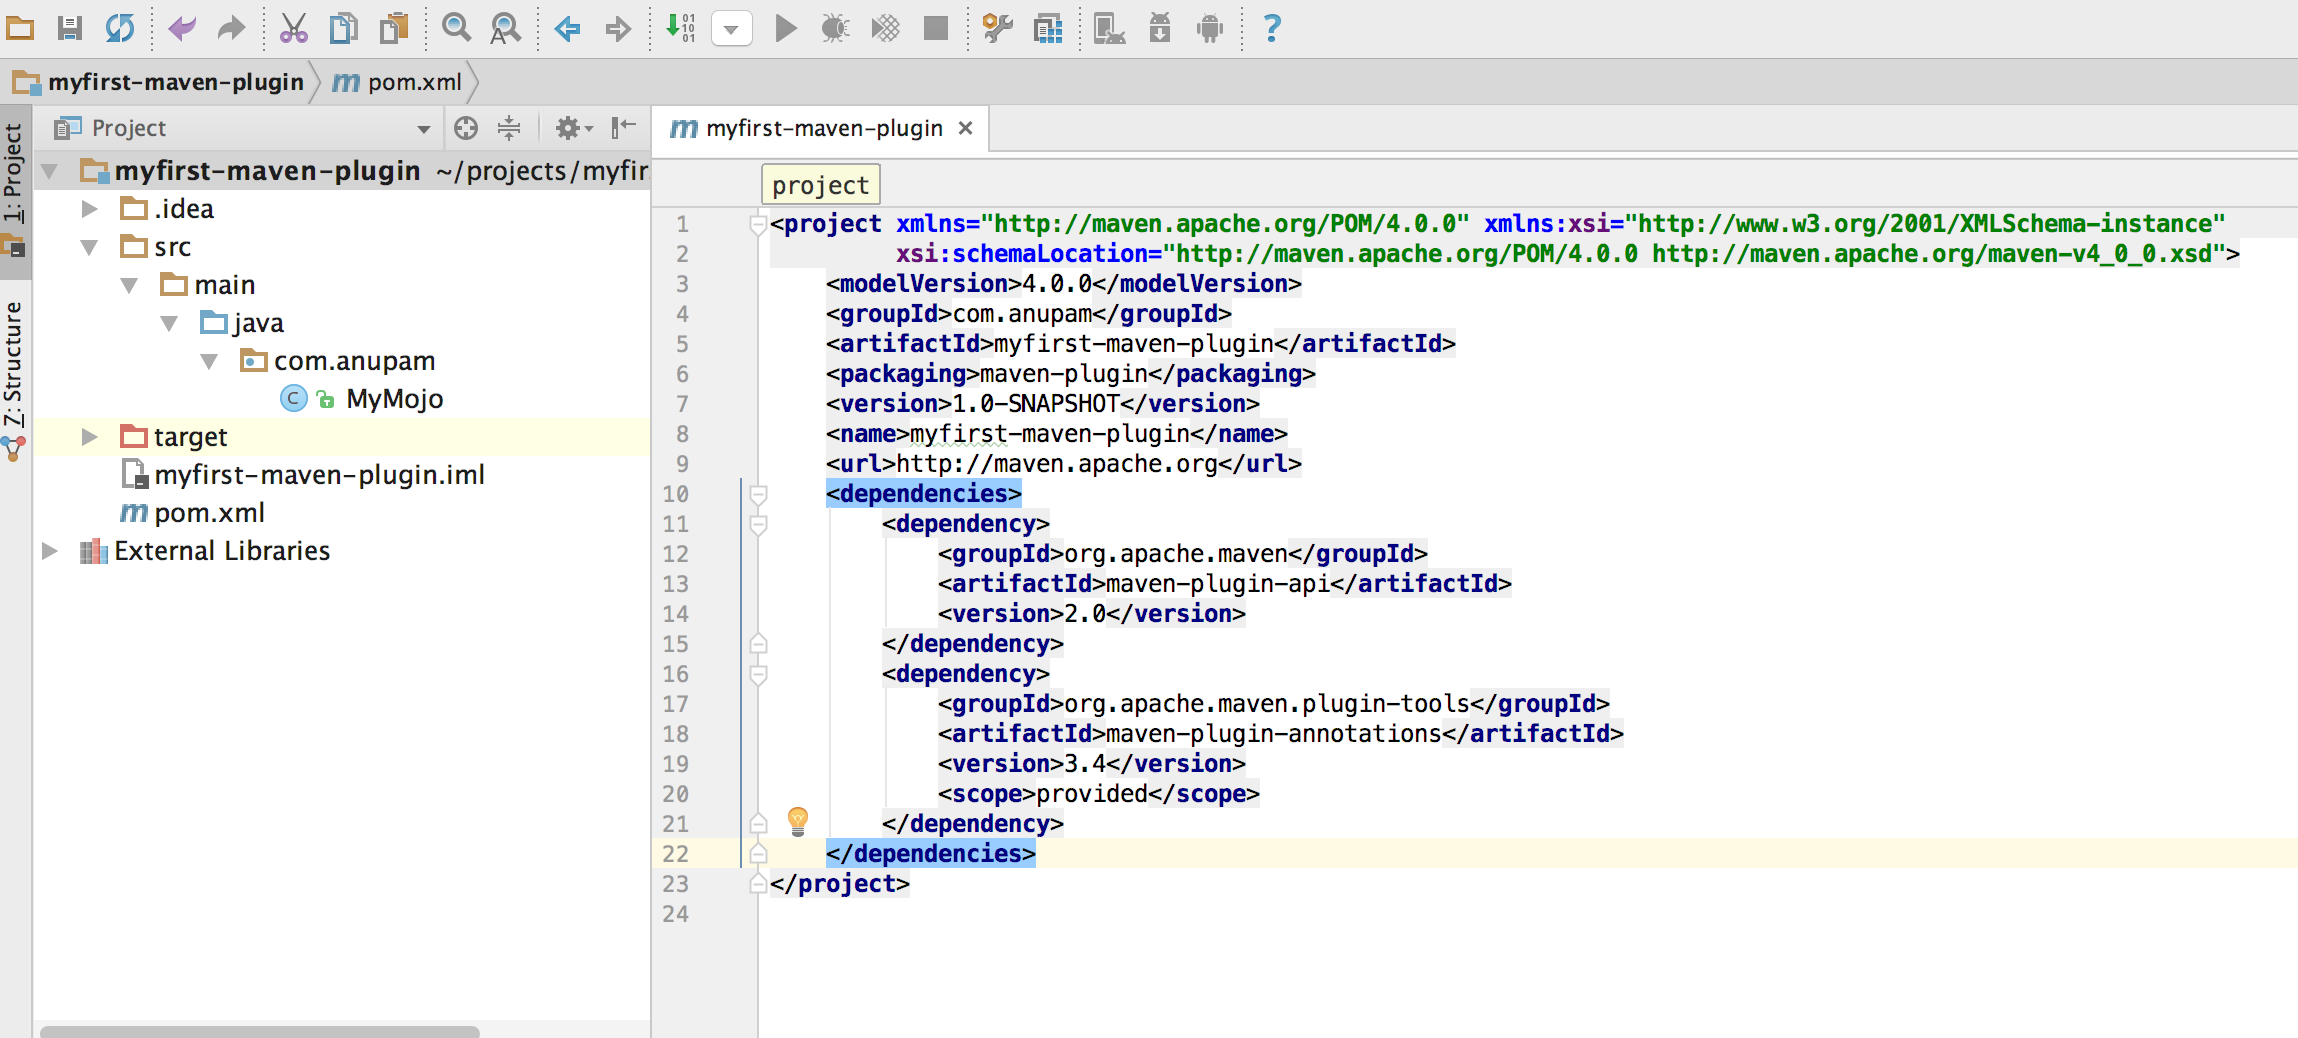
The important part is the Maven dependencies.
<project xmlns="http://maven.apache.org/POM/4.0.0" xmlns:xsi="http://www.w3.org/2001/XMLSchema-instance"
         xsi:schemaLocation="http://maven.apache.org/POM/4.0.0 http://maven.apache.org/maven-v4_0_0.xsd">
    <modelVersion>4.0.0</modelVersion>
    <groupId>com.anupam</groupId>
    <artifactId>myfirst-maven-plugin</artifactId>
    <packaging>maven-plugin</packaging>
    <version>1.0-SNAPSHOT</version>
    <name>myfirst-maven-plugin</name>
    <url>http://maven.apache.org</url>
    <dependencies>
        <dependency>
            <groupId>org.apache.maven</groupId>
            <artifactId>maven-plugin-api</artifactId>
            <version>2.0</version>
        </dependency>
        <dependency>
            <groupId>org.apache.maven.plugin-tools</groupId>
            <artifactId>maven-plugin-annotations</artifactId>
            <version>3.4</version>
            <scope>provided</scope>
        </dependency>
    </dependencies>
</project>
Then we have a very simple Mojo class:
package com.anupam;

import org.apache.maven.plugin.AbstractMojo;
import org.apache.maven.plugin.MojoExecutionException;
import org.apache.maven.plugins.annotations.Mojo;
import org.apache.maven.plugins.annotations.Parameter;

import java.io.File;
import java.io.FileWriter;
import java.io.IOException;

@Mojo(name = "hello")
public class MyMojo extends AbstractMojo {

    @Parameter(property = "msg",defaultValue = "from maven")
    private String msg;


    public void execute()
            throws MojoExecutionException {
        getLog().info("Hello " + msg);
    }

    public String getMsg() {
        return msg;
    }

    public void setMsg(String msg) {
        this.msg = msg;
    }
}
The annotation below will serve as the goal of the Maven plugin.
@Mojo(name = "hello")I have declared a simple configurable property with the following piece of code:
@Parameter(property = "msg",defaultValue = "from maven")private String msg;And that's it. This simple Maven plugin is ready to be used. Now browse to the root of the project and execute mvn clean install . It will build and install the plugin in your local repository.
Testing the Plugin
Create any normal Maven project and insert the plugin.
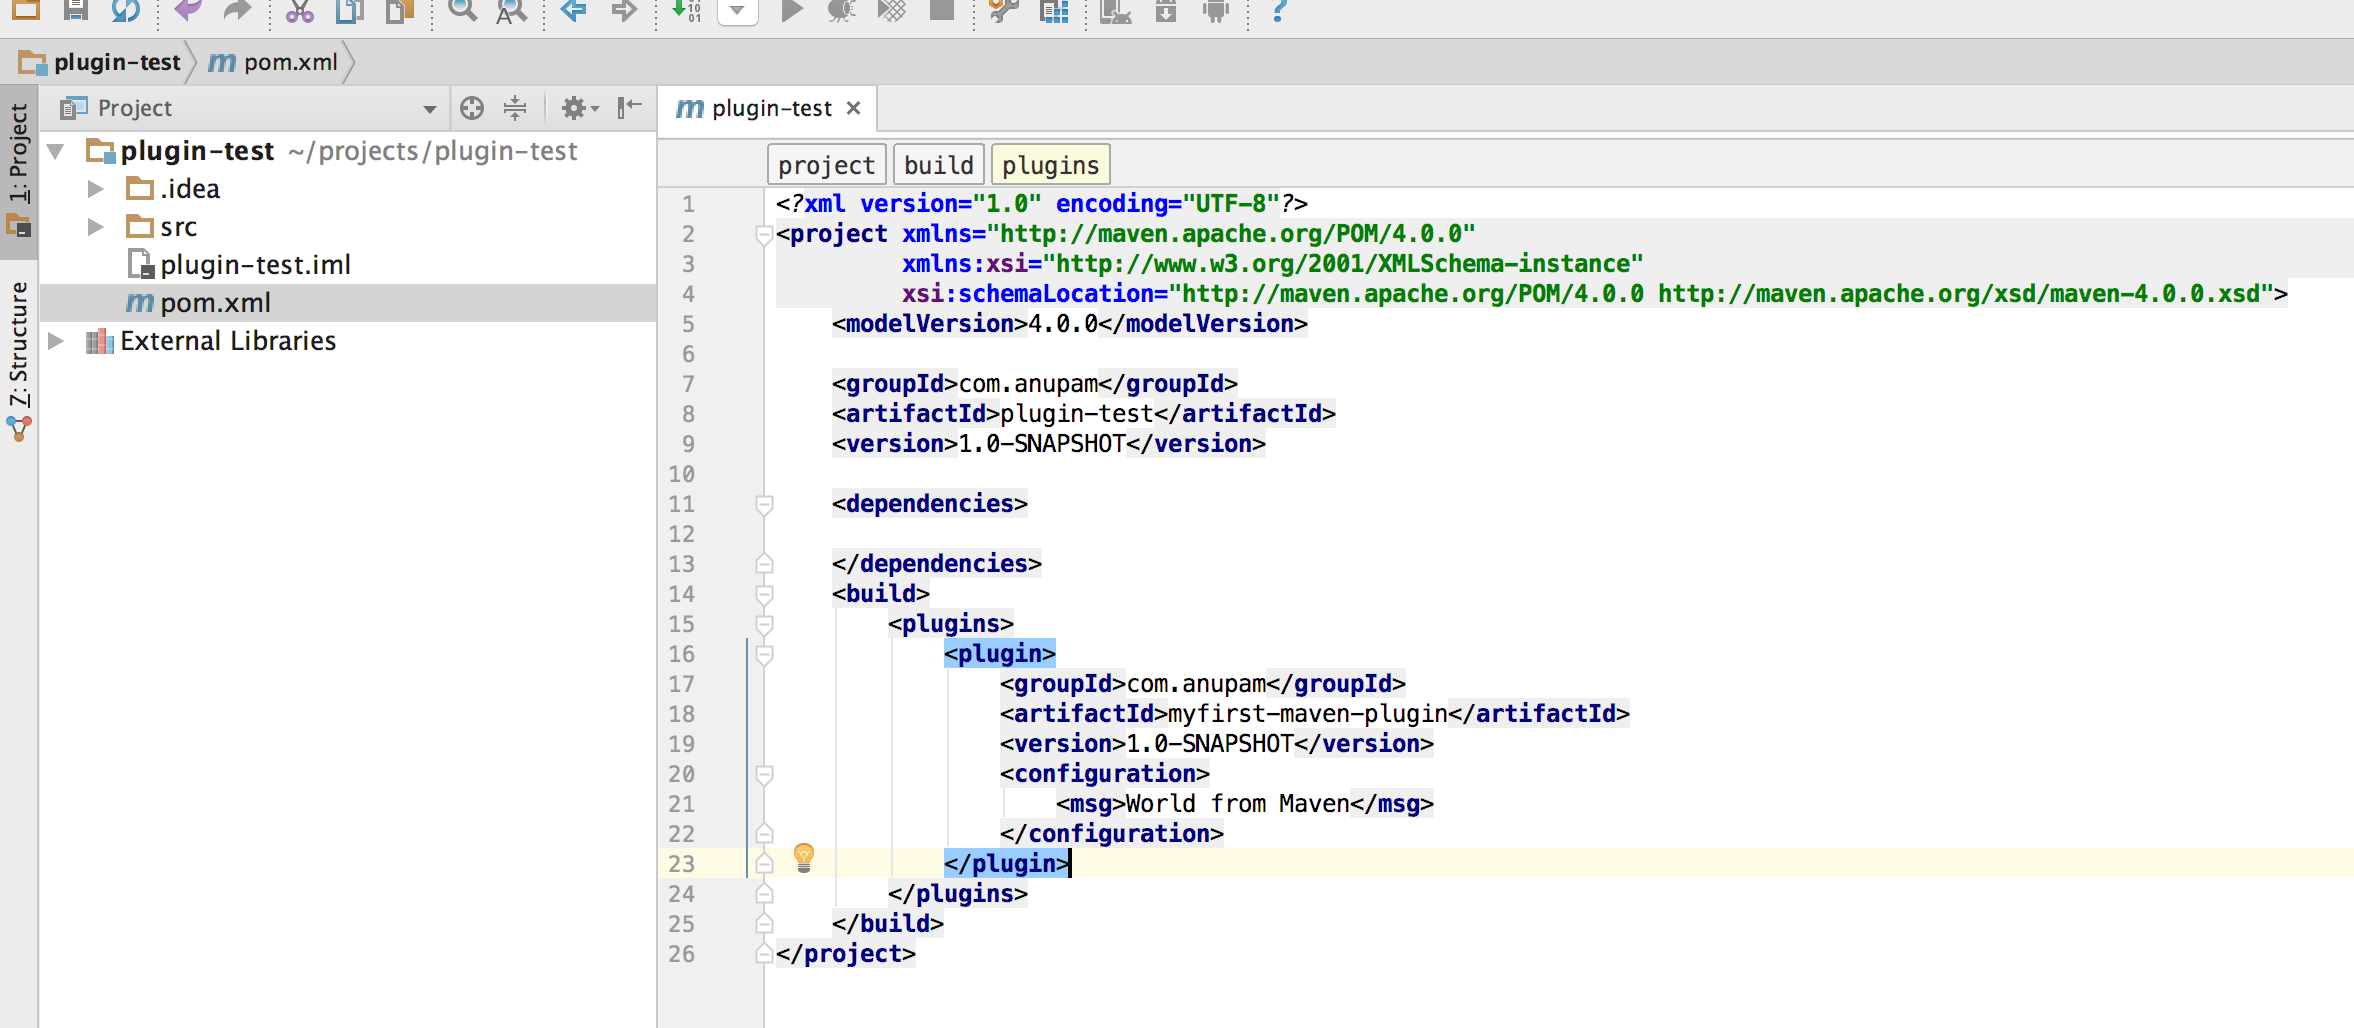
In the configuration, we are passing a String value to the msg property.
Execute The Plugin
There are two ways to execute the plugin.
The longer way: To execute the plugin, we have to use the format:
mvn groupId:artifactId:version:goal
So, in this case, it will bemvn com.anupam:myfirst-maven-plugin:1.0-SNAPSHOT:helloThe shortcut: Here is an interesting article regarding naming conventions. As we are following the aforementioned proper plugin naming conventions (${prefix}-maven-plugin), we can execute our plugin like so:
mvn myfirst:hello
Execute The Plugin With a CLI param
Let's declare a property (e.g test) in our pom.xml:
<?xml version="1.0" encoding="UTF-8"?>
<project xmlns="http://maven.apache.org/POM/4.0.0"
         xmlns:xsi="http://www.w3.org/2001/XMLSchema-instance"
         xsi:schemaLocation="http://maven.apache.org/POM/4.0.0 http://maven.apache.org/xsd/maven-4.0.0.xsd">
    <modelVersion>4.0.0</modelVersion>

    <groupId>com.anupam</groupId>
    <artifactId>plugin-test</artifactId>
    <version>1.0-SNAPSHOT</version>

    <properties>
        <test></test>
    </properties>

    <dependencies>

    </dependencies>
    <build>
        <plugins>
            <plugin>
                <groupId>com.anupam</groupId>
                <artifactId>myfirst-maven-plugin</artifactId>
                <version>1.0-SNAPSHOT</version>
                <configuration>
                    <msg>${test}</msg>
                </configuration>
            </plugin>
        </plugins>
    </build>
</project>
Now let's execute: mvn myfirst:hello -Dtest=I am CLI
You should see the desired output.
Conclusion
In this article, I have shown how easy it is to create a Maven plugin. I have not covered the testing part of the plugin, but I will try to cover that part in another article.
Thanks!
Opinions expressed by DZone contributors are their own.
Comments