DZone
Thanks for visiting DZone today,
Edit Profile
  • Manage Email Subscriptions
  • How to Post to DZone
  • Article Submission Guidelines
Sign Out View Profile
  • Post an Article
  • Manage My Drafts
Over 2 million developers have joined DZone.
Log In / Join
Refcards Trend Reports
Events Video Library
Refcards
Trend Reports

Events

View Events Video Library

Related

  • Implementing ROS Communication Patterns
  • How To Use AzureSignTool to Sign Executables With Azure DevOps
  • Mastering Git
  • How To Use the Node Docker Official Image

Trending

  • The Agent Protocol Stack: MCP vs. A2A vs. AG-UI
  • How AI Coding Assistants Are Changing Developer Flow
  • Querying Without a Query Language
  • Building an Image Classification Pipeline With Apache Camel and Deep Java Library (DJL)

Add Mule 4 Standalone Runtime as On-Premise Server in Anypoint Platform Runtime Manager

In this article, see how to add a Mule 4 Standalone Runtime as an additional server in the Anypoint Platform Control Plane.

By 
Enrico Rafols Dela Cruz user avatar
Enrico Rafols Dela Cruz
·
Dec. 06, 19 · Tutorial
Likes (4)
Comment
Save
Tweet
Share
22.3K Views

Join the DZone community and get the full member experience.

Join For Free

Mule standing in a field near cliff

Add Mule 4 Standalone Runtime as On-Premise Server in Anypoint Platform Runtime Manager

In this article, I will explain how to add a Mule 4 Standalone Runtime as an additional server in the Anypoint Platform Control Plane.

Prerequisites

  • Mule 4.2 Standalone Runtime, which can be downloaded in https://www.mulesoft.com/lp/dl/mule-esb-enterprise
  • Anypoint Platform Account, which can be created in https://anypoint.mulesoft.com/login/signup

1. First, extract the downloaded Mule 4.2 standalone runtime zip file in your root directory.

Image title

2. Go to Runtime Manager > Servers, click the Add Server, and copy the below command, which will be executed in the on-prem server to install the Mule agent and establish the communication between the on-prem Mule 4 runtime and Anypoint Platform Control Plane.
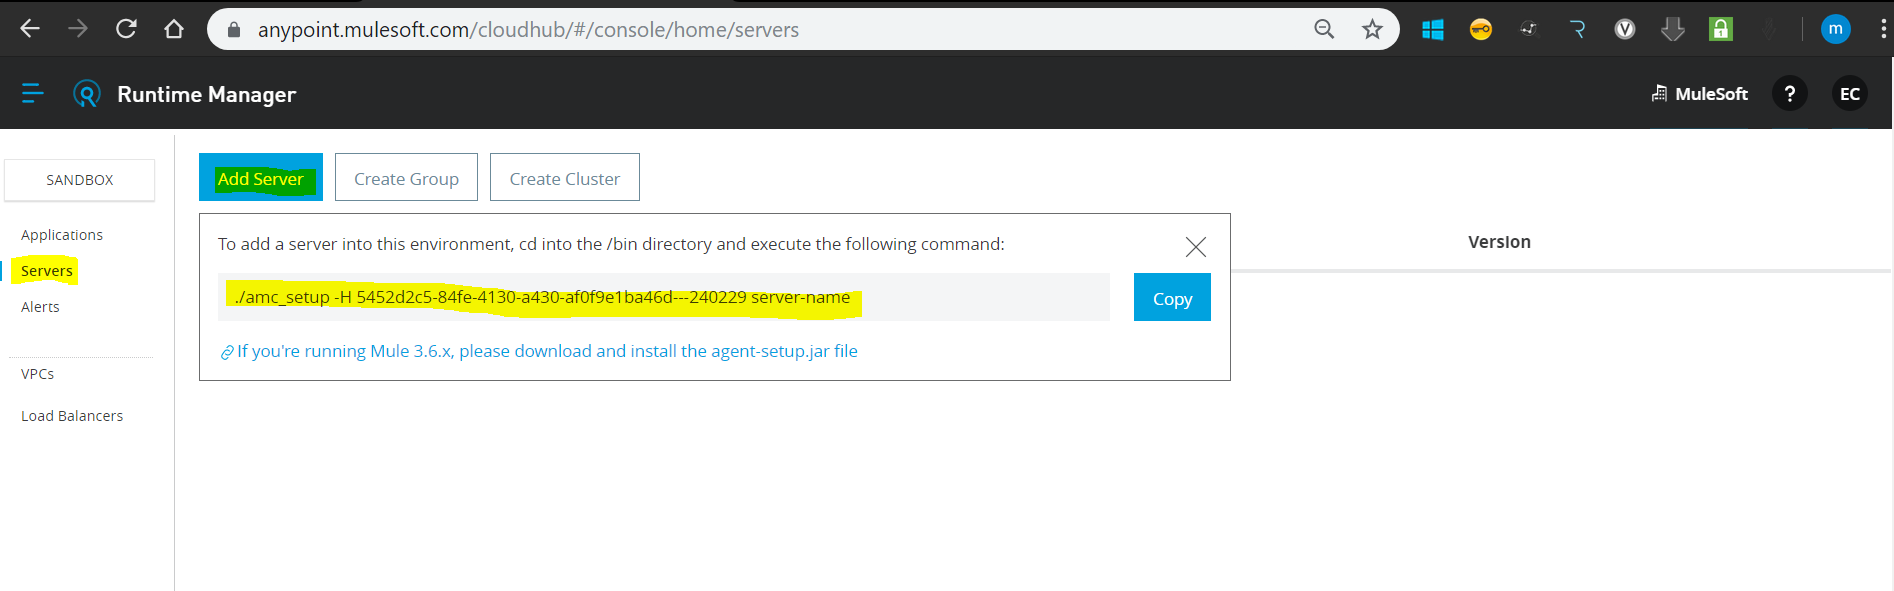
Image title

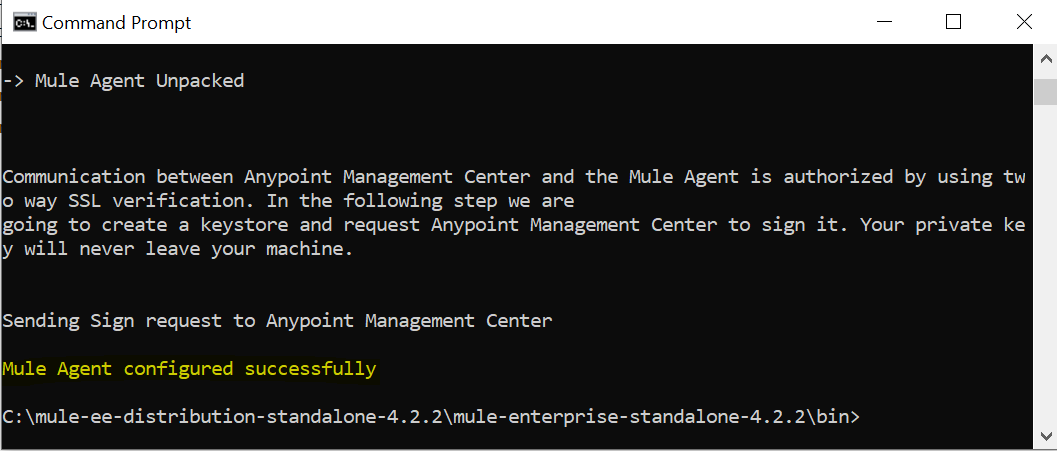
3. Execute the command ./amc_setup -H b9ca89f8-39cc-44b8-8b9e-07607ed54abf---240229 server-name under the /bin directory inside the Mule 4 runtime folder. The server-name should be replaced with the name of your on-prem server. In this example, I will use mule4-node1 as the name of the server.

You might also like:  How to Deploy an Application in Mule Standalone Runtime
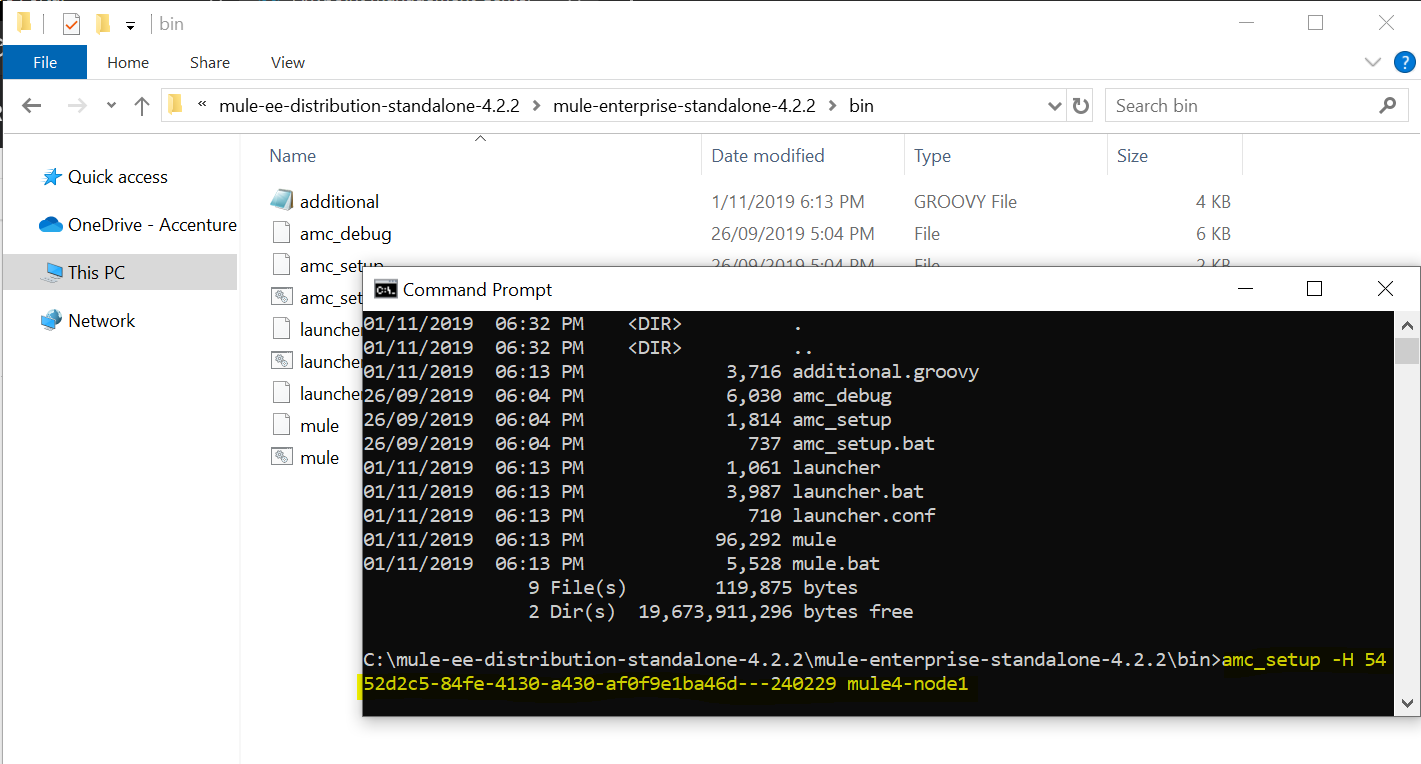
Image title

Image title

Checking the Runtime Manager, you should see that the on-prem server is now reflected on the Servers tab.
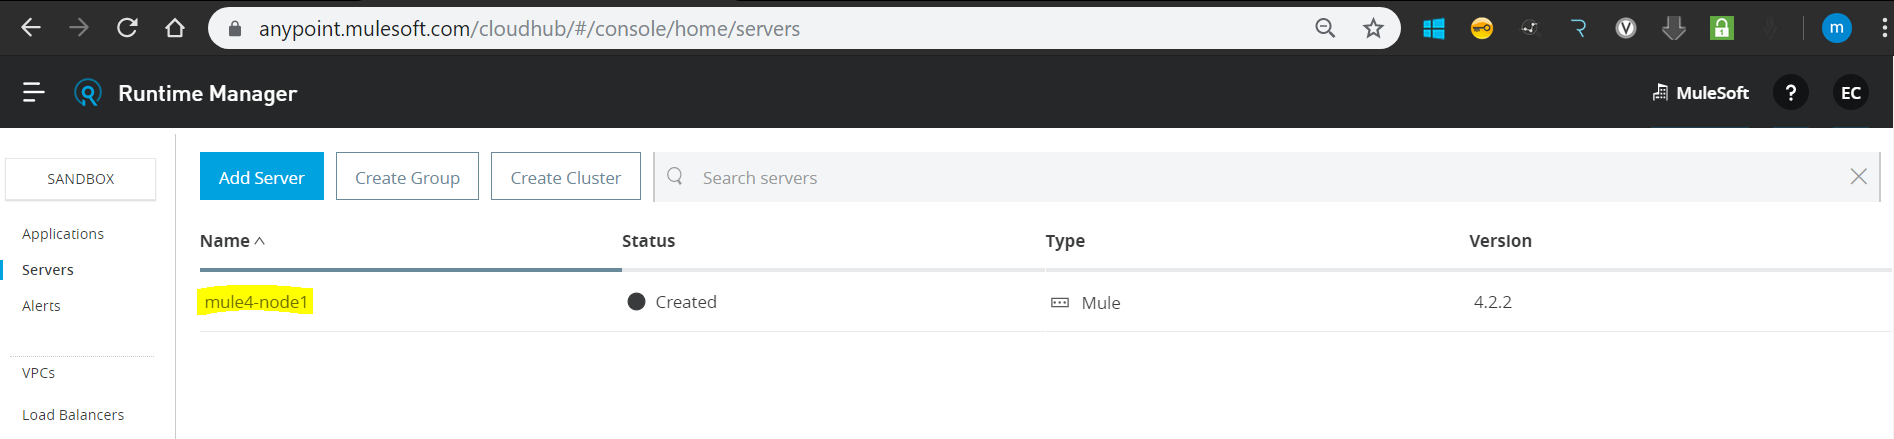
Image title

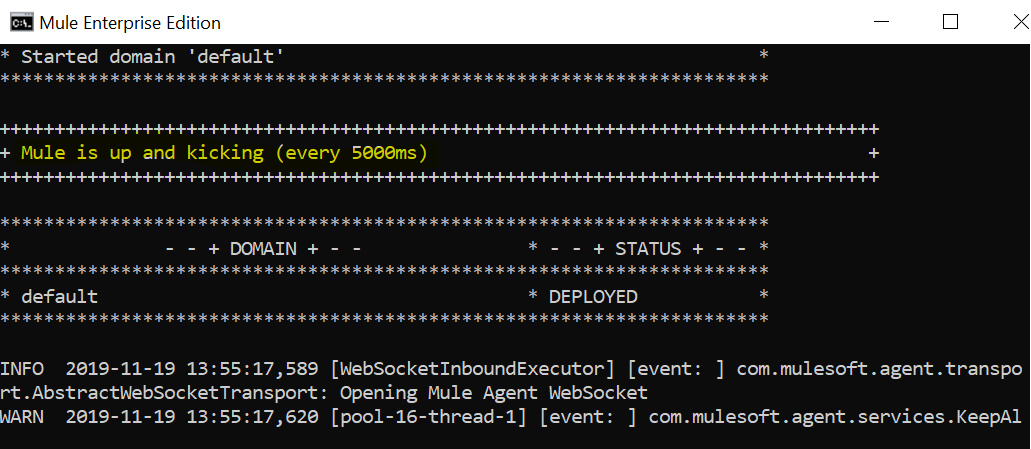
4. Start the Mule 4 Standalone Runtime by executing the mule.bat under /bin directory.
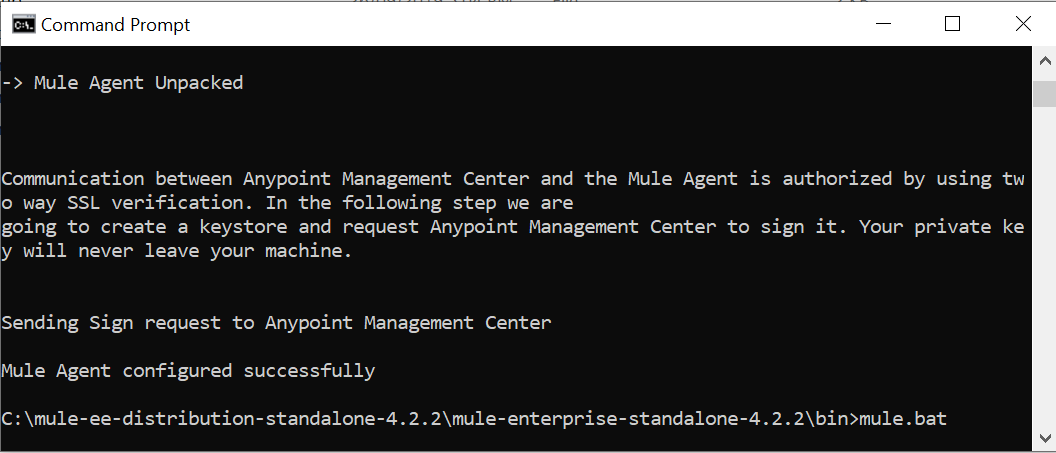
Image title

Image title

In Runtime Manager, under Servers, the added on-prem server status should be running.
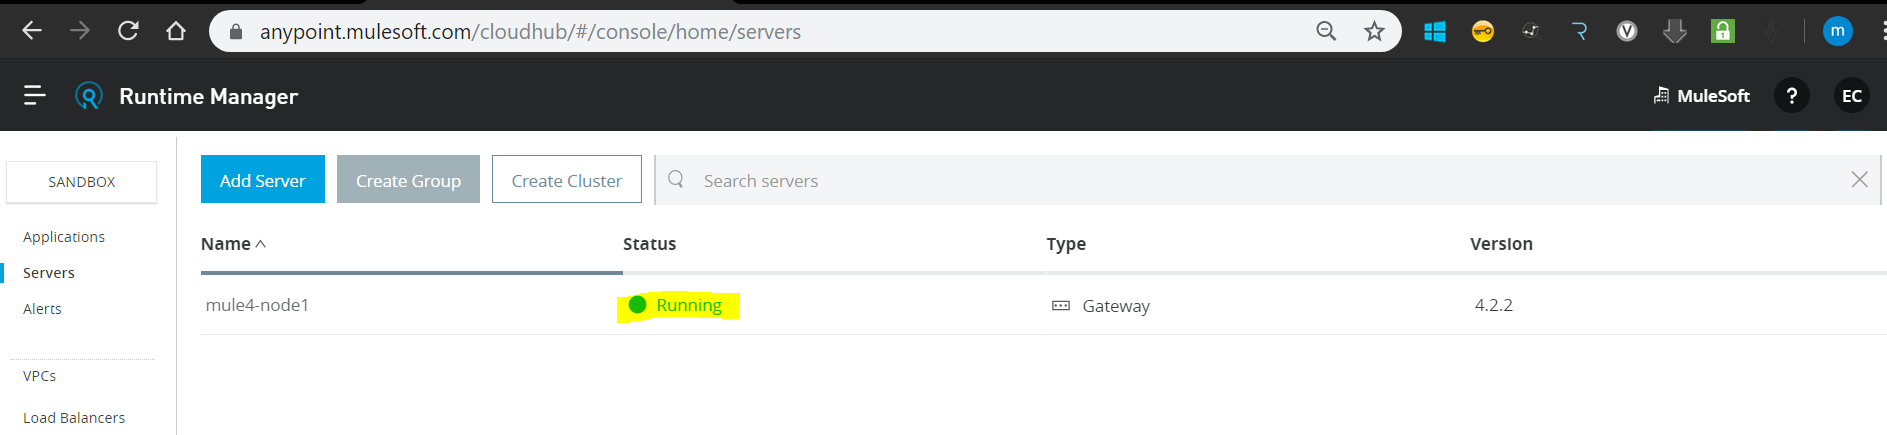
Image title


5. Deploy a Mule 4 application and use the on-prem Mule runtime as the target deployment.
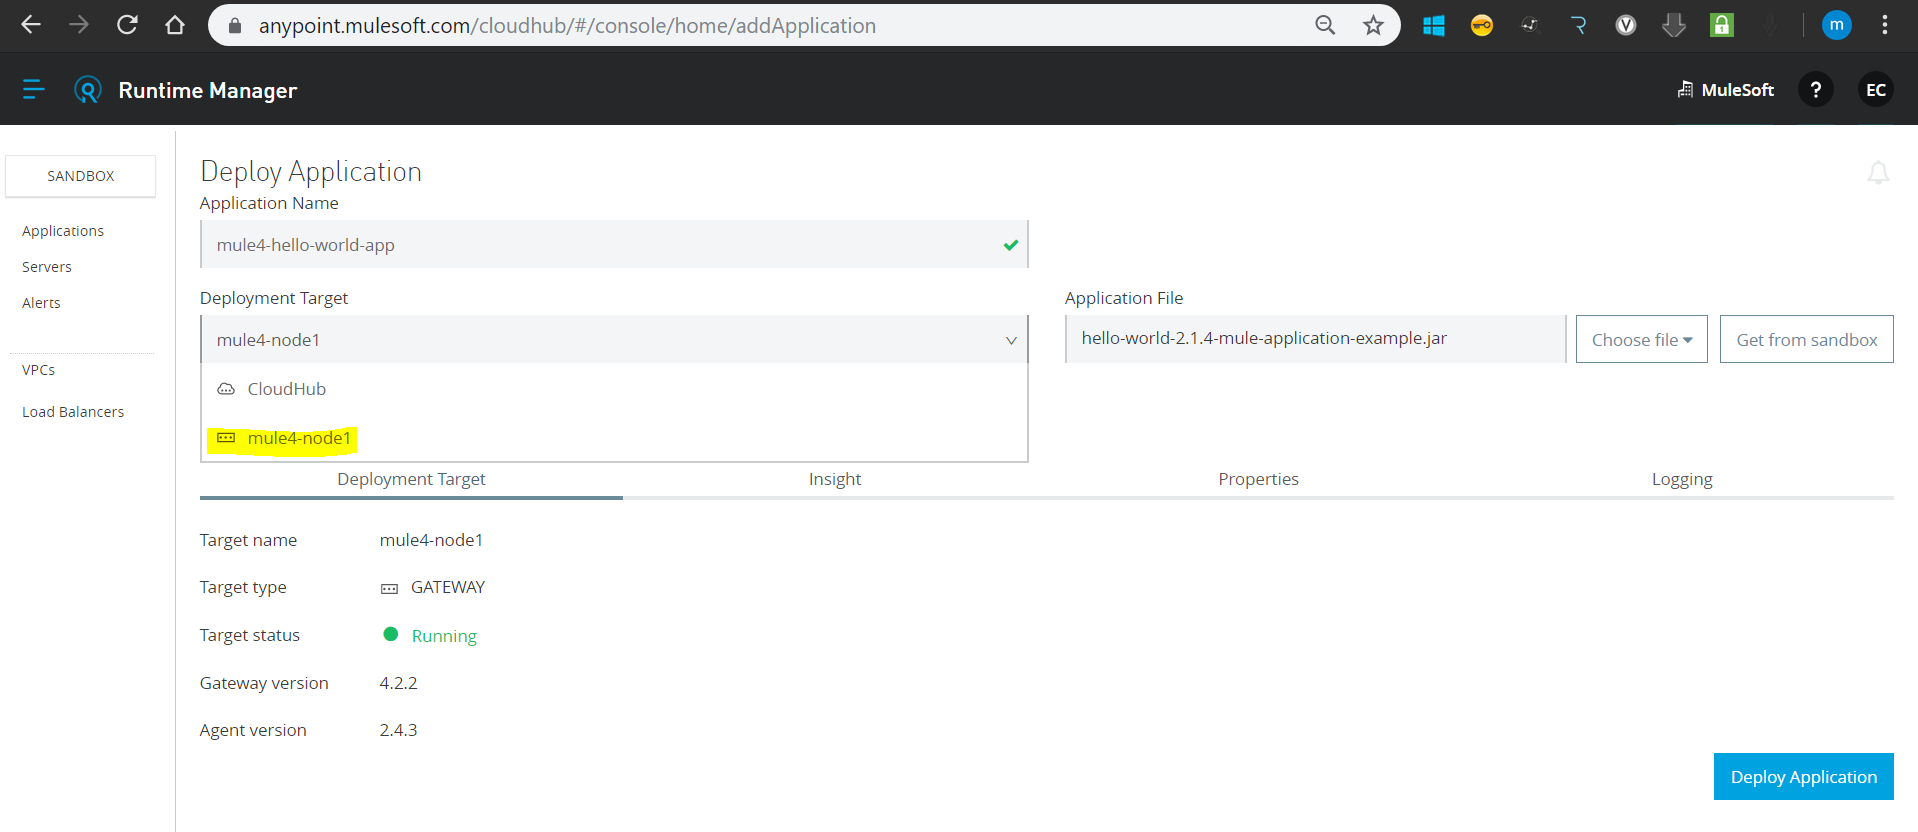
Image title

The application should be deployed successfully.
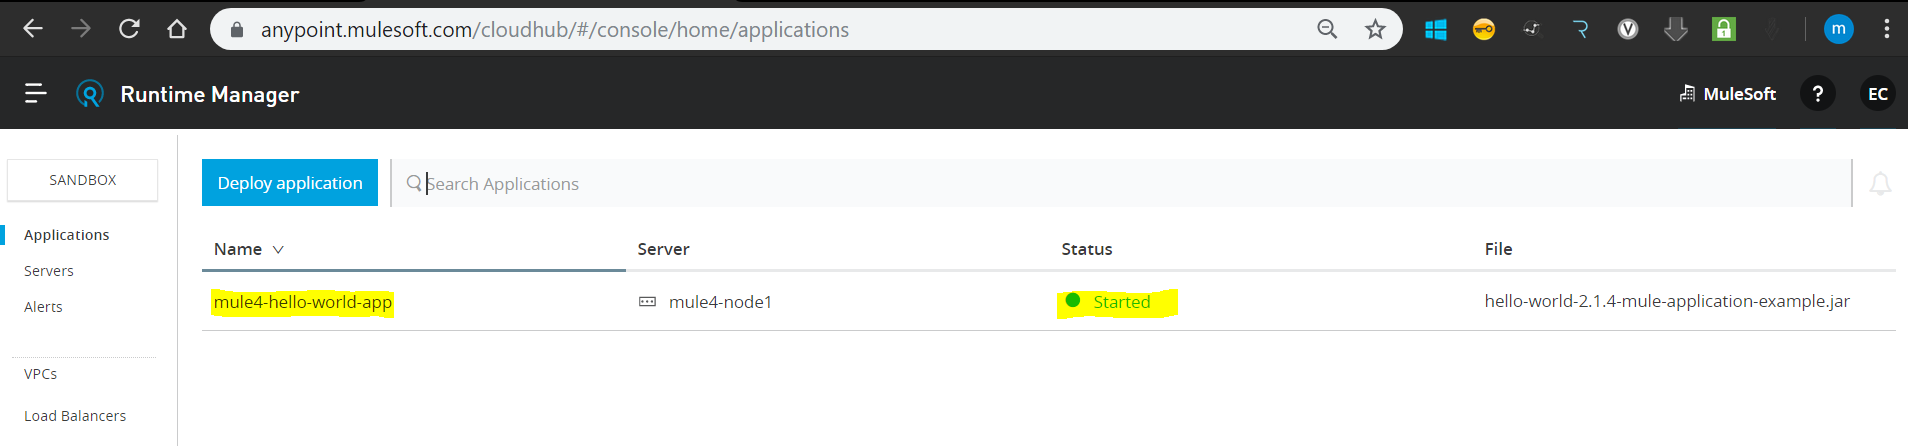
Image title

Testing the Mule 4 application deployed in the on-prem Mule 4 runtime.

Image title

That's it.

Hope this helps!

Further Reading

Runtime-Patching in Mule 4

Working With Custom Policy in Mule 4

application Directory Command (computing) Extract

Opinions expressed by DZone contributors are their own.

Related

  • Implementing ROS Communication Patterns
  • How To Use AzureSignTool to Sign Executables With Azure DevOps
  • Mastering Git
  • How To Use the Node Docker Official Image

Partner Resources

×

Comments

The likes didn't load as expected. Please refresh the page and try again.

  • RSS
  • X
  • Facebook

ABOUT US

  • About DZone
  • Support and feedback
  • Community research

ADVERTISE

  • Advertise with DZone

CONTRIBUTE ON DZONE

  • Article Submission Guidelines
  • Become a Contributor
  • Core Program
  • Visit the Writers' Zone

LEGAL

  • Terms of Service
  • Privacy Policy

CONTACT US

  • 3343 Perimeter Hill Drive
  • Suite 215
  • Nashville, TN 37211
  • [email protected]

Let's be friends:

  • RSS
  • X
  • Facebook