Adding a Selenium-Maven Project From Eclipse to GitHub Repository
How to add a Selenium project created in Eclipse using Maven to GitHub public Repository.
Join the DZone community and get the full member experience.
Join For FreeIn this article, we will understand how to create a simple Selenium project using Maven in Eclipse and we will see how to push the project to GitHub Repository.
How to Create Selenium Test in Eclipse?
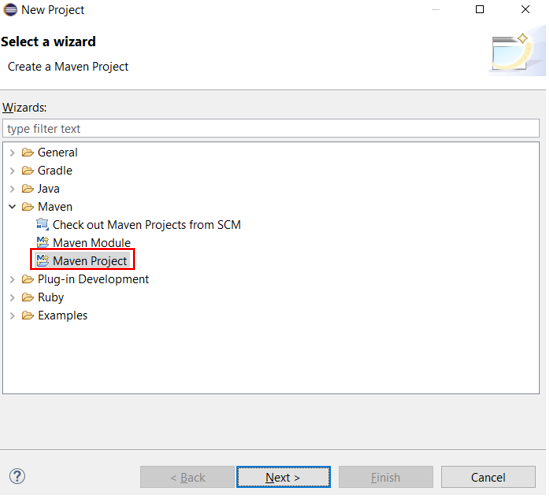
Step 1: File -> New -> Project -> Maven Project
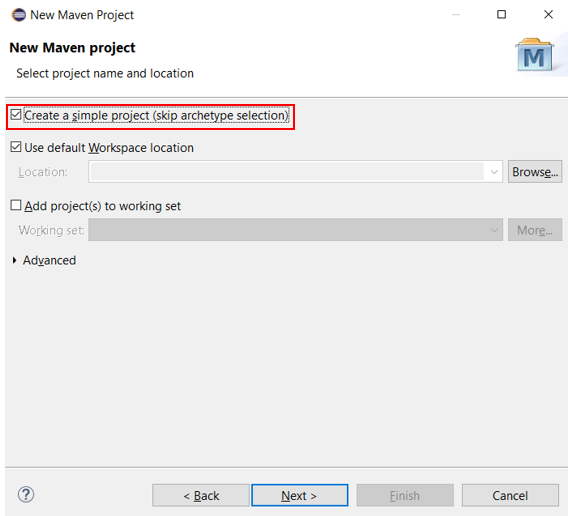
Step 2: Check “Create a simple project (skip archetype selection) and say “Next”
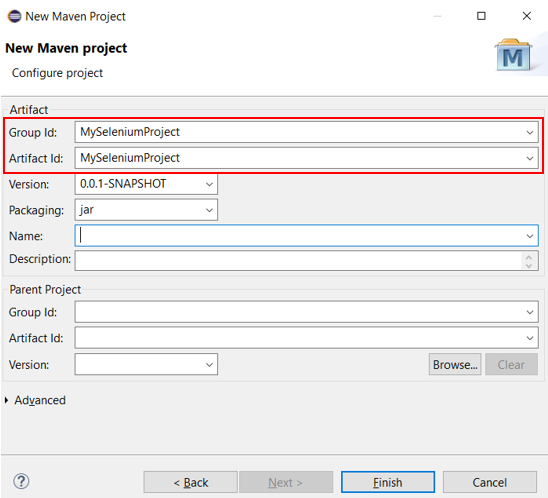
Step 3: Name Group Id and Artifact Id as “MySeleniumProject” and say “Finish”. You can name as any name as you wish
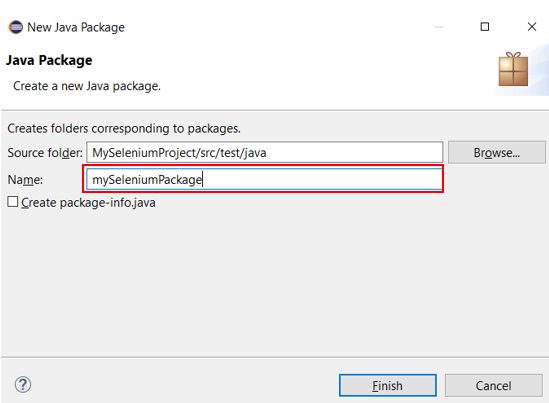
Step 4: Create a new package “mySeleniumPackage” under src/test/java of our Maven project and say “Finish”.
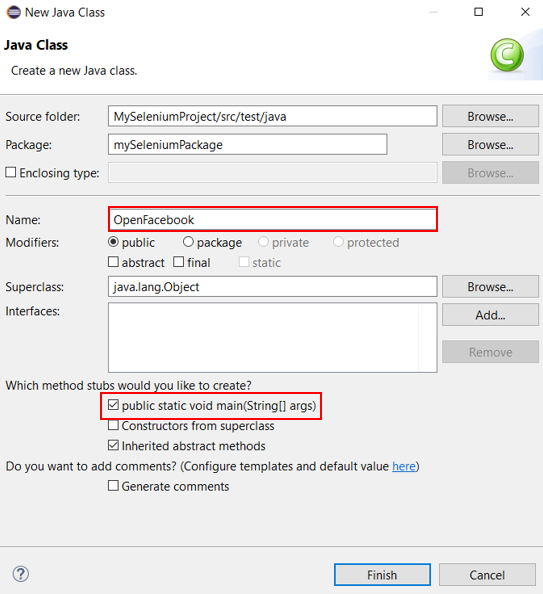
Step 5: Create a new class “OpenFacebook” under mySeleniumPackage and enable main()
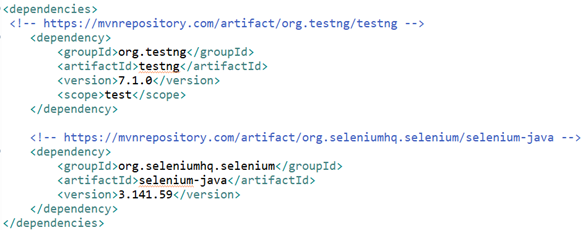
Step 6: Update the pom.xml file of the Maven project with latest Selenium and TestNG dependencies
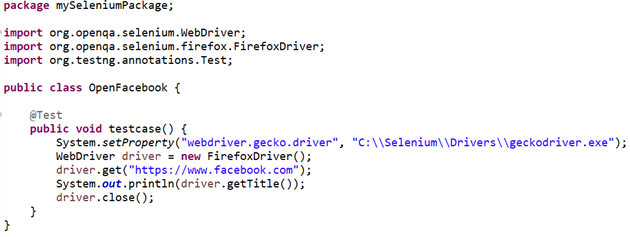
Step 7: Create a Selenium test to open Facebook home page in Firefox browser by loading the geckodriver.exe and get the title of the webpage
Step 8: Create a xml file named “testing.xml” in our Maven project to run the created testcase. Add the below code. Mention the package name and the class name where we have our Selenium test in the format packagename.classname
Please note:- This step is optional and it is required to run the test as batch and if we need to run the test in any continuous integration server like Jenkins

Step 9: Run the testing.xml file as TestNG Suite to ensure everything is working fine in our local system
***********************************************************************************************
How to create a public GIT Repository?
Step 1: Open www.github.com
Step 2: Sign Up and register a free account in github.com
Step 3: Login to www.github.com and create a new repository selecting “New” button

Step 4: Give a name for your repository “SeleniumProject”, select Public and say “Create repository”. Providing “Public” access enables anyone to see your repository. If you want to restrict access to your repository, you can select as “Private”
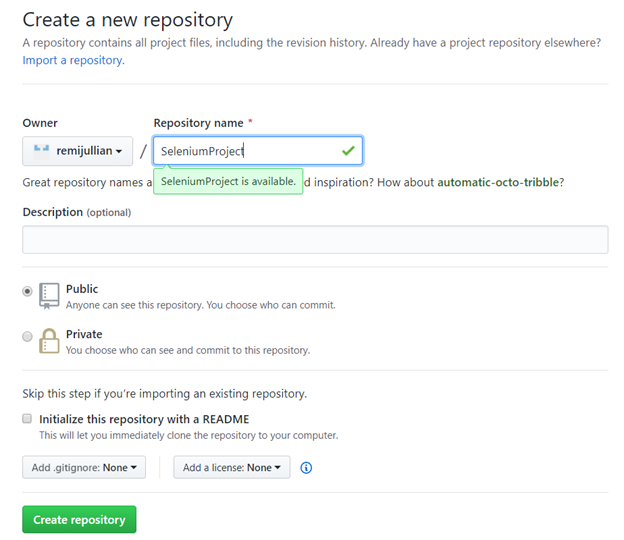
Step 5: This creates a public repository in github.com and it can be accessed using the URL – https://github.com/remijullian/SeleniumProject.git
How to Push Your Selenium Project to GitHub
Step 1: Install GIT locally in system. Go to URL -> https://git-scm.com/download/win and download GIT for Windows based on your operating system whether it is 32 bit or 64 bit.
Step 2: Install GIT in the local system by following the installation steps. This step is important to create a local repository in our system.
Step 3: Go to Eclipse, select your project “MySeleniumProject” -> Right Click -> Team -> Share Project
Step 4: Configure Git repository. This step is to create a local repository of our Selenium project in our system. Check “Use or create repository in parent folder of project” and select “Create Repository” and say “Finish”. This creates a .git file in the physical location of the selenium project. In our case, the local repository is created at “C:\RemiFiles\Backup4\Projects\Selenium\MySeleniumProject.git”
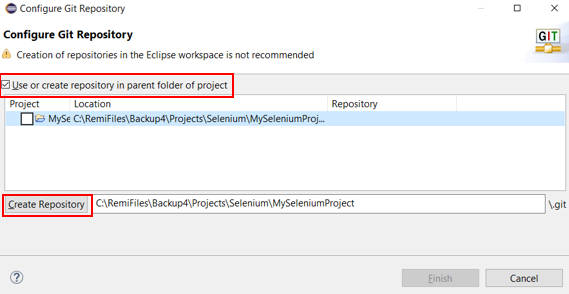
Step 5: Our project in eclipse is connected to local repository. If we want to push the project to remote repository, right click the project -> Team -> Commit

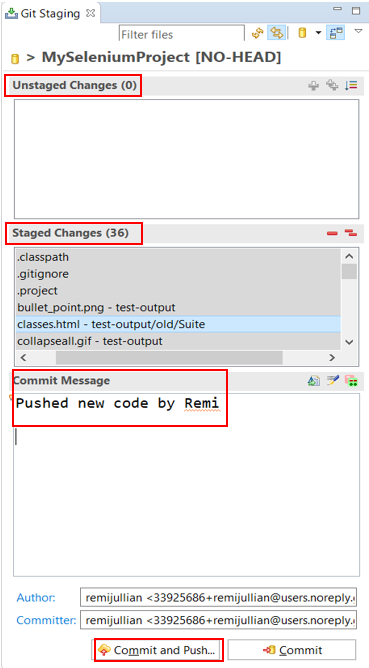
Step 6: Eclipse will open a “Git Staging” window. We will find 3 sections – Unstaged Changes, Staged Changes and Commit Message.
Step 7: Unstaged Changes are the new files that needs to get updated in the shared repository. If we need to add code to shared repository, we need to move Unstaged Changes to Staged Changes. Once moved, provide a “Commit message” and select “Commit and Push”. Commit message enables others to understand what changes has been made to the existing code in Git Repository
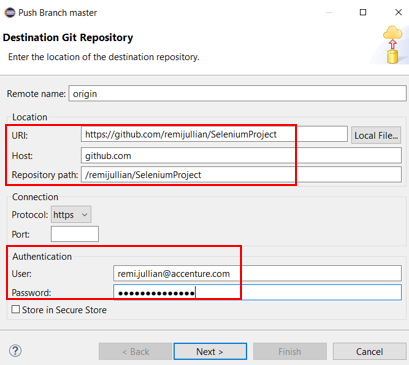
Step 8: Give the details of the shared repository where we wish to push the Selenium code. Also give the Authentication credentials to connect to shared repository and push the code
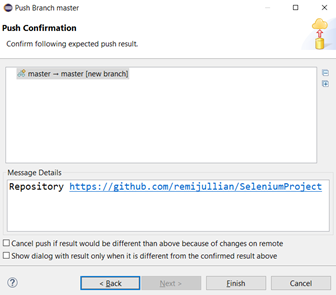
Step 9: Accept the confirmation message on the details of the shared repository where to push the files. Click the “Finish” button
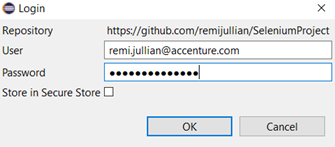
Step 10: Confirm the credentials once again to push
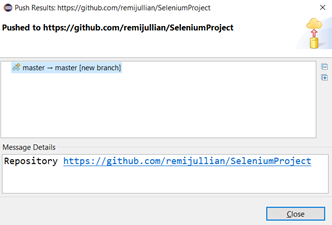
Step 11: Once the project gets pushed successfully to remote repository, we will get a confirmation message as below:
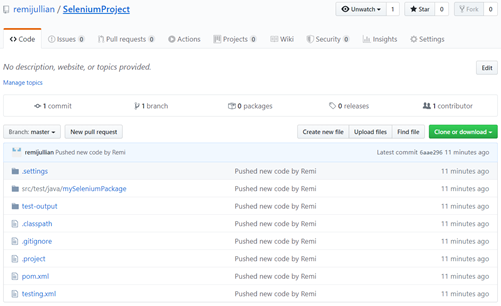
Step 12: Go to remote repository and refresh the page. We can able to see the Selenium project contents got updated there along with the commit message we have issued in eclipse
Conclusion
This is how we can create a Selenium project in eclipse and update in GIT repository. We can further clone the project if we need a local copy on a different system or pull the project to update the local repository with the recent changes made in the remote repository.
Thanks for reading this article. For any queries please reach out to me.
Opinions expressed by DZone contributors are their own.

Comments