

Anypoint Platform Connected Apps
In this article, we are going to learn what is a connected app, supported authentication protocols, its benefits, and how to create your Anypoint Platform connected app.
Join the DZone community and get the full member experience.
Join For FreeWhat Is a Connected App?
The connected App feature provides you the option to integrate an external application with the Anypoint platform without sharing your user credentials with the help of OAuth 2.0 or OpenID Connect.
Authentication Protocol Supported by Connected Apps
1. OAuth 2.0: OAuth (Open Authorization) is an open protocol that enables secure API authorization from applications in a standardized way. It can authorize resource access without revealing user credentials to apps.
2. OpenID Connect: OpenID Connect identifies the end-user and obtains information to pass to OAuth 2.0 connected apps.
Connected Apps Benefits
There are a number of benefits of connected apps that include:
1. Integrate external applications with Anypoint Platform.
2. An organization can own up to 200 Connected Apps.
3. Each connected app can have up to 1000 scopes.
4. Granted access/ Revoke Access.
5. Connected Apps usage can be tracked and is auditable.
How to Create Connected Apps
1. Sign in to your Anypoint Platform Account, navigate to the Access Management section and Click on Connected Apps.

If you are not at the root level of the organization or are at any other level except the root organization, then you won't be able to see the connected apps option in the access management of your Anypoint Platform account.
3. Under Owned Apps section, click on Create App. Type the app name in the Name section and then select App acts on its own behalf (client credentials).

4. Click on Add scopes and add the necessary scopes required for the user to use the Anypoint Platform features(design center privileges, exchange privileges, runtime manager privileges, and others as well).

5. Once you have selected all the scopes, click on Next. Select the Business Group and also choose the environments you want to add.
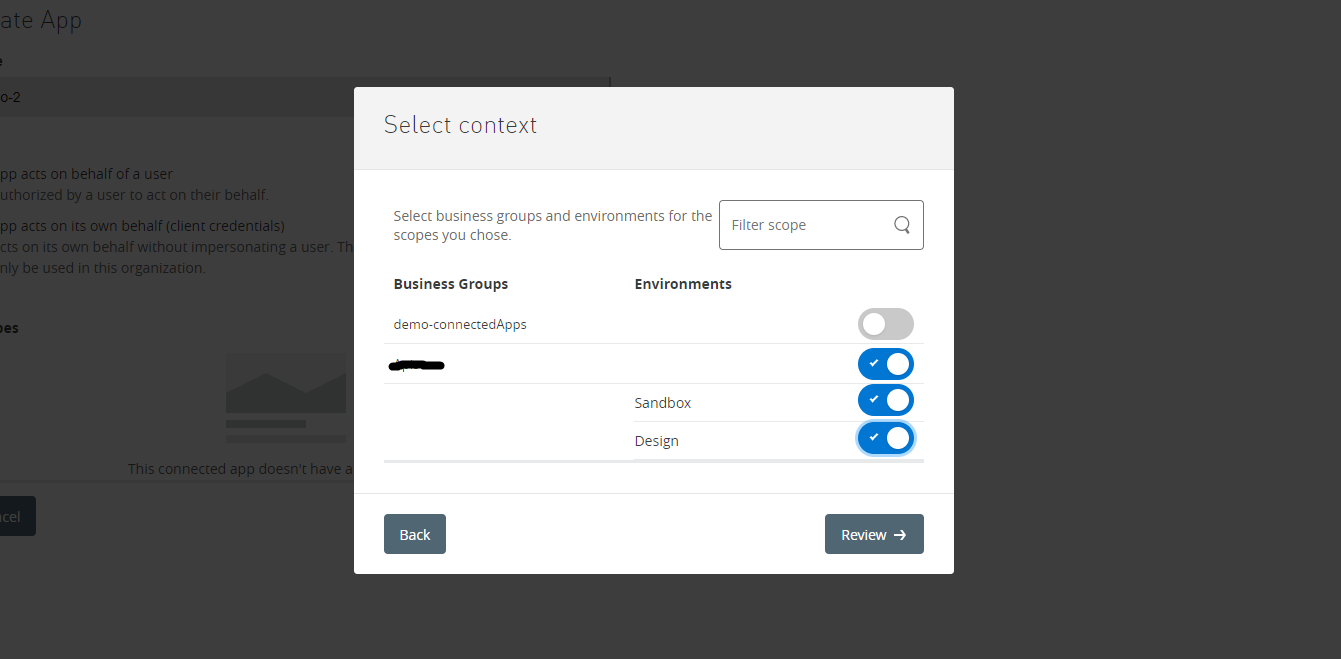
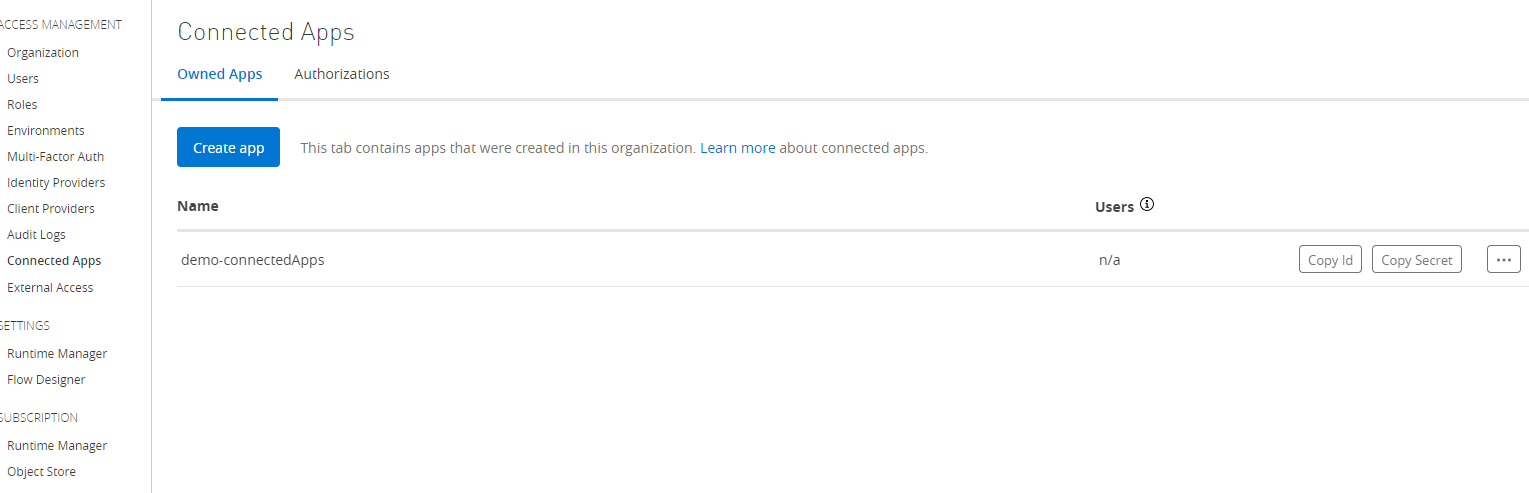
6. Click on Review and then Add Scope. At last, Click on SAVE. Navigate to the Connected Apps section and verify the app created.
Deploy Mule Application to Cloudhub Using Connected Apps
- Add the following code snippet to pom.xml inside the plugins section.
<plugin>
	<groupId>org.mule.tools.maven</groupId>
	<artifactId>mule-maven-plugin</artifactId>
	<version>3.4.2</version>
	<extensions>true</extensions>
	<configuration>
		<cloudHubDeployment>
			<uri>https://anypoint.mulesoft.com</uri>
			<muleVersion>${app.runtime}</muleVersion>
			<connectedAppClientId>${connectedApp-ClientID}</connectedAppClientId>
			<connectedAppClientSecret>${connectedApp-ClientSecret}</connectedAppClientSecret>
			<connectedAppGrantType>client_credentials</connectedAppGrantType>
			<applicationName>${cloudhub.application.name}</applicationName>
			<environment>${environment}</environment>
			<region>${region}</region>
			<workers>${workers}</workers>
			<workerType>${workerType}</workerType>
			<objectStoreV2>true</objectStoreV2>
		</cloudHubDeployment>
	</configuration>
</plugin>
- The values for connectedAppClientId and connectedAppClientSecret can be taken from the connected apps section.
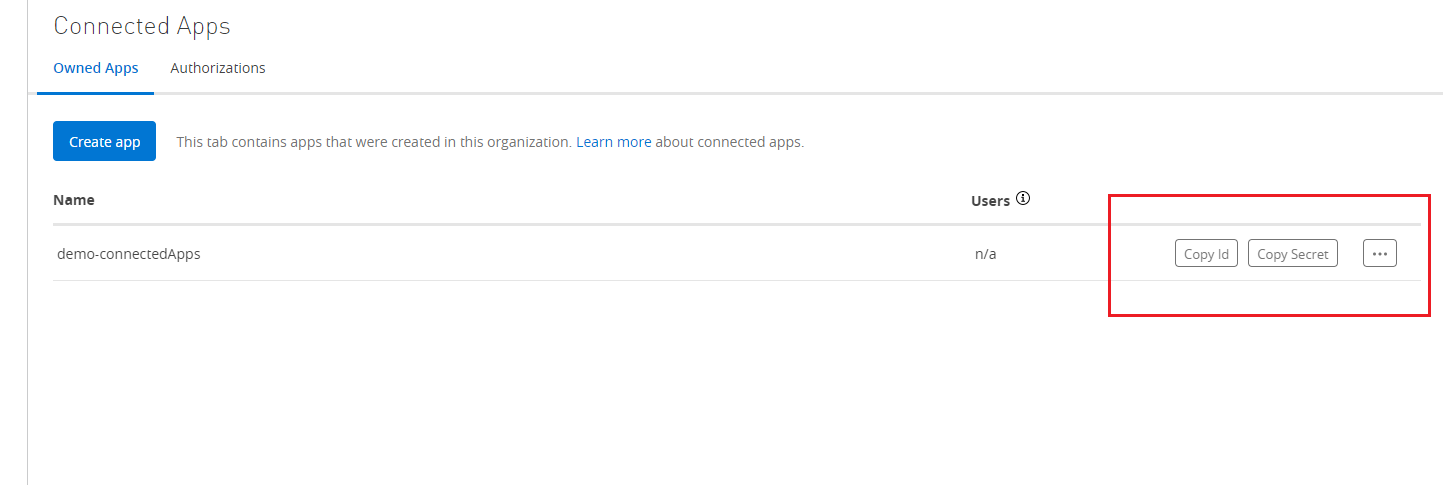
- Use the following command to deploy your mule application to Cloudhub using maven: mvn clean package deploy -DmuleDeploy
References
https://docs.mulesoft.com/access-management/connected-apps-overview
https://blogs.mulesoft.com/news/anypoint-platform/introducing-connected-apps/
Opinions expressed by DZone contributors are their own.
Comments