API Manager WSO2
In this brief article, I am going to demonstrate how easy and cool it is to use the API Manager provided by WSO2.
Join the DZone community and get the full member experience.
Join For FreeIntroduction
In this brief article, I am going to demonstrate how easy and cool it is to use the API Manager provided by WSO2. For this tutorial, I am using the API Manager Version 2.5.0.
Installation and Running
Installation is quite straightforward. You can either use the Cloud edition or an on-premise edition. For this demo, I have chosen the binary on-premise version.
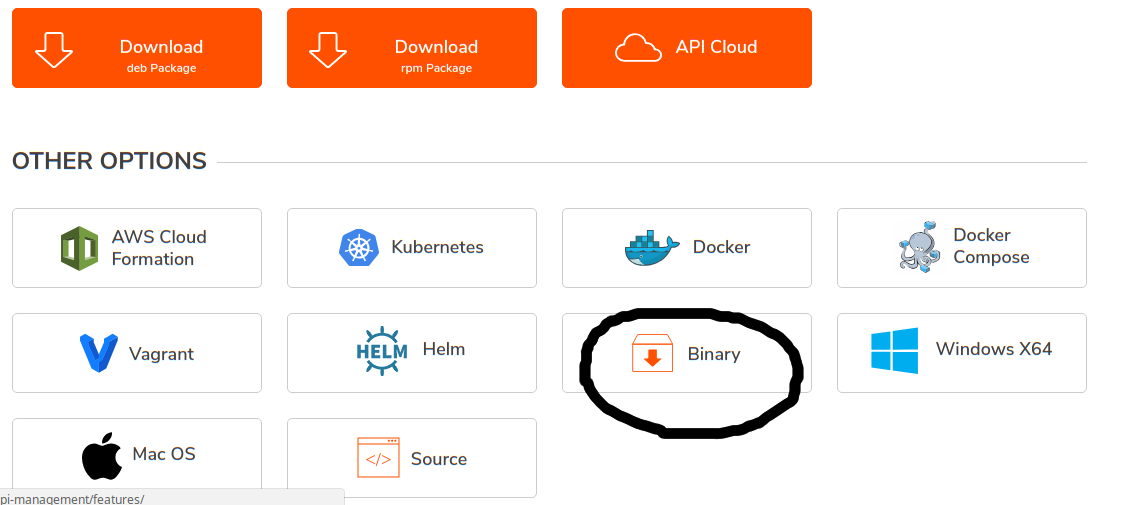
After downloading the binary file, extract the zip file in some directory in your system and navigate to the bin directory. Then execute the wso2server.sh in Linux or wso2server.bat in Windows.
Note: It's mandatory to set the JAVA_HOME environment variable in your OS. In my case, the installation was done successfully with Java 8.
Key Services
After properly running the API Manager, you will be provided with some important endpoints. In this demo, I will show only the store and publisher endpoints.
API Store: https://localhost:9443/store/
API Publisher: https://localhost:9443/publisher
For both services use: username=admin and password=admin
API Publisher
API Publisher is the main entry point where you design your APIs using Swagger.
URL |
Login |
Password |
https://localhost:9443/publisher |
admin | admin |
Design
Here, you design the API using the Swagger specification. It's kind of Design Center in Anypoint Platform. Here is a screenshot,
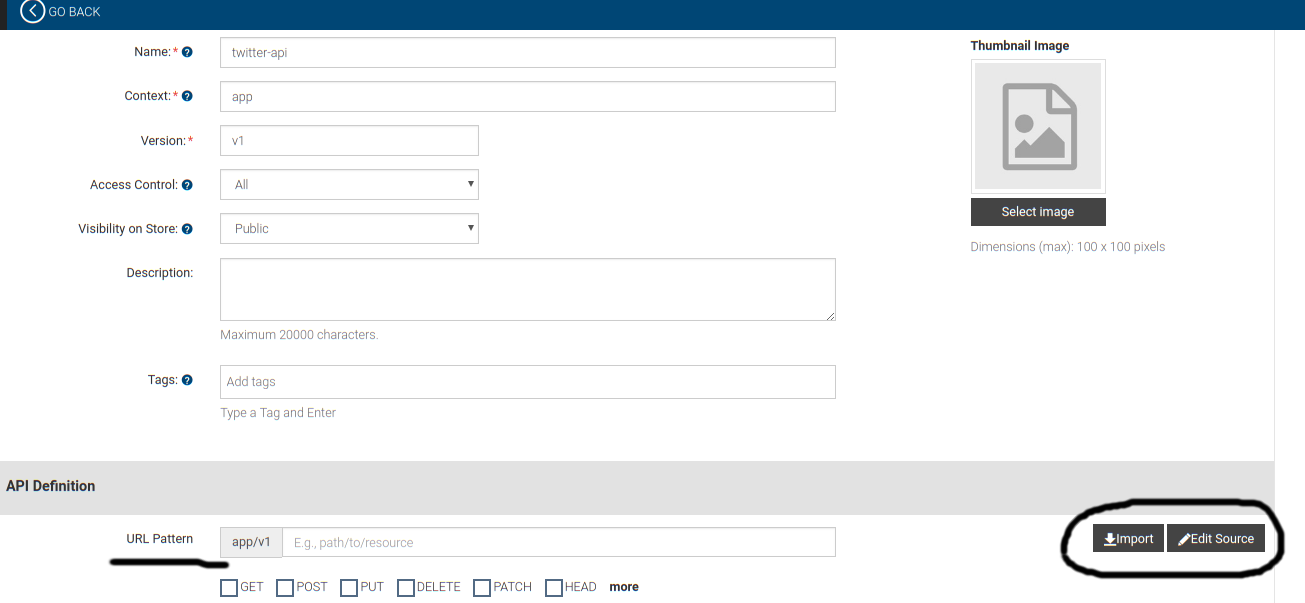
In the Design tab, you can create the API resources either visually or by editing Swagger source just by clicking the Edit Source button. Or if you have previously created API you can import it directly.
Small Note for URL Pattern
The URL Pattern is something that will uniquely identify the API. For this example, let's suppose that the URL Pattern is /app/v1. Let's suppose that we have defined two resources in the Swagger specification.
1. GET /users
2. GET /tag
When the API will be published the resources will be available at http://localhost:8280/app/v1/usersand http://localhost:8280/app/v1/tagrespectively. (Host & Port are subject to change as per your configuration)
Implement
This is an interesting part. Here, you provide the actual implementation URL of the API. 
For example, I have implemented an API and the resources are available at the following URLs,
GET http://localhost:8081/stats/users
GET http://localhost:8081/stats/tag
So, how does the mapping of the URLs work? Here comes the role of the URL Pattern from the previous section.
URL Pattern |
Actual Endpoint |
http://localhost:8280/app/v1 |
http://localhost:8081/stats |
http://localhost:8280/app/v1/users |
http://localhost:8081/stats/users |
http://localhost:8280/app/v1/tag |
http://localhost:8081/stats/tag |
URL Pattern is somewhat kind of Proxy as in the API Manager of Anypoint Platform. So, basically, we will define the Production and Sandbox endpoint as http://localhost:8081/stats
Note: It's up to you how you define the strategy.
Manage
In the Manage tab, you simply apply the rate-limiting kind of stuff etc. Here is a screenshot,
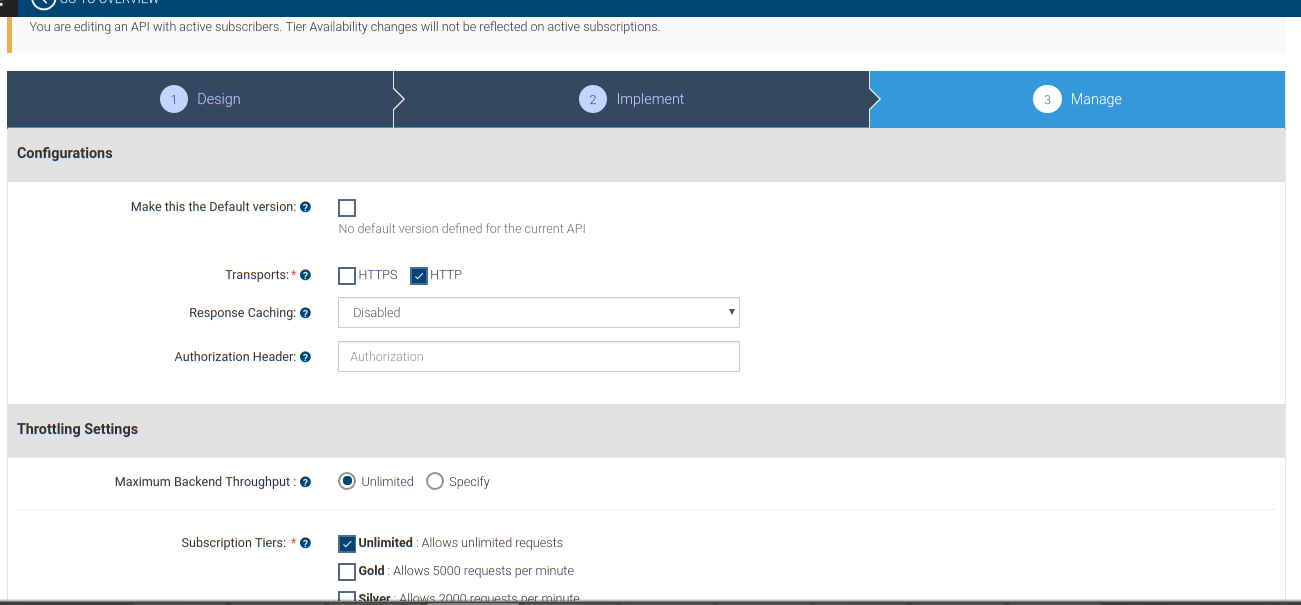
After setting up the configuration publish the API. Once the API is published successfully it will be available in the API Store section.
API Store
API Store is basically a central location for all published APIs. Here, the published APIs can be consumed by creating Application and subscribing to that APIs.
URL |
Login |
Password |
https://localhost:9443/store |
admin | admin |
APIs
Here you can find a list of the Published APIs. It's similar to Exchange in Anypoint Platform.
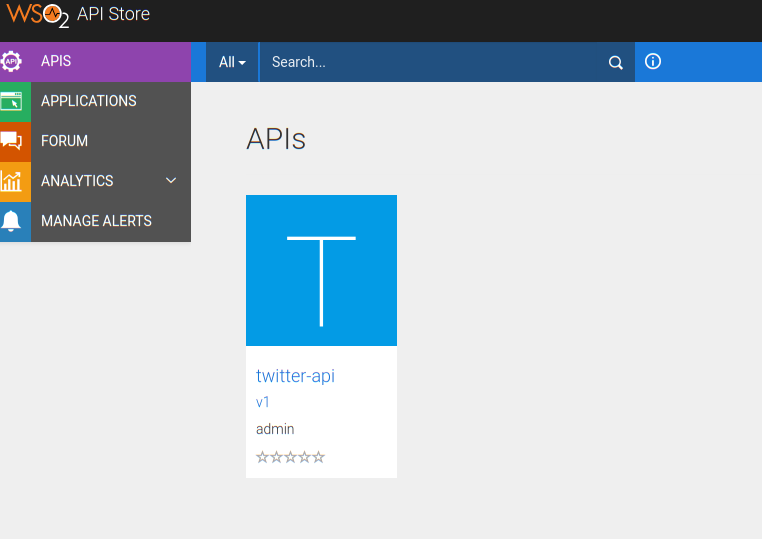
You can click the API to get detailed information of it.
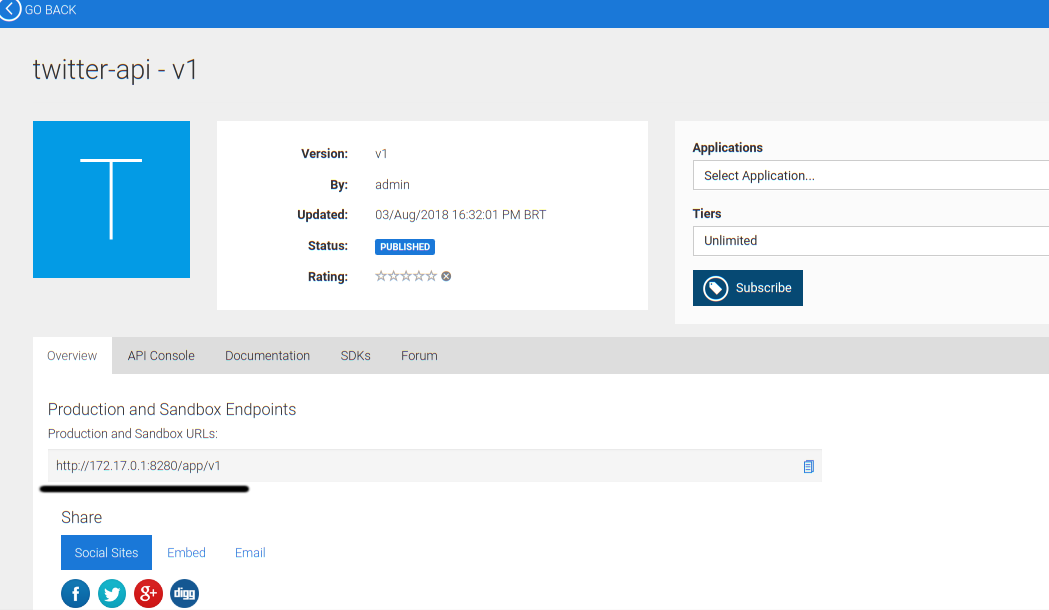
You can check the URL of our API.
Applications
Applications can be created easily in this section. There are two Token types available OAuth & JWT.

Once an application is created, you are provided with a very informative page to explain how to get the Access Token and use it in the requests.
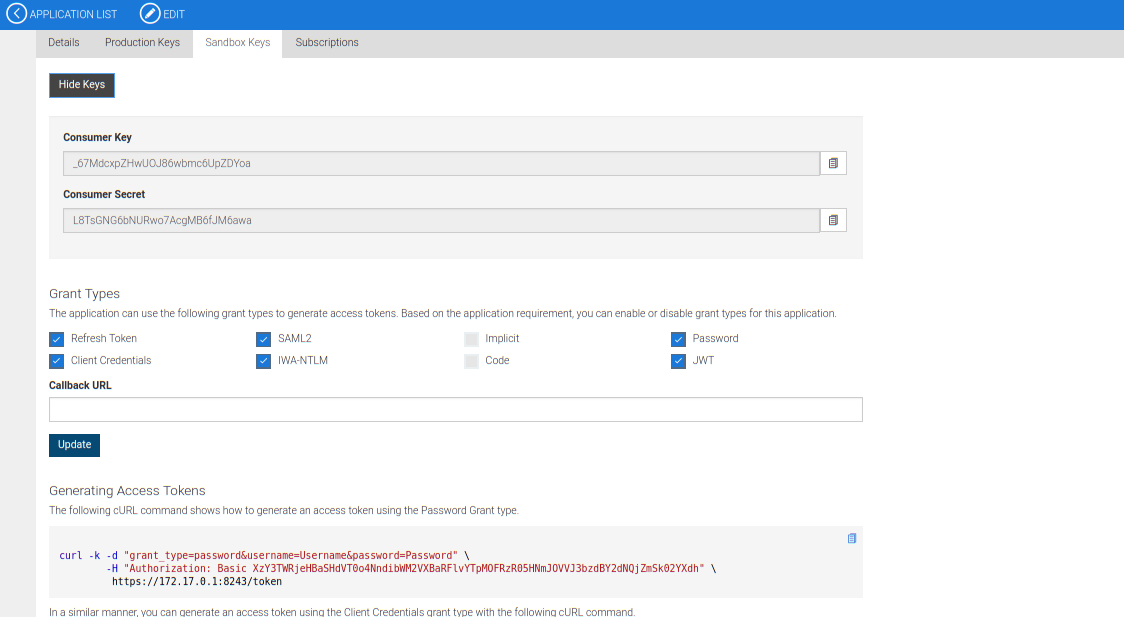
In my case, the following command has been executed to get the access_token,
curl -k -d "grant_type=client_credentials" -H "Authorization: Basic XzY3TWRjeHBaSHdVT0o4NndibWM2VXBaRFlvYTpMOFRzR05HNmJOVVJ3bzdBY2dNQjZmSk02YXdh" https://172.17.0.1:8243/token Once access_token is in hand, the API can be called easily providing the token as Authorization header.
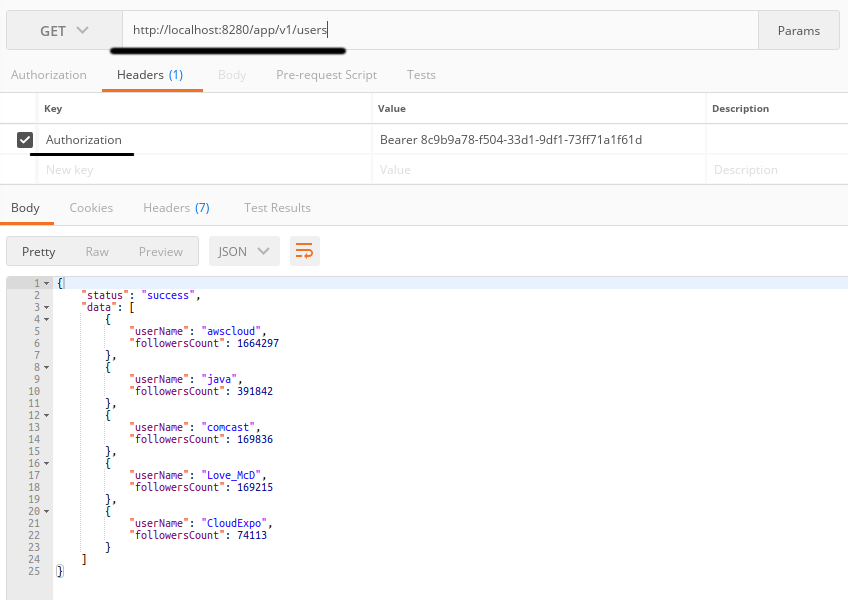
Check the URL we are accessing. This is the kind of proxy URL to our actual implementation URL.
Conclusion
In this tutorial, I have shown how easy it is to use the API Manager provided by WSO2. The best thing about the API Manager is that it can be downloaded, installed, and run in your local system very easily without the least effort. Apart from providing easy API management facilities, there are other cool features included in the product. In my next articles, I will try to explain them.
Opinions expressed by DZone contributors are their own.
Comments