API Testing With Playwright
Modern software development requires API testing, and Playwright offers a strong, adaptable framework for building thorough API test suites.
Join the DZone community and get the full member experience.
Join For FreeModern software development requires API testing, and Playwright offers a strong, adaptable framework for building thorough API test suites. You can create tests that cover every step of the application flow with Playwright, from interacting with UI elements to submitting API queries and validating the responses. As a result, Playwright turns into an extraordinarily comprehensive tool that enables you to test the UI’s connection with the API and provides you with a comprehensive understanding of your application’s capabilities.
About Playwright
Playwright is a tool used in software development for testing web applications. It allows developers to automate the testing of web applications across different browsers like Chrome, Firefox, and Safari. Playwright provides a set of APIs that developers can use to interact with web pages, simulate user actions like clicking buttons and filling out forms, and assert the expected behavior of the application. It’s similar to other testing tools like Selenium, but it’s known for its speed, reliability, and support for modern web technologies.
Type of API Testing
API (Application Programming Interface) testing is a type of software testing that focuses on validating the functionality, reliability, performance, and security of APIs. APIs act as intermediaries between different software components or applications, allowing them to communicate and share data effectively. API testing is crucial because it ensures that the interfaces behave as expected and can handle various scenarios and conditions.
There are several types of API testing, including:
- Functional testing: This type of testing verifies that the API functions correctly and delivers the expected results based on the defined requirements. It involves testing different API operations (GET, POST, PUT, DELETE, etc.), input data validation, response validation, and error handling.
- Load testing: Load testing evaluates the performance and behavior of an API under different load conditions, such as high traffic or concurrent requests. It helps identify bottlenecks, scalability issues, and potential performance degradation.
- Security testing: Security testing aims to uncover vulnerabilities and potential security risks in APIs. It includes testing for common security threats like injection attacks (SQL injection, XML injection, etc.), authentication and authorization issues, data exposure, and compliance with security standards.
- End-to-end testing: End-to-end testing involves testing the API in conjunction with other integrated systems or applications that consume or rely on the API. It ensures that the entire flow of data and functionality works as expected across multiple components.
Why Do Teams Use Playwright for Rest API Testing?
Playwright, which is primarily a tool for end-to-end testing of web applications, could also be used for API testing
- Unified testing solution: Playwright provides a unified platform for testing both frontend and backend components of web applications. This means you can use the same tool and testing framework for both API and frontend testing, simplifying your testing setup and workflow.
- Cross-browser compatibility: Playwright supports multiple browsers, allowing you to test your APIs across different browser environments. This ensures that your APIs behave consistently across various user agents, enhancing the reliability and compatibility of your web applications.
- Automation capabilities: Playwright offers powerful automation capabilities for interacting with web pages and elements. While its primary focus is on frontend automation, it can also be used to automate API testing tasks such as making HTTP requests, validating responses, and asserting data integrity.
- Flexible testing scenarios: Playwright’s flexibility allows you to create a wide range of testing scenarios for your APIs. Whether you need to test simple CRUD operations, complex API interactions, or performance testing, Playwright provides the tools and capabilities to automate these tasks effectively.
- Code reusability: With Playwright, you can reuse code and test logic across different types of tests, including API tests and frontend tests. This promotes code reusability and maintainability, as you can leverage existing test code and libraries for both frontend and backend testing.
- Integration with frontend tests: Since Playwright is often used for frontend testing, it can seamlessly integrate API testing into your existing test suites. This allows you to test both frontend and backend functionality in a single test run, providing comprehensive test coverage for your web applications.
In the next section, you will see how we can set up a new Playwright Project.
Set up New Playwright Project
Creating the New Project Directory
The first step is to create a new project directory let’s name it ‘playwright-talent500api’ with the following commands:
mkdir playwright-talent500api
cd playwright-talent500api
Initializing the Playwright Project
Initialize the new project with the following command:
npm init playwright@latest
Select the Correct Option During Installation
During the initialization, there are several options to choose from. Here are the recommended choices:
- Select JavaScript as the project language.
- Save the test cases in the ‘./tests’ directory.
API Methods
The four main HTTP methods used in REST APIs are:
GET
- Retrieves data or resources from the server.
- Should not modify any data on the server (no side effects).
POST
- Creates a new resource on the server.
- The request body typically contains the data for the new resource.
PUT
- Updates or replaces an existing resource on the server with the request payload.
- If the resource doesn’t exist, it can create a new one.
DELETE
- Deletes or removes a specified resource from the server.
- Idempotent (multiple identical requests have the same effect as a single request).
In the next section, you will see how we can automate API methods using Playwright.
Automate API Methods Using Playwright
Prerequisites
- Install Node.js from Node.js
- Install Playwright from Playwright
- We will be using Go Rest APIs for demo purposes
Let’s look at some examples to automate the API endpoint using Playwright for the site.
POST Method
POST method is used to send data to a server to create/update a resource.POST requests typically include data in the body of the request, which can be in various formats like JSON or form data.
const { test, expect } = require("@playwright/test");
test("POST request Create New Booking ", async ({ request }) => {
const response = await request.post("/booking", {
 data: {
 firstname: "Kim",
 lastname: "Smith",
 totalprice: 125,
 depositpaid: true,
 bookingdates: {
 checkin: "2024–04–01",
 checkout: "2024–07–15",
 },
 additionalneeds: "Breakfast",
 },
});
console.log(JSON.stringify(response));
expect(response.ok()).toBeTruthy();
expect(response.status()).toBe(200);
const responseBody = await response.json();
expect(responseBody.booking).toHaveProperty("totalprice", 125);
expect(responseBody.booking).toHaveProperty("firstname", "Kim");
expect(responseBody.booking).toHaveProperty("lastname", "Smith");
expect(responseBody.booking).toHaveProperty("depositpaid", true);
});
Here’s a breakdown of the code:
const { test, expect } = require(“@playwright/test”);
This line imports the test and expect functions from the @playwright/test module.
test("POST request Create New Booking ", async ({ request }) => {
 // Test logic goes here
});
This code defines a test named “POST request Create New Booking”. It is an asynchronous function that receives a request object.
const response = await request.post("/booking", { data: { … } });Inside the test function, a POST request is sent to the “/booking” endpoint with some JSON data representing a new booking. The response is awaited and stored in the response variable.
expect(response.ok()).toBeTruthy();
expect(response.status()).toBe(200);
These assertions verify that the response is successful (status code 200) and the response:
const responseBody = await response.json();
expect(responseBody.booking).toHaveProperty("totalprice", 125);
expect(responseBody.booking).toHaveProperty("firstname", "Kim");
expect(responseBody.booking).toHaveProperty("lastname", "Smith");
expect(responseBody.booking).toHaveProperty("depositpaid", true);
These assertions validate the properties of the response body JSON. They ensure that the booking object in the response has the expected properties (totalprice, firstname, lastname, depositpaid) with the specified values.
GET Method
The GET method is used to send a GET request to the specified URL.
const { test, expect } = require("@playwright/test");
test('GET Request : used to get all the booking details', async ({ request }) => {
const response = await request.get("/booking");
console.log(await response.json());
expect(response.ok()).toBeTruthy();
expect(response.status()).toBe(200);
});
GET request is to fetch all booking details, logs the response to the console, and asserts that the response status is 200 and it’s OK.
PUT Method
The PUT method is used to update an existing resource on the server. When you send a PUT request to a server, you typically indicate that you want to replace the current state of the resource with the new data provided in the request.
const { test, expect } = require("@playwright/test");
var token;
test("PUT Request : Update the booking details", async ({ request }) => {
//Generate the Token
const response = await request.post("/auth", {
 data: {
 username: "admin",
 password: "password123",
 },
});
console.log(JSON.stringify(response));
expect(response.ok()).toBeTruthy();
expect(response.status()).toBe(200);
const responseBody = await response.json();
token = responseBody.token;
// PUT Request : Update Booking Detail
const updateBookingDetail = await request.put("/booking/1", {
 headers: {
 "Content-Type": "application/json",
 Accept: "application/json",
 Cookie: `token=${token}`,
 },
 data: {
 firstname: "Tarry",
 lastname: "Liu",
 totalprice: 189,
 depositpaid: true,
 bookingdates: {
 checkin: "2024–02–01",
 checkout: "2024–06–15",
 },
 additionalneeds: "Breakfast",
 },
});
expect(updateBookingDetail.ok()).toBeTruthy();
expect(updateBookingDetail.status()).toBe(200);
const updateBookingDetailResponsebody = await updateBookingDetail.json();
expect(updateBookingDetailResponsebody).toHaveProperty("totalprice", 189);
expect(updateBookingDetailResponsebody).toHaveProperty("lastname", "Liu");
expect(updateBookingDetailResponsebody).toHaveProperty("firstname", "Tarry");
});
Here’s a breakdown of the code:
const { test, expect } = require("@playwright/test");This line imports the test and expects functions from the @playwright/test library.
test("PUT Request : Update the booking details", async ({ request }) => {
 // Test logic goes here
});
This code defines a test named “PUT Request: Update the booking details”. It’s an asynchronous function that receives a request object.
const response = await request.post("/auth", {
 data: {
 username: "admin",
 password: "password123",
 },
});
Inside the test function, a POST request is sent to the “/auth” endpoint with username and password. This is likely to authenticate the user and obtain a token for authorization. The response is awaited and stored in the response variable.
const updateBookingDetail = await request.put("/booking/1", {
 headers: {
 "Content-Type": "application/json",
 Accept: "application/json",
 Cookie: `token=${token}`,
 },
 data: {
 // Updated booking details
 },
});
This PUT request is to update booking details. The request includes the updated details and the token in the headers for authentication.
expect(updateBookingDetail.ok()).toBeTruthy();
expect(updateBookingDetail.status()).toBe(200);
const updateBookingDetailResponsebody = await updateBookingDetail.json();
expect(updateBookingDetailResponsebody).toHaveProperty("totalprice", 189);
expect(updateBookingDetailResponsebody).toHaveProperty("lastname", "Liu");
expect(updateBookingDetailResponsebody).toHaveProperty("firstname", "Tarry");
Above assertions are made in response to the PUT request to ensure it’s successful, and that the updated booking details match the expected values.
DELETE Method
The delete method is used to delete the created record. In the code below you can see we have used (/booking/1) which we want to delete.
const { test, expect } = require("@playwright/test");
var token;
test("DELETE Request Delete the booking details", async ({ request }) => {
//Generete the Token
const response = await request.post("/auth", {
 data: {
 username: "admin",
 password: "password123",
 },
});
console.log(await response.json());
expect(response.ok()).toBeTruthy();
expect(response.status()).toBe(200);
const responseBody = await response.json();
token = responseBody.token;
// DELETE the Booking detail
const deleteRequest = await request.delete("/booking/1", {
 headers: {
 "Content-Type": "application/json",
 Cookie: `token=${token}`,
 },
});
expect(deleteRequest.ok()).toBeTruthy();
});
Here’s a breakdown of the code:
const { test, expect } = require(“@playwright/test”);
This line imports the test and expects functions from the @playwright/test module.
const response = await request.post("/auth", {
 data: {
 username: "admin",
 password: "password123",
 },
});
The POST request is sent to the “/auth” endpoint with a username and password to generate a token for authentication.
const deleteRequest = await request.delete("/booking/1", {
 headers: {
 "Content-Type": "application/json",
 Cookie: `token=${token}`,
 },
});
This request is made to delete booking details. The request includes the token in the headers for authentication.
expect(deleteRequest.ok()).toBeTruthy();An assertion is made on the response of the DELETE request to ensure it’s successful.
Execution Report of Test Cases
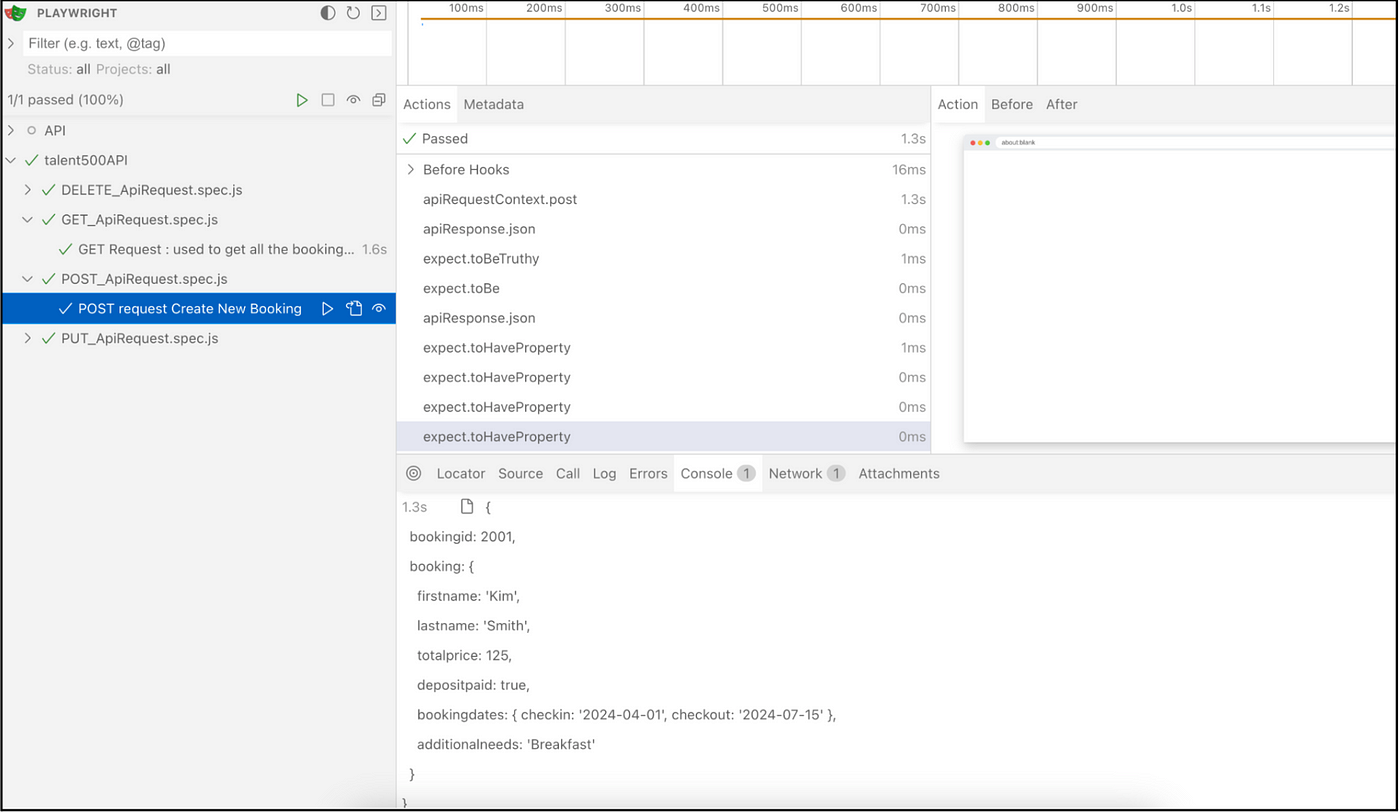
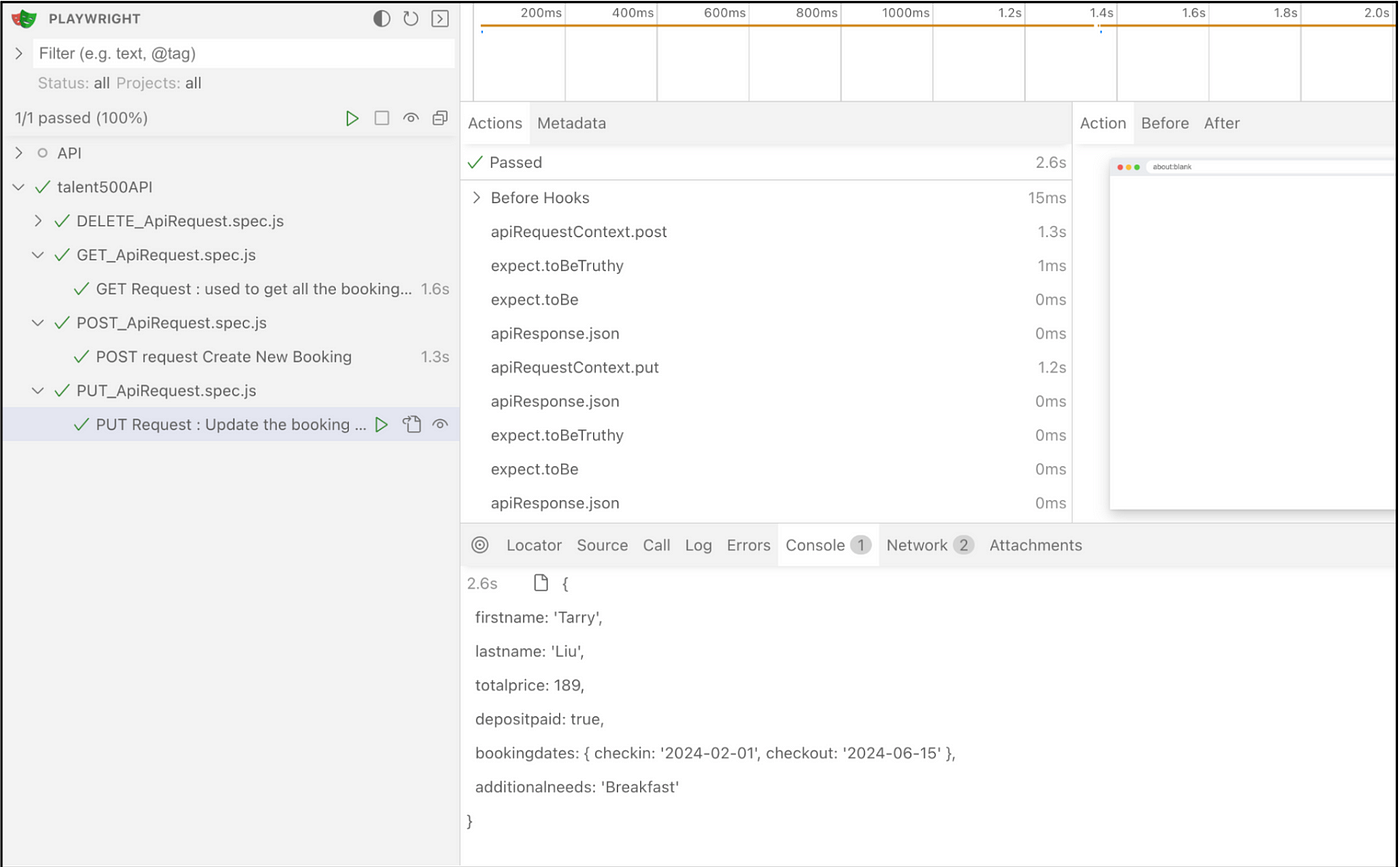
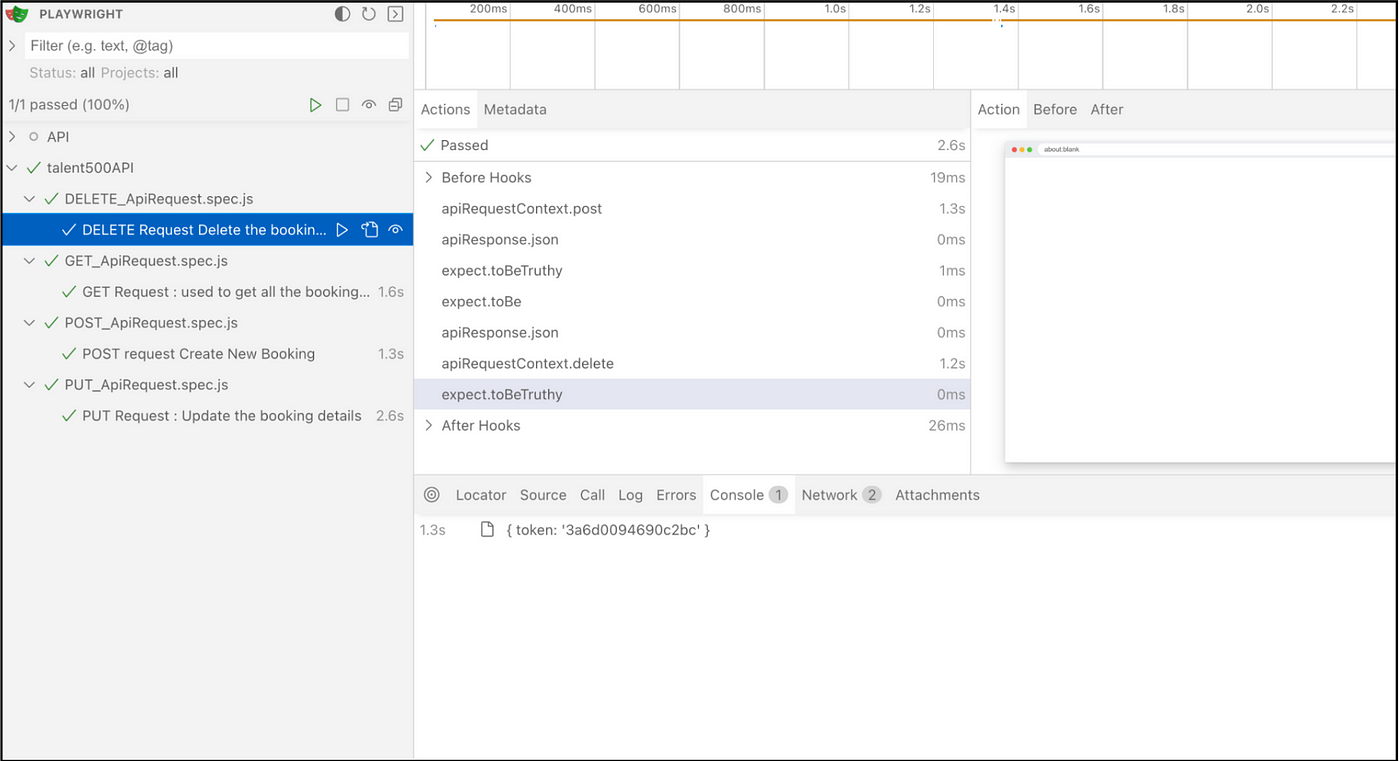
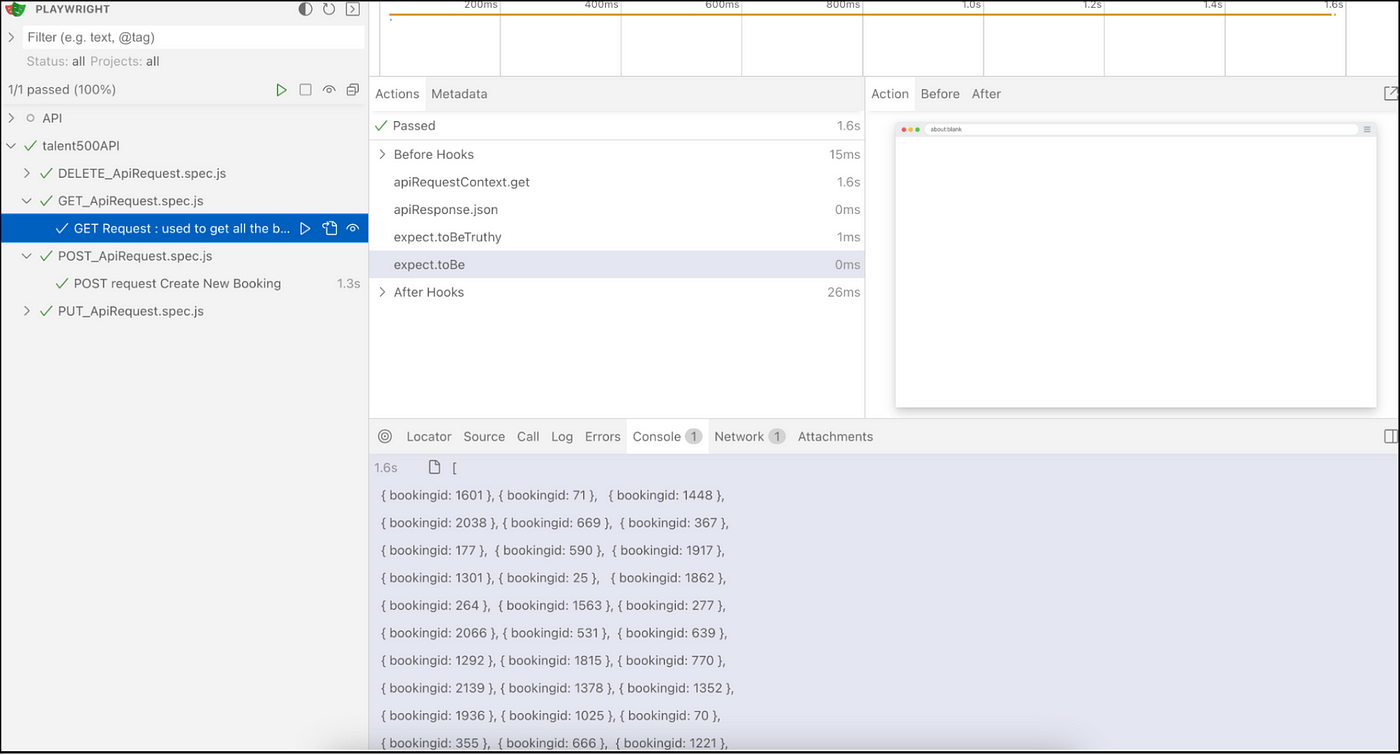
Run the command ’npx playwright test –ui’ which will open Playwright runner from where you can execute the test cases.
Execution Report Post Method

Execution Report Get Method
![Execution Report Get Method]()
Execution Report PUT Method

Execution Report DELETE Method

Wrapping Up
By leveraging Playwright for API testing, you can automate the validation of your API endpoints, ensuring that they meet the specified requirements and function correctly across different scenarios. This leads to improved software quality, faster release cycles, and enhanced confidence in your application’s performance.
Published at DZone with permission of Kailash Pathak. See the original article here.
Opinions expressed by DZone contributors are their own.


Comments