Application Retirement Using Informatica Data Archive
How to retire an application using Informatica Data Archive. Full detailed tutorial with follow-along images.
Join the DZone community and get the full member experience.
Join For FreeHigh-Level Steps Required to Retire an Application
- Mine the schema
- Create retirement entities
- Create Source connection
- Create a Security Group
- Create Target connection
- Create Access role
- Create and run retirement projects
Mining Schema
Mining the schema for tables will be the first step for any archiving process. Once the tool is installed, you will need to mine schema where the tables reside. In this process, the data dictionary related information of the table identified for archiving will be copied from the source database into the ILM metadata repository (commonly referred to as AMHOME).
When you mine the schema, the process also stores information about all the physical constraints found at the database level. ILM allows creating logical constraints too to relate the tables.
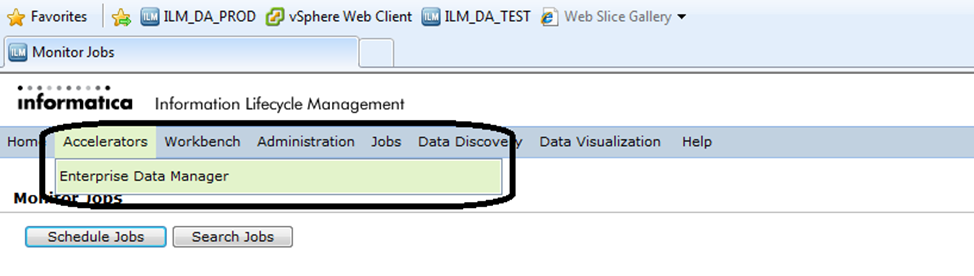
You will need to mine the schema via Informatica Enterprise Data Manager (commonly termed as EDM). You can launch this via ILM Workbench UI. Under “Accelerators” you will find “Enterprise Data Manager”.
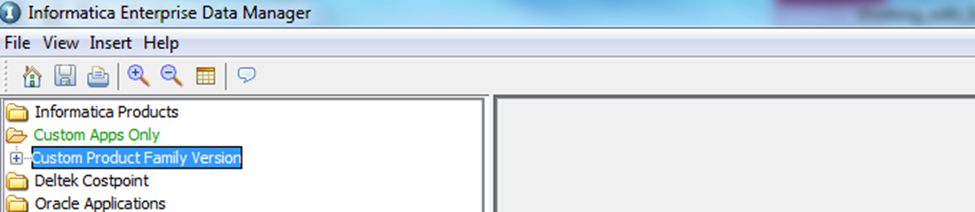
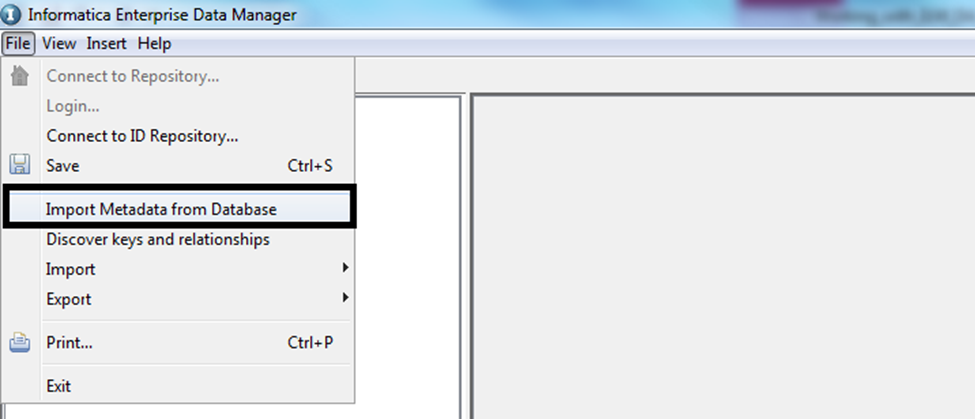
Once EDM is launched, to mine the schema, select “Custom Apps Only”–> “Custom Product Family Version” in the EDM. Then, from the tool menu, select “File”–> “Import metadata from Database”. This is a wizard-driven functionality. You can provide the connection details and move forward in the wizard, which subsequently allows you to select the schemas and then tables that you would like to mine.
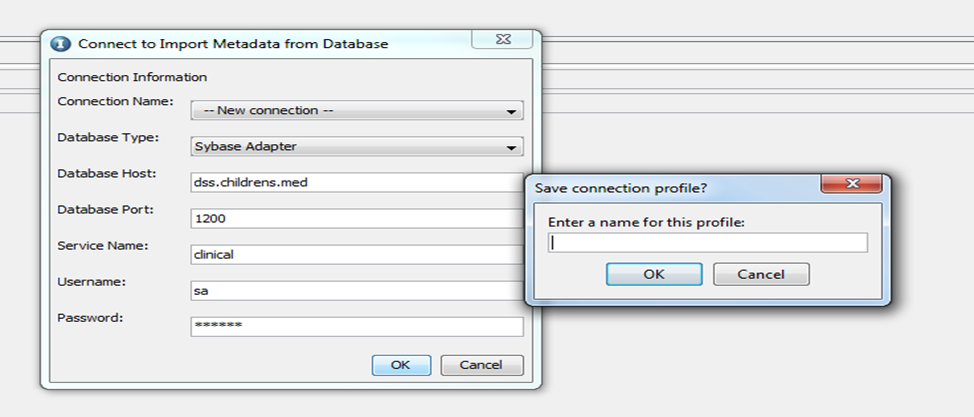
For any new connection, click on “New Connection”. Enter all the relevant details and when you click “OK”, you will be prompted to save the profile with any name. Enter a name and click on “OK”.
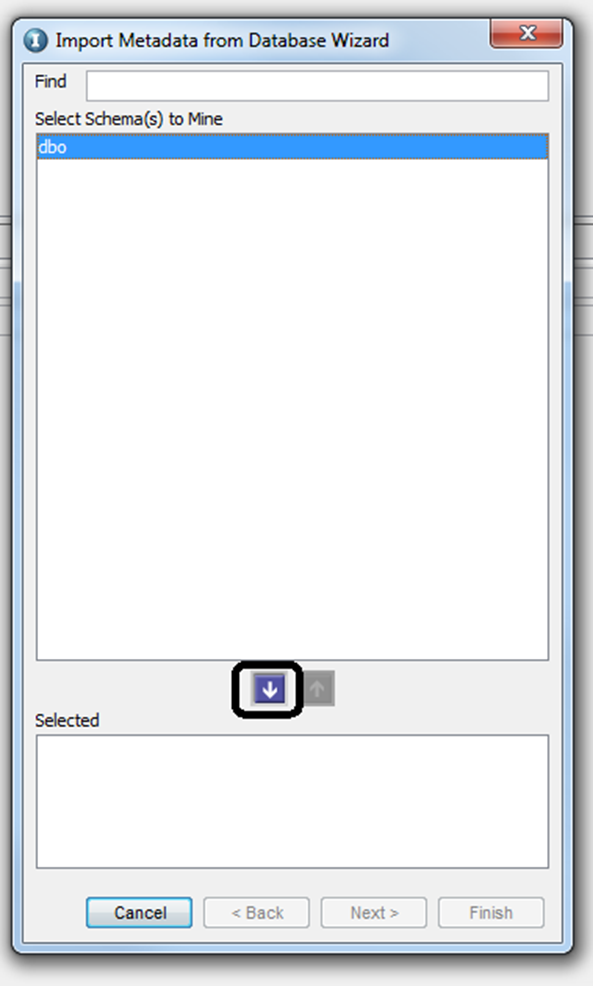
Once you specify the profile information, the next screen will show you the available schemas that you can mine from. Select the schema that you require and hit the down arrow button, then click on “Next”.
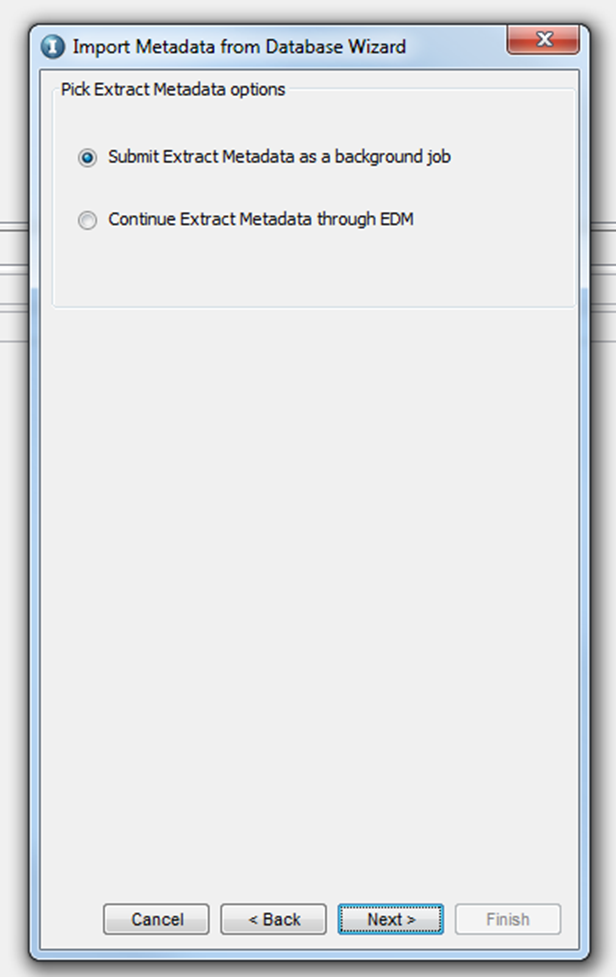
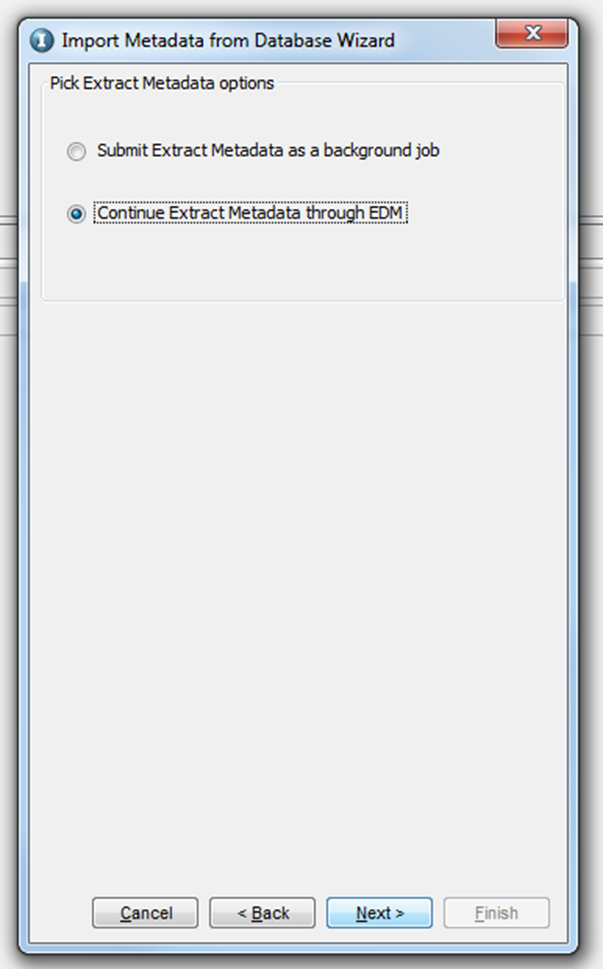
You will be prompted to select the options to extract the metadata, either foreground or background. If you select to run as a background job, ILM will trigger a job which can be monitored via ILM Workbench UI. If there are many tables (more than 100, it is always recommended to use the background method to import tables into ILM metadata repository). If you select the option “Continue Extract Metadata through EDM”, you will be prompted with a list of tables that are available under the schema selected. You can select the tables that you want to mine, and click on “Next”, which will start the mining process.
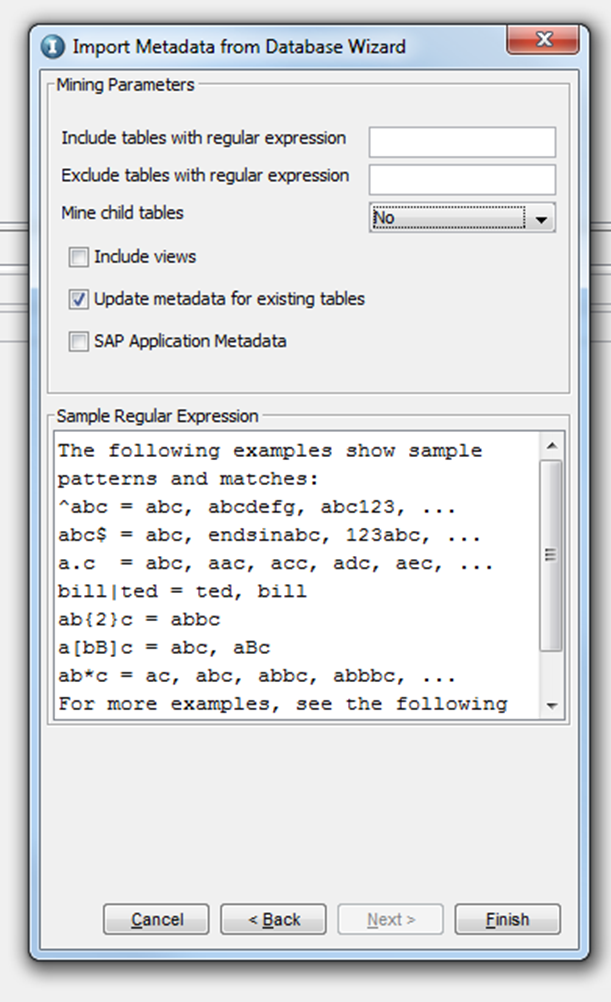
Note: In a retirement scenario, do not select “Mine Child Tables” when extracting the metadata. This holds good for both foreground and background extraction.
Background extraction:
Once you click “Finish”, a background job will be scheduled and will begin running. You can check the status of this job from ILM workbench UI.
Foreground extraction:
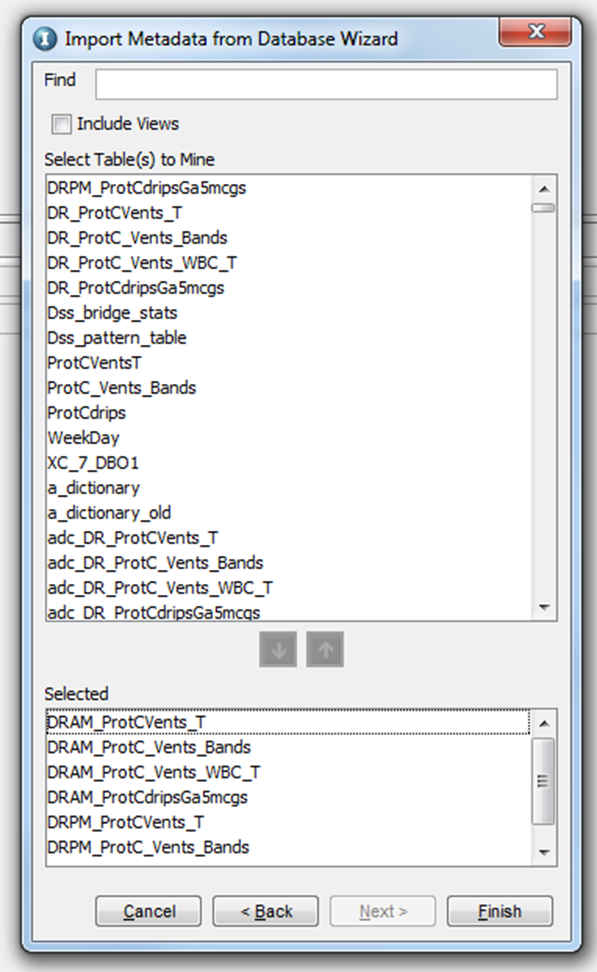
Once you click “Next”, the tool will provide you the list of tables available under the schema. Select the tables that you want to mine from the list and click on “Finish”, which will start a foreground process to mine the tables. Click on “Save” once the process is finished.
As a best practice, it is always recommended to create a process such that the ILM metadata repository is also updated whenever there are changes in the metadata/data dictionary of the source tables. All the extracted tables can be seen via “View”–> “Constraints”, from the application tool menu.
Creating retirement entities
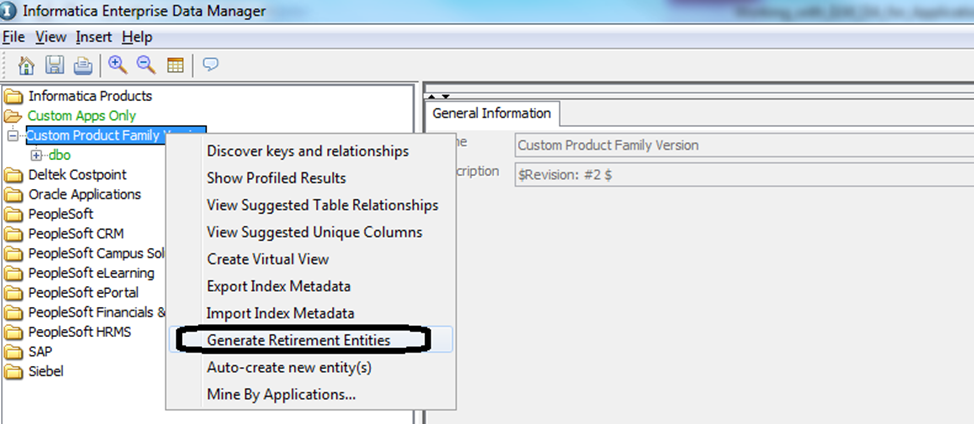
The easiest and quickest way to create retirement entities is by using the “Generate Retirement Entities” functionality available within the Enterprise Data Manager. Navigate to the “Constraints” tab by selecting “View” à “Constraints” from the application tool menu. Right-click on the application module “Custom Product Family Version” and select “Generate Retirement Entities” from the context menu.
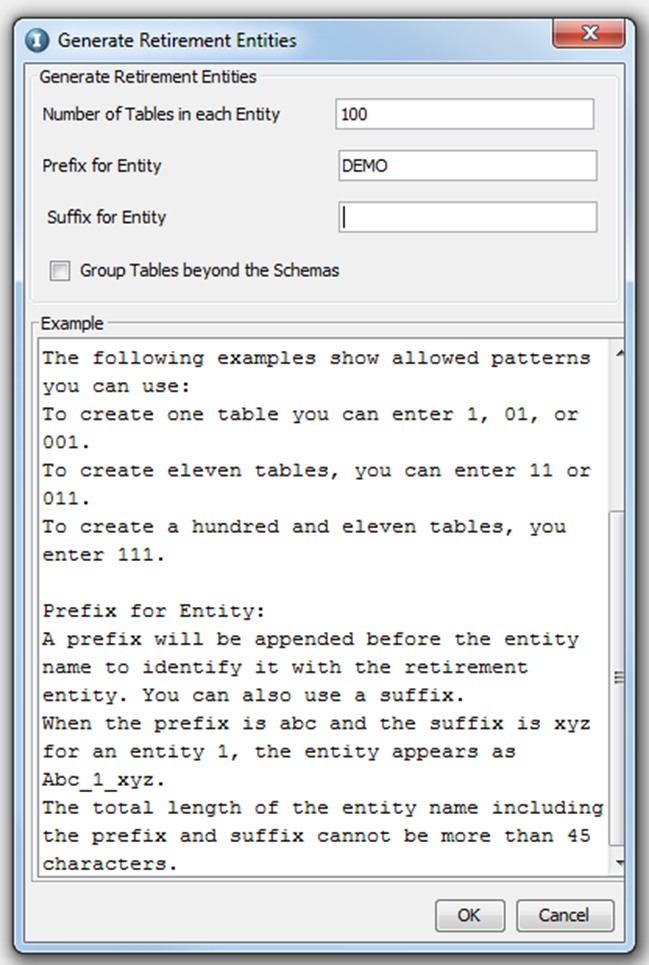
You will be prompted for giving the number of tables per entity, prefix, and a suffix. Enter the details as required and click on “OK”.
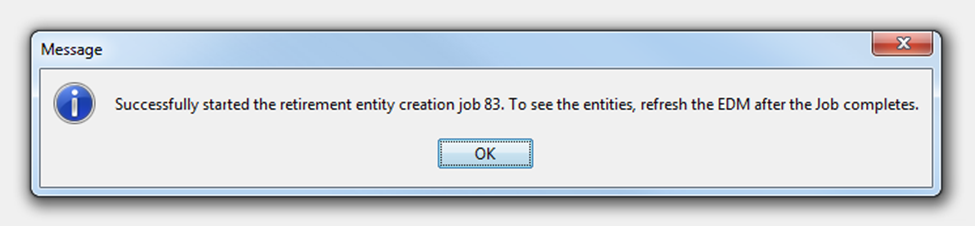
Once you click “OK”, a background job is run, whose status can be seen via ILM Workbench UI.

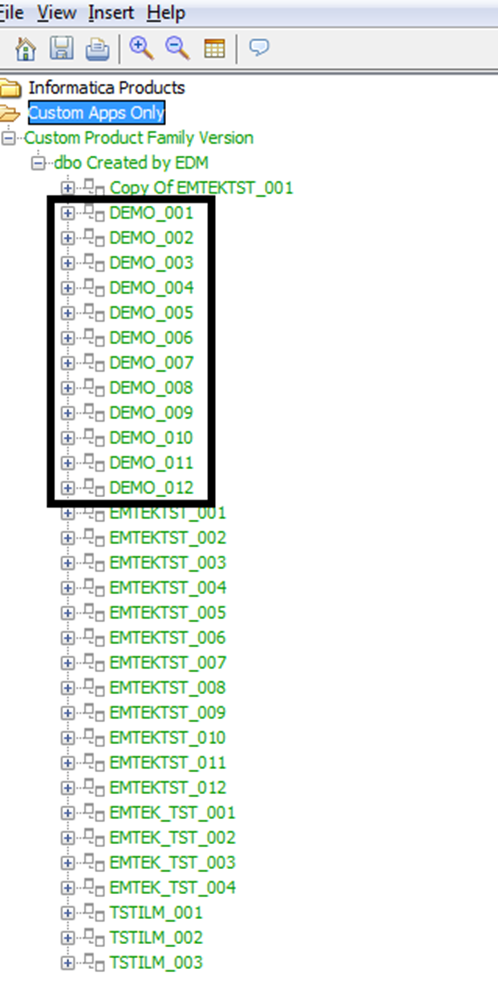
Then, go back to EDM. From the tool menu select “View” à “Refresh” which will refresh the EDM UI content. Expand the application module “Custom Product Family Version” and then the schema “dbo”. You will be able to see the newly created entities now.
Creating an archive Source Connection
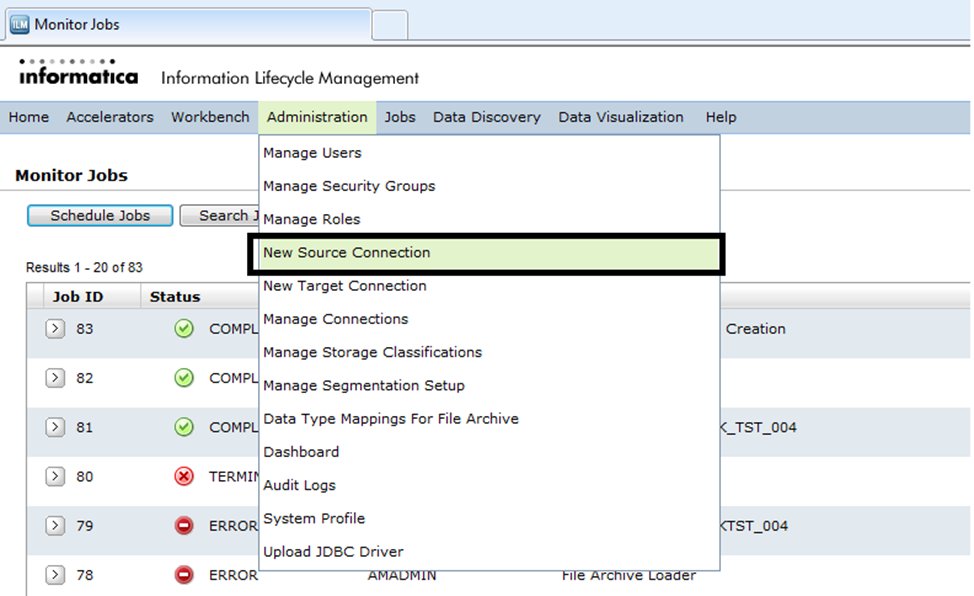
To archive from a database, a source connection has to be created via ILM Workbench UI. ILM provides various types of connectivity and you can select one based on your database type. Based on the database types, the parameter fields will vary. To create a new source connection, select “New Source Connection’ under the “Administration” option from the tool menu.
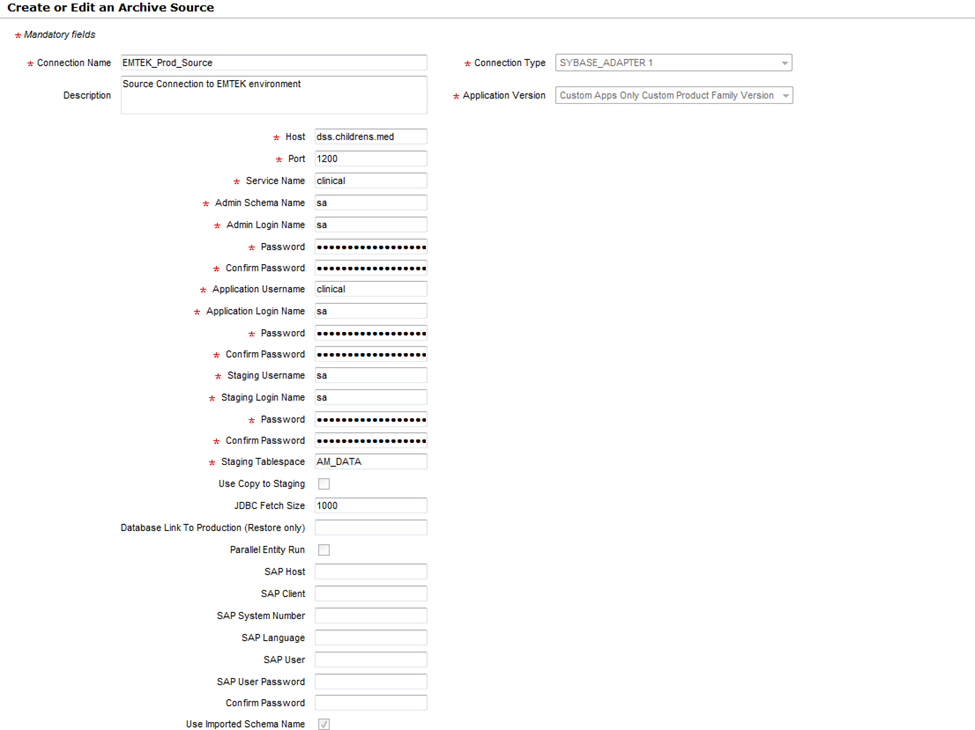
You need to select the relevant database type and provide all the necessary details that are required. Click on “Save” and the ILM application will validate and saves the details. If it cannot validate the details provided, it will show java exception errors. Once the details are provided, the connection appears as below (a reference to EMTEK source connection which is of Sybase database type).
Creating a Security Group
Once a source connection is created, you need to create a security group and assign users to it so that the users can use this source connection to run the retirement jobs. You should also assign the custom application, which you are retiring, to this security group.
Every source connection should have a corresponding security group defined.
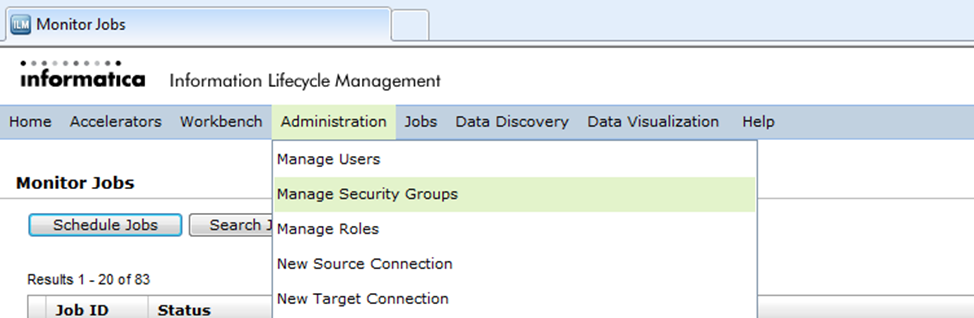
You can create a security group in the ILM Workbench UI. Select “Manage Security Groups” under “Administration” in the tool menu.
A new page with parameter fields is displayed as below –
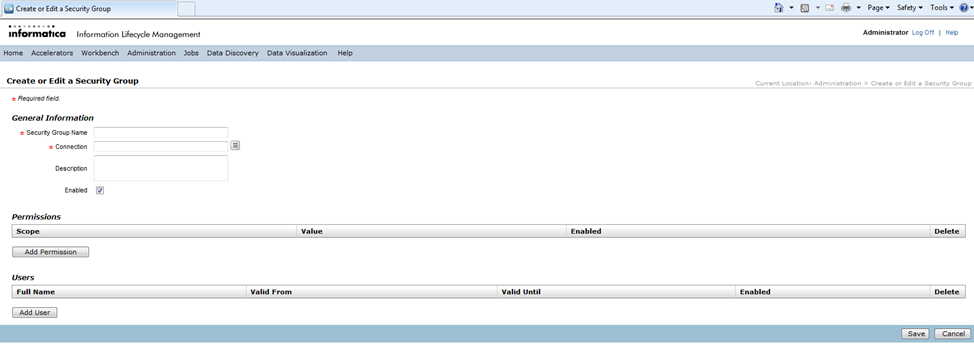
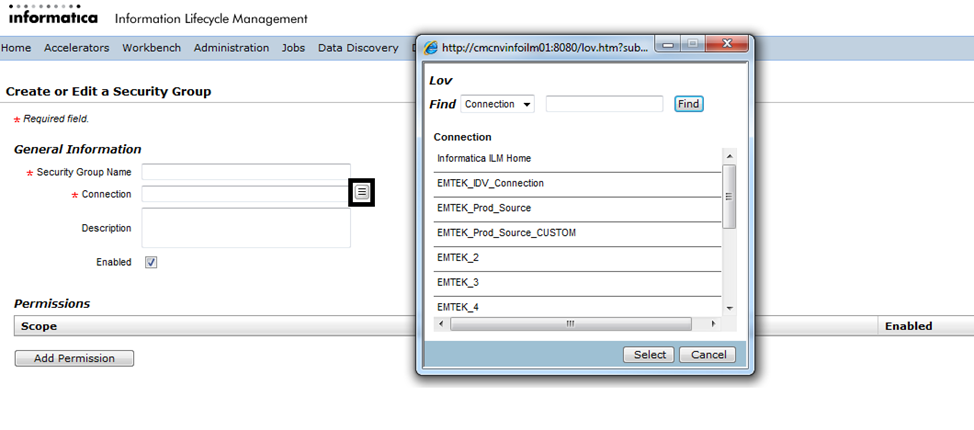
Enter all the relevant details on the screen. You can select an existing connection by clicking on the LOV button next to the parameter field “Connection”, which lists all the available connections. Select a valid source connection from the list.
 Once you select the connection, click on the “Add Permission” button under the “Permissions” header. You can either add permission to the entire application or individual entities. When individual entities are selected, the user who has access to this security group can run only those entities in a retirement job. If a custom application is selected, the user can run all the entities under the selected custom application.
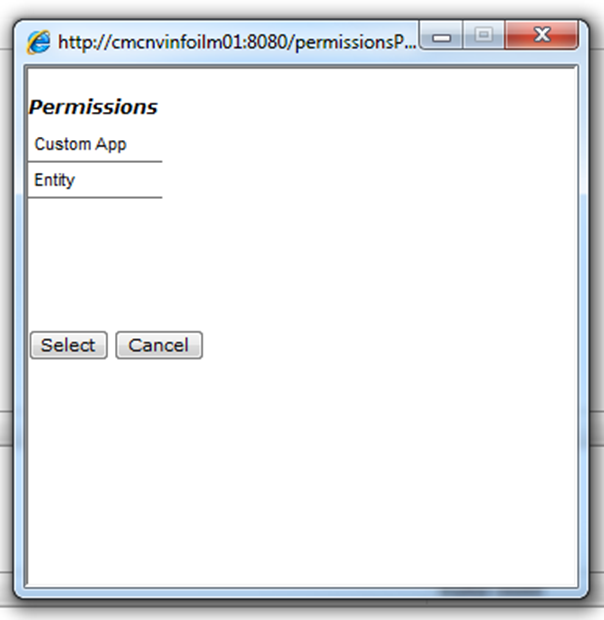
Once a permission type (either “Custom App” or “Entity”) is selected, you need to select corresponding value too. When all the values for given permission, type are filled in, the “Permissions” section looks as below –

Click on the “Add User” button and add the user who needs to have permissions to use this security group. If there are multiple users, you need to add one user at a time. Once the users are added, the “Users” section looks as below –

Target Connection
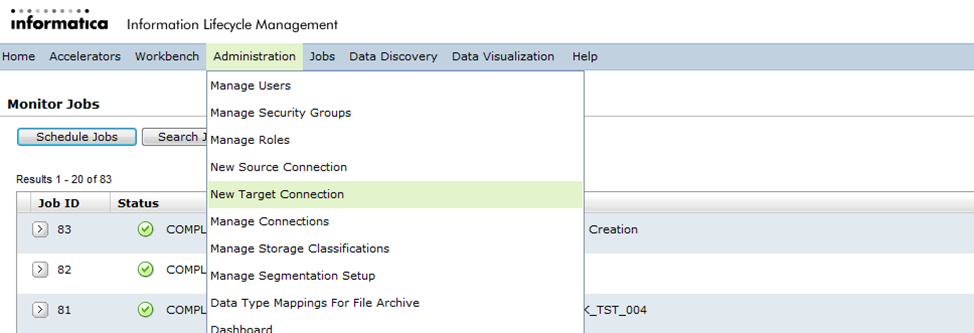
Similarly to the source connection, a target connection has to be defined. Based on the database types, the parameters to be defined will vary. In a retirement scenario, you will always load data into Informatica Data Vault. For this, you need to select the type of connection as “Optimized File Archive” when defining the target connection. To create a new source connection, select “New Target Connection’ under the “Administration” option from the tool menu.
For an “Optimized File Archive” type connection, you will need to provide details of the server on which the Informatica Data Vault services are running. Once all the details are provided, the target connection page looks as below –
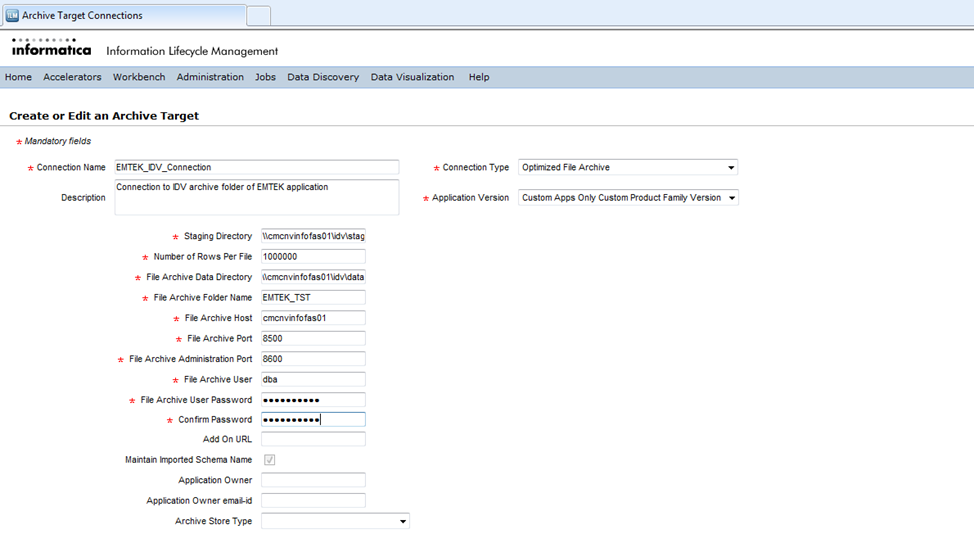
The “File Archive User” and the “File Archive User Password” are the user and password details that are defined during the installation of Informatica Data Vault.
“File Archive Folder” name is the unique directory where all data for a given application is stored. For every new application, a new archive folder (target connection) has to be defined.
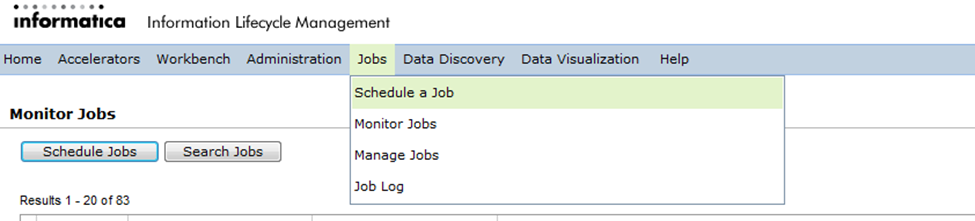
Once the target connection (Optimized File Archive) is defined, you need to run a stand-alone program called “Create Archive Folder” to create the archive folder mentioned in the target connection. To do so, you need to navigate to “Schedule a Job” under “Jobs” from the application tool menu.
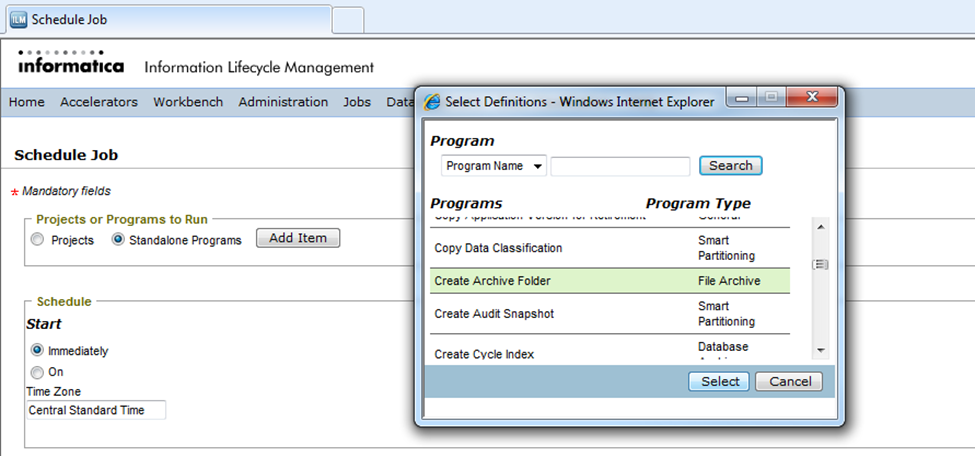
Under the tab “Projects or Programs to run”, select “Standalone Programs” and click on the button “Add Item”. It will open a window will all the available inbuilt standalone programs. Scroll through them and select the program “Create Archive Folder”.
You will need to select the “Destination Repository” (target connection) for which the archive folder has to be created and click on “Schedule”.
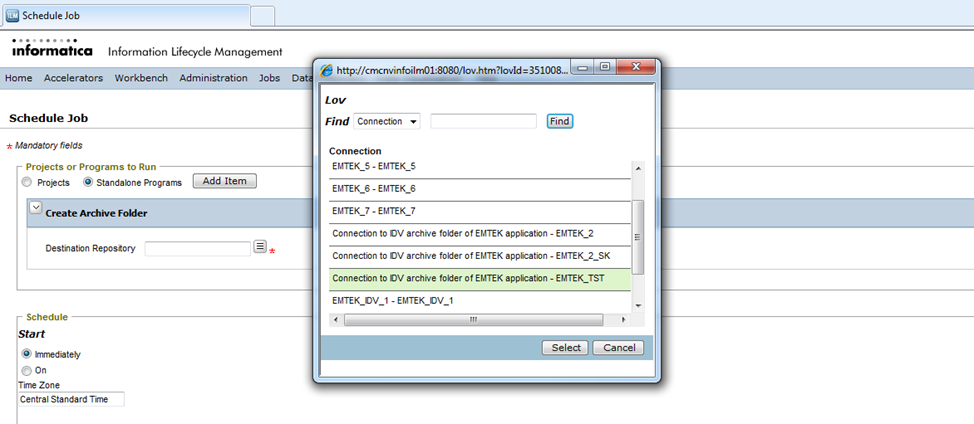
You will need to repeat this process for every new target connection that is of type “Optimized File Archive”.
Access roles
Access roles are the privileges that are assigned to a user so that he can access the data stored in the data vault. You need to create an access role and assign it to entities. The same access role has to be assigned to the user so that the user can access the data that is stored in the Informatica Data Vault.
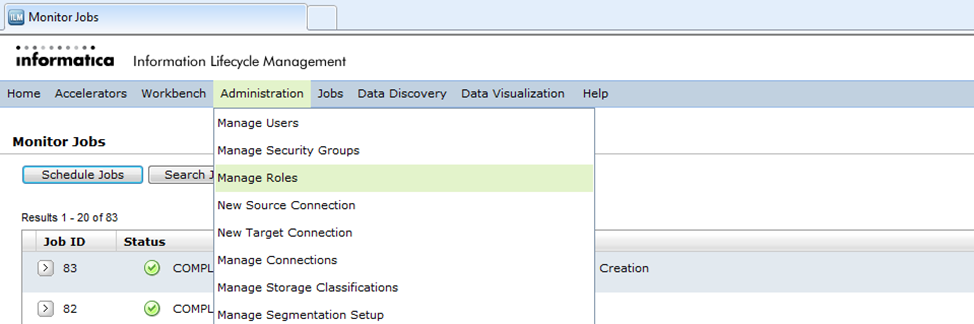
To create a new access role, you need to navigate to the “Manage Roles” option under “Administration” from the application tool menu.
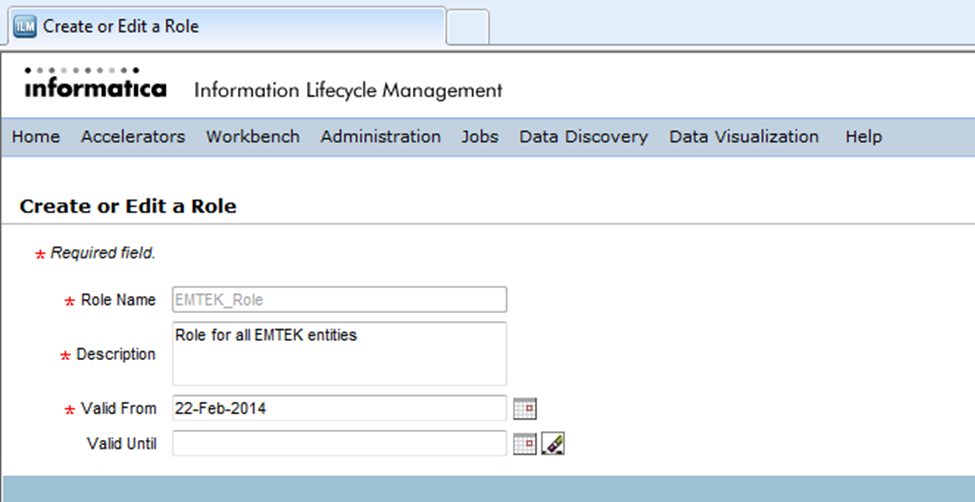
Click on the button “New Access Role” and provide the necessary information on the page that is opened.

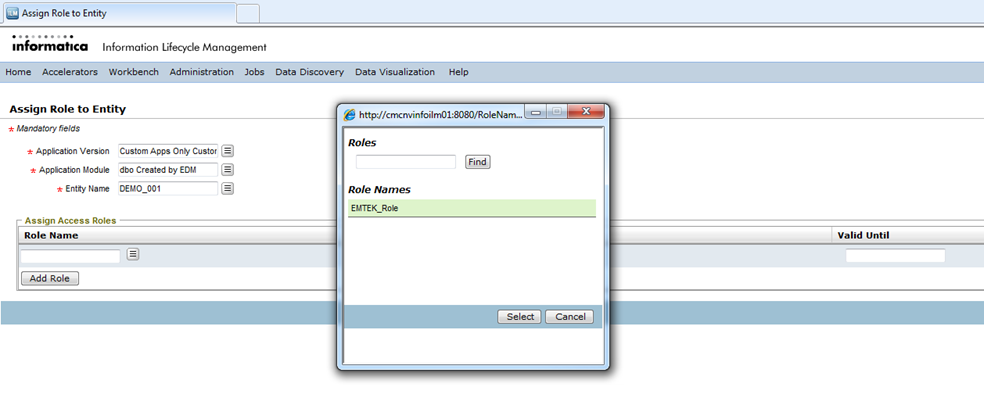
Save the details. You will be directed to the previous page, where you need to now assign this newly created role to an entity. To do so, click on the button “Assign Access Role to Entity”.

You will be directed to a page where you can assign this role to an entity. Select the appropriate values for “Application Version”, “Application Module” and “Entity” and click on the “Add Role” button. A window with the list of existing roles will be opened and you need to select the role that is previously created.
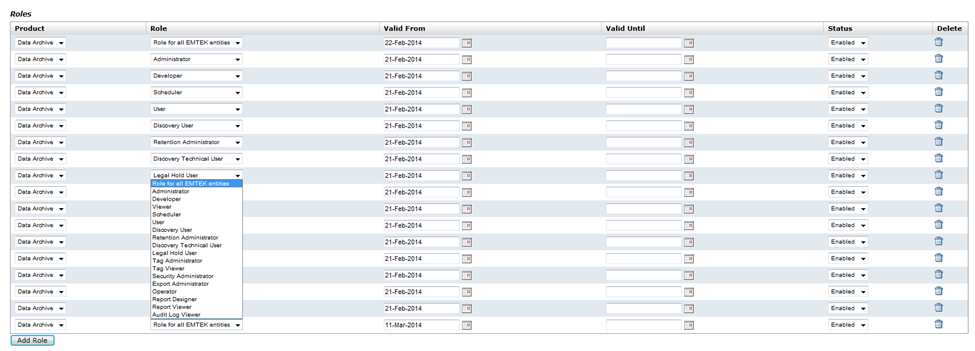
You will need to repeat this process for all the entities. Once the role is assigned to an entity, you need to assign the same role to the user who requires access to this entity. You will need to navigate to “Manage Users” under “Administration” and “Edit” the user who needs this access role, by clicking the pencil icon under the column “Edit”.


Click on the button “Add Role” at the end of the page which will create a new row (this will be the last row if there are other roles assigned to this user). From the drop-down against the column “Role”, select the newly created role and click on “Save”.
Retirement Projects
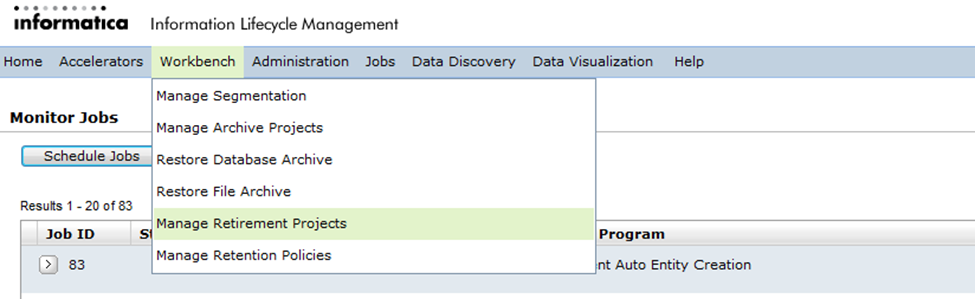
Once all the pre-requisites (as outlined in the earlier sections) are completed, you are ready to start the retirement projects. To run a retirement job, you need to navigate to “Manage Retirement Projects” under “Workbench” from the application tool menu.
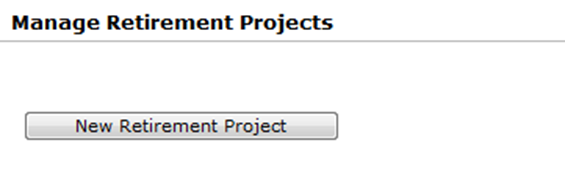
Click on the “New Retirement Project” button to create a new retirement project.
The creation of a retirement project is like a wizard-driven format, where you specify the details in one page and click on “Next” which will prompt from another set of information. You will need the following details when creating a retirement project –
- Any unique project Name and select the date on which you are running the retirement job
- Application Version
- Source and Target connections
- Entity/Entities which needs to be retired
- Retention Policy, if defined
- Access role
On the last page, you will be able to “Schedule” the job for a later time or to run immediately. Since the target is an optimized file archive, you will see that a secondary job called “File Archive Loader” is also scheduled along with the current project. Once the retirement project is completed, the “File Archive Loader” job is started automatically.
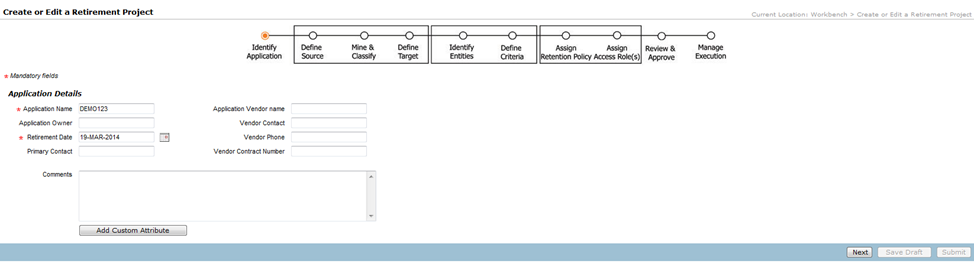
Enter any unique name for the project against the field “Application Name”. Select the “Retirement Date” which is also a mandatory parameter. Enter details against the other parameters at will and click on “Next”.
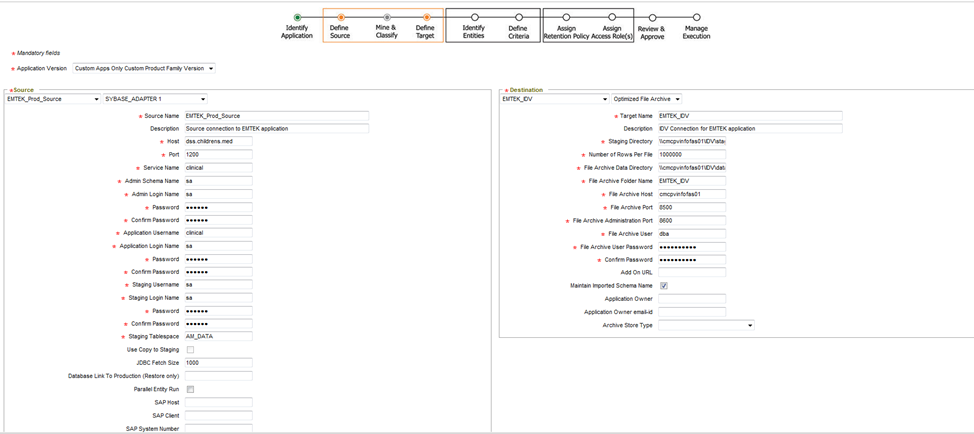
On the next page, you will need to select the source and targets from which you want to extract the data and load it into. Select the relevant “Application Version” first and then the “Source” and “Destination” and click on “Next”.
In the next page, you need to select the entity that you would like to archive/retire, by clicking on the button “Add Entity”. Then click on “Next”.

On the next page, select the access role that you would like to assign by clicking the drop-down under “Access Roles”, then click on “Next”.

The next page displays the approver information. You can enter the details if required, as these are not mandatory. Click “Next”.

The next page shows the steps that will be run.
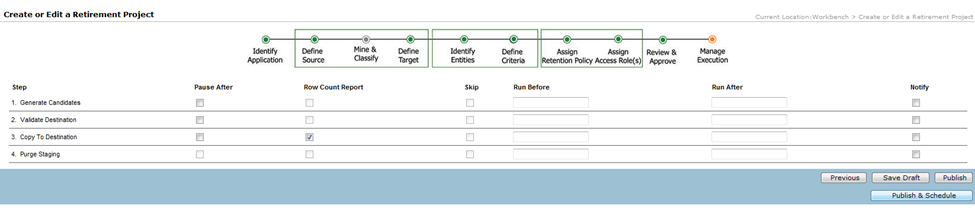
Note: In the above page where it shows the steps that will be processed, always check the “Row Count Report” box against the 3rd step, i.e. “Copy To Destination”.
When clicked on the “Publish & Schedule” button, the final page appears where you can either schedule this project to run immediately or at a later time. Select an appropriate run time and click on “Schedule” at the end of the page. If you have selected the job to run immediately, you will be able to monitor the job by going to “Monitor Jobs” under “Jobs” from the application too menu.
The below screens are from an already finished project.
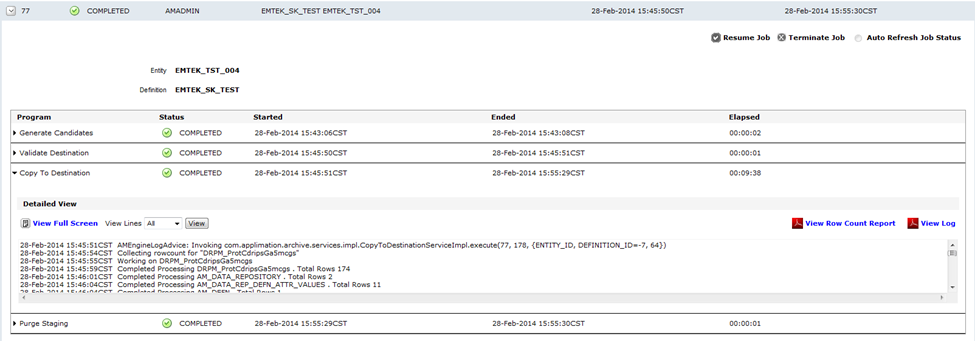
You will be able to see the logs for every step of the retirement project –
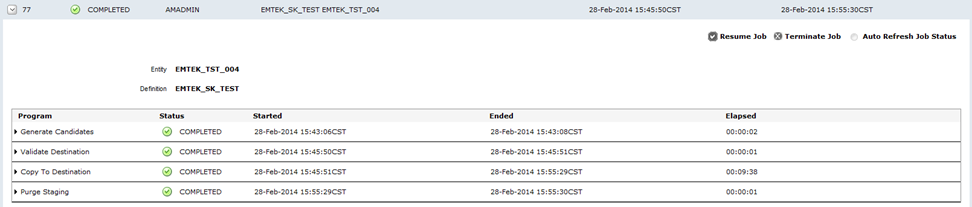
You can expand each of the steps to see the log generated –
Appendix:
You can rerun a project that is either in a “Completed” status or in a “Terminated” status. When you navigate to the “Manage Retirement Projects” page, you will be able to edit the corresponding project. Make the changes, if required, and navigate through all the pages to schedule the project.
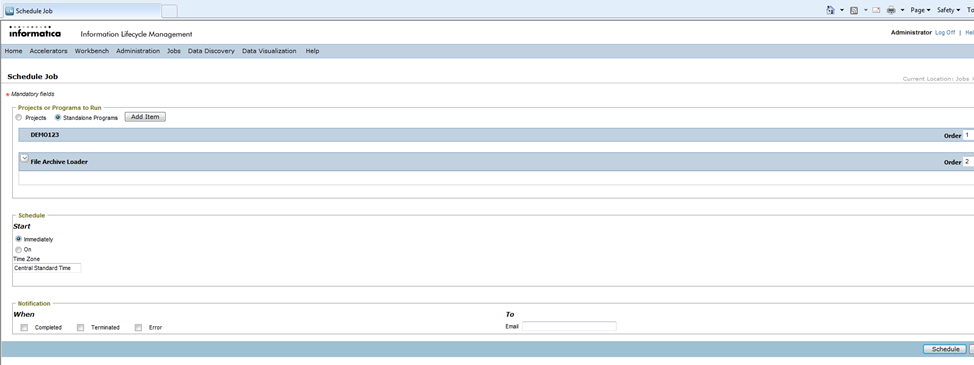
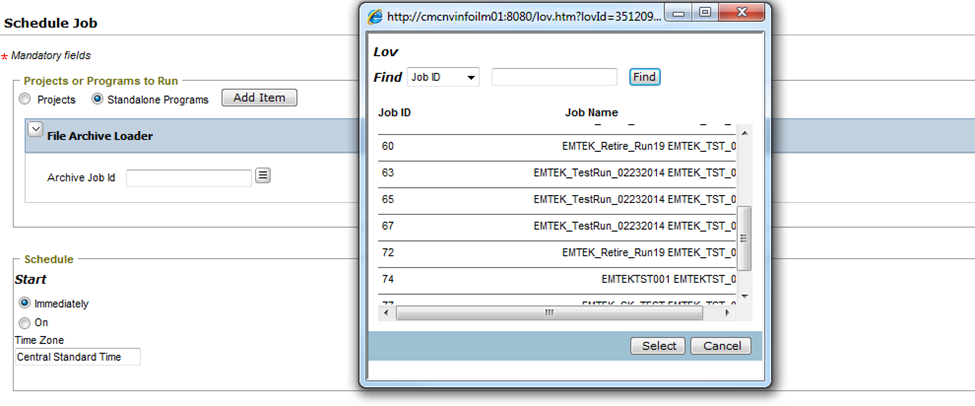
You can also rerun a “Completed” project via selecting “Schedule a Job” under “Jobs” from the application tool menu. Select the radio button for “Projects” and click on “Add Item” which will show the list of all completed projects only. Select the desired project and click on “Schedule”. Please note that this approach is possible for projects that are in “Completed” status only.

If you follow this approach, the “File Archive Loader” job is not added automatically. Once the selected job is completed, navigate back to “Schedule a Job” under “Jobs” and this time, select the radio button “Standalone Programs” and click on “Add Item”. From the list of the programs select “File Archive Loader”. You will need to select the job ID of the completed job and click on “Schedule”.
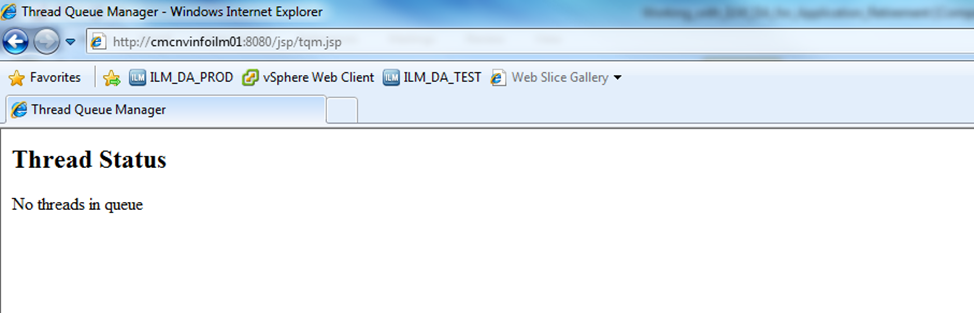
You can monitor the running threads that are initiated from the ILM server. You need to use the following URL to do so:
http://<ILM Server Hostname>:<port number configured to run the services>/jsp/tqm.jsp
e.g. http://cmcnvinfoilm01:8080/jsp/tqm.jsp
To increase the performance of the extraction and loader process, we have modified the “startApplimation.bat” script to use more Java heap memory. Be default, is it 1GB only. On a 64bit machine, we can extend it up to 3GB. Below is the modified entry –

Opinions expressed by DZone contributors are their own.
Comments