Authentication in Golang With JWTs
Go is an excellent choice for building fast and scalable API's. The net/http package provides most of what you need, but augmented with the Gorilla Toolkit, you'll have an API up and running in no time. Learn how to build and secure a Go API with JSON Web Tokens and consume it via a modern UI built with React.
Join the DZone community and get the full member experience.
Join For Freegolang or simply go is a programming language developed by google for building modern software. go is a language designed to get stuff done efficiently and fast. the key benefits of golang include:
- strongly typed and garbage collected
- blazing fast compile times
- concurrency built in
- extensive standard library
go makes every attempt to reduce both the amount of typing needed and complexity of its syntax. variables can be declared and initialized easily with
:=
syntax, semicolons are unnecessary and there is no complex type hierarchy. go is a highly opinionated language. the end result is clean, easy to understand and read as well as reason about code.
golang playground
in this tutorial, we will be building a restful api in go so knowledge of the go language is a prerequisite. it is out of scope of this tutorial to cover the fundamentals of the go programming language. if you are new to go, check out the masterfully crafted tour of go which covers everything from the basics to advanced topics such as concurrency and then you’ll be ready to proceed with this tutorial. if you are already familiar with go on the other hand, let’s build an api!
building an api in go
go is well suited for developing restful api’s. the
net/http
standard library provides key methods for interacting via the http protocol. the app we are building today is called
“we r vr.”
the app allows virtual reality enthusiasts to provide feedback to developers on the games and experiences they are working on.
idiomatic go prefers small libraries over large frameworks and the use of the standard library whenever possible. we will adhere to these idioms as much possible to ensure that our code samples are applicable across the go ecosystem. with that said, a couple of handy libraries such as
gorilla/mux
for routing and
dgrijalva/jwt-go
for json web tokens will be used to speed up development.
golang frameworks
before jumping into the code, i do want to point out that while idiomatic go tends to shy away from large frameworks, it does not mean that no frameworks are written in go.
beego
,
gin gionic
,
echo
and
revel
are just some of the more traditional web/api frameworks available. since the
net/http
standard package already provides so much functionality, these frameworks tend to be built on top of it or at least use parts of the
net/http
package, so learning any or all of them will not be time wasted as the skills will be applicable throughout your go career.
getting started
we will write our entire application in a file called
main.go
. the reason for this is so that we do not have to explicitly build the application every time we make changes to the code. we’ll simply run our application with the
go run
command from the terminal. with that said, let’s examine our initial setup:
package main

// import our dependencies. we'll use the standard http library as well as the gorilla router for this app
import (
  "net/http"
  "github.com/gorilla/mux"
)

func main() {
  // here we are instantiating the gorilla/mux router
  r := mux.newrouter()

  // on the default page we will simply serve our static index page.
  r.handle("/", http.fileserver(http.dir("./views/")))
  // we will setup our server so we can serve static assest like images, css from the /static/{file} route
  r.pathprefix("/static/").handler(http.stripprefix("/static/", http.fileserver(http.dir("./static/"))))

  // our application will run on port 3000. here we declare the port and pass in our router.
  http.listenandserve(":3000", r)
}
let's go ahead and create two folders in the same directory that our
main.go
file is in and name them
views
and
static
. in the
views
folder, create a new file called
index.html
. the
index.html
page can be really simple for now:
<!doctype html>
<head>
  <title>we r vr</title>
</head>
<body>
  <h1>welcome to we r vr</h1>
</body>
let's make sure our server runs by running
go run main.go
from our terminal. if you have never used the
gorilla/mux
package before, you will additionally need to run the
go get
command which will download any dependencies you have declared but do not already have downloaded and installed in the proper directory. once the application is successfully running, navigate to
localhost:3000
in your browser. if all went well, you should just see the text
welcome to we r vr
displayed on the page. good work so far. next, let's define our api.
defining the api
with the foundation in place, we’ll define our api routes. for our demo app, we’ll stick to
get
and
post
requests. in addition to defining the routes we’ll also implement a handler function called
notimplemented
, which will be the default handler for routes that we have not yet added functionality to. let's add this additional code to our
main.go
file now.
func main(){
  ...

  // our api is going to consist of three routes
  // /status - which we will call to make sure that our api is up and running
  // /products - which will retrieve a list of products that the user can leave feedback on
  // /products/{slug}/feedback - which will capture user feedback on products
  r.handle("/status", notimplemented).methods("get")
  r.handle("/products", notimplemented).methods("get")
  r.handle("/products/{slug}/feedback", notimplemented).methods("post")

  ...
}

// here we are implementing the notimplemented handler. whenever an api endpoint is hit
// we will simply return the message "not implemented"
var notimplemented = http.handlerfunc(func(w http.responsewriter, r *http.request){
  w.write([]byte("not implemented"))
})
our go api is shaping up nicely. let's run the server again and try to access each of the three routes. each route will return a
200 ok
with the message
not implemented
. that's ok we're going to add the implementation next.
adding functionality
we have our routes in place, but currently they do nothing. let’s change that. in this section we will add the expected functionality to each of the routes.
...

/* we will first create a new type called product
   this type will contain information about vr experiences */
type product struct {
    id int
    name string
    slug string
    description string
}

/* we will create our catalog of vr experiences and store them in a slice. */
var products = []product{
  product{id: 1, name: "hover shooters", slug: "hover-shooters", description : "shoot your way to the top on 14 different hoverboards"},
  product{id: 2, name: "ocean explorer", slug: "ocean-explorer", description : "explore the depths of the sea in this one of a kind underwater experience"},
  product{id: 3, name: "dinosaur park", slug : "dinosaur-park", description : "go back 65 million years in the past and ride a t-rex"},
  product{id: 4, name: "cars vr", slug : "cars-vr", description: "get behind the wheel of the fastest cars in the world."},
  product{id: 5, name: "robin hood", slug: "robin-hood", description : "pick up the bow and arrow and master the art of archery"},
  product{id: 6, name: "real world vr", slug: "real-world-vr", description : "explore the seven wonders of the world in vr"
}

/* the status handler will be invoked when the user calls the /status route
   it will simply return a string with the message "api is up and running" */
var statushandler = http.handlerfunc(func(w http.responsewriter, r *http.request){
  w.write([]byte("api is up and running"))
})

/* the products handler will be called when the user makes a get request to the /products endpoint.
   this handler will return a list of products available for users to review */
var productshandler = http.handlerfunc(func(w http.responsewriter, r *http.request){
  // here we are converting the slice of products to json
  payload, _ := json.marshal(products)

  w.header().set("content-type", "application/json")
  w.write([]byte(payload))
})

/* the feedback handler will add either positive or negative feedback to the product
   we would normally save this data to the database - but for this demo we'll fake it
   so that as long as the request is successful and we can match a product to our catalog of products
   we'll return an ok status. */
var addfeedbackhandler = http.handlerfunc(func(w http.responsewriter, r *http.request){
  var product product
  vars := mux.vars(r)
  slug := vars["slug"]

  for _, p := range products {
    if p.slug == slug {
        product = p
    }
  }

  w.header().set("content-type", "application/json")
  if product.slug != "" {
    payload, _ := json.marshal(product)
    w.write([]byte(payload))
  } else {
    w.write([]byte("product not found"))
  }
})

...
with our functions in place, let's go back to the routes and update them with the appropriate handler functions.
...

func main(){
  ...
  r.handle("/status", statushandler).methods("get")
  r.handle("/products", productshandler).methods("get")
  r.handle("/products/{slug}/feedback", addfeedbackhandler).methods("post")
  ...
}
...
handlers / middleware
in go, middleware is referred to as handlers . if you are not already familiar with middleware, it is abstracted code that runs before the the intended code is executed. for example, you may have a logging middleware that logs information about each request. you wouldn't want to implement the logging code for each route individually, so you would write a middleware function that gets inserted before the main function of the route is called that would handle the logging.
gorilla/handlers
package. let's look at the implementation below:
package main

import(
  ...
  // add the handlers package dependency
  "github.com/gorilla/handlers"
  ...
)

func main(){
  ...
  // wrap the logginghandler function around our router so that the logger is called first on each route request
  http.listenandserve(":3000", handlers.logginghandler(os.stdout, r))
}

...
with just two lines of code we were able to add logging functionality to our application. now every time a resource is requested, the terminal will display information such as the type of request, response code and the time it took to process the request. to learn about the different settings and options for this handler and other handlers in the
gorilla/handlers
package check out their
docs
.
middleware libraries
we've been sticking to
net/http
as much as possible for our implementation. i would be remiss to not mention the many options for handling middleware in auth0. we've seen the pure implementation in golang by wrapping the middleware function around the intended function.
negroni
and
alice
are two excellent alternatives to handling middleware in golang.
securing our golang api with json web tokens
let's secure our golang api with jwt. we'll do this two ways. first, we'll do a simple demonstration of how json web tokens work with golang. second, we'll implement end to end authentication with auth0 a little later in the tutorial.
for the basic example, we'll have a route that will generate a new jwt for us. we'll then add middleware to secure our existing endpoints.
  ...
  func main(){
    ...
    r.handle("/get-token", gettokenhandler).methods("get")
    ...
  }
  /* set up a global string for our secret */
  var mysigningkey = []byte("secret")

  /* handlers */
  var gettokenhandler = http.handlerfunc(func(w http.responsewriter, r *http.request){
    /* create the token */
    token := jwt.new(jwt.signingmethodhs256)

    /* set token claims */
    token.claims["admin"] = true
    token.claims["name"] = "ado kukic"
    token.claims["exp"] = time.now().add(time.hour * 24).unix()

    /* sign the token with our secret */
    tokenstring, _ := token.signedstring(mysigningkey)

    /* finally, write the token to the browser window */
    w.write([]byte(tokenstring))
  })
the code above will allow us to generate tokens and add claims to those tokens. as this is a fairly simple example, we've hard coded the claims as well as not required any authentication to get a token. we'll do this with auth0 a little later in the tutorial. now let's secure our api endpoints. the first thing we'll do is create a handler for verifying the token.
/* handlers */

...

var jwtmiddleware = jwtmiddleware.new(jwtmiddleware.options{
  validationkeygetter: func(token *jwt.token) (interface{}, error) {
    return mysigningkey, nil
  },
  signingmethod: jwt.signingmethodhs256,
})
next, we'll update our routes to use this new middleware.
...

func main(){

  ...

  r.handle("/status", notimplemented).methods("get")
  /* we will add the middleware to our products and feedback routes. the status route will be publicly accessible */
  r.handle("/products", jwtmiddleware.handler(productshandler)).methods("get")
  r.handle("/products/{slug}/feedback", jwtmiddleware.handler(addfeedbackhandler)).methods("post")

  ...
}

...
with this code in place, let's build our application and navigate to
localhost:3000/products
. you will get a message saying
required authorization token not found
. our middleware works! navigate to
localhost:3000/get-token
and you will receive a token. copy this token. for this next step, i recommend using
postman
or a similar program that will allow you to add headers to your requests. send a request to
localhost:3000/products
but add an
authorization
header in the format of
bearer {token-you-copied}
. you will see the list of products now. the
jwtmiddleware
verified the token and the
productshandler
was called properly returning the list of products.
building the ui (with react)
an api is only as good as the frontend that consumes it. we will build our ui with react. we won’t go too deeply into programming with react, if you need a guide check out the official react tutorial and a great intro to react tutorial by ken wheeler . our golang api does not discriminate, so feel free to implement the ui with any frontend technology you are comfortable with.
getting started with front end
before we can start working with react, we'll need to do some setup in our
index.html
file. we'll need to add in the correct libraries and hook into our
app.jsx
file which will contain our react code. let's look at how we'll accomplish this.
<!doctype html>
<html>
  <head>
    <meta charset="utf-8" />
    <meta name="viewport" content="width=device-width, initial-scale=1.0, maximum-scale=1.0, user-scalable=no" />
    <title>we r vr</title>
    <script src="http://code.jquery.com/jquery-2.1.4.min.js"></script>
    <!-- we will use the babel transpiler so that we can convert our jsx code to js on the fly -->
    <script src="https://cdnjs.cloudflare.com/ajax/libs/babel-core/5.8.23/browser.min.js"></script>

    <!-- core react libraries which we will be using -->
    <script src="http://fb.me/react-0.14.7.js"></script>
    <script src="https://fb.me/react-dom-0.14.7.js"></script>

    <!-- our react app code will be placed in the app.jsx file -->
    <script type="text/babel" src="static/js/app.jsx"></script>

    <!-- we will import bootstrap so that we can build a good looking ui fast -->
    <link href="https://maxcdn.bootstrapcdn.com/bootstrap/3.3.6/css/bootstrap.min.css" rel="stylesheet">
  </head>
  <body>
    <!-- this will be the entry point for our react app -->
    <div class="container" id="app">

    </div>
  </body>
</html>
let's go ahead and create the
app.jsx
file in our static directory. we will place the entirety of our react application in this file. we'll break our app into react components. once our ui is complete, we will integrate our react frontend with our go backend. we will additionally secure our application with auth0.
building react components
our application will allow the user to view and leave feedback on vr products. users must be logged in before they can leave feedback. we will need to build four components. a main
app
component that will launch the application, a
home
component that will be displayed for non-logged in users, a
loggedin
component that will be displayed when a user is authenticated and finally a
product
component that will display the products available for review.
app component
the main component that will kick off our react application will be the the
app
component. let's build it first:
var app = react.createclass({
  componentwillmount: function() {
    this.setstate({idtoken: null})
  },
  render: function() {
    if (this.state.idtoken) {
      return (<loggedin idtoken={this.state.idtoken} />);
    } else {
      return (<home />);
    }
  }
});
home component
the
home
component will be displayed when a user does not have an
idtoken
meaning they are not logged in.
var home = react.createclass({
render: function() {
return (
<div classname="container">
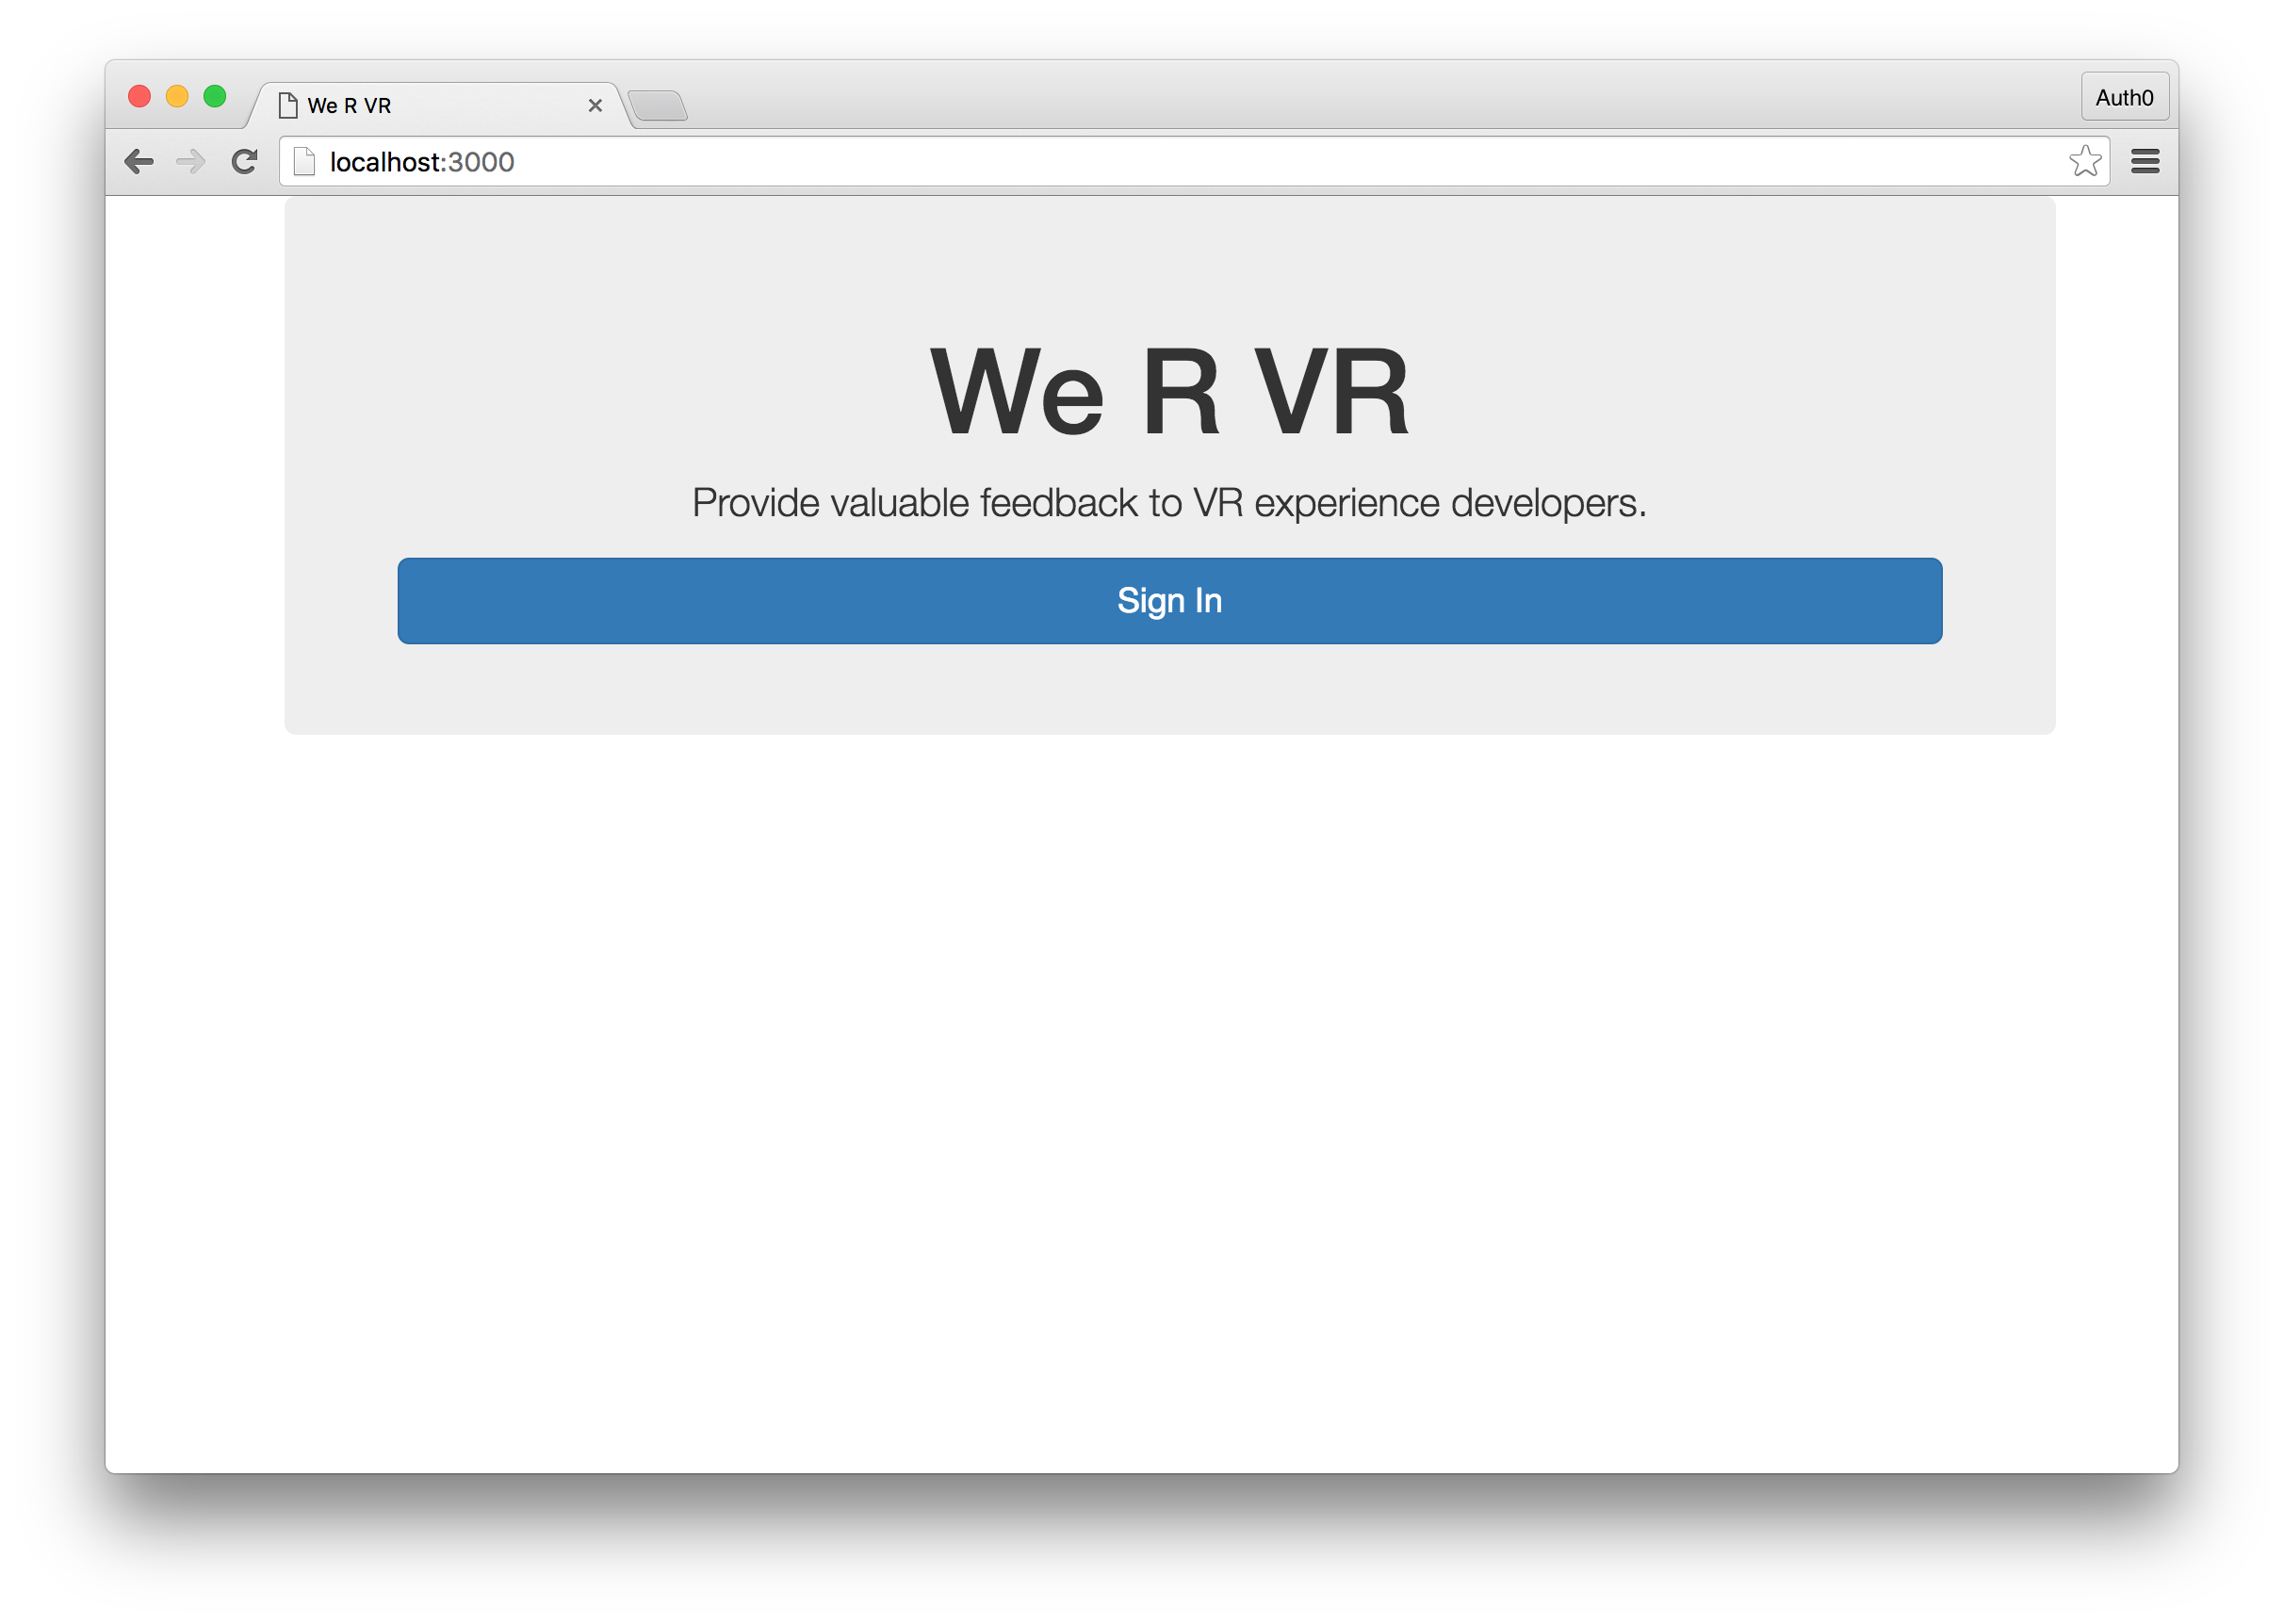
<div classname="col-xs-12 jumbotron text-center">
<h1>we r vr</h1>
<p>provide valuable feedback to vr experience developers.</p>
<a classname="btn btn-primary btn-lg btn-login btn-block">sign in</a>
</div>
</div>);
}
});
for now, we'll just build the ui. we'll add in the sign in functionality soon.
loggedin component
the
loggedin
component will be displayed when a user does have an
idtoken
meaning they are logged in.
var loggedin = react.createclass({
getinitialstate: function() {
return {
profile: null,
products: null
}
},
render: function() {
if (this.state.profile) {
return (
<div classname="col-lg-12">
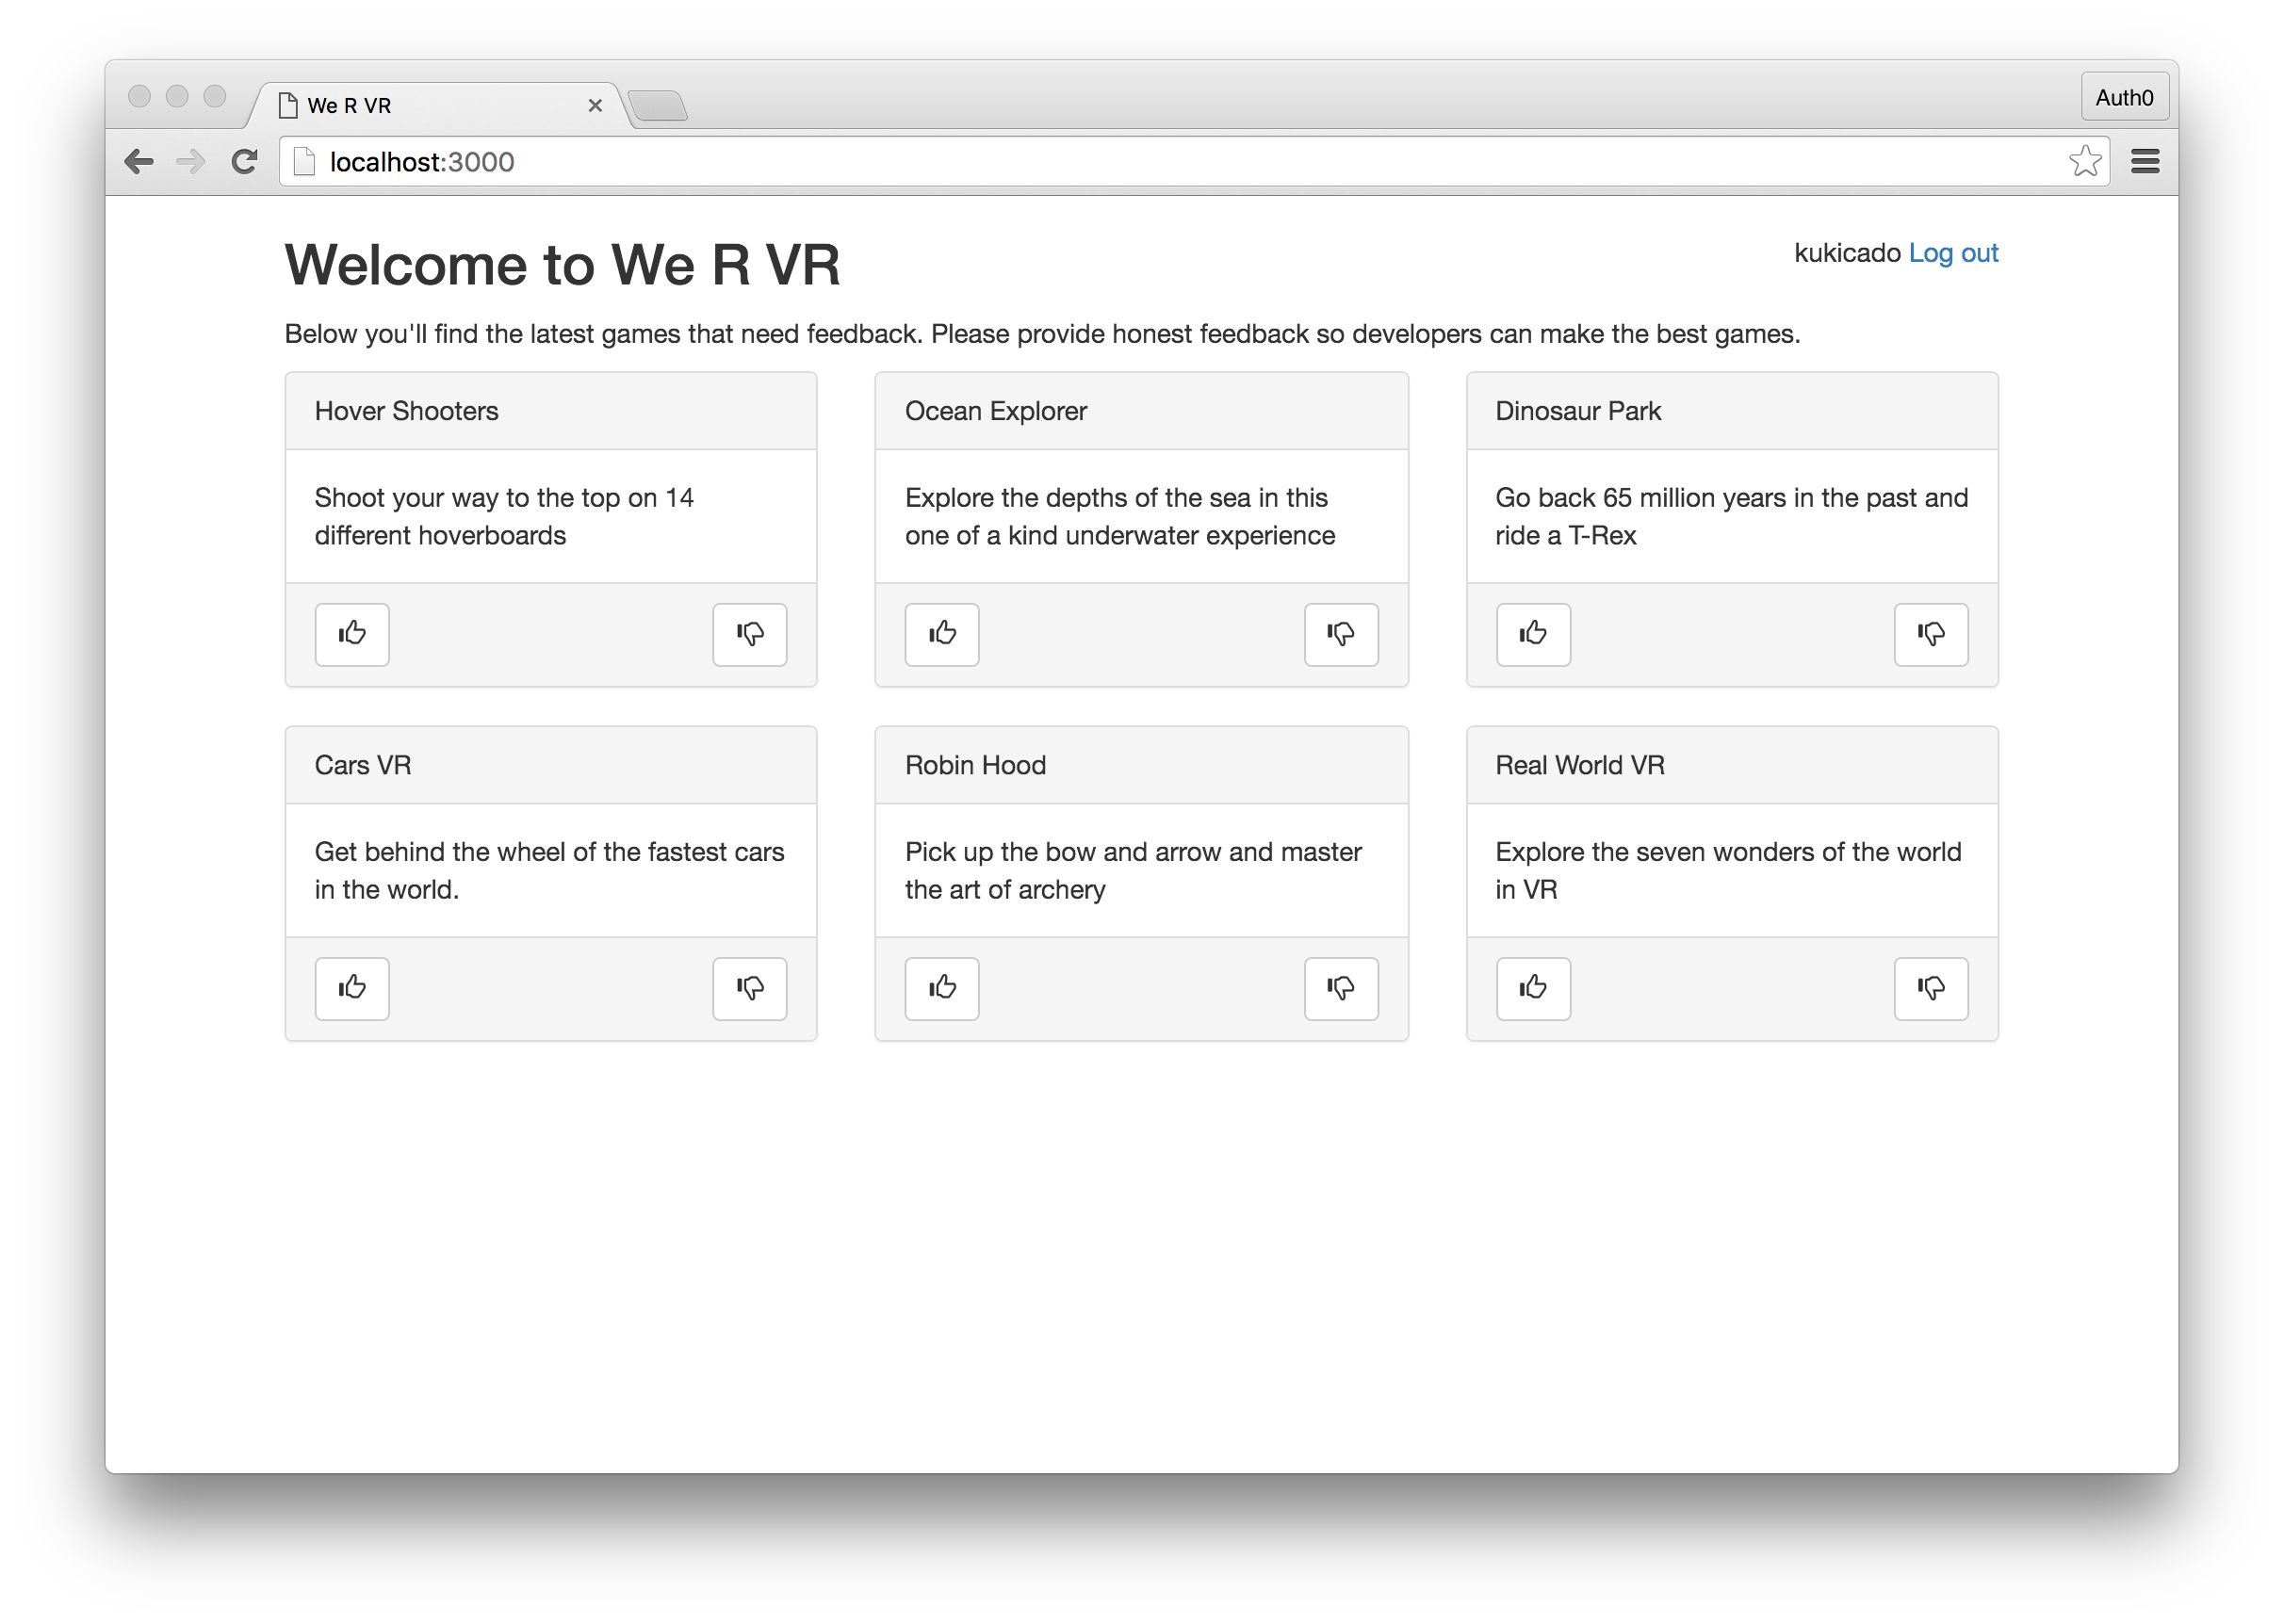
<span classname="pull-right">{this.state.profile.nickname} <a onclick={this.logout}>log out</a></span>
<h2>welcome to we r vr</h2>
<p>below you'll find the latest games that need feedback. please provide honest feedback so developers can make the best games.</p>
<div classname="row">
{this.state.products.map(function(product, i){
return <product key={i} product={product} />
})}
</div>
</div>);
} else {
return (<div>loading...</div>);
}
}
});
product component
finally, the
product
component will contain information about the vr experience. we could further break this component down into multiple components, but for brevity, we'll keep it all in one component for the demo.
var product = react.createclass({
  upvote : function(){
  },
  downvote: function(){
  },
  getinitialstate: function() {
    return {
      voted: null
    }
  },
  render : function(){
    return(
    <div classname="col-xs-4">
      <div classname="panel panel-default">
        <div classname="panel-heading">{this.props.product.name} <span classname="pull-right">{this.state.voted}</span></div>
        <div classname="panel-body">
          {this.props.product.description}
        </div>
        <div classname="panel-footer">
          <a onclick={this.upvote} classname="btn btn-default">
            <span classname="glyphicon glyphicon-thumbs-up"></span>
          </a>
          <a onclick={this.downvote} classname="btn btn-default pull-right">
            <span classname="glyphicon glyphicon-thumbs-down"></span>
          </a>
        </div>
      </div>
    </div>);
  }
})
finalizing the ui
with our components in place, the last thing we'll need to do is tell our react app how to start. we'll do that like this:
reactdom.render(<app />, document.getelementbyid('app'));
this code will tell react to look for a
div
with the id of
app
and if it finds it, insert our
app
component at that location. the
app
component will then load in the appropriate sub-components and react will do it's job managing state from then on.
with our ui finalized, let's add authentication in golang and hook up our front end.
aside: adding authentication with auth0
adding user authentication will allow us to protect our api. since our app deals with projects that are in active development, we don’t want any data to be publicly available. we will accomplish this in two parts. we will add authentication in go and protect our api endpoints from being accessed without a proper token. next, we'll add a way for users to login through our react app and get a token.
authentication in golang
to start, let’s secure our api endpoints. we did this earlier with manual generation and verification of the jwt, but now we'll expand on the functionality here. we will utilize the
auth0/go-jwt-middleware
and
dgrijalva/jwt-go
libraries for dealing with the jwt. additionally, we will utilize the
joho/godotenv
library so that we can store our auth0 credentials outside of our
main.go
file. let's see what our implemented code looks like.
package main

import(
  ...
  "github.com/joho/godotenv"
  "github.com/dgrijalva/jwt-go"
  "github.com/auth0/go-jwt-middleware"
)

func main() {

  // here we are loading in our .env file which will contain our auth0 client secret and domain
  err := godotenv.load()
  if err != nil {
    log.fatal("error loading .env file")
  }

  ...

  r.handle("/status", statushandler).methods("get")
  r.handle("/products", jwtmiddleware.handler(productshandler)).methods("get")
  r.handle("/products/{slug}/feedback", jwtmiddleware.handler(addfeedbackhandler)).methods("post")

}

// handlers
...

var jwtmiddleware = jwtmiddleware.new(jwtmiddleware.options{
  validationkeygetter: func(token *jwt.token) (interface{}, error) {
  decoded, err := base64.urlencoding.decodestring(os.getenv("auth0_client_secret"))
  if err != nil {
    return nil, err
  }
  return decoded, nil
  },
})
we have made minor changes to our
jwtmiddleware
function to use the
auth0_client_secret
variable rather than a hardcoded secret. we got this variable from our auth0 management
dashboard
and stored it an environmental variable. that is all we needed to do on the golang side.
next, we'll implement the login functionality on the frontend. feel free to remove to the
/get-token
route as it is no longer necessary. we will get the token from auth0.
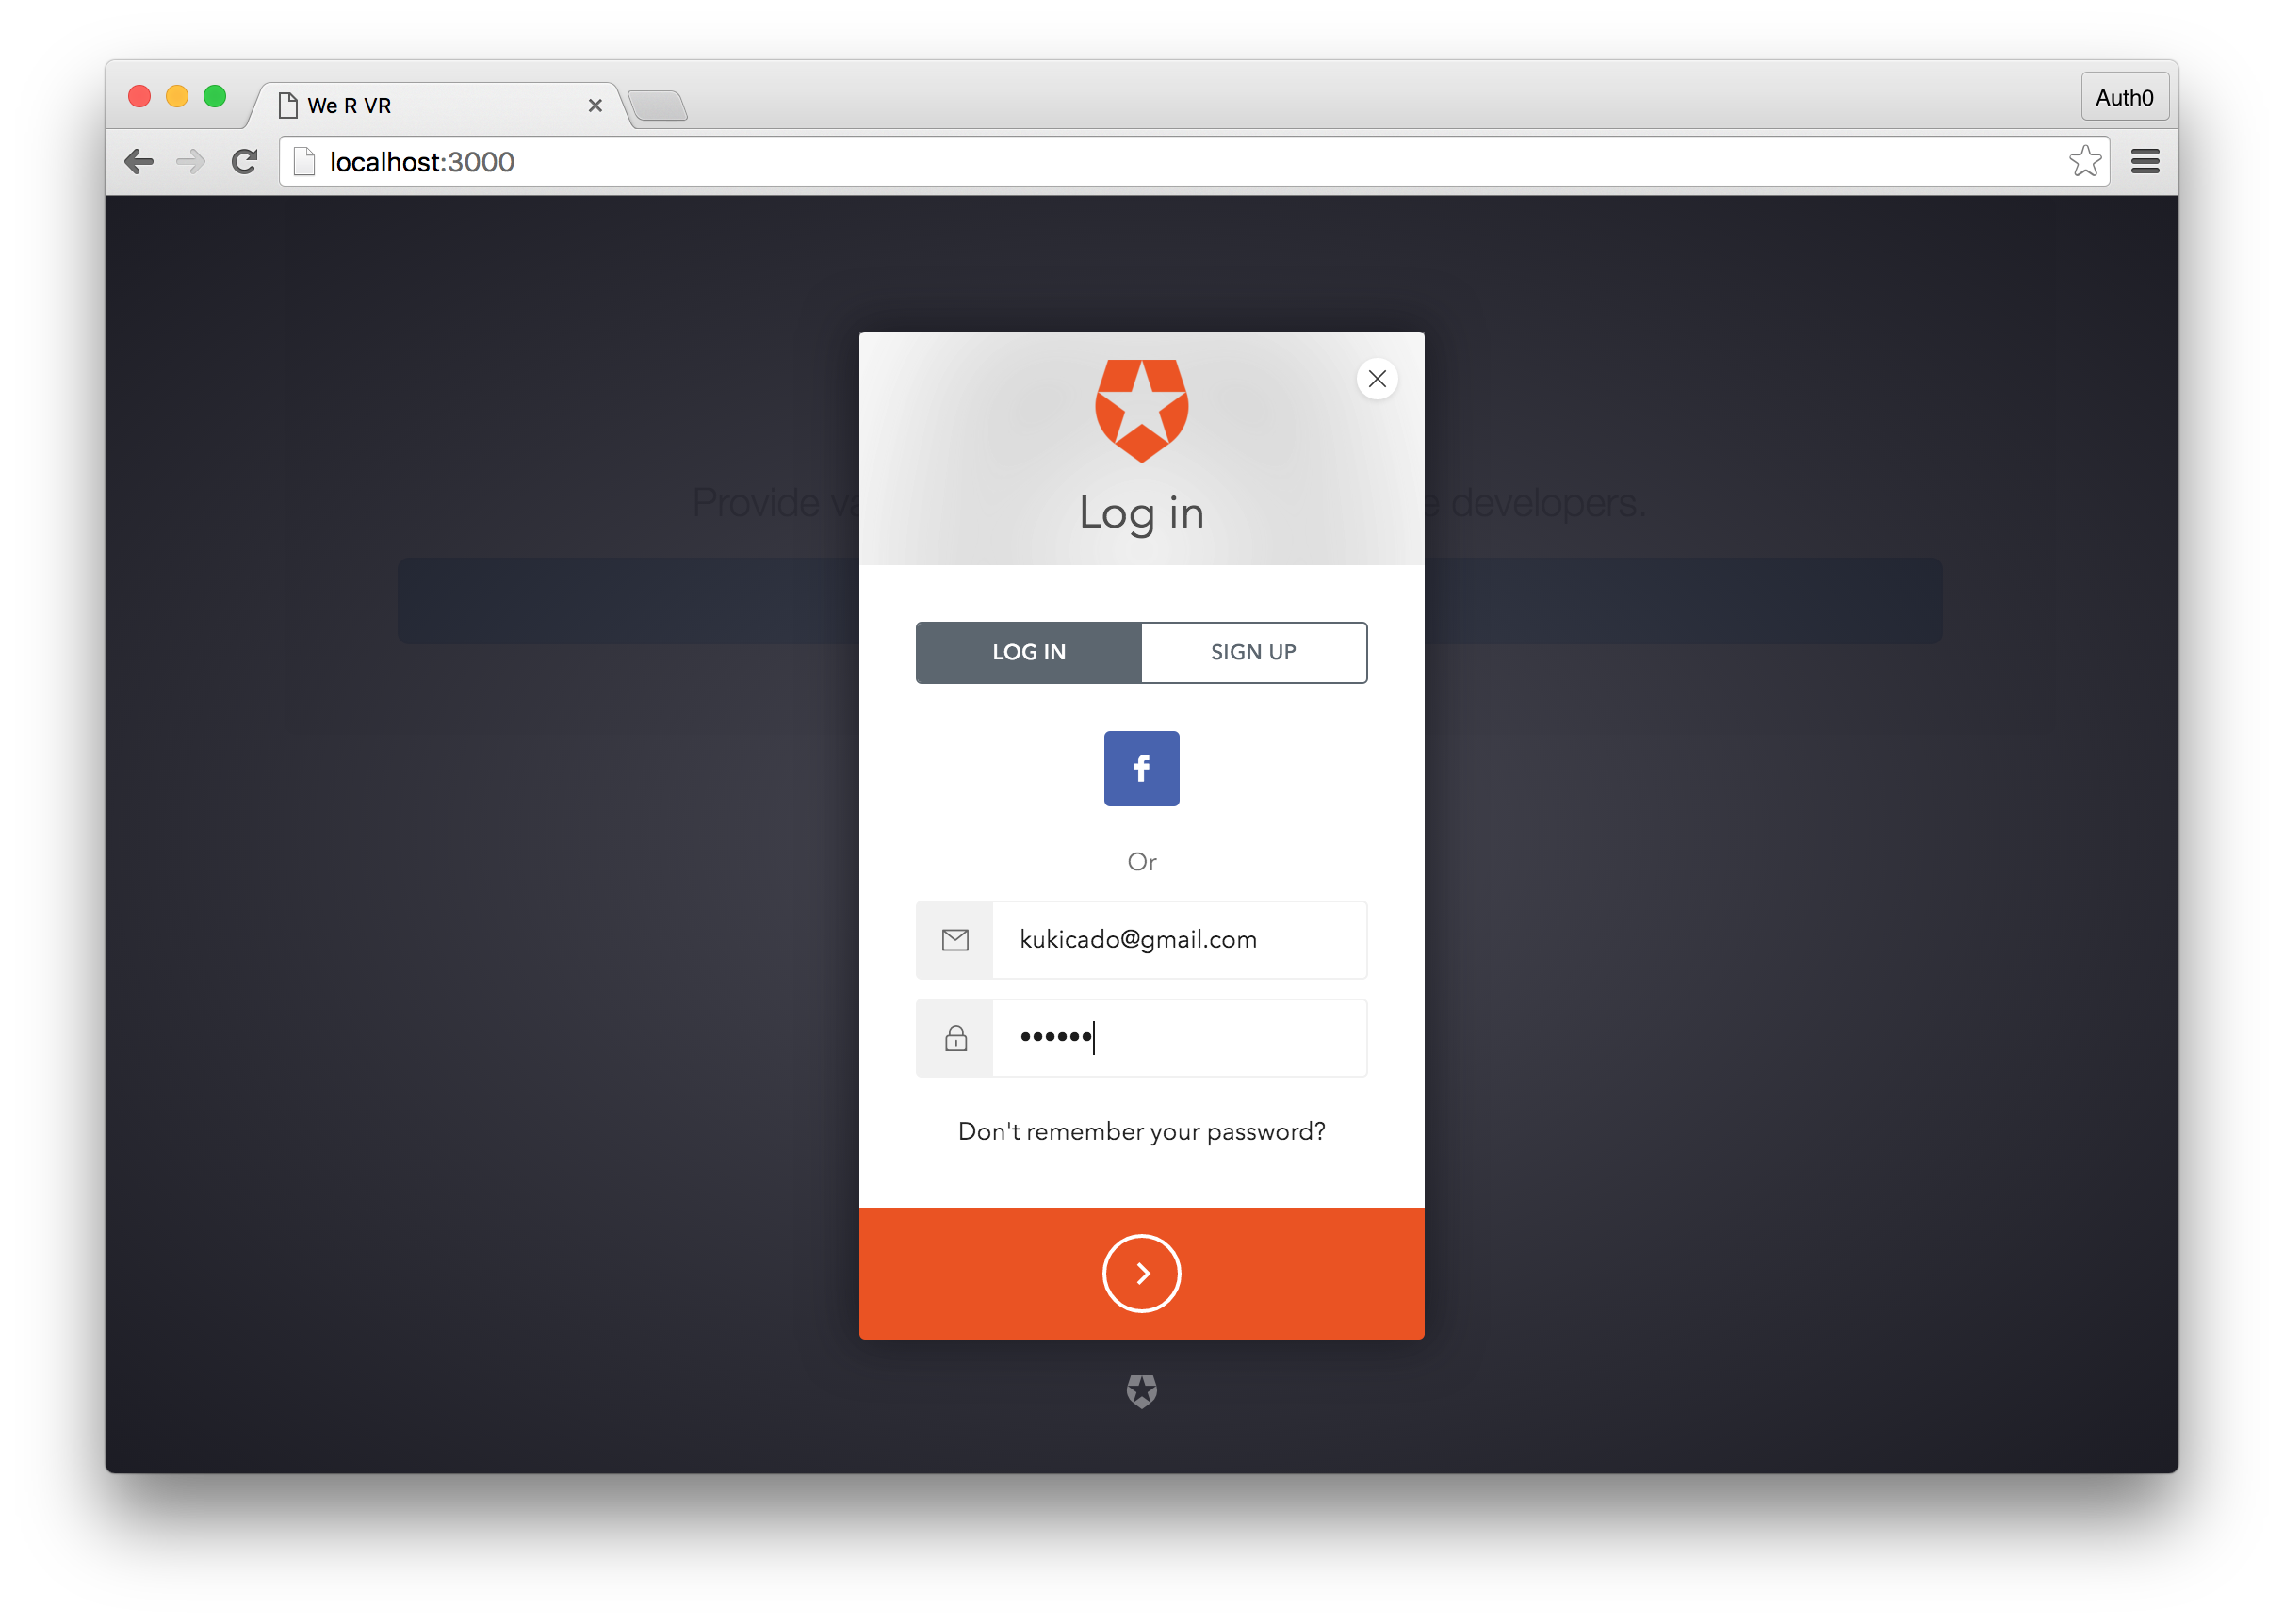
login with auth0 lock and react
next, we’ll implement the login system on the frontend that will allow users to login and create accounts. we will do this using auth0’s
lock
widget. we'll first need to add the required libraries for the lock widget. let's update the
index.html
file.
<!doctype html>
<html>
  <head>
    <meta charset="utf-8" />
    <meta name="viewport" content="width=device-width, initial-scale=1.0, maximum-scale=1.0, user-scalable=no" />
    <title>we r vr</title>
    <script src="//cdn.auth0.com/js/lock-9.0.min.js"></script>
    <script type="text/javascript" src="static/js/auth0-variables.js"></script>
    <!-- ... existing libraries ... -->
  </head>
  <body>
  </body>
</html>
we've pulled the lock library from auth0. we'll additionally need to create a new file called
auth0-variables.js
which will store our auth0
client_id
and
client_domain
. you can get the
client_id
and
client_domain
from your auth0 management dashboard. with the libraries in place, we'll update our react components to handle the login as well as make calls to our go api. let's update the components one by one.
app component
the
app
component will be updated to create an instance of the lock widget, capture and store the user token and add the correct authorization header to any requests to our go api. let's see what that code looks like below:
var app = react.createclass({
  componentwillmount: function() {
    this.setupajax();
    this.createlock();
    this.setstate({idtoken: this.getidtoken()})
  },
  /* we will create the lock widget and pass it to sub-components */
  createlock: function() {
    this.lock = new auth0lock(this.props.clientid, this.props.domain);
  },
  /* we will ensure that any ajax request to our go api has the authorization
     header and passes the user jwt with the request */
  setupajax: function() {
    $.ajaxsetup({
      'beforesend': function(xhr) {
        if (localstorage.getitem('usertoken')) {
          xhr.setrequestheader('authorization',
                'bearer ' + localstorage.getitem('usertoken'));
        }
      }
    });
  },
  /* the getidtoken function get us the users jwt if already authenticated
     or if it's the first time logging in, will get the jwt data and store it in local storage */
  getidtoken: function() {
    var idtoken = localstorage.getitem('usertoken');
    var authhash = this.lock.parsehash(window.location.hash);
    if (!idtoken && authhash) {
      if (authhash.id_token) {
        idtoken = authhash.id_token
        localstorage.setitem('usertoken', authhash.id_token);
      }
      if (authhash.error) {
        console.log("error signing in", authhash);
      }
    }
    return idtoken;
  },
  render: function() {
    if (this.state.idtoken) {
      /* if the user is logged in, we'll pass the lock widget and the token to the loggedin component */
      return (<loggedin lock={this.lock} idtoken={this.state.idtoken} />);
    } else {
      return (<home lock={this.lock} />);
    }
  }
});
home component
the updates to the
home
component will add the functionality to allow a user to login.
var home = react.createclass({
  /* we will get the lock instance created in the app component
     and bind it to a showlock function */
  showlock: function() {
    this.props.lock.show();
  },
  render: function() {
    return (
    <div classname="container">
      <div classname="col-xs-12 jumbotron text-center">
        <h1>we r vr</h1>
        <p>provide valuable feedback to vr experience developers.</p>
        // when the user clicks on the button titled sign in we will display the lock widget
        <a onclick={this.showlock} classname="btn btn-primary btn-lg btn-login btn-block">sign in</a>
      </div>
    </div>);
  }
});
once a user clicks on the sign in button, they will be prompted to login via the auth0 lock widget.
loggedin component
the
loggedin
component will be updated to pull in products to review from the golang api.
var loggedin = react.createclass({
  /* we will create a logout function that will log the user out */
  logout : function(){
    localstorage.removeitem('usertoken');
    this.props.lock.logout({returnto:'http://localhost:3000'})
  },
  getinitialstate: function() {
    return {
      profile: null,
      products: null
    }
  },
  componentdidmount: function() {
    /* once the component is created, we will get the user information from auth0 */
    this.props.lock.getprofile(this.props.idtoken, function (err, profile) {
      if (err) {
        console.log("error loading the profile", err);
        alert("error loading the profile");
      }
      this.setstate({profile: profile});
    }.bind(this));

    /* additionally, we will make a call to our go api and get a list of products the user can review */
    this.serverrequest = $.get('http://localhost:3000/products', function (result) {
      this.setstate({
        products: result,
      });
    }.bind(this));
  },

  render: function() {
    if (this.state.profile) {
      return (
        <div classname="col-lg-12">
          <span classname="pull-right">{this.state.profile.nickname} <a onclick={this.logout}>log out</a></span>
          <h2>welcome to we r vr</h2>
          <p>below you'll find the latest games that need feedback. please provide honest feedback so developers can make the best games.</p>
          <div classname="row">
          {this.state.products.map(function(product, i){
            return <product key={i} product={product} />
          })}
          </div>
        </div>);
    } else {
      return (<div>loading...</div>);
    }
  }
});
product component
finally, the
product
component will be updated to add functionality to vote on products. the result will be sent to the api and the go api will ensure that the
post
request is valid and the product voted on actually exists.
var product = react.createclass({
  /* we will add the functionality for our upvote and downvote functions
     both of this will send a post request to our golang api */
  upvote : function(){
    var product = this.props.product;
    this.serverrequest = $.post('http://localhost:3000/products/' + product.slug + '/feedback', {vote : 1}, function (result) {
      this.setstate({voted: "upvoted"})
    }.bind(this));
  },
  downvote: function(){
    var product = this.props.product;
    this.serverrequest = $.post('http://localhost:3000/products/' + product.slug + '/feedback', {vote : -1}, function (result) {
      this.setstate({voted: "downvoted"})
    }.bind(this));
  },
  getinitialstate: function() {
    return {
      voted: null
    }
  },
  render : function(){
    return(
    <div classname="col-xs-4">
      <div classname="panel panel-default">
        <div classname="panel-heading">{this.props.product.name} <span classname="pull-right">{this.state.voted}</span></div>
        <div classname="panel-body">
          {this.props.product.description}
        </div>
        <div classname="panel-footer">
          <a onclick={this.upvote} classname="btn btn-default">
            <span classname="glyphicon glyphicon-thumbs-up"></span>
          </a>
          <a onclick={this.downvote} classname="btn btn-default pull-right">
            <span classname="glyphicon glyphicon-thumbs-down"></span>
          </a>
        </div>
      </div>
    </div>);
  }
})
putting it all together
with the api and ui complete, we are ready to test our application. fire up the server by once again running
go run main.go
. navigate to
localhost:3000
and you should see the sign in page. click on the sign in button, and you will see the auth0 lock widget. login and you will be redirected to the logged in view of the application and will be able to leave feedback on the different experiences.
let's take it one step further, and let's actually build and compile our application. instead of writing
go run main.go
, execute the command
go build main.go
in your terminal window. you should see a new file appear in your directory. this will be a unix or windows executable file. now you can run your application by simply executing
./main
in your directory and the web server will start.
conclusion
today, we built and secured an api in go. the use of handlers made our authentication in golang simple and straightforward. we saw how we could chain multiple handlers together to create middleware in go. additionally, we built a ui in react to consume our go api and saw how the interaction between the frontend and backend was facilitated. to conclude, go is an excellent language for building scalable and highly performant api's.
Published at DZone with permission of Adnan Kukic. See the original article here.
Opinions expressed by DZone contributors are their own.
Comments