Blocking Ads on Your Network Using Raspberry Pi 3 + Fedora + Pi-hole
This article proposes how to build a device to block advertisements on the network using Linux and Pi-hole on Raspberry Pi 3.
Join the DZone community and get the full member experience.
Join For FreeThis article proposes how to build a device to block advertisements on the network using Linux and Pi-hole on Raspberry Pi 3. The equipment needed to build the device, configured software, and use will be described in the next sections.
Requirements
The following are hardware and software requirements to run the tutorial.
Skill Requirements
For this tutorial, the following skills are necessary:
- Basic Linux administration skills
- Linux deployment and configuration
- SELinux
- Firewalld
- Linux devices
- Network administration
Hardware Requirements
For this tutorial, the following devices are necessary:
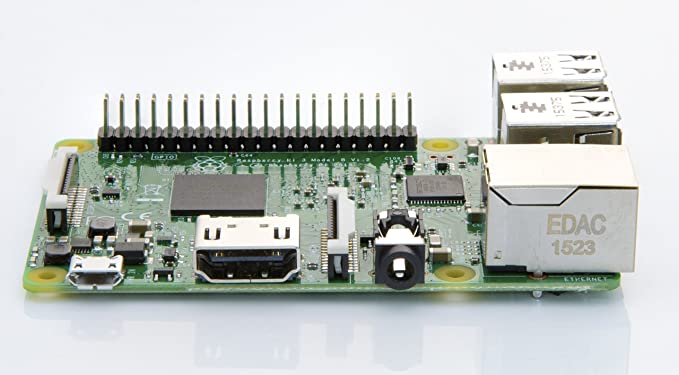
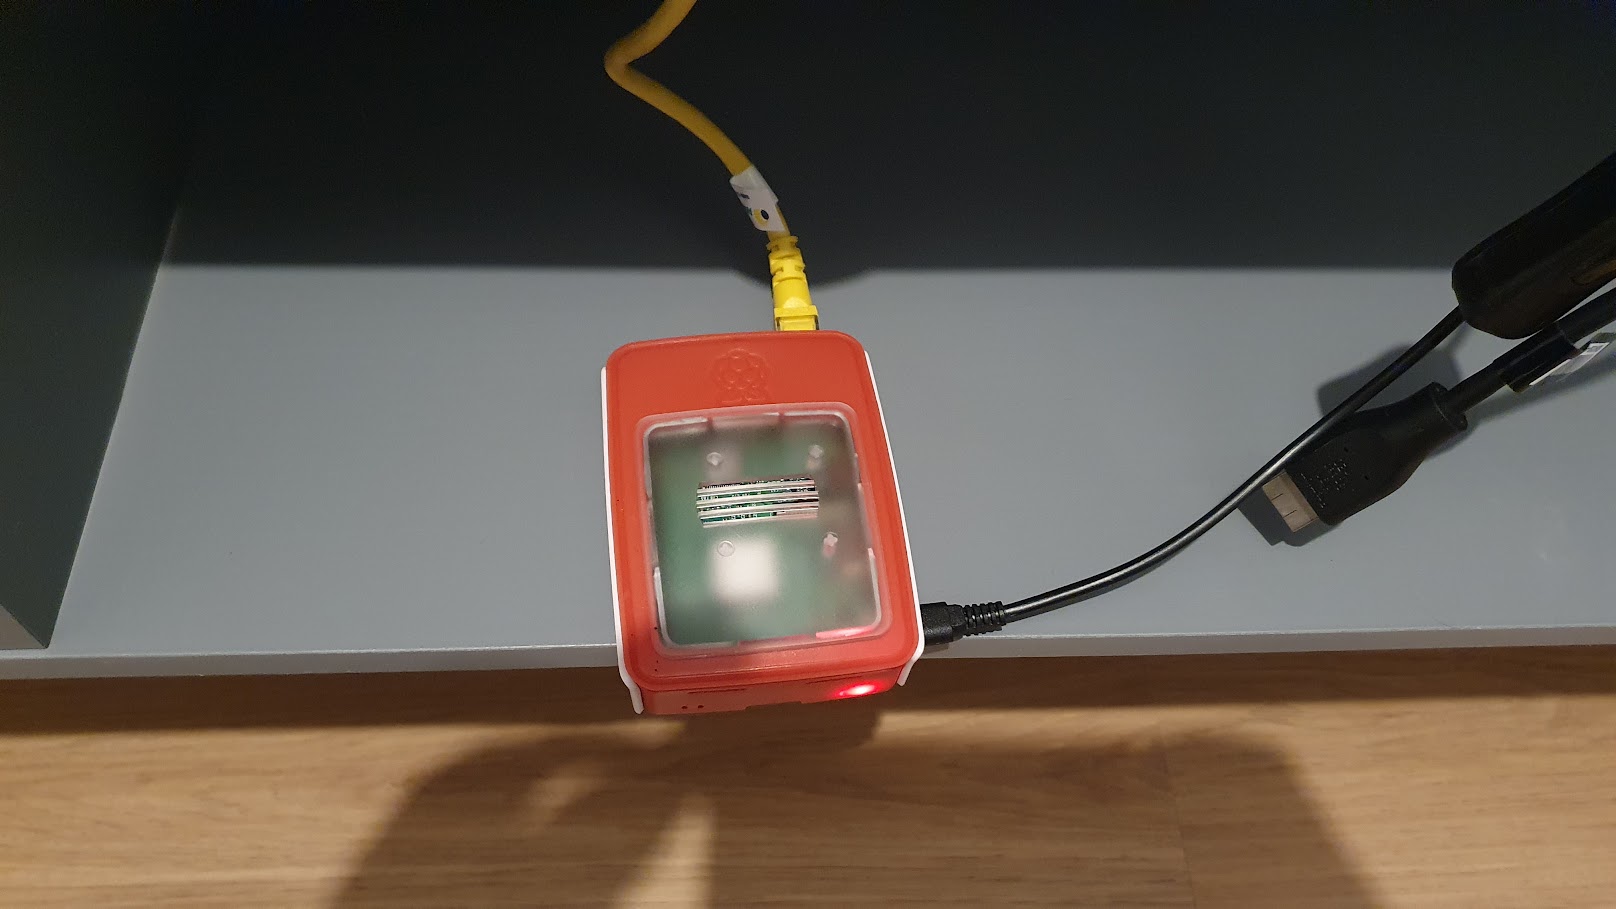
- Raspberry Pi 3 Model B Quadcore 1.2ghz 1GB
- Raspberry Pi 3 On and Off Switch- 5V 3A

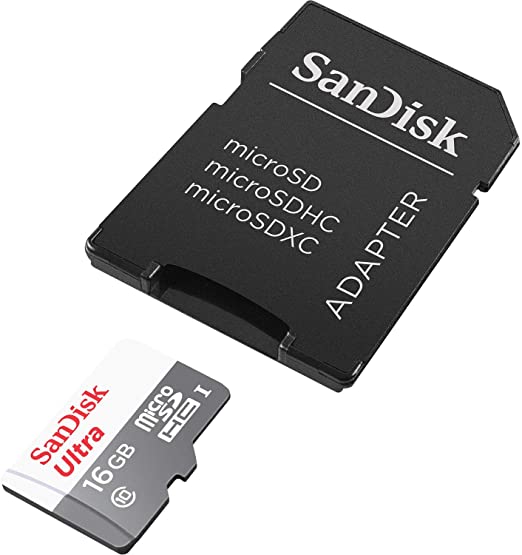
- Micro SD Card, 16GB
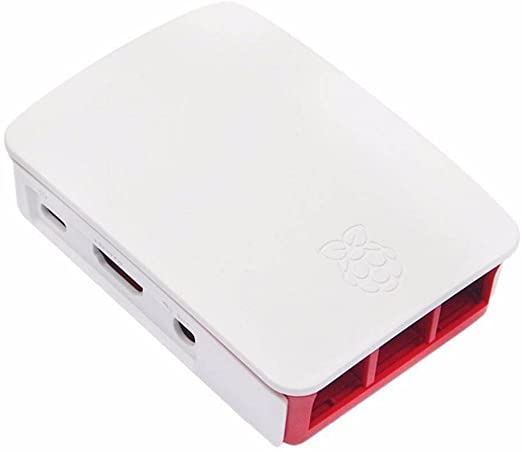
- Official Case With Cooler For Raspberry Pi 3 (Optional)
Software Requirements
Necessary for this tutorial also are:
Downloading and Installing Fedora
For this tutorial, Fedora 34 Server on ARM architecture was selected. Fedora 35 and 36 are not supported to run Pi-hole.
Downloading Fedora
We used wget to download Fedora 34 ARM, but you can use your favorite download tool.
$ wget https://mirror.cedia.org.ec/fedora/linux/releases/34/Server/armhfp/images/Fedora-Server-34-1.2.armhfp.raw.xzOutput was omitted.
Installing ARM Installer in Your Fedora
For this tutorial, we are using Fedora Linux 35 as the base system, but you can use any Linux distribution. Mac, even Windows, can be used to make a bootable SD Card with Fedora Linux 34.
$ sudo dnf -y install arm-image-installerOutput was omitted.
Note: If are you using any other operating system different from Fedora, look at Fedora ARM documentation.
Installing Fedora 34 on Your SD Card
Now we'll proceed with deploying Fedora 34 Arm on your SD Card.
First, connect your micro SD card to your PC, as in the image below.
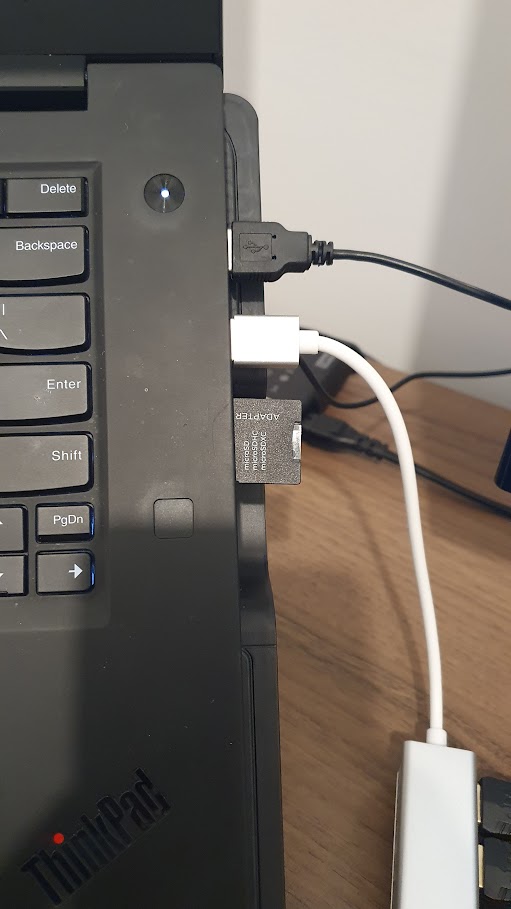
After connecting your micro SD card, let's locate it on your PC. Enter the command lsblk in your Linux terminal to check which disk devices are available.
$ lsblkOutput:
NAME                                          MAJ:MIN RM   SIZE RO TYPE  MOUNTPOINTS
loop0                                           7:0    0  55.5M  1 loop  /var/lib/snapd/snap/core18/2344
loop1                                           7:1    0  44.7M  1 loop  /var/lib/snapd/snap/snapd/15534
loop2                                           7:2    0  10.7M  1 loop  /var/lib/snapd/snap/jbang/42
mmcblk0                                       179:0    0  14.8G  0 disk
├─mmcblk0p1                                   179:1    0   600M  0 part  /run/media/xxxxx/4E8E-E968
├─mmcblk0p2                                   179:2    0     1G  0 part  /run/media/xxxxx/451acd33-df61-432e-9daa-8c2283ee8b3a
└─mmcblk0p3                                   179:3    0  13.3G  0 part
  └─fedora_fedora-root                        253:1    0  13.2G  0 lvm
zram0                                         252:0    0     8G  0 disk  [SWAP]
nvme0n1                                       259:0    0 476.9G  0 disk
├─nvme0n1p1                                   259:1    0   600M  0 part  /boot/efi
├─nvme0n1p2                                   259:2    0     1G  0 part  /boot
└─nvme0n1p3                                   259:3    0 475.4G  0 part
  └─luks-06b507fe-2833-4c62-a561-9b1d1c9a7bd6 253:0    0 475.3G  0 crypt /home
                                                                         /
Note: My device is mmcblk0. Look for your device to proceed with the installation.
Now let's proceed with Fedora 34 ARM on your SD Card. To install Fedora 34 on your SD Card, type the following command in your Linux terminal:
$ sudo arm-image-installer --image=Fedora-Server-34-1.2.armhfp.raw.xz --media=/dev/mmcblk0Expected output:
= Selected Image:
= Fedora-Server-34-1.2.armhfp.raw.xz
= Selected Media : /dev/mmcblk0
=====================================================

*****************************************************
*****************************************************
******** WARNING! ALL DATA WILL BE DESTROYED ********
*****************************************************
*****************************************************

 Type 'YES' to proceed, anything else to exit now

= Proceed? YES
= Writing:
= Fedora-Server-34-1.2.armhfp.raw.xz
= To: /dev/mmcblk0 ....
7501324288 bytes (7.5 GB, 7.0 GiB) copied, 137 s, 54.8 MB/s
0+843272 records in
0+843272 records out
7516192768 bytes (7.5 GB, 7.0 GiB) copied, 383.881 s, 19.6 MB/s
= Writing image complete!
= No U-boot will be written.

= Installation Complete! Insert into the board and boot.
Command arguments:
- Image: SO image downloaded
- Media: Your SD Card Device
Now, connect your Raspberry Pi to your network, turn it on, and create an administrator user to configure Pi-hole in your device.
Pre-Install
Before we start the Pi-hole deployment and configuration, we'll prepare Fedora Linux, upgrade SO, and configure SELinux and firewall rules.
Upgrading Fedora Linux
Now let's proceed with the upgrading of your SO. Updating is important to reduce the risk of possible vulnerabilities and to make patches available in the community.
$ sudo dnf -y install arm-image-installerOutput was omitted.
Configuring SELinux
Now we'll prepare a permissive role for SELinux. This enables your device to execute the HTTP server and DNS server. If you prefer, you can configure specific rules to SELinux. To configure SELinux as permissive, type the following command in your Linux terminal:
$ sudo sed -i 's/enforcing/permissive/g' /etc/selinux/configNo output for the command.
After these configurations, you need to reboot your Raspberry Pi device.
$ sudo rebootNo output for the command.
Configuring Linux Firewall
Now we'll configure Linux Firewall, firewalld, to open server ports. The following ports are necessary to correctly run Pi-hole in your device:
- port 80/tcp - httpd Server
- port 53/tcp - DNS Server
- port 53/udp - DNS Server
Before opening firewall ports, let's discover the default SO zone. Type the following command for that:
$ sudo firewall-cmd --get-default-zoneExpected output:
FedoraServerNow let's apply the firewall rules to ports 80/tcp, 53/tcp, and 53/udp:
- Adding port 80/tcp:
$ sudo firewall-cmd --zone=FedoraServer --add-port=80/tcp --permanentOutput: success
- Adding port 53/tcp:
$ sudo firewall-cmd --zone=FedoraServer --add-port=53/tcp --permanentOutput: success
- Adding port 53/udp:
$ sudo firewall-cmd --zone=FedoraServer --add-port=53/udp --permanentOutput: success
Now, let's reload the firewall configuration to take effect:
$ sudo firewall-cmd --reloadOutput: success
The configuration is done, and finally, we are prepared to install and configure Pi-hole in the Raspberry Pi device.
Installing Pi-hole
To procedure with Pi-hole deployment, in your Raspberry Pi device, follow the instructions described in the following commands:
$ curl -sSL https://install.pi-hole.net | bashExpected output:
  [i] Root user check
  [i] Script called with non-root privileges
      The Pi-hole requires elevated privileges to install and run
      Please check the installer for any concerns regarding this requirement
      Make sure to download this script from a trusted source

  [✓] Sudo utility check
[sudo] password for XXXXX:

  [✓] Root user check

        .;;,.
        .ccccc:,.
         :cccclll:.      ..,,
          :ccccclll.   ;ooodc
           'ccll:;ll .oooodc
             .;cll.;;looo:.
                 .. ','.
                .',,,,,,'.
              .',,,,,,,,,,.
            .',,,,,,,,,,,,....
          ....''',,,,,,,'.......
        .........  ....  .........
        ..........      ..........
        ..........      ..........
        .........  ....  .........
          ........,,,,,,,'......
            ....',,,,,,,,,,,,.
               .',,,,,,,,,'.
                .',,,,,,'.
                  ..'''.


  [i] Checking dnf for upgraded packages...
Omitted
Follow the installation sequence as shown in the illustrative images below:
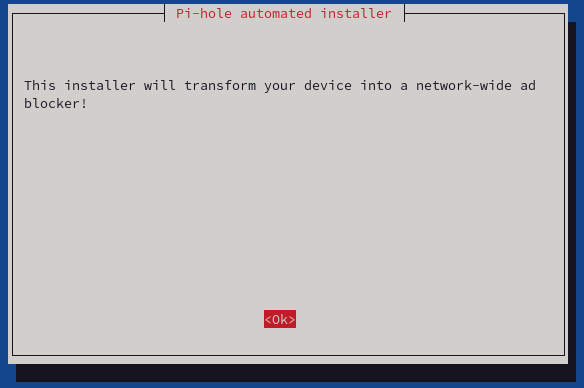
- Welcome pages: Just press "Ok" and follow deployment.
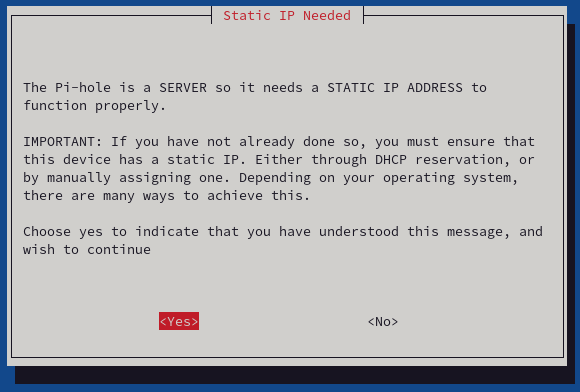
- The next page shows that the IP number of your device must be static. Make sure that your DHCP server will not change the IP number our configure static IP, select it, and press "Yes."
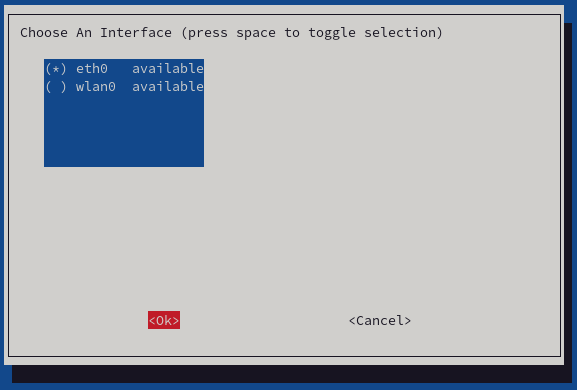
- Now, select your network device. In our case, we are using a cable connection, so we selected "eth0." Select it, and press "Ok."
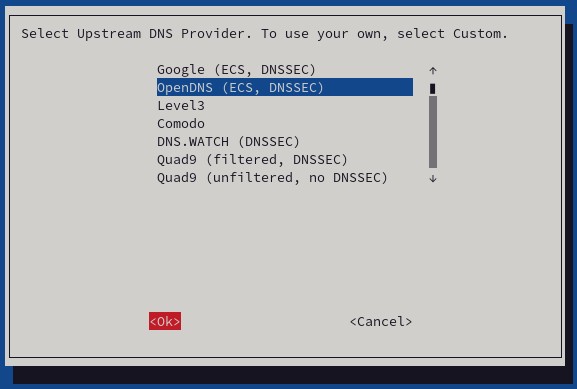
- In this step, we'll select a DNS Provider. You can choose your preferred provider. Select the DSN provider and press "Ok."
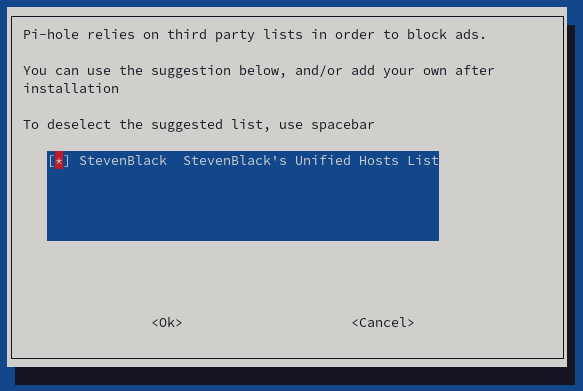
- The next screen shows the provider the list of hosts that will be blocked. Select and press "Ok."
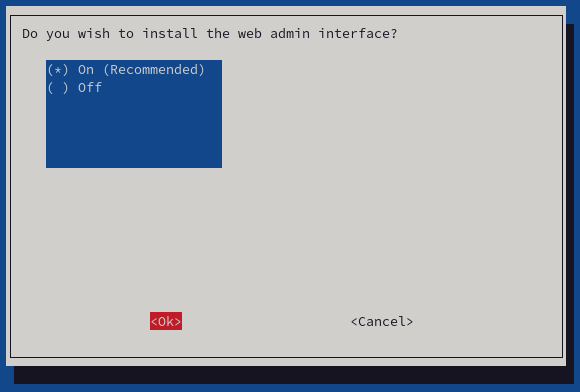
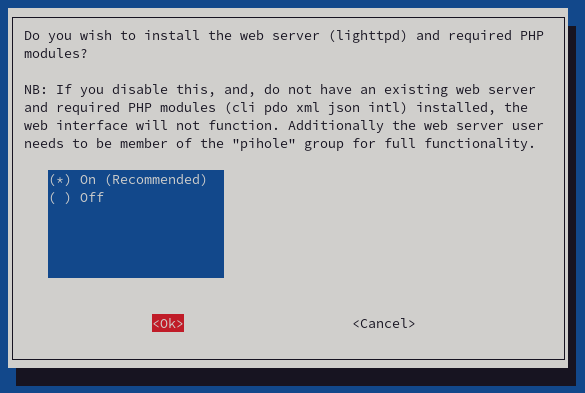
- It is recommended that the Pi-hole administration web console be installed. Additionally, the installer will do the deployment of the lighttpd server. Select these options, and press "Ok."
![Do you wish to install the web admin interface?]()
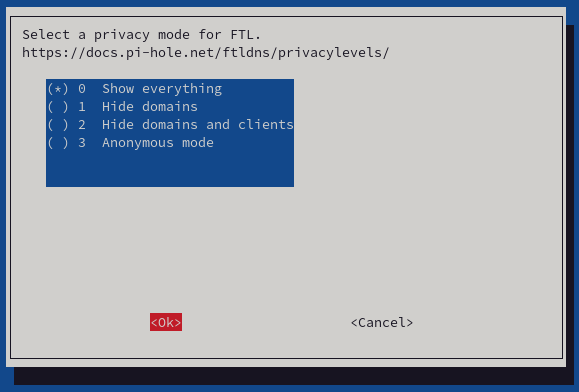
- In the next step, the installer will activate query logs. Mark this option "0" and press "Ok."
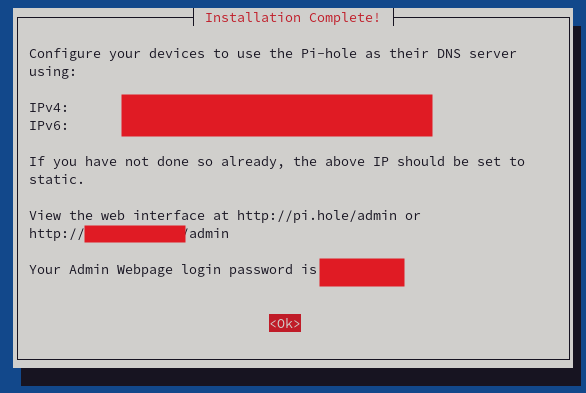
- The Pi-hole deployment in Raspberry Pi is completed. The following screen shows the admin password and web console address. Copy these to make sure that you can be accessed after installation.
After complete installation, let's update the DNS list block definitions. Type in your Linux terminal the following command:
$ Pi-hole -upExpected output:
  [✓] Checking for git
  [✓] Checking for iproute
  [✓] Checking for newt
  [✓] Checking for procps-ng
  [✓] Checking for which
  [✓] Checking for chkconfig
  [✓] Checking for ca-certificates

  [i] Checking for updates...
  [i] Pi-hole Core:	up to date
  [i] Web Interface:	up to date
  [i] FTL:		up to date

  [✓] Everything is up to date!
In the next section, we'll configure devices and validate Pi-hole installation.
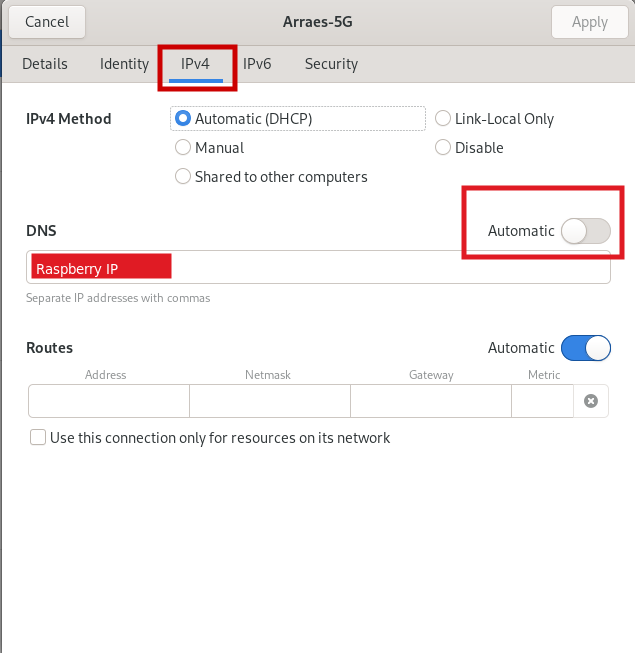
Post-Install
Now, define your DNS Server as an IP raspberry device. For example:
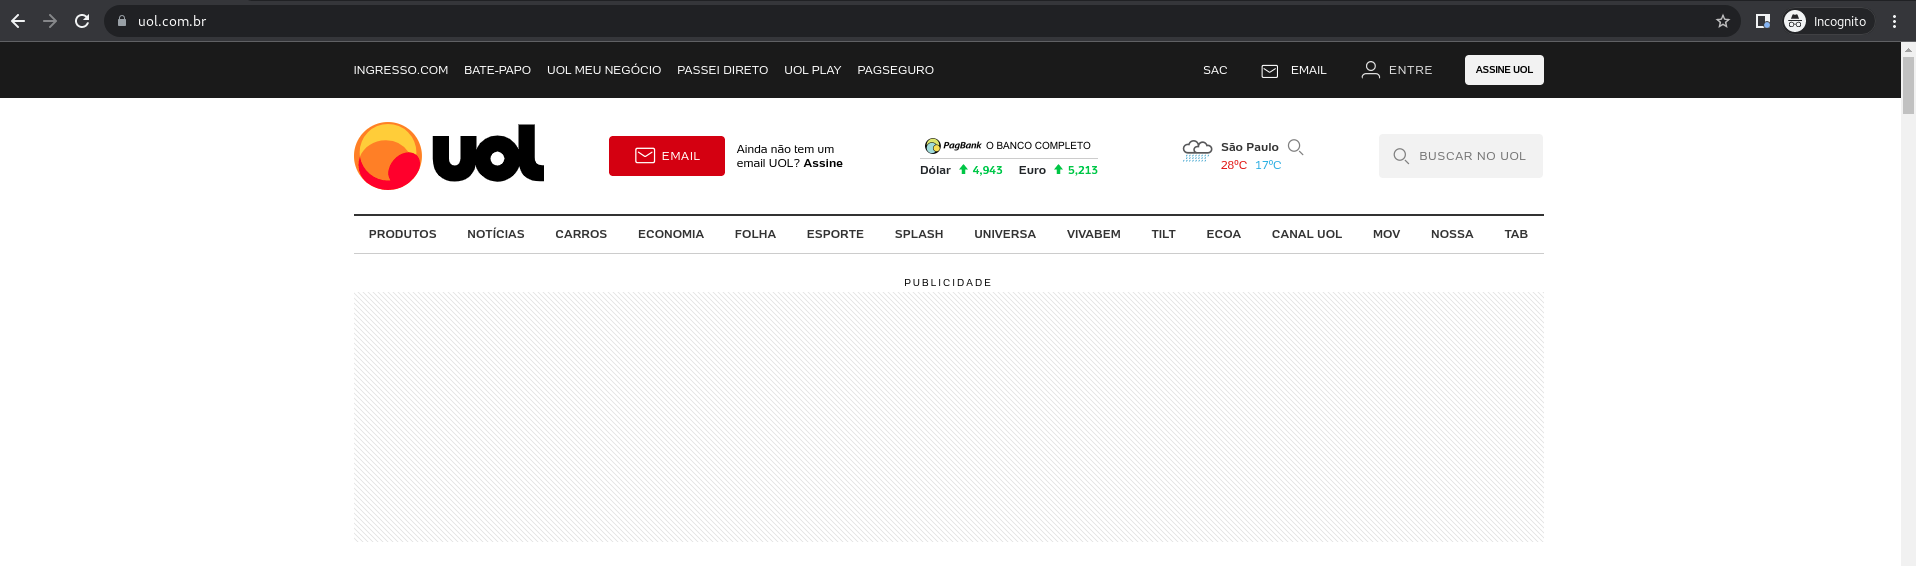
Now let's check if Pi-hole is blocking ads on your device.
- Without DNS server configuration:

- With DNS server configuration:
Opinions expressed by DZone contributors are their own.
Comments