Build and Deploy an ASP.NET App With Azure DevOps
We look at how to create a DevOps friendly web application in ASP.NET, taking advantage of the framework's built-in features.
Join the DZone community and get the full member experience.
Join For Freei’ve blogged in the past about deploying asp.net applications, but lots of new features haved changed in azure devops and it is time to do some refreshing on basic concepts. especially in the field of web.config transform there is always lots of confusion and even if i’m an advocate of removing every configuration from files and sources, it is indeed something that worth examining.
the best approach for configuration is removing it from the source control, using configuration services, etc., and moving away from web.config.
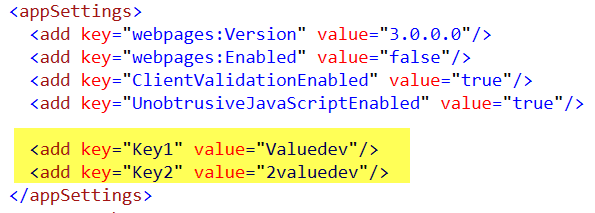
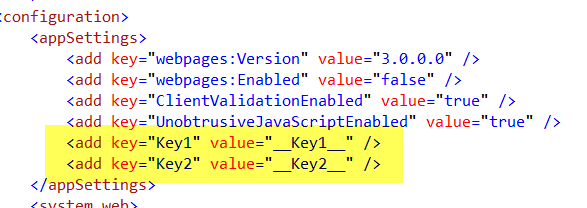
but since most people still use web.config, let's start with a standard asp.net application with a web.config file and a couple of application settings that should be changed during deploy.
figure 1: simple configuration file with two settings
when it is time to configure your release pipeline, you must adhere to the mantra, 'build once, deploy often.' this means that you should have one build that prepares the binaries to be installed, and the very same binaries will be deployed in several environments.
since each environment will have a different value for app settings stored in web.config, i’ll start creating a web config transform for the release configuration (then one that will be released), changing each configuration with a specific token.
figure 2: transformation file that tokenize the settings
in figure 2, i show how i changed the value of the
key1
setting to
__key1__
and
key2
to
__key2__
. this is necessary because i’ll replace these values with the real value during releases.
the basic trick is changing configuration values in files during the build, setting some tokenized value that will be replaced during release. using underscores as te prefix and suffix is enough for most situations.
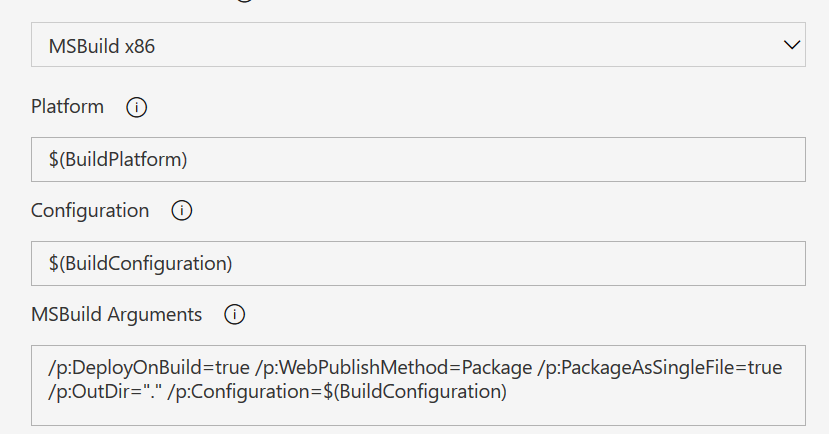
now it is time to create a build that generates the package to install. the pipeline is really simple, the solution is to build with msbuild with a standard configuration for publishing web sites. i’ve used msbuild and not visual studio task, because i do not want to have visual studio on my build agent — msbuild is enough.
figure 3: build and publish web site with a standard msbuild task.
if you run the build you will be disappointed because resulting web.config is not transformed, but remains with the same content it had in source control. this happens because transformation is an operation that is not done during standard web site publishing, but, rather, is performed from visual studio when you use the publishing wizard. luckily enough there is a task in preview that performs web.config transformations. you can simply place this task before the msbuild task.
figure 4: file transform task is in preview but it does its work perfectly
as you can see in figure 4, you should simply specify the directory of the application, then choose xml transformation, and finally choose the
web.$(buildconfiguration).config
transformation file to transform web.config.
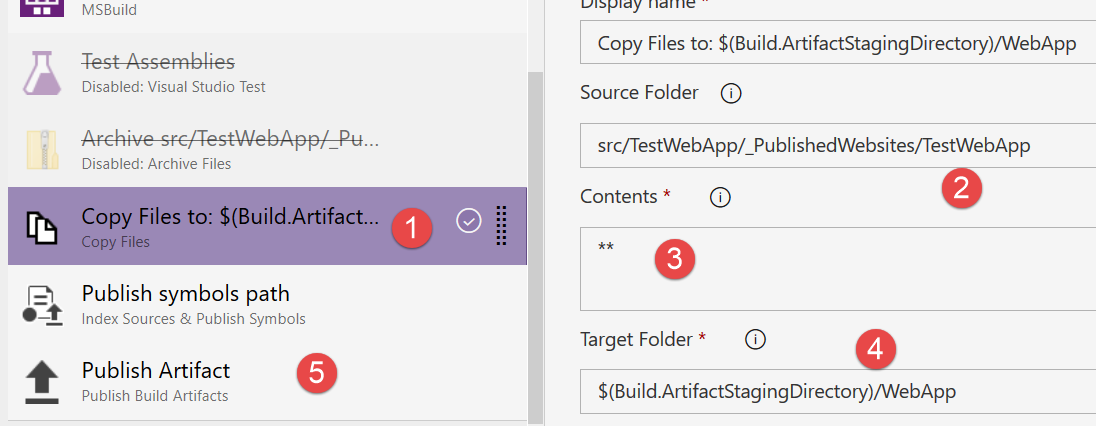
now you only need to copy the result into the artifact staging directory, then upload it with a standard upload artifact task.
figure 5: copy result of the publish task into staging directory and finally publish the artifact.
if you've read my other posts, you know that i usually use a powershell script that reorganize files, compress them, etc., but for this simple application it is perfectly fine to copy the
_publishedwebsites/
directory as a build artifact.
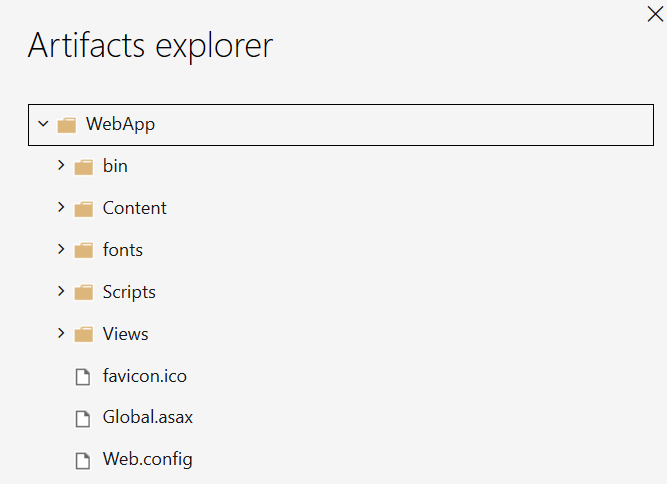
figure 6: published artifacts after the build completes.
take time to verify that the output of the build (artifacts) is exactly what you expected before moving to configure the release.
before going to build the release phase, please download the web.config file and verify that the substitutions were performed and web.config contains what you expected.
fiure 7: both of my settings were substituted correctly.
now it is time to create the release, but first i suggest you install this extension , which works well for performing substitutions during a release in an easy and intuitive way.
one of the great powers of azure devops is extensibility, there are tons of custom tasks, so take time and look in the marketplace if you are not able to find the task you need at first glance.
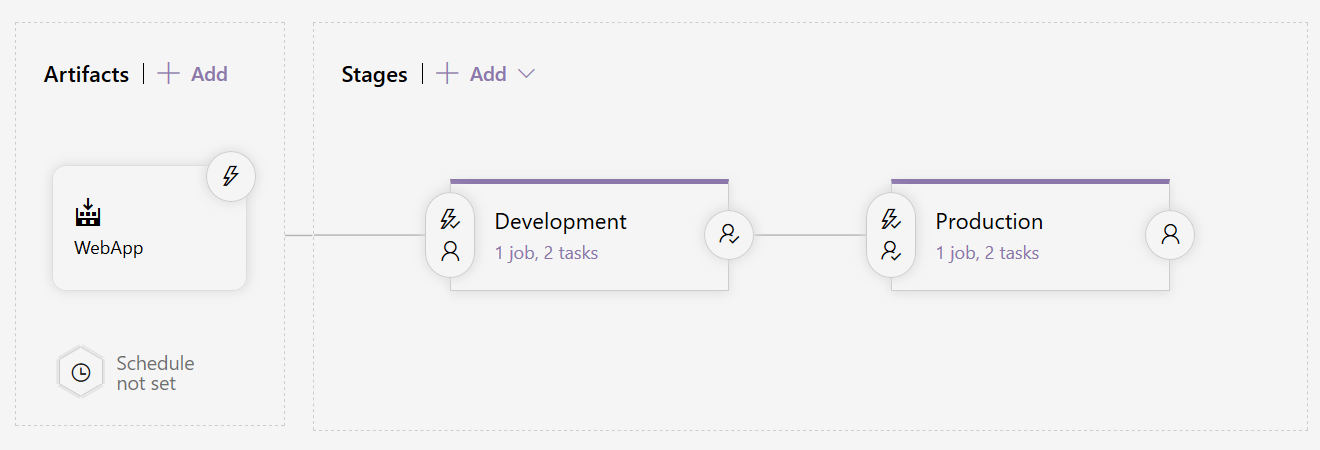
let' start creating a simple release that uses the previous build as an artifact, and contains two simple stages, dev and production.
figure 8: simple release with two stages to deploy the web application.
each of the two stages has a simple two task job to deploy the application and they are based on the assumption that each environment was already configured (iis installed, site configure, etc.). so, to deploy our asp.net app, we can simply overwrite the old installation folder and replace it with the new binaries.
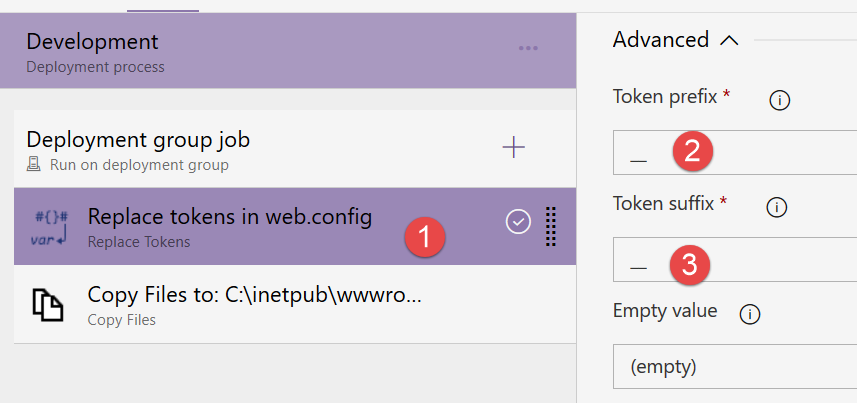
the replace token task comes in handy in this situation, you simply need to add it as the first task of the job (before the task that copies the file into the iis directory), then configure the prefix and suffix with the two underscores to match criteria used to tokenize configurations in web.config.
figure 9: configure replace token suffix and prefix to perform substitution.
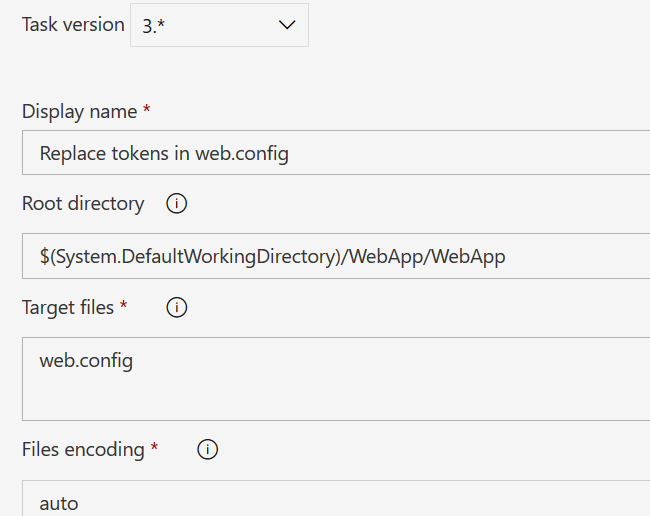
in this example, only web.config should be changed, but the task can perform substitutions on multiple files.
figure 10: substition configuration points to web.config file.
the beautiful aspect of the transform task is that it uses all the variables of the release to perform substitution. for each variable it replaces the token using a prefix and suffix — this is the reason for my transformation release file in the build. my web.config file has
__key1__
and
__key2__
tokens inside configuration, so i can simply configure those two variables differently for the two environments and my release is finished.
if you use grid visualization, it is immediately clear how each stage is configured.
figure 11: configure variables for each stage, the replace task will do the rest.
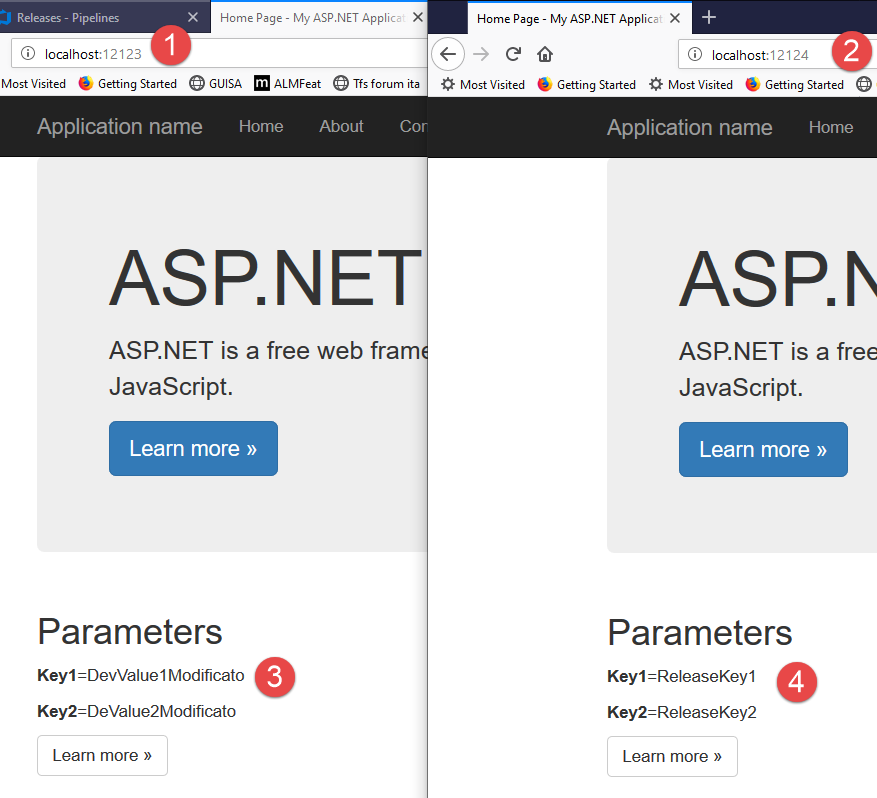
everything is done, just trigger a release and verify that the web.config of the two stages is changed accordingly.
figure 12: sites deployed in two stages with different settings, everything worked as expected.
everything worked well. i was able to build once with web.config tokenization, then release the same artifacts in different stages with different configurations managed by release definitions.
Published at DZone with permission of Ricci Gian Maria, DZone MVB. See the original article here.
Opinions expressed by DZone contributors are their own.




Comments