Build Chatbots with Dialogflow - Step By Step Guidelines
This tutorial provides a detailed guide of how to set up create tracks and integrations for chatbots with Google's Dialogflow Agent application.
Join the DZone community and get the full member experience.
Join For FreeDialogflow from Google (earlier known as API.ai) is a great platform for developing chatbots for multiple platforms. Earlier when Dialogflow was known as API.ai, they had an Android and iOS client library to integrate chatbot into mobile apps. But after merging into Google, the existing library is not getting updated; rather we are seeing Dialogflow added to Google’s Cloud platform and a new Java-based client API is being developed.
In this article, I will show you how you can integrate a chatbot developed in Dialogflow using the new Java client API.
1. First, we will create a Dialogflow Agent which we will name FirstActionApp.
Please click on this link.
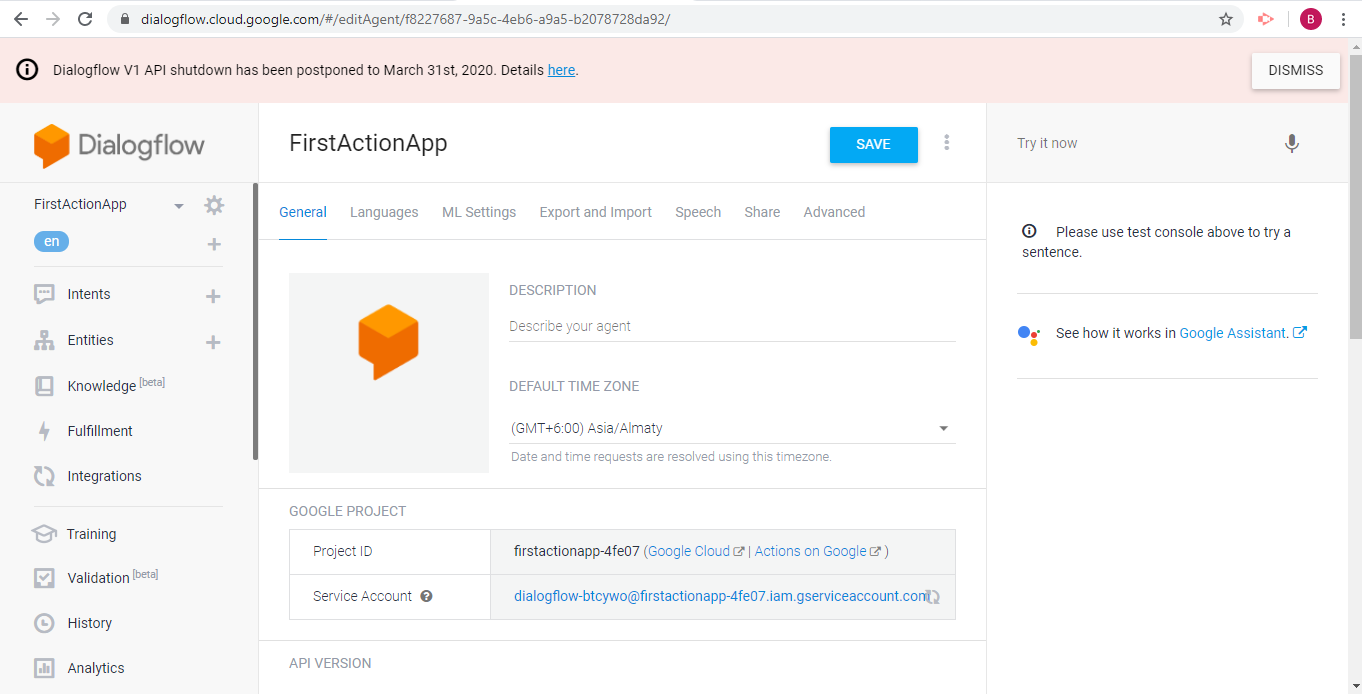
Note: Dialogflow V1 API will be shut down on March 31st, 2020.
So we are creating a Dialogflow app with V2 API version. The service account in this image is used for creating credentials for the Java client API.
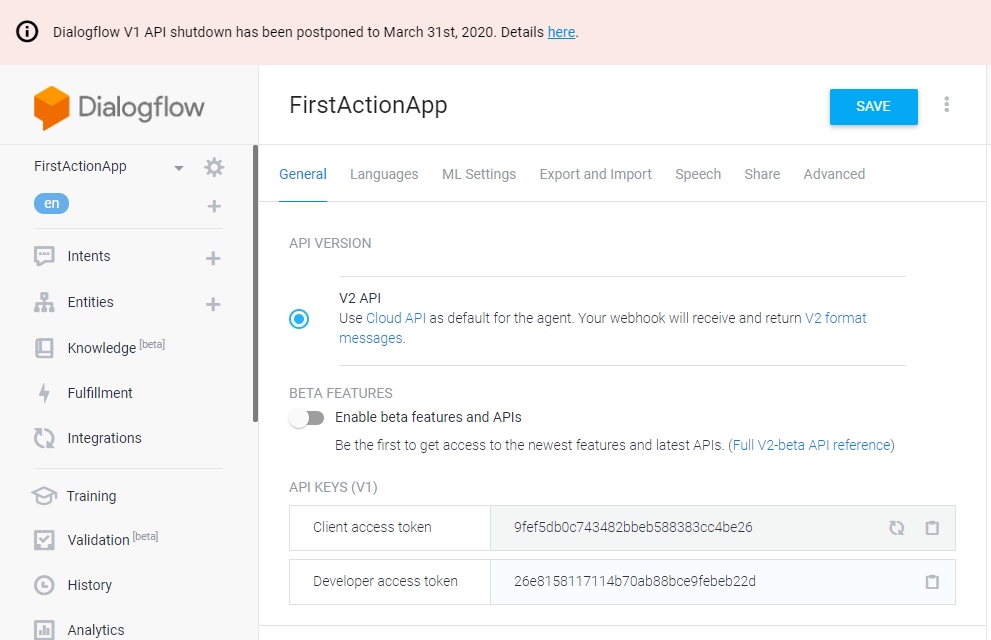
For creating a chatbot with V1 API we use the client access token which is used for integrating the Android client library. For creating a chatbot with V2 API we have to go with a service account.
Select your App.
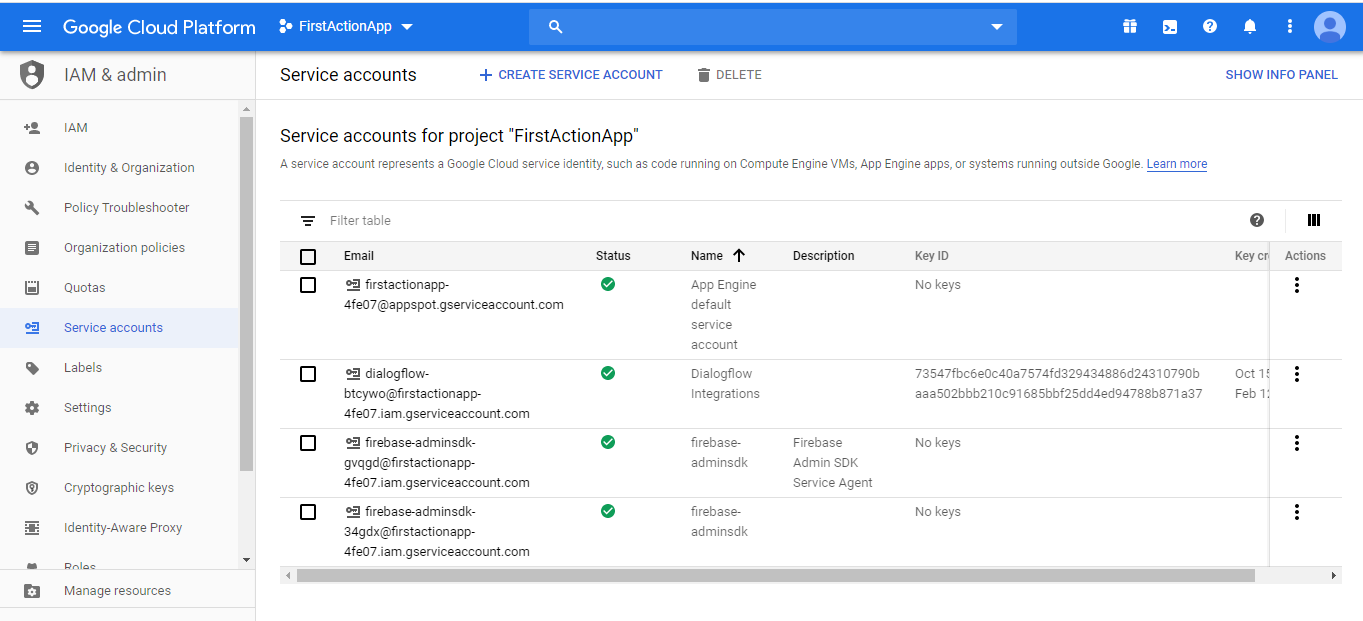
Create a new key with Dialogflow integrations and download the created JSON file.
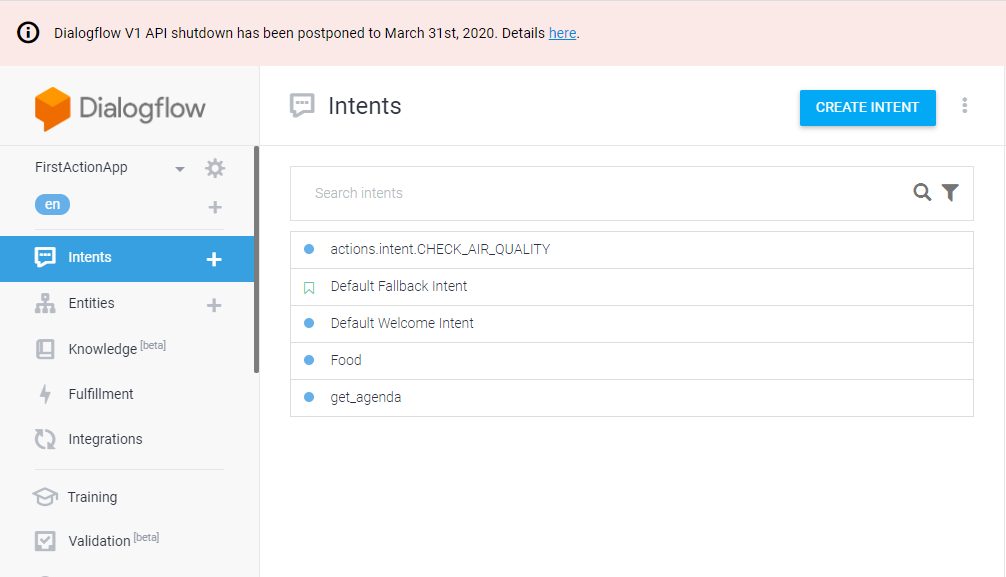
2. Now we will create the Intents and Entities to train the agent.
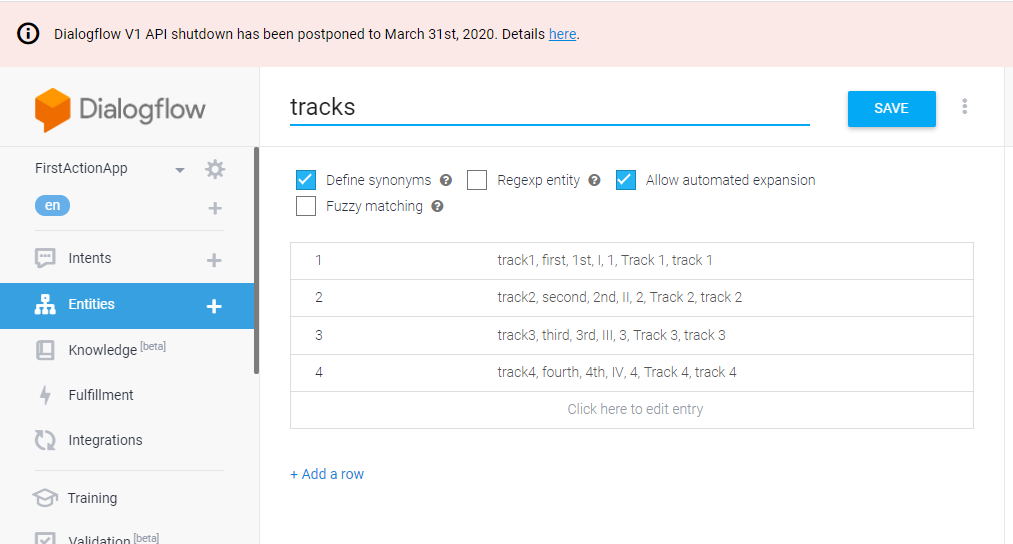
Adding synonyms to capture track values.
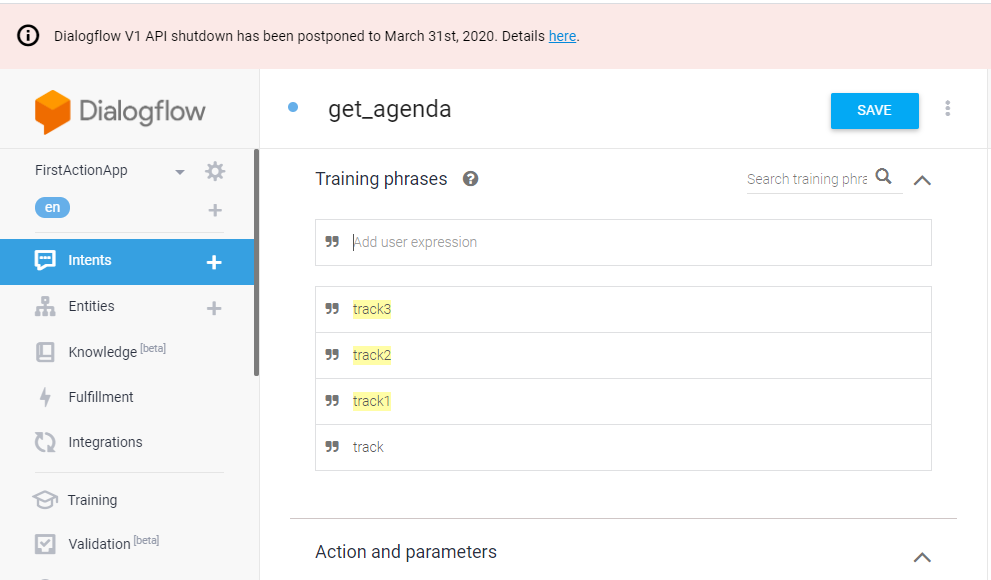
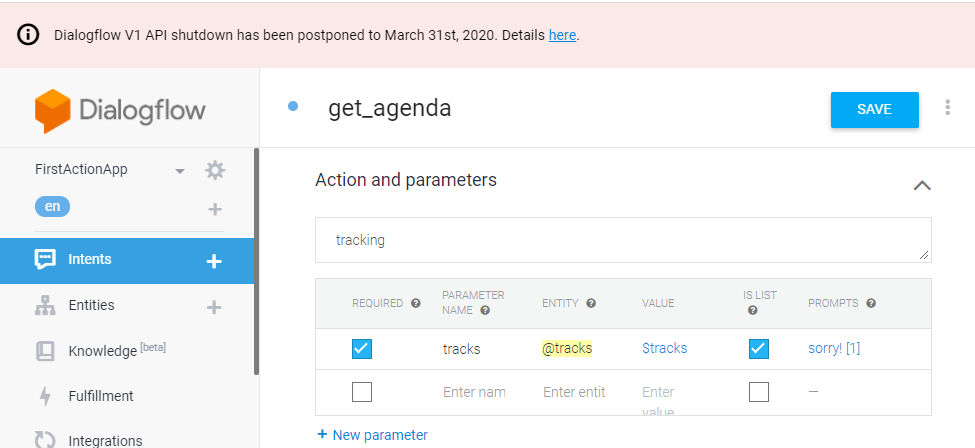
Create a parameter to fetch the track.


Enable webhook calls are deployed code through web service to provide data to the user.
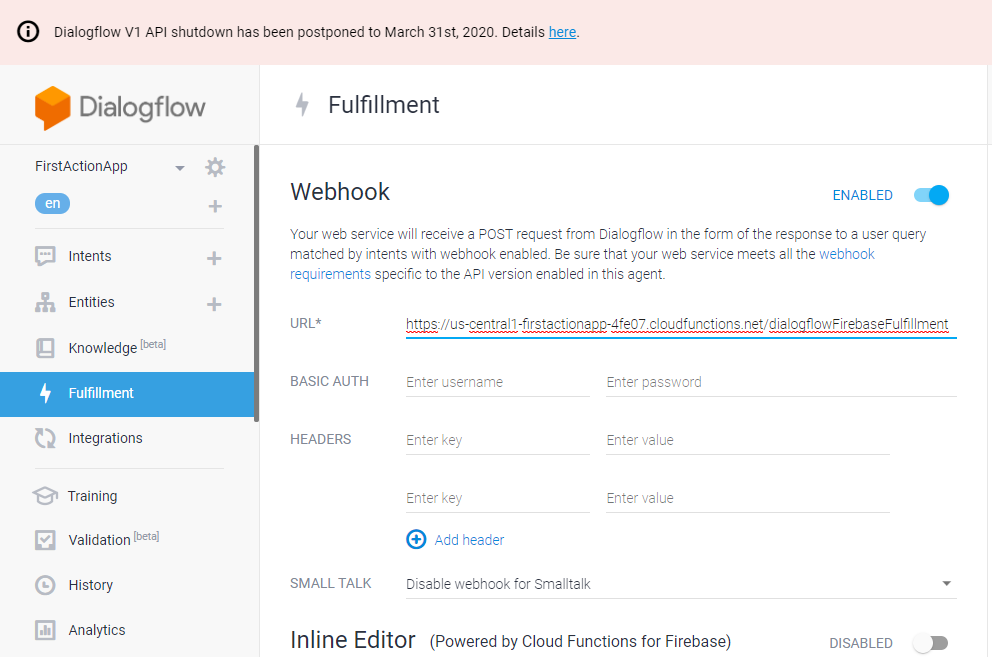
By default, your agent responds to a matched intent with a static response. If you're using one of the integrations options, you can provide a more dynamic response by using fulfillment. When you enable fulfillment for an intent, Dialogflow responds to that intent by calling a service that you define. For example, if an end-user wants to schedule a haircut on Friday, your service can check your database and respond to the end-user with availability information for Friday.
The end-user types or speaks an expression.
Dialogflow matches the end-user expression to an intent and extracts parameters.
Dialogflow sends a webhook request message to your webhook service. This message contains information about the matched intent, the action, the parameters, and the response defined for the intent.
Your service performs actions as needed, like database queries or external API calls.
Your service sends a webhook response message to Dialog Flow. This message contains the response that should be sent to the end-user.
Dialogflow sends the response to the end-user.
The end-user sees or hears the response.
3. Create a cloud function fulfillment to handle the webhook request. Based on the detected track number, an appropriate response will be send to the user.
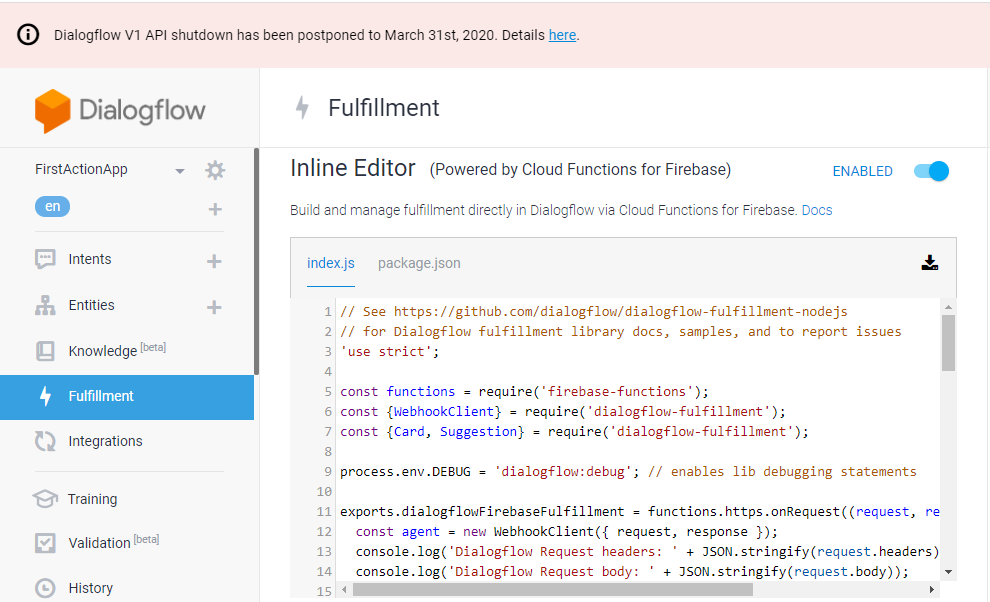
The Dialogflow Console has a built-in code editor, called the inline editor, that you can use to create fulfillment code and deploy the code to Clout functions for Firebase. The inline editor is intended for simple fulfillment testing and prototyping. Once you are ready to build a production application, you should create a webhook service.
4. Now our Agent is ready and we will now integrate it to the Android app. In the build.gradle(app), we will add the dependencies for both Android client library and Java client API as we will be developing for both.
xxxxxxxxxx
// Java V2
implementation 'com.google.cloud:google-cloud-dialogflow:0.67.0-alpha'
5. The chatbot will be initiated in the onCreate method of the Android activity. We will first configure the Dialog Flow agent using either the Client Access Token or using the JSON key. Then a new session is created using the unique ID and then the bot is made ready to communicate with the user.
Client access token can not be used because that was used by V1 API.
We are using V2 so, we will use the JSON key.
private void initV2Chatbot() {
try {
InputStream stream = getResources().openRawResource(R.raw.test_agent_credentials);
GoogleCredentials credentials = GoogleCredentials.fromStream(stream);
String projectId = ((ServiceAccountCredentials)credentials).getProjectId();
SessionsSettings.Builder settingsBuilder = SessionsSettings.newBuilder();
SessionsSettings sessionsSettings = settingsBuilder.setCredentialsProvider(FixedCredentialsProvider.create(credentials)).build();
sessionsClient = SessionsClient.create(sessionsSettings);
session = SessionName.of(projectId, uuid);
} catch (Exception e) {
e.printStackTrace();
}
}
The
test_agent_credentialsis the JSON file which we downloaded in the first step from the Service account.We have copy and paste that file in the directory app -> res -> raw(new directory) and Paste.
6. We will handle the communication with the chatbot in an Asynchronous way. This we will do in AsyncTask where the request query from the user is send as a request to the chatbot and the response is captured.
xxxxxxxxxx
public class RequestJavaV2Task extends AsyncTask<Void, Void, DetectIntentResponse> {
Activity activity;
private SessionName session;
private SessionsClient sessionsClient;
private QueryInput queryInput;
RequestJavaV2Task(Activity activity, SessionName session, SessionsClient sessionsClient, QueryInput queryInput) {
this.activity = activity;
this.session = session;
this.sessionsClient = sessionsClient;
this.queryInput = queryInput;
}
protected DetectIntentResponse doInBackground(Void... voids) {
try{
DetectIntentRequest detectIntentRequest =
DetectIntentRequest.newBuilder()
.setSession(session.toString())
.setQueryInput(queryInput)
.build();
return sessionsClient.detectIntent(detectIntentRequest);
} catch (Exception e) {
e.printStackTrace();
}
return null;
}
protected void onPostExecute(DetectIntentResponse response) {
((MainActivity) activity).callbackV2(response);
}
}
7. The user can send a query from the Android app using EditText and the response will be shown in a TextView.
xxxxxxxxxx
private void sendMessage(View view) {
String msg = queryEditText.getText().toString();
if (msg.trim().isEmpty()) {
Toast.makeText(MainActivity.this, "Please enter your query!", Toast.LENGTH_LONG).show();
} else {
showTextView(msg, USER);
queryEditText.setText("");
// Java V2
QueryInput queryInput = QueryInput.newBuilder().setText(TextInput.newBuilder().setText(msg).setLanguageCode("en-US")).build();
new RequestJavaV2Task(MainActivity.this, session, sessionsClient, queryInput).execute();
}
}
Get Response:
xxxxxxxxxx
public void callbackV2(DetectIntentResponse response) {
if (response != null) {
// process aiResponse here
String botReply = response.getQueryResult().getFulfillmentText();
showTextView(botReply, BOT);
} else {
showTextView("There was some communication issue. Please Try again!", BOT);
}
}
Opinions expressed by DZone contributors are their own.
Comments