DZone
Thanks for visiting DZone today,
Edit Profile
  • Manage Email Subscriptions
  • How to Post to DZone
  • Article Submission Guidelines
Sign Out View Profile
  • Post an Article
  • Manage My Drafts
Over 2 million developers have joined DZone.
Log In / Join
Please enter at least three characters to search
Refcards Trend Reports
Events Video Library
Refcards
Trend Reports

Events

View Events Video Library

Zones

Culture and Methodologies Agile Career Development Methodologies Team Management
Data Engineering AI/ML Big Data Data Databases IoT
Software Design and Architecture Cloud Architecture Containers Integration Microservices Performance Security
Coding Frameworks Java JavaScript Languages Tools
Testing, Deployment, and Maintenance Deployment DevOps and CI/CD Maintenance Monitoring and Observability Testing, Tools, and Frameworks
Culture and Methodologies
Agile Career Development Methodologies Team Management
Data Engineering
AI/ML Big Data Data Databases IoT
Software Design and Architecture
Cloud Architecture Containers Integration Microservices Performance Security
Coding
Frameworks Java JavaScript Languages Tools
Testing, Deployment, and Maintenance
Deployment DevOps and CI/CD Maintenance Monitoring and Observability Testing, Tools, and Frameworks

Last call! Secure your stack and shape the future! Help dev teams across the globe navigate their software supply chain security challenges.

Modernize your data layer. Learn how to design cloud-native database architectures to meet the evolving demands of AI and GenAI workloads.

Releasing software shouldn't be stressful or risky. Learn how to leverage progressive delivery techniques to ensure safer deployments.

Avoid machine learning mistakes and boost model performance! Discover key ML patterns, anti-patterns, data strategies, and more.

Related

  • Building a Flask Web Application With Docker: A Step-by-Step Guide
  • Manage Microservices With Docker Compose
  • 5 Simple Tips to Keep Dockerized Apps Secure
  • How To Dockerize Mean Stack App

Trending

  • Scalable System Design: Core Concepts for Building Reliable Software
  • Emerging Data Architectures: The Future of Data Management
  • *You* Can Shape Trend Reports: Join DZone's Software Supply Chain Security Research
  • GDPR Compliance With .NET: Securing Data the Right Way
  1. DZone
  2. Software Design and Architecture
  3. Cloud Architecture
  4. Build and Deploy a Flask Application Using Docker

Build and Deploy a Flask Application Using Docker

These basic steps can get you started with the initial setup of a Flask application. This application can further scale to store data into a persistent source.

By 
subodh kureel user avatar
subodh kureel
·
Dec. 20, 20 · Tutorial
Likes (6)
Comment
Save
Tweet
Share
33.8K Views

Join the DZone community and get the full member experience.

Join For Free


This tutorial covers simple steps to build and deploy a Flask application using Docker on Ubuntu 18.04. The sample application process data stored in a JSON file format and displayed on the browser.

Introduction

Docker is an open-source platform to develop, manage, and deploy applications using containers. For Docker installation, refer to this article.

Flask is a web micro-framework built on Python. 

Instructions

Step 1: Create a Dockerfile.

Dockerfile is a first step to containerize an application. Dockerfile contains a list of commands to assemble an image.

Dockerfile


x
19


1
# start from base
2
FROM ubuntu:18.04
3
 
          
4
LABEL maintainer="Your Name <youremailaddress@provider.com>"
5
 
          
6
RUN apt-get update -y && \
7
    apt-get install -y python-pip python-dev
8
 
          
9
 
          
10
# We copy just the requirements.txt first to leverage Docker cache
11
COPY ./requirements.txt /app/requirements.txt
12
 
          
13
WORKDIR /app
14
 
          
15
RUN pip install -r requirements.txt
16
 
          
17
COPY . /app
18
 
          
19
CMD [ "python", "./app.py" ]


Step 2: Create a configuration file to install Flask framework of version 0.10.1

file name: requirements.txt

Plain Text


xxxxxxxxxx
1


1
Flask==0.10.1


Step 3: Create a sample JSON data file.

file name: file.json 

JSON


xxxxxxxxxx
1


1
'{ "name":"John", "age":30, "city":"New York"}'


Step 4: Write Python code to process JSON file data and flush out output to index.html. 

file name: app.py

Python


xxxxxxxxxx
1
17


1
import os
2
from flask import Flask, render_template, abort, url_for, json, jsonify
3
import json
4
 
          
5
app = Flask(__name__,template_folder='.')
6
 
          
7
# read file
8
with open('file.json', 'r') as myfile:
9
    data = myfile.read()
10
 
          
11
@app.route("/")
12
def index():
13
    return render_template('index.html', title="page", jsonfile=json.dumps(data))
14
 
          
15
 
          
16
if __name__ == '__main__':
17
    app.run(debug=True, host='0.0.0.0')


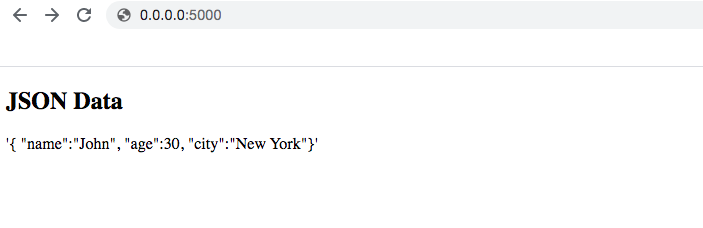
Step 5: Index.html file render and display extract on the browser.

file name: Index.html 

HTML


xxxxxxxxxx
1
16


1
<!DOCTYPE html>
2
<html>
3
<body>
4
 
          
5
<h2>JSON Data</h2>
6
 
          
7
<p id="demo"></p>
8
 
          
9
<script>
10
 var jsonfile ={{ jsonfile|tojson }};
11
 var obj = JSON.parse(jsonfile);;
12
document.getElementById("demo").innerHTML = obj;
13
</script>
14
 
          
15
</body>
16
</html>


Step 1 through 5 setup code and configuration of a Flask application on docker. Now execute the below-mentioned docker command to install and run the sample application.

$docker build -t flask_json:latest

log

Python


xxxxxxxxxx
1


1
---> 9d095b8eacb9
2
 
          
3
Successfully built 9d095b8eacb9
4
 
          
5
Successfully tagged flask_json:latest


$docker run -p 5000:5000 flask_json

log

Python


xxxxxxxxxx
1


1
* Running on http://0.0.0.0:5000/ (Press CTRL+C to quit)
2
 * Restarting with stat
3
 * Debugger is active!
4
 * Debugger PIN: 292-583-301


In this step, you have successfully deployed the sample Flask application on Docker. Below command to verify container run.

$docker ps -a

Python


xxxxxxxxxx
1


1
CONTAINER ID        IMAGE               COMMAND             CREATED              STATUS              PORTS                    NAMES
2
1ba26dd499f3        flask_json          "python ./app.py"   About a minute ago   Up About a minute   0.0.0.0:5000->5000/tcp   admiring_goodall


Lastly, now check application is running; visit the IP address(0.0.0.0:0000) at your browser. http://0.0.0.0:0000/

checking the application is running

Conclusion

These basic steps can get you started with the initial setup of a Flask application. This application can further scale to store data into a persistent source and furthermore.

application Docker (software) Flask (web framework) Build (game engine)

Opinions expressed by DZone contributors are their own.

Related

  • Building a Flask Web Application With Docker: A Step-by-Step Guide
  • Manage Microservices With Docker Compose
  • 5 Simple Tips to Keep Dockerized Apps Secure
  • How To Dockerize Mean Stack App

Partner Resources

×

Comments
Oops! Something Went Wrong

The likes didn't load as expected. Please refresh the page and try again.

ABOUT US

  • About DZone
  • Support and feedback
  • Community research
  • Sitemap

ADVERTISE

  • Advertise with DZone

CONTRIBUTE ON DZONE

  • Article Submission Guidelines
  • Become a Contributor
  • Core Program
  • Visit the Writers' Zone

LEGAL

  • Terms of Service
  • Privacy Policy

CONTACT US

  • 3343 Perimeter Hill Drive
  • Suite 100
  • Nashville, TN 37211
  • support@dzone.com

Let's be friends:

Likes
There are no likes...yet! 👀
Be the first to like this post!
It looks like you're not logged in.
Sign in to see who liked this post!