Build a REST Web Service Using Spring
This tutorial provides a step-by-step guide for building and configuring a REST web service in Java using the Spring framework.
Join the DZone community and get the full member experience.
Join For Freethis tutorial provides a step-by-step guide for building a rest web service using the spring framework.
prerequisites:
- eclipse ide (mars release)
- java 1.8
- apache tomcat 8
1. create a maven web project
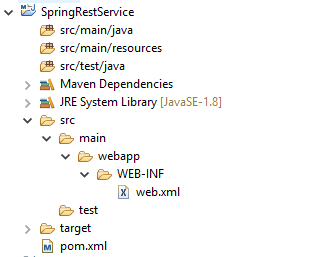
create a maven web project using this tutorial and name your project springrestservice .
the structure of the generated project looks like the following:
2. add spring dependencies
after creating the web project, the first step is to add spring dependencies into pom.xml, like so:
<properties>
        <springframework.version>4.3.0.release</springframework.version>
        <jackson.library>2.7.5</jackson.library>
   <maven.compiler.source>1.8</maven.compiler.source>
      <maven.compiler.target>1.8</maven.compiler.target>
</properties>
<dependencies>
    <dependency>
            <groupid>org.springframework</groupid>
            <artifactid>spring-core</artifactid>
            <version>${springframework.version}</version>
        </dependency>

        <dependency>
            <groupid>org.springframework</groupid>
            <artifactid>spring-web</artifactid>
            <version>${springframework.version}</version>
        </dependency>
        <dependency>
            <groupid>org.springframework</groupid>
            <artifactid>spring-webmvc</artifactid>
            <version>${springframework.version}</version>
        </dependency>

        <dependency>
            <groupid>javax.servlet</groupid>
            <artifactid>javax.servlet-api</artifactid>
            <version>3.1.0</version>
        </dependency>
        <dependency>
            <groupid>com.fasterxml.jackson.core</groupid>
            <artifactid>jackson-databind</artifactid>
            <version>${jackson.library}</version>
        </dependency>
  </dependencies>
in this tutorial, we use spring 4.3.0 and we're interested in the following modules:
- spring-core: this is the core module of the spring framework; it should be used in any spring-based application.
- spring-web, spring-webmvc: these are the web modules which allow you to create either rest resources or standard controllers.
- jackson-databind: this library provides implicit conversion between json and pojo classes. when this library is imported into pom.xml, you don't have to worry about converting json requests into pojo or pojo responses into json; this is fully handled implicitly by this library. in case you're interested in xml data type, then use jackson-xml-databind .
to learn more about spring modules, check this out.
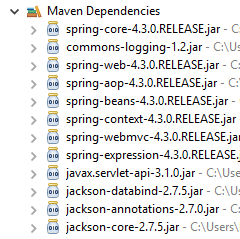
after adding the above dependencies, the following jars are automatically imported into your project under maven dependencies :
3. implement rest resources
now that we're able to create our first rest application using spring.
we're going to implement a very basic payment api which charges customers for buying items.
our api will only accept json requests and respond back with json responses thanks to the jackson library, which allows us to deal with requests and responses as pojo classes without worrying about json/pojo conversions.
following is the payment request class which should be submitted by clients on each payment request:
package com.programmer.gate;

public class paymentrequest {

 private int userid;
 private string itemid;
 private double discount;

 public string getitemid() {
  return itemid;
 }

 public void setitemid(string itemid) {
  this.itemid = itemid;
 }

 public double getdiscount() {
  return discount;
 }

 public void setdiscount(double discount) {
  this.discount = discount;
 }

 public int getuserid() {
  return userid;
 }

 public void setuserid(int userid) {
  this.userid = userid;
 }

}
and this is the base response returned back from our service:
package com.programmer.gate;

public class baseresponse {

 private string status;
 private integer code;

 public string getstatus() {
  return status;
 }

 public void setstatus(string status) {
  this.status = status;
 }

 public integer getcode() {
  return code;
 }

 public void setcode(integer code) {
  this.code = code;
 }

}
the most important class in our api is the controller which acts as the interface for client/server communication, each controller acts as a resource which exposes some services and is accessed via specific url.
in our example, we define one resource called paymentcontroller , which exposes the payment service to the customers.
our controller looks like the following:
package com.programmer.gate;

import org.springframework.web.bind.annotation.requestbody;
import org.springframework.web.bind.annotation.requestmapping;
import org.springframework.web.bind.annotation.requestmethod;
import org.springframework.web.bind.annotation.requestparam;
import org.springframework.web.bind.annotation.restcontroller;

@restcontroller
@requestmapping("/payment")
public class paymentcontroller {

 private final string sharedkey = "shared_key";

 private static final string success_status = "success";
 private static final string error_status = "error";
 private static final int code_success = 100;
 private static final int auth_failure = 102;

 @requestmapping(value = "/pay", method = requestmethod.post)
 public baseresponse pay(@requestparam(value = "key") string key, @requestbody paymentrequest request) {

  baseresponse response = new baseresponse();
  if (sharedkey.equalsignorecase(key)) {
   int userid = request.getuserid();
   string itemid = request.getitemid();
   double discount = request.getdiscount();

   // process the request
   // ....
   // return success response to the client.

   response.setstatus(success_status);
   response.setcode(code_success);
  } else {
   response.setstatus(error_status);
   response.setcode(auth_failure);
  }
  return response;
 }
}
the only service exposed by our controller is the pay() method, which looks very straightforward; it validates the client request using a predefined shared key, processes the request and responds back with the operation status.
following are the common annotations used by our controller:
- @restcontroller: this annotation marks the class as a resource, it defines implicitly both @controller and @responsebody mvc annotations, when annotating a class with @restcontroller, it's not necessary to write @responsebody beside the pojo classes returned from your methods.
- @requestmapping: this annotation defines the url of the resource in addition to the method type: get/post, in our example we expose the payment service as post which is accessed through /payment/pay.
- @requestparam: this annotation represents a specific request parameter, in our example, we map a request parameter called key to an argument key of type string.
- @requestbody: this annotation represents the body of the request, in our example, we map the body of the request to a pojo class of type paymentrequest(jackson handles the json/pojo conversion).
as noticed the response is represented as baseresponse and there is no need to annotate it, jackson converts it implicitly to json.
4. configure the rest api
after implementing our resource and defining the requests and responses of our api, now we need to configure the context url of our api and instruct our servlet container to load the resource on startup. without this configuration section, your resources wouldn't be exposed to clients.
spring 4.3.0 supports several configuration annotations, there is no more need to define configurations in web.xml .
basically, we need to create two classes:
- applicationinitializer: this is an initializer class which is loaded at the startup of the application, it defines the configuration class of the application along with the context url.
- applicationconfiguration: this is the configuration class of the application, it is basically used to instruct the servlet container to load rest resources from a specific package.
here we go:
package com.programmer.gate;

import org.springframework.context.annotation.componentscan;
import org.springframework.context.annotation.configuration;
import org.springframework.web.servlet.config.annotation.enablewebmvc;

@configuration
@enablewebmvc
@componentscan(basepackages = "com.programmer.gate")
public class applicationconfiguration {


}
package com.programmer.gate;
import org.springframework.web.servlet.support.abstractannotationconfigdispatcherservletinitializer;
public class applicationinitializer extends abstractannotationconfigdispatcherservletinitializer {
@override
protected class < ? > [] getrootconfigclasses() {
return new class[] {
applicationconfiguration.class
};
}
@override
protected class < ? > [] getservletconfigclasses() {
return null;
}
@override
protected string[] getservletmappings() {
return new string[] {
"/rest/*"
};
}
}in our example, we're instructing the servlet container to load the resources from the com.programmer.gate package, and we're exposing our api through /rest url.
5. deploy the rest api
now that our api is ready for deployment, so we deploy it on tomcat 1.8/jre8 (if you haven't set up tomcat on eclipse, then follow this guide ).
in order to test our api, we use the advanced rest client plugin from chrome and we initiate 2 different requests:
successful request: in this request we pass a valid shared key as a request parameter along with item details in the request body. this is how it looks:
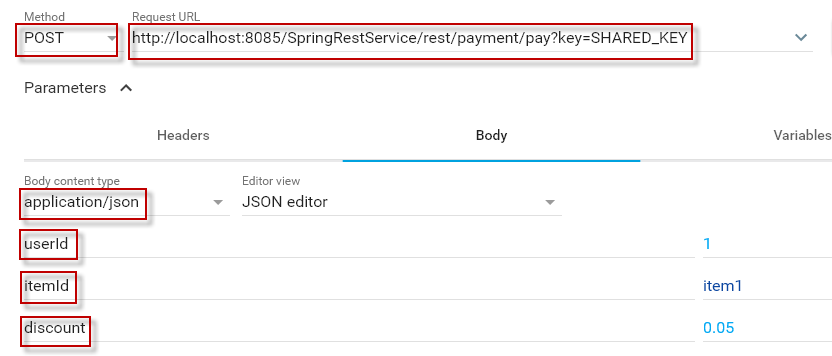
and this is our response:
{
 "status": "success",
 "code": 100
}
failure request: this request looks similar to the above but with an invalid shared key, this is what we get from our api:
{
 "status": "error",
 "code": 102
}
that's it; i hope you find it useful.
Published at DZone with permission of Hussein Terek. See the original article here.
Opinions expressed by DZone contributors are their own.
Comments