CI/CD for .NET MVC Using Jenkins
In this tutorial, take a look at how Windows Visual Studio and Jenkins come together to create an effective CI/CD process for .NET applications.
Join the DZone community and get the full member experience.
Join For FreeJenkins is an open-source, self-contained automation server that includes the features of continuous integration (CI), continuous delivery, and deployment (CD) pipelines. Continuous integration ensures that team members commit their work on a regular basis so that build can be conducted upon significant change. The CI generates a continuous feedback loop of the software and any defect or deficiencies identified are resolved early and easily. Continuous delivery (CD), on the other hand, automates the process of build, test, and deployment operations. In both cases, the Jenkins server states that the best practices are followed and the desired state is achieved. Since the process is automated Jenkins helps in increasing the pace of release. This eradicates limitation of the manual deployment and reduces the stress on the development and operation team significantly.
Jenkins provides many ways to set up a CI/CD environment for almost any code language and source code repository. It has a suite of plugins to implement CI/CD pipelines in .NET MVC application development and ensure high-quality deliverables. These plugins can be extended to support MSBuild files, Git version control, CVS, Subversion, etc. Once the MSBuild plugin is installed and configured, the Jenkins pipeline is initiated. The automation server takes care of almost the entire development life cycle starting from integration and testing to the deployment of the the .NET MVC application development. The DevOps team can focus on the product, update, and new features while many intricate processes are handled behind the scenes by the Jenkins server. For more details about automation servers, review our coverage of Jenkins vs. Bamboo.
The article provides a basic step-by-step implementation of CI/CD for the .NET MVC framework using Jenkins.
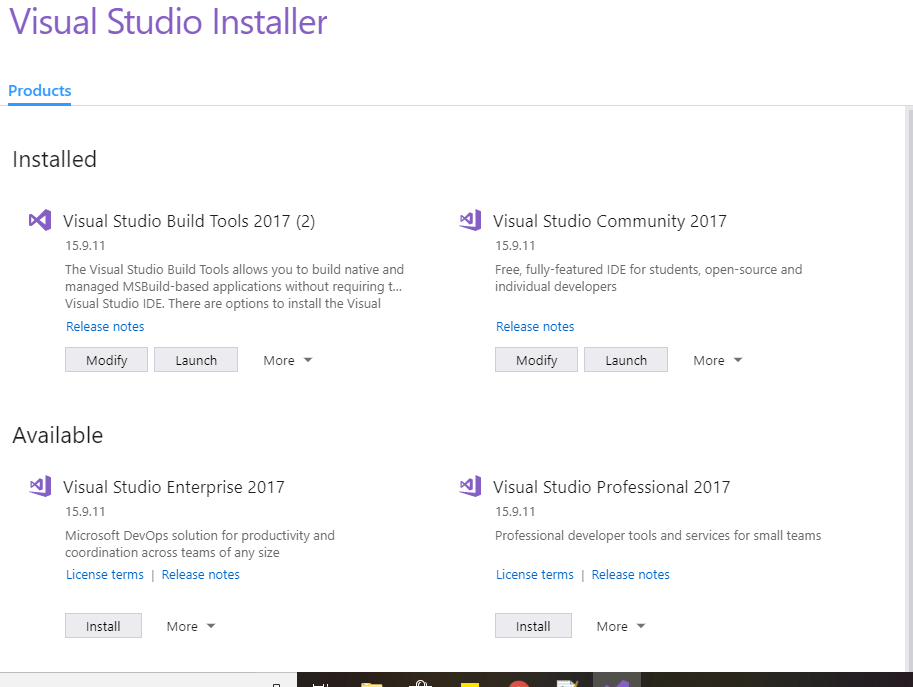
Step 1: Installing Build Tools Through Visual Studio Installer
Before we proceed with actual building and deployment, we need to make sure we have build tools installed on the machine.
This can be done through Visual Studio Build Tools, available from the Visual Studio Installer.
Then we need to install build tools to build an MVC application. This can be done by clicking the Modify button for Visual Studio Build Tools and then selecting Web development build tools.
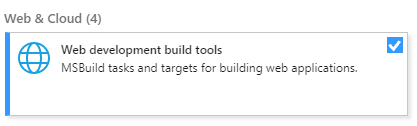
If we didn't install these build tools, the msbuild command would only work in the Developer Command Prompt.
Step 2: Installing Plugins for Jenkins
We need to install plugins to use in Jenkins.
- Go to Manage Plugins.
- Find and install the GitHub Plugin.
- Find and install the MSBuild Plugin.
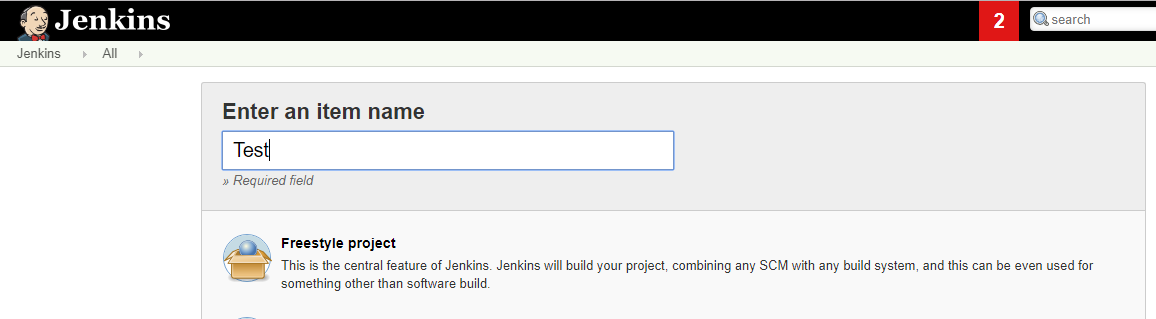
I have implemented CI/CD using Jenkins. First of all, you need to download Jenkins. There are a number of ways to use it. I am using it as a Windows service on the machine. After starting the Jenkins service, you need to add your application and the configuration. First, click on "New Item." Then, give the application an Item Name, select the "Freestyle Project" option, and then click "OK."
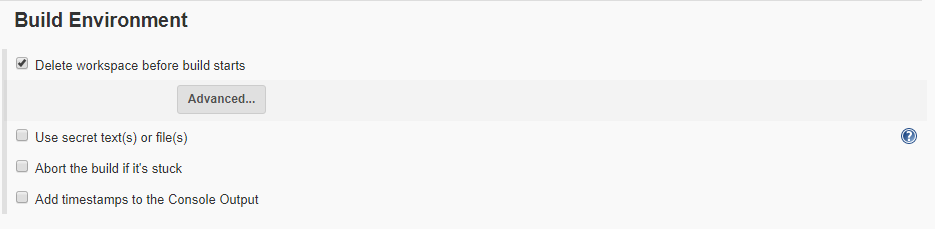
Step 3: The Configuration
Now for the configuration.
In the General section, you can enter the description of the item and discard the old builds. It will automatically discard builds.
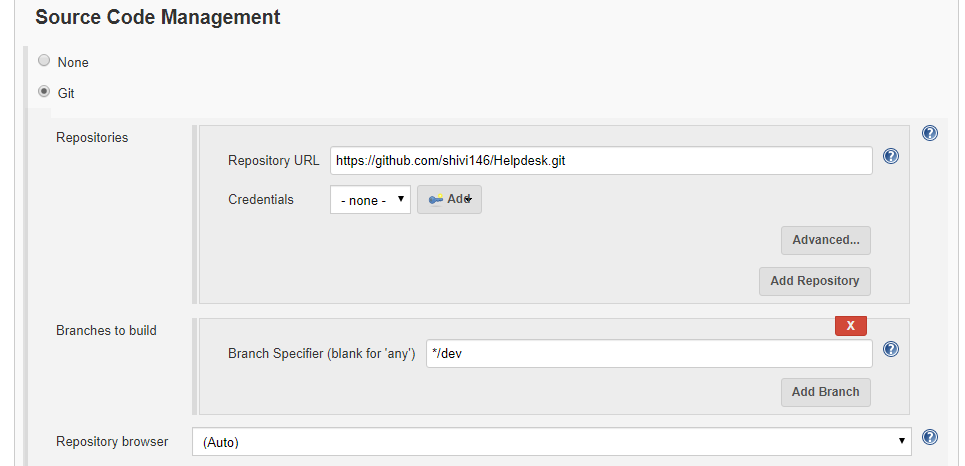
In the Source Code section, I used a Git repository. Here we have to provide the URL of the repository and the branch name from which you want to deploy the code.
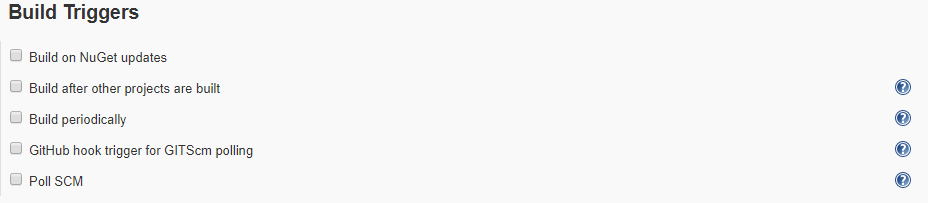
In the build environment, we want to make sure we choose to clean the Jenkins workspace before the build starts.
Step 4: Restoring NuGet Packages
When we commit the code in the repository, we don't commit the packages, so first we have to restore the NuGet packages.
As you can see, the code is committed without NuGet dependencies.

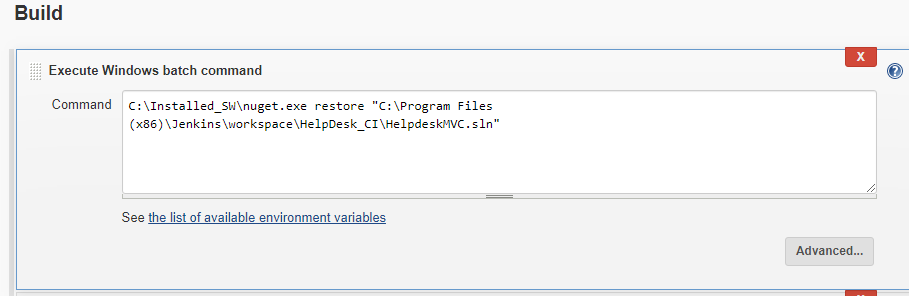
Once the command is entered, you can see the packages folder created with all NuGet dependencies.

Step 5: Using MSBuild
Now we can actually execute the MSBuild command.
This command requires that the MSBuild plugin be installed in Jenkins, the path to the sln file, and optionally, we can also provide the PackageFileName attribute in the command line with the path and package name.
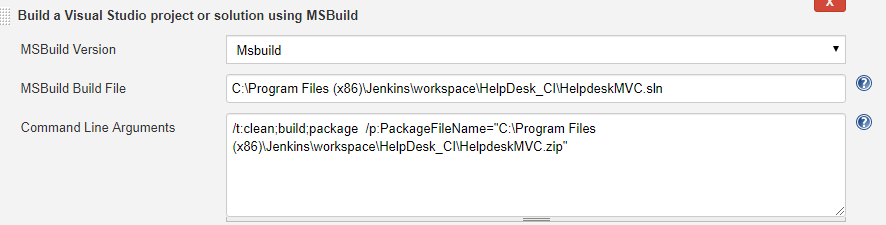
Command:
/t:clean;build;package /p:PackageFileName="C:\Program Files (x86)\Jenkins\workspace\HelpDesk_CI\HelpdeskMVC.zip"Step 6: Using MSDeploy Command
MSDeploy command can be used to deploy the zip created in the previous step to be deployed to IIS.
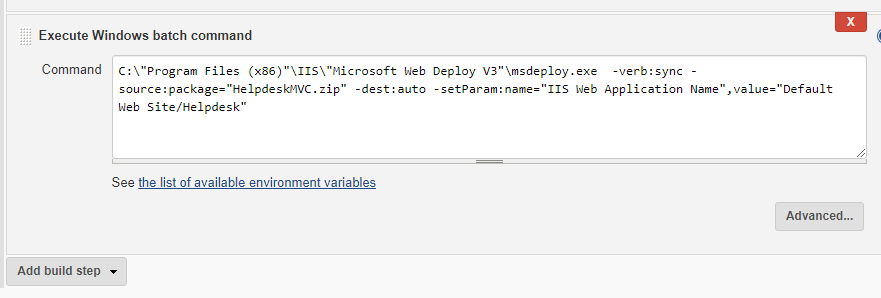
Command:
C:\"Program Files (x86)"\IIS\"Microsoft Web Deploy V3"\msdeploy.exe -verb:sync -source:package="HelpdeskMVC.zip" -dest:auto -setParam:name="IIS Web Application Name",value="Default Web Site/Helpdesk"Step 7: Install Web Deployment Tool
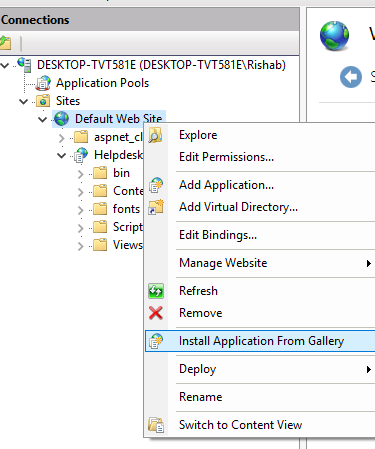
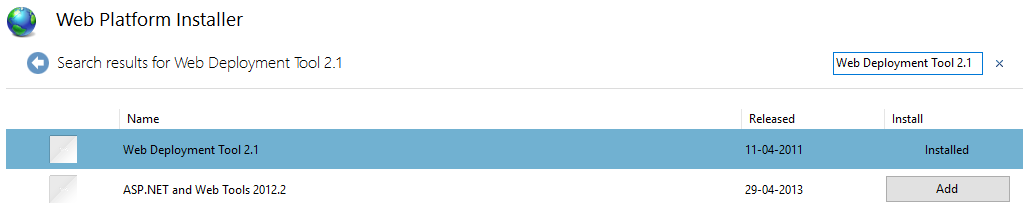
In order to deploy the zip, you need to install "Web Deployment Tool 2.1".
You can install this by right-clicking on "Default Web Site" and then going to "Install Application from Gallery".
Then search for "Web Deployment Tool 2.1" in the search box. In my case, it is already installed.
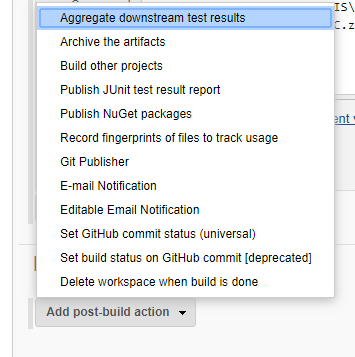
Step 8: Post Build/Deploy Actions
You can add various post-build actions like sending email notifications, archiving the deployable artifact, etc.
You have now created a very basic CI/CD for your .NET MVC application. Jenkins gives us flexibility for adding more complex builds.
Opinions expressed by DZone contributors are their own.
Comments