CI/CD Pipelines and Caching of Dependencies on Azure DevOps
Follow a brief explanation of CI/CD and how to implement caching of Maven dependencies in the pipelines while deploying your Mule application to CloudHub.
Join the DZone community and get the full member experience.
Join For FreeIn this blog, we'll be taking you through a brief explanation of CI/CD pipelines in Azure DevOps and how to implement caching of Maven dependencies in the pipelines while deploying your Mule application to CloudHub.
What Is CI/CD?
CI, short for continuous integration, is a software development practice in which all developers merge code changes in a central repository multiple times a day. CD stands for continuous delivery, which on top of continuous integration adds the practice of automating the entire software release process.
What Is Azure DevOps?
Azure DevOps provides developer services for allowing teams to plan work, collaborate on code development, and build and deploy applications. It provides the following integrated features that you can access through your web browser or IDE client:
Azure Repos
Azure Boards
Azure Pipelines
Azure Artifacts
Azure Test Plans
We’ll be using Azure Pipelines and Azure Repos for this demonstration. Azure Repos is a Git-based repository. We will use Azure Pipelines to implement our CI/CD pipeline, as the name suggests.
Prerequisites for Azure CI/CD Pipeline
Anypoint Studio to develop your application
Azure DevOps account with access to hosted parallelism
An active Anypoint Platform account
Maven and Git installed on your local system
Tutorial
The first step after you create your Azure DevOps account is to raise a request for hosted parallelism. Otherwise, whenever you execute your pipeline you will get the below error:
To raise a request, complete an Azure DevOps Parallelism Request with the correct organization name. It will take around 2 business days to get this request approved.
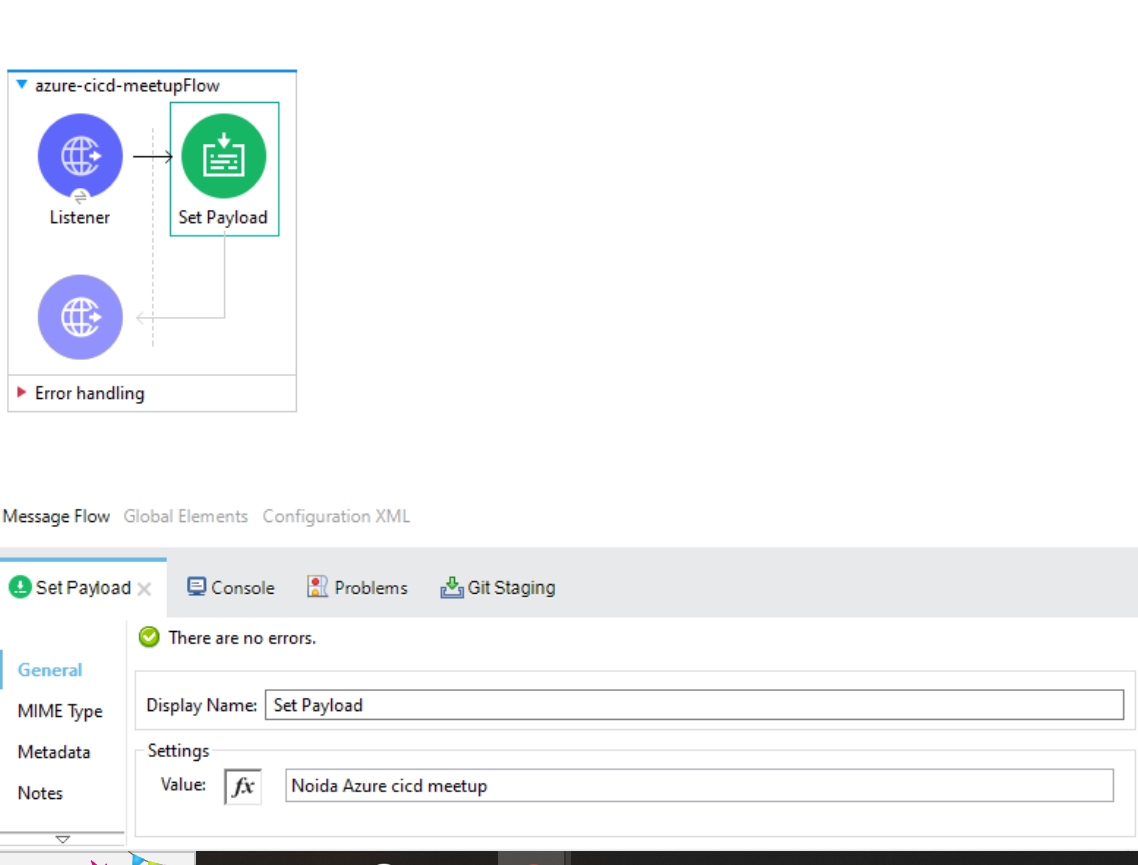
Now, create a project in Anypoint studio which you wish to deploy on your CloudHub. For this tutorial, we’ll take a simple example that consists of an HTTP Listener and a Logger component.
![Set Payload]()
Now configure your project’s pom.xml to enable the deployment of your project on CloudHub via maven. This uses mule-maven-plugin which is already a part of your pom.xml generally, in case it is missing just add the dependency and use the following configuration:
<plugin>
<groupId>org.mule.tools.maven</groupId>
<artifactId>mule-maven-plugin</artifactId>
<version>3.5.4</version>
<extensions>true</extensions>
<configuration>
<cloudHubDeployment>
<uri>https://anypoint.mulesoft.com</uri>
<muleVersion>${app.runtime}</muleVersion>
<username>${username}</username>
<password>${password}</password>
<applicationName>${cloudhub.application.name}</applicationName>
<environment>${environment}</environment>
<region>${region}</region>
<workers>${workers}</workers>
<workerType>${workerType}</workerType>
<properties>
<key>value</key>
</properties>
</cloudHubDeployment>
</configuration>
</plugin>
These variables can be defined at runtime or can be directly given in the pom.xml, For further reading on these properties or any additional flags, you can visit the official documentation.
Remember to keep your application name unique; otherwise, you’ll get an error during the pipeline execution.
Be sure to check that your Maven settings.xml file has all the correct credentials and the required repositories are added there. Otherwise, your pipeline would fail. This settings.xml file is present at your Maven home in your local system.
Now let’s create a repository on Azure Repos.
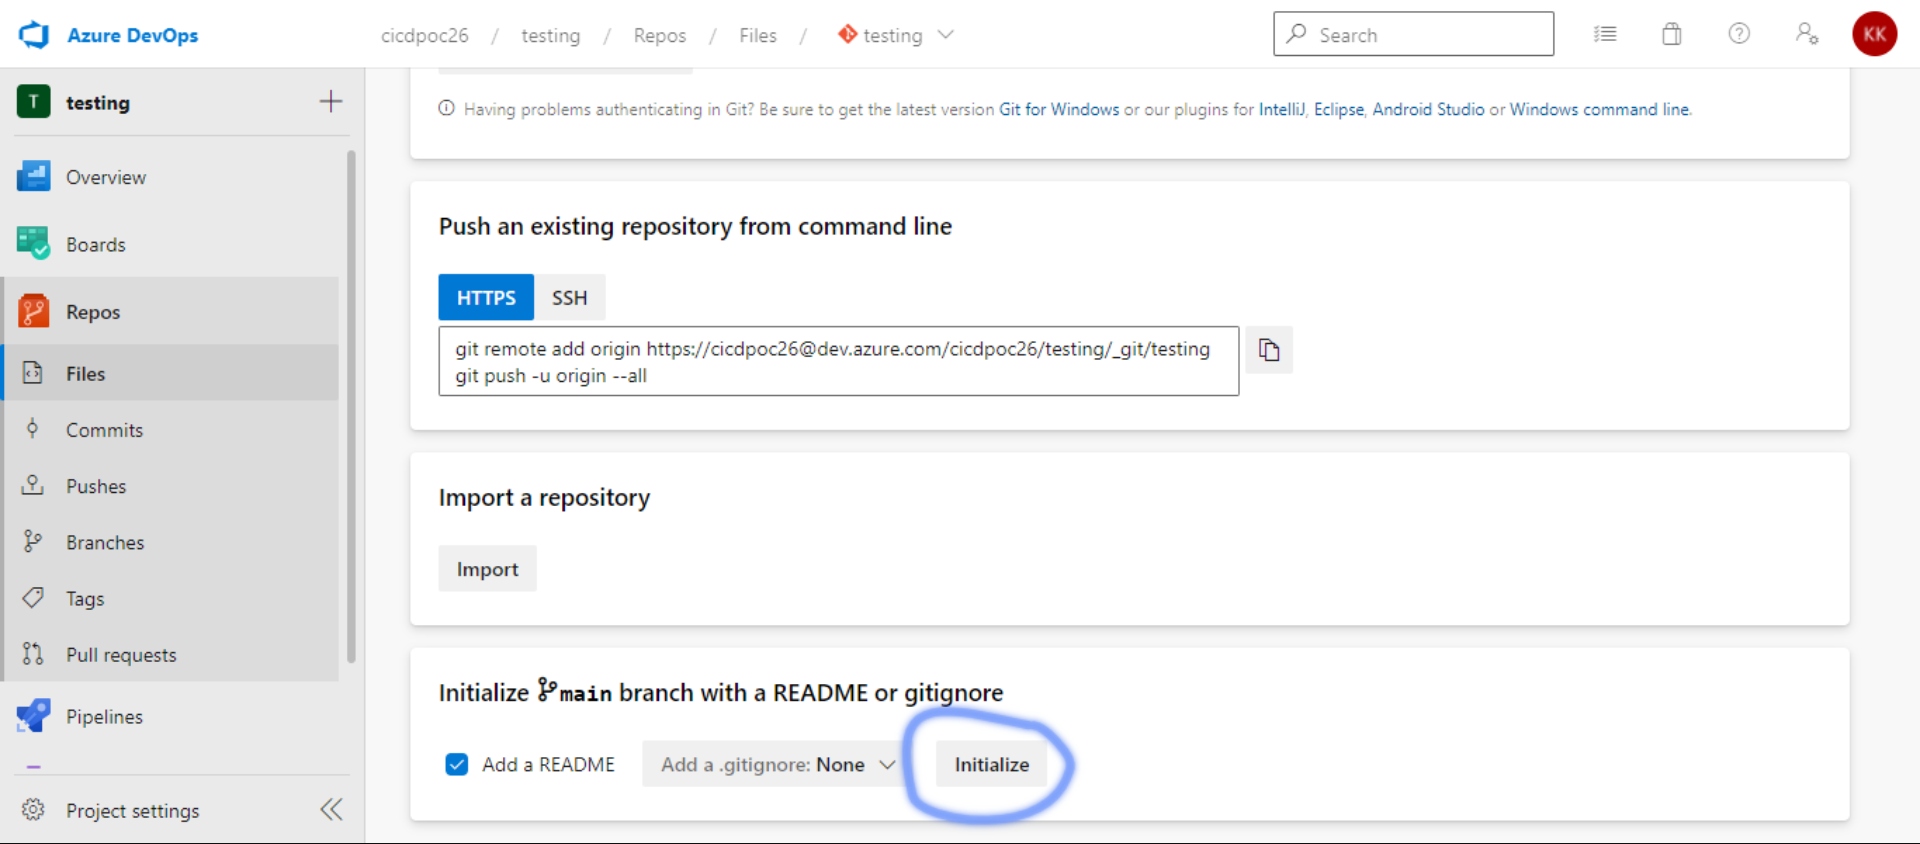
Go to Repos in your Project -> Click on initialize.
![Click on initialize]()
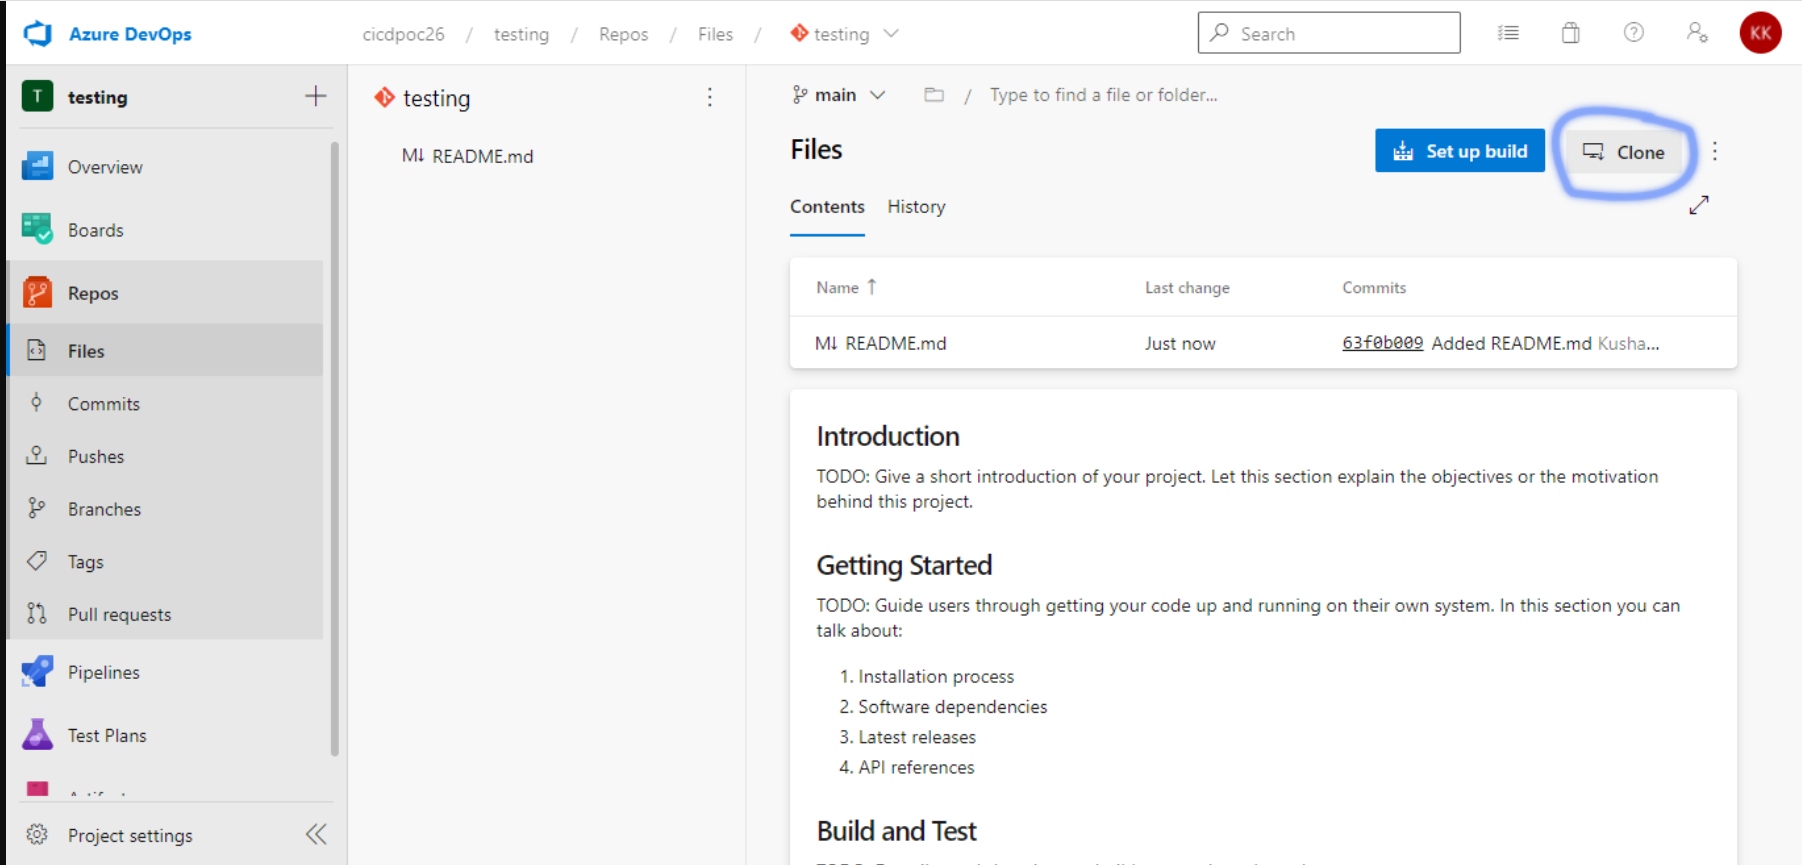
Now clone your repository into your local system by getting the clone URL from your Azure Repo.
![Clone]()
Now, using this URL, execute the
git clonecommand on your local system to clone your repository.It will ask for your DevOps credentials while cloning. Alternatively, you may use Git credentials for HTTPS/SSH according to your requirement.
Now commit and push your code into the Azure repository it would look like this after a successful code push:

We’ll now proceed to create the Pipeline.
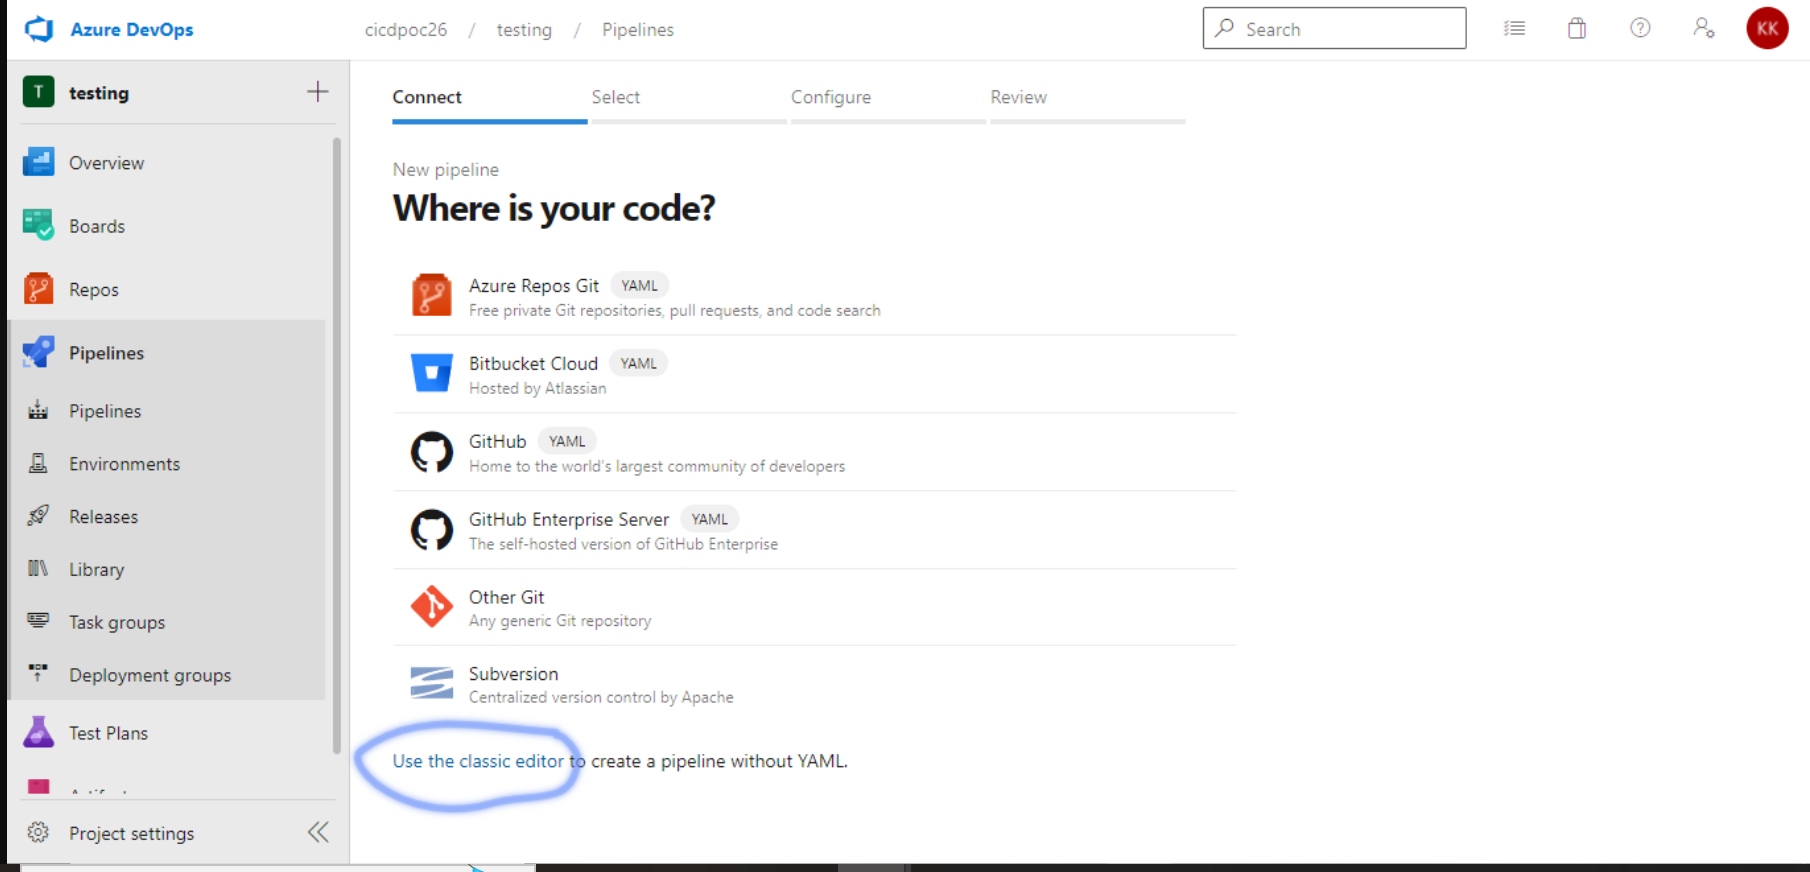
Click on "Create pipeline" and then go to the classic editor:
![Classic editor]()
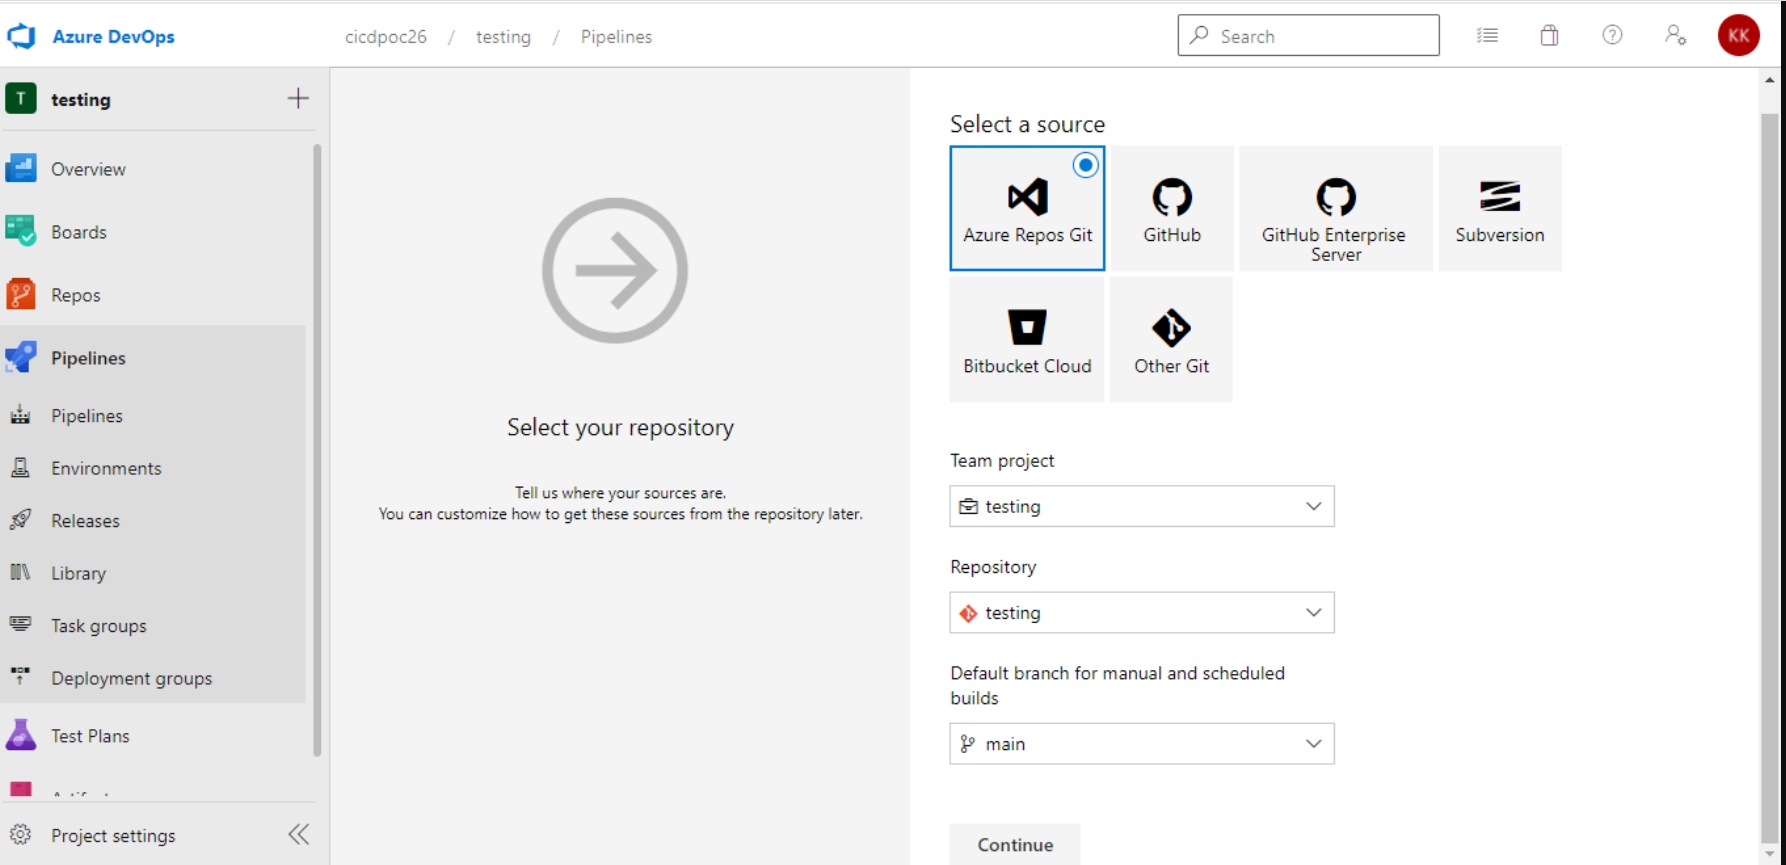
As we are using Azure Repos, we’ll select the Azure Repository here. You may proceed with any other option if you have already set up your repository somewhere else:
![Azure repos Git]()
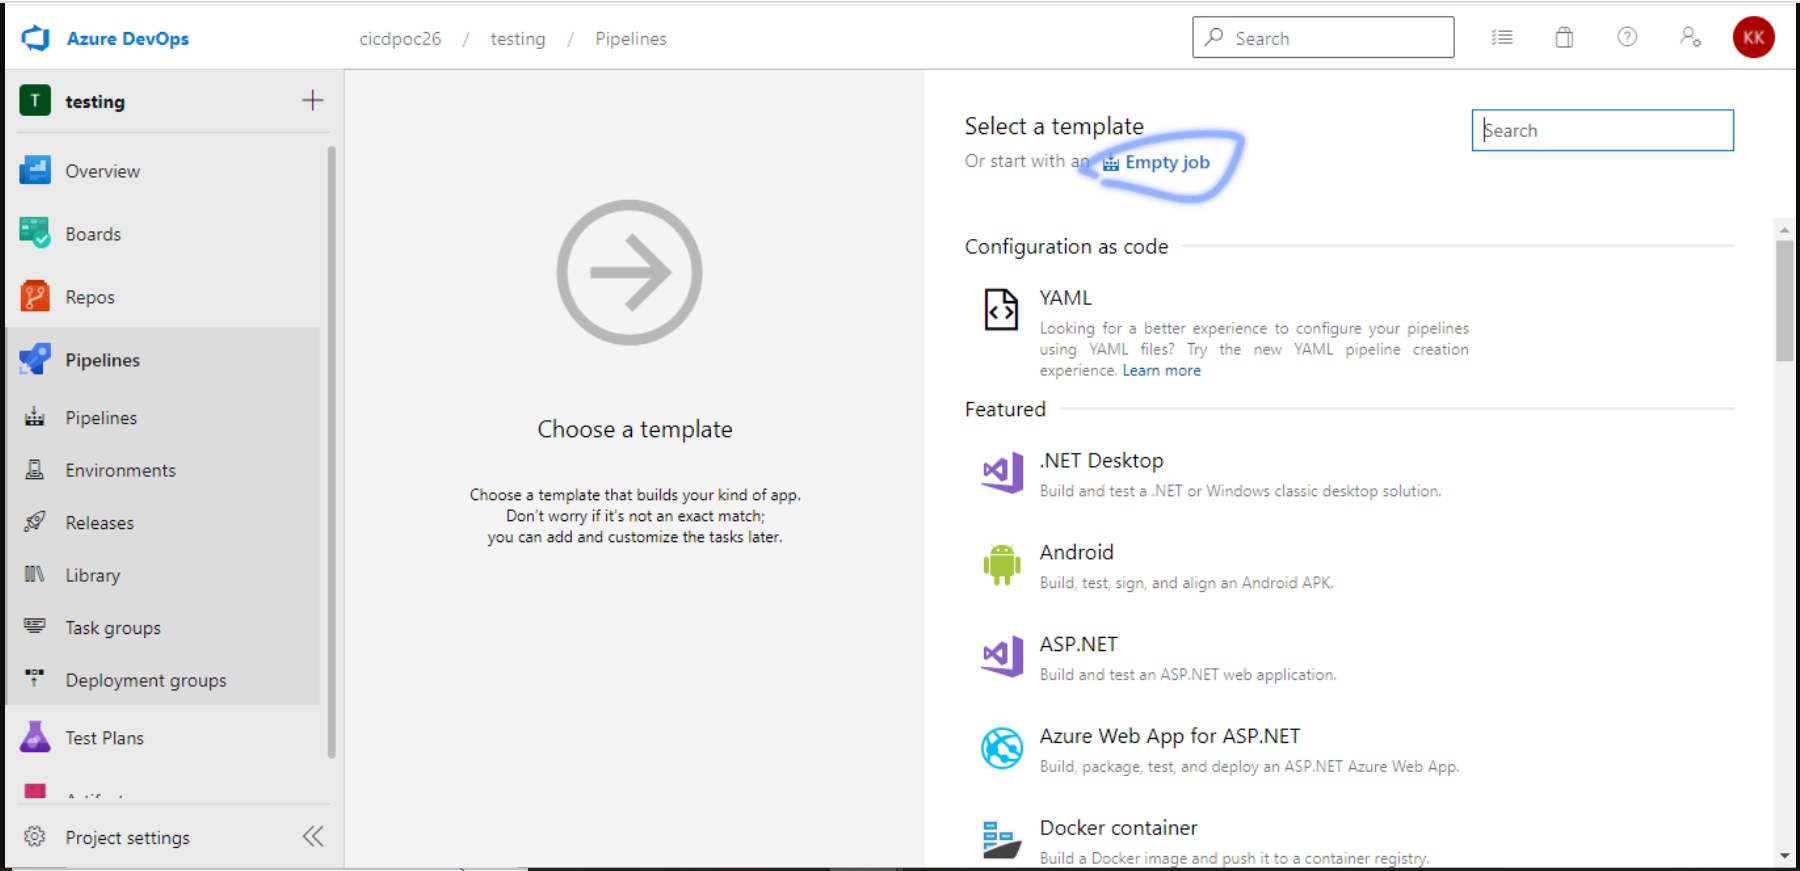
Now click on "Empty Job." If you have exposure to write pipelines using YAML to create and configure your pipelines, you may select the YAML option; but if you are looking for ease of use, just go with an empty job.
![Empty job]()
If you have any specific agent requirements (i.e., you want your pipeline to run on Ubuntu/Windows), you may select that in "Agent Specification." The default is Windows-2019, which we are using for our demo.
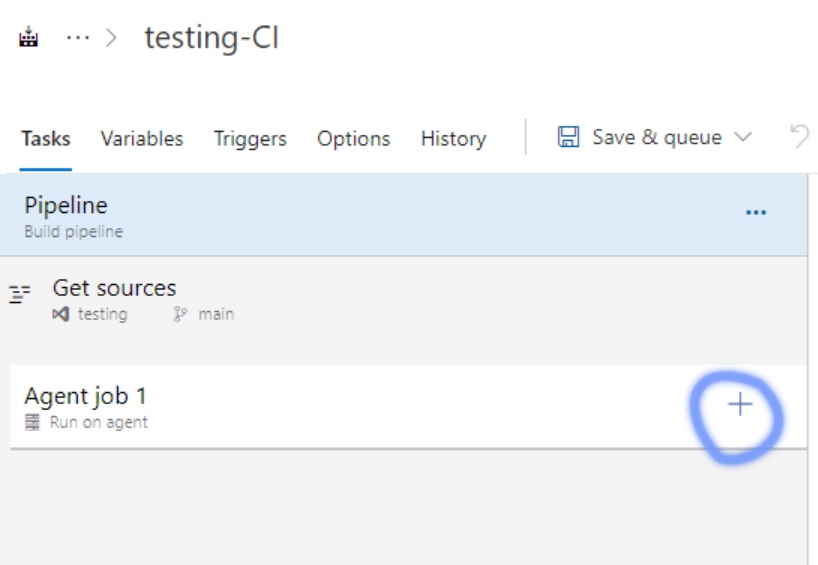
Now click on the "+" button to start adding agent jobs:
![+ button]()
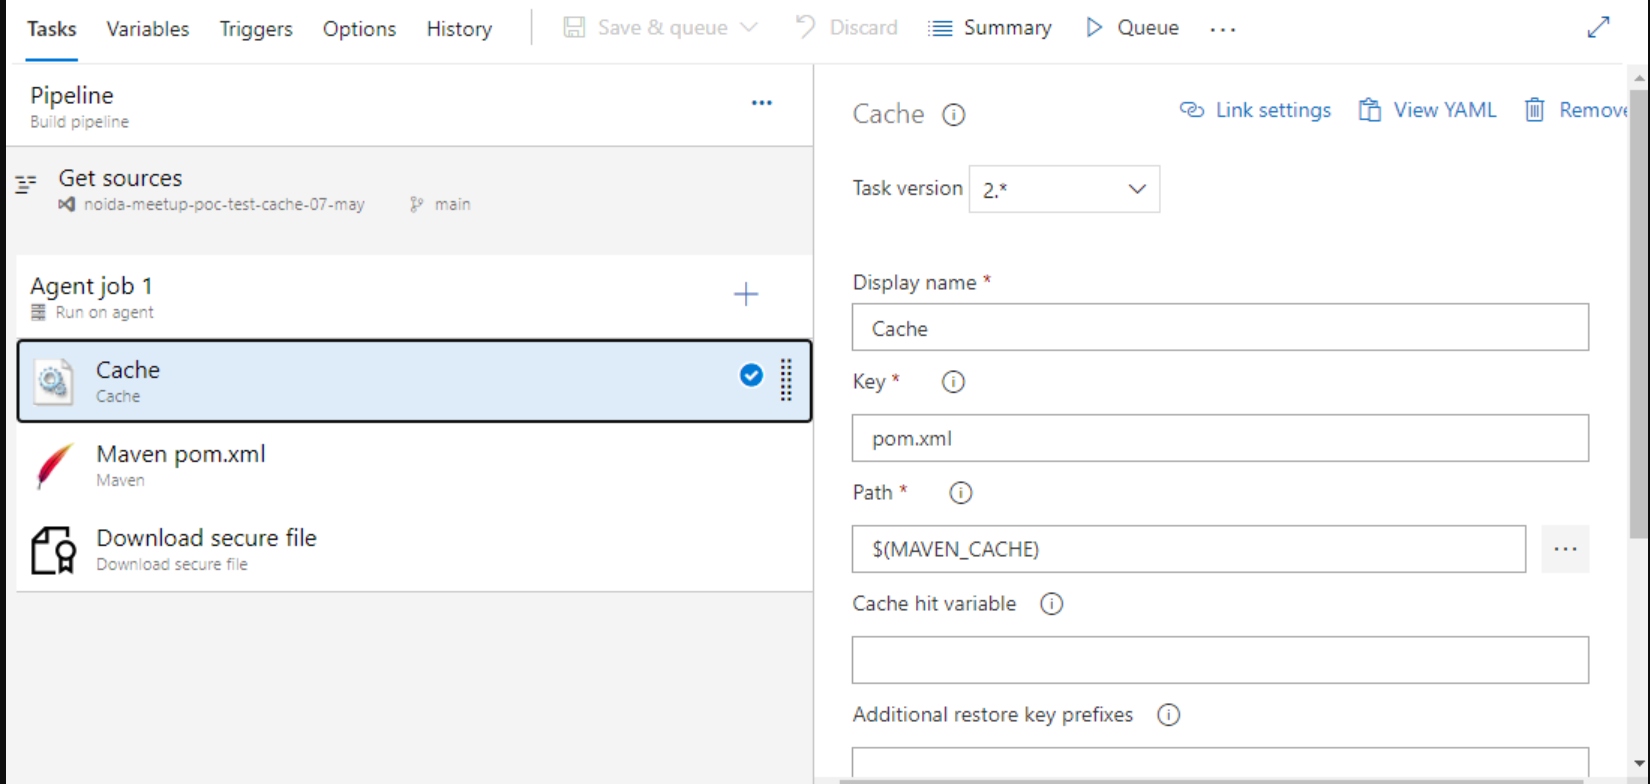
We need to add 3 jobs: Cache, Maven, and Download Secure File. The order should be: Cache, then Maven, and in the end the DownloadSecure file. Otherwise, the Cache won’t work.
For Cache, provide the below properties:
![Cache]()
We are providing pom.xml as our key so that the cache would check for any changes in pom.xml and would download the dependencies in case there is a cache miss. Otherwise, it would use the dependencies present on the path specified. For us, we have provided $(MAVEN_CACHE) as our variable. For the first-time execution of your pipeline, the cache will always be a miss.
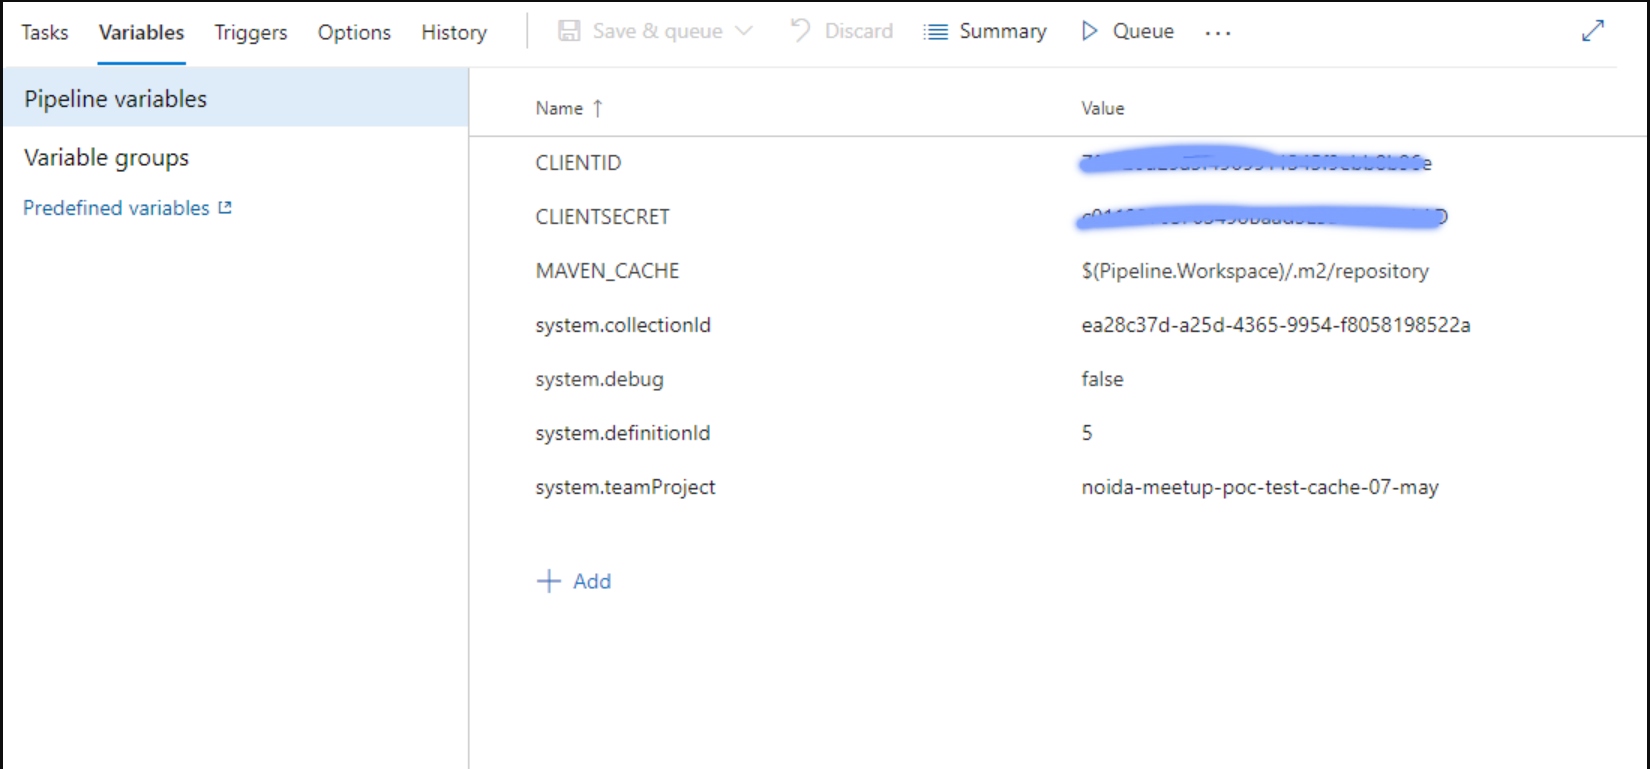
Now to provide values to the variable, go to the "Variables" section and define the value. For $(MAVEN_CACHE) the value should be $(Pipeline.Workspace)/.m2/repository. This is the location where the maven dependencies are stored on Azure. $(Pipeline.Workspace) is a predefined variable.
![Predefined variable]()
Also, remember to provide all the variables which you want to provide here which will be used in your Maven command.
We have an option of creating variable groups in case you want to create some secure properties, such as your username and password. You can provide them in Library->Variable Groups.
After this group is created you have to Link it in the Pipelines-> Variables section.
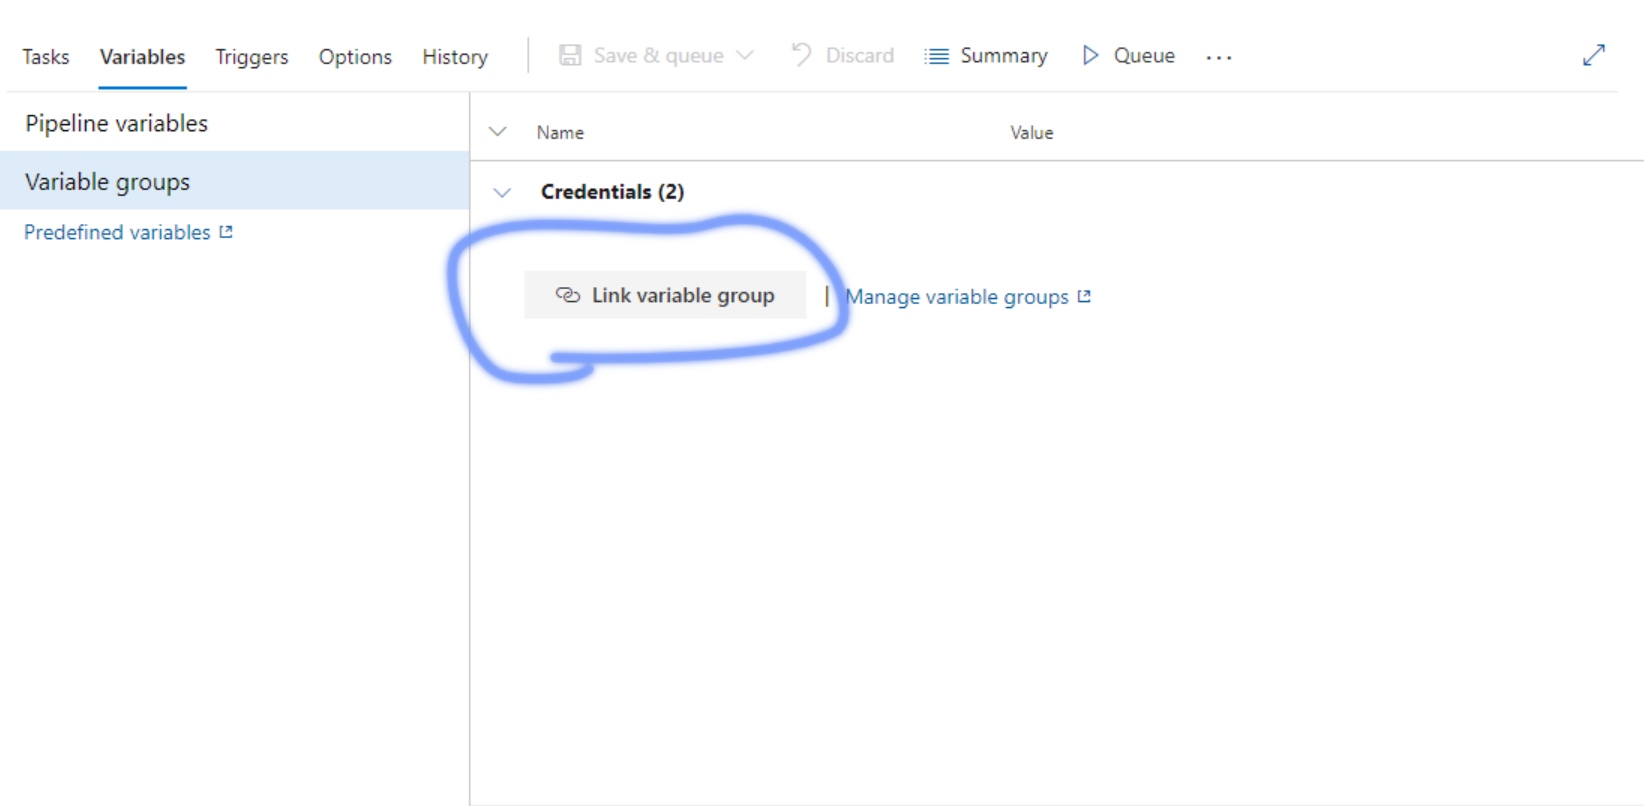
- Now go to "Secure files" in library, and add your Maven settings.xml from your local system here.
![Secure files]()
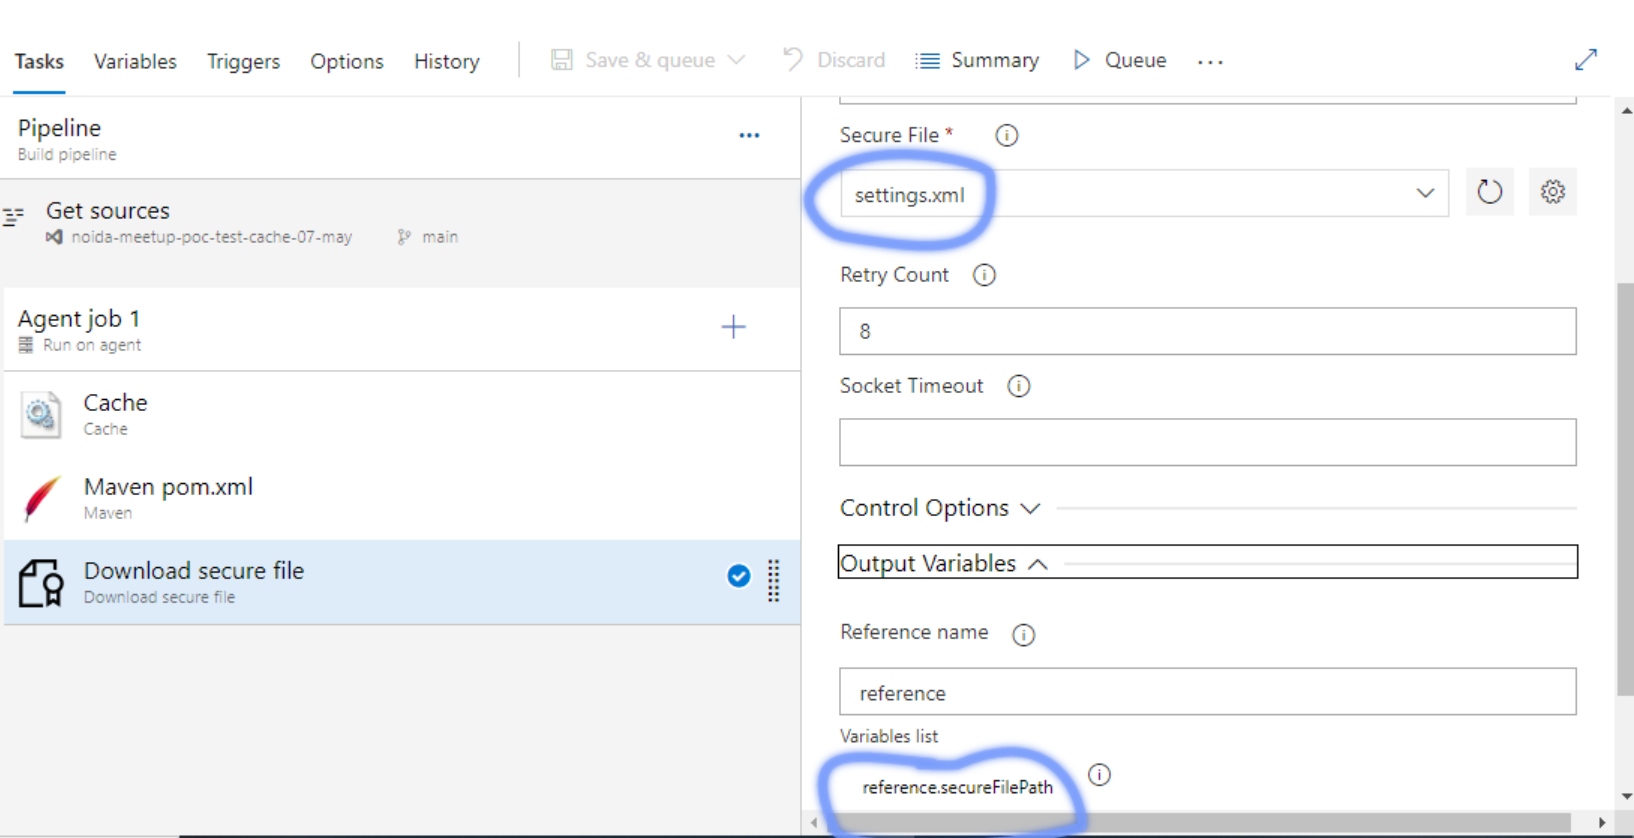
- Go to your pipeline-> Download Secure File in your agent job and provide the settings.xml from the dropdown under "Secure file." In the "Output Variables" section, provide a variable name and copy the full variable from the "Variables list" which will be used to access the secure file via the Maven command.
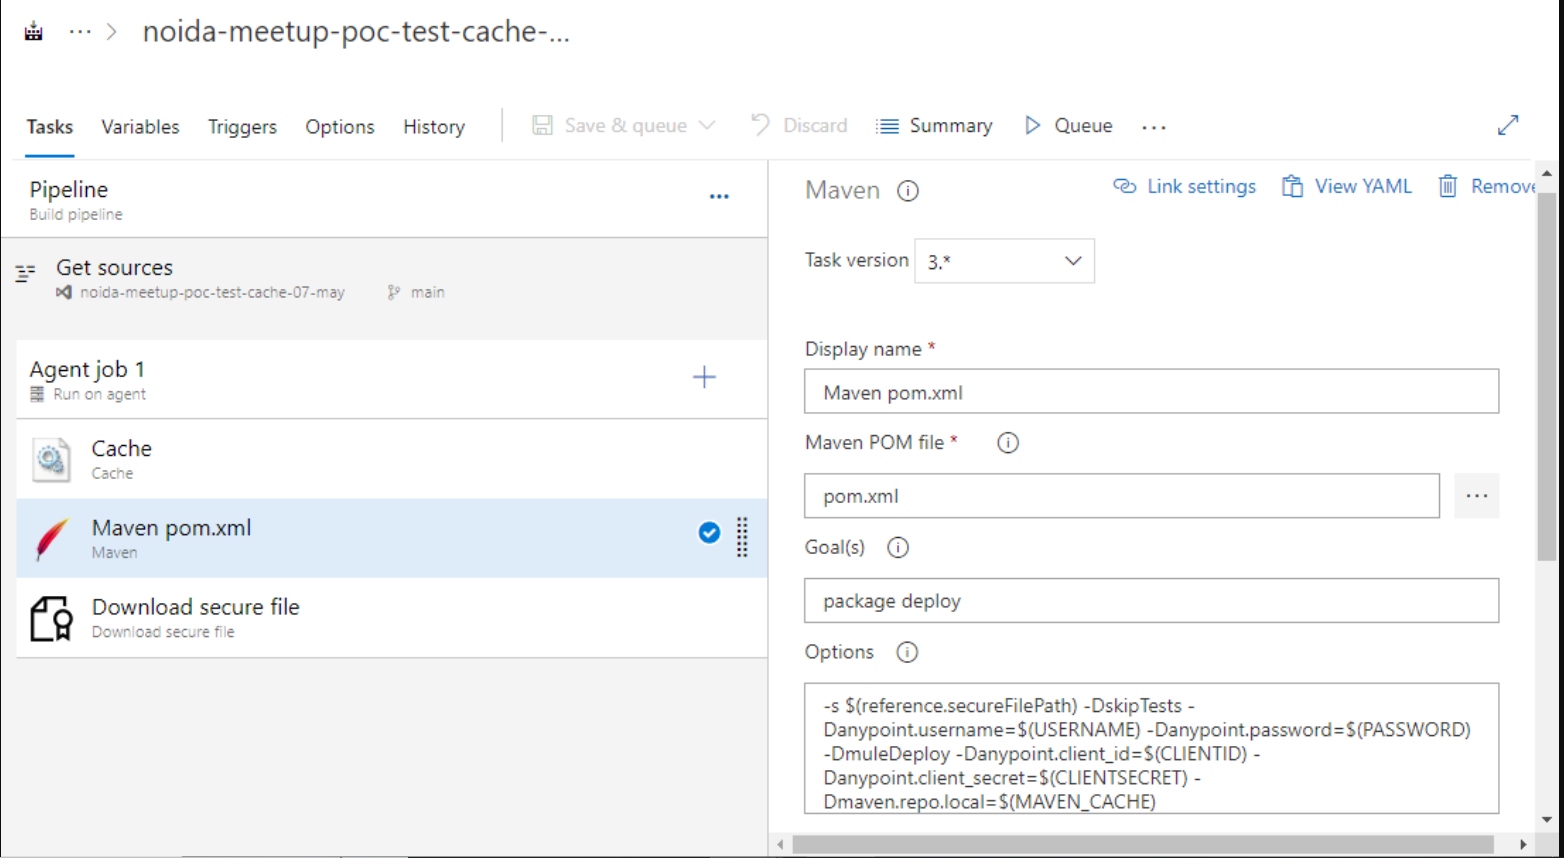
- Now go back to the pipeline and go to your Maven task and provide the Maven details such as the location of the pom file, your goals, and the command.
7. You can enable Trigger as well so that you can leverage the Continuous Integration ability of your Pipeline. Whenever you push your code the pipeline will automatically Execute. Go to Pipeline-> Triggers and check Enable continuous integration.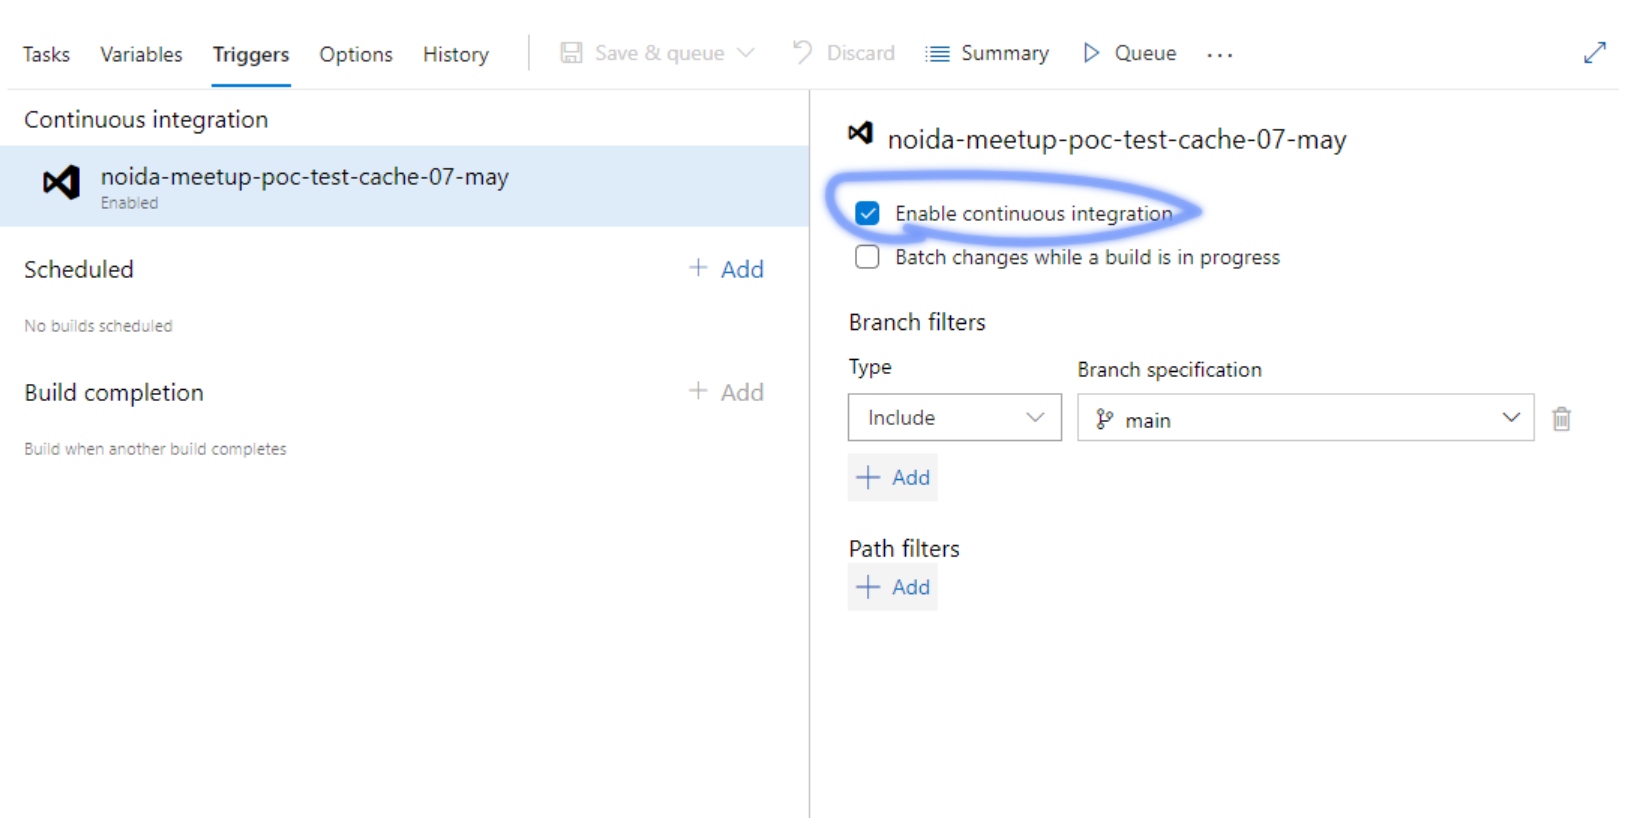
8. Now click on "Save & Queue," and your pipeline will execute. In case there is any error, that will be displayed in the pipeline itself.
9. Now you may check the Runtime Manager on CloudHub, and if the job was successful and all the parameters were correct you should see the application there!
Happy Learning! Do reach out to us if you have any questions/suggestions.
Published at DZone with permission of Rahul kumar. See the original article here.
Opinions expressed by DZone contributors are their own.


Comments