Microservice Configuration: Spring Cloud Config Server Tutorial
In this post, we build out a sample microservices application with Spring and create a configuration server for it.
Join the DZone community and get the full member experience.
Join For FreeConfiguring Microservices: The Challenges
Managing application configuration in a traditional monolith is pretty straight forward. The configuration is usually externalized in a properties files on the same server as the application. If you need to update the configuration you simply amend the properties file and restart the application. Things can get a little tricker with microservices, but why is that?
Microservices are composed of many small, autonomous services, each with their own configuration. Rather than a centralised properties file (like the monolith), configuration is scattered across multiple services, running on multiple servers. In a production environment, where you likely have multiple instances of each service, configuration management can become a hefty task.
If you're running in the cloud things don't get any easier. Cloud environments tend to be quite fluid with instances regularly added and removed as a result of auto-scaling activity. This fluidity can make it difficult to apply updates and ensure that each service has the correct configuration.
Introducing Centralized Configuration
Centralized configuration is a pattern where the configuration for all services is managed in a central repository rather than being scattered across individual services. Each service pulls its configuration from the central repository on startup.
Spring provides a basis for implementing this pattern via Spring Cloud Config, a subproject of Spring Cloud. With Spring Cloud Config you can create a Spring Boot application that exposes application properties via a REST API. Services can consume their application properties from the REST API rather than loading them locally from the file system or classpath. Configuration is not stored in the Cloud Config Server itself but pulled from a Git repository. This allows you to manage your application configuration with all the benefits of version control. Spring Cloud Config can be configured to use either a local git repository (useful during dev) or a remote repository. In a production environment, you'd want the Config Server to access configuration from a private Git repository.
Sample Application
In this post, I'm going to show you how to set up a Configuration Service that pulls configuration from GitHub. I'll also show you how the configuration is consumed by another service, in this case, a simple bank account service. The diagram below describes the main components involved.

The full source code for the sample app is available on GitHub.
Creating the Cloud Config Service
We'll begin by creating a simple Spring Boot app for the Config Service. Inside the main application class use @EnableConfigServer to enable the config server functionality.
@EnableConfigServer
@SpringBootApplication
public class ConfigServerApplication {

    public static void main(String[] args) {
        SpringApplication.run(ConfigServerApplication.class, args);
    }
}
Configuring the POM
In order to make the required Spring Cloud dependencies available you'll need to add the following dependencies to the POM.
<?xml version="1.0" encoding="UTF-8"?>
<project xmlns="http://maven.apache.org/POM/4.0.0" xmlns:xsi="http://www.w3.org/2001/XMLSchema-instance" xsi:schemaLocation="http://maven.apache.org/POM/4.0.0                         http://maven.apache.org/xsd/maven-4.0.0.xsd">
   <modelVersion>4.0.0</modelVersion>
   <groupId>com.briansjavablog.microservices</groupId>
   <artifactId>config-server</artifactId>
   <version>0.0.1-SNAPSHOT</version>
   <packaging>jar</packaging>
   <name>config-server</name>
   <description>Demo config server provides centralised configuration for various micro services</description>
   <parent>
      <groupId>org.springframework.boot</groupId>
      <artifactId>spring-boot-starter-parent</artifactId>
      <version>2.0.3.RELEASE</version>
   </parent>
   <properties>
      <project.build.sourceEncoding>UTF-8</project.build.sourceEncoding>
      <project.reporting.outputEncoding>UTF-8</project.reporting.outputEncoding>
      <java.version>1.8</java.version>
      <spring-cloud.version>Finchley.RELEASE</spring-cloud.version>
   </properties>
   <dependencies>
      <dependency>
         <groupId>org.springframework.cloud</groupId>
         <artifactId>spring-cloud-config-server</artifactId>
      </dependency>
      <dependency>
         <groupId>org.springframework.boot</groupId>
         <artifactId>spring-boot-devtools</artifactId>
         <scope>runtime</scope>
      </dependency>
   </dependencies>
   <dependencyManagement>
      <dependencies>
         <dependency>
            <groupId>org.springframework.cloud</groupId>
            <artifactId>spring-cloud-dependencies</artifactId>
            <version>${spring-cloud.version}</version>
            <type>pom</type>
            <scope>import</scope>
         </dependency>
      </dependencies>
   </dependencyManagement>
   <build>
      <plugins>
         <plugin>
            <groupId>org.springframework.boot</groupId>
            <artifactId>spring-boot-maven-plugin</artifactId>
         </plugin>
      </plugins>
   </build>
</project>-
Configuring the Config Server
Next, you'll need to configure the Config Service via theapplication.properties file.
spring.application.name=config-server
server.port=8888

# URI of GIT repo containing properties
spring.cloud.config.server.git.uri=https://github.com/briansjavablog/micro-services-spring-cloud-config

# path to properties from root of repo
spring.cloud.config.server.git.searchPaths: configuration

logging.level.org.springframework.web=INFO- Line 1 -
spring.application.namespecifies the name of the application. This isn't essential but it's good practice to name your Boot applications. This name will appear on the actuator/info endpoint and will be displayed in Spring Boot Admin if you use it. - Line 2 -
server.portspecifies the port that the admin app will run on. - Line 5 -
spring.cloud.config.server.git.urispecifies the URL of the remote repository containing the property files that will be served up by the Config Service. In this example, I am pointing at my own repository on GitHub, but this could also point to a local Git repo. A local repository is useful during development and can be specified with the file prefix as follows file:///c:/dev/micor-services/git-local-config-repo. - Line 8 -
spring.cloud.config.server.git.searchPathsspecifies the path to the properties files from the root of the repository. So, in the example above, I want to access property files in theconfigurationdirectory of the repository.
Running the Cloud Config Service
Now that we have the Config Server configured, it's time to fire it up and do a quick test. You can start the application in Eclipse or on the command line the same way you'd start any other Boot app. You should see the application start on port 8888 as follows.

Testing the Config Service
You can test the service by calling http://localhost:8888/bank-account-service/default. This GET request contains the name of the name and profile of the properties we want to load. In this instance, we are looking for the properties belonging to the bank-account-service and we want the properties associated with the default profile.
When a request is received, the Config Service uses the GIT URI from the application.properties file to perform a git clone of the remote repository. The screenshot below shows the repository being cloned to the local temp directory and includes the following line.

The properties in bank-account-service.properties are then read by the Config Service and returned to the client in JSON as shown below.
Config Service Response
{
   "name": "bank-account-service",
   "profiles": ["default"],
   "label": null,
   "version": "7b0732778b442726f8dd0bf7d1a36fc00f15c5b8",
   "state": null,
   "propertySources": [{
      "name": "https://github.com/briansjavablog/micro-services-spring-cloud-config/configuration/bank-account-service.properties",
      "source": {
          "bank-account-service.minBalance": "99",
          "bank-account-service.maxBalance": "200"
      }
   }]
}
The name attribute contains the name of the properties we requested. In this instance, we requested properties for the bank-account-service. Note that this matches the name of the default properties file in GitHub.
The profiles attribute is the Spring profile specified in the request. In this instance, we used the default profile, but we can specify any valid profile we want here. If you look at the property files on GitHub you'll see three files.
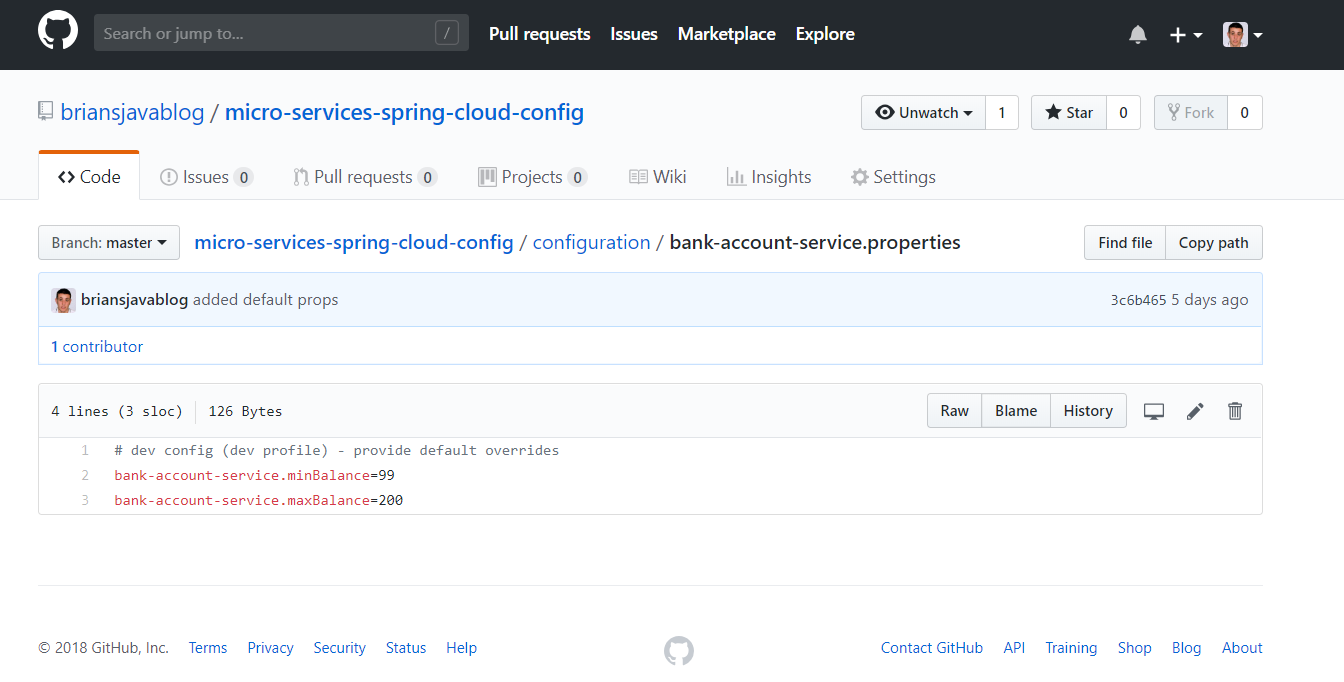
- bank-account-service.properties - this file contains the default properties and is used as the property source when the default profile is specified on the request.
- bank-account-service-dev.properties - this file has a '-dev' postfix and contains the properties returned when the dev profile is specified on the request.
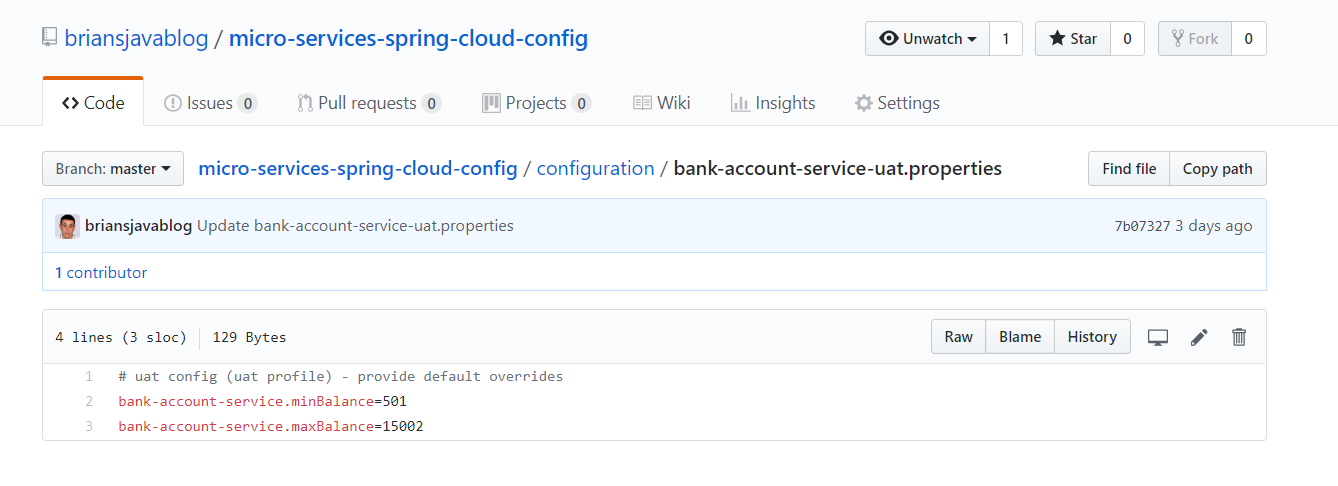
- bank-account-service-uat.properties - this file has a '-uat' postfix and contains the properties returned when the uat profile is specified on the request.
If we specify dev or uat as the profile, the Config Service will return properties from the file matching that profile.
The version attribute is the current commit sha of the properties being returned. If you check GitHub this will match the commit sha of the latest commit. Finally, the propertySources attribute contains the GitHub source URI of the properties being returned along with the actual property values.
Creating a Bank Account Service
Now that the Config Service is up and running, its time to put it to work. We'll create a simple Bank Account Service that will call the Config Service on startup to retrieve its properties. The Bank Account Service has two REST endpoints, one to create a bank account and one to retrieve a bank account.
@RestController
@Slf4j
public class BankAccountController {

  @Autowired
  public BankAccountService bankAccountService;

  @PostMapping("/bank-account")
  public ResponseEntity << ? > createBankAccount(@RequestBody BankAccount bankAccount, HttpServletRequest request) throws URISyntaxException {

    bankAccountService.createBankAccount(bankAccount);
    log.info("created bank account {}", bankAccount);
    URI uri = new URI(request.getRequestURL() + "bank-account/" + bankAccount.getAccountId());
    return ResponseEntity.created(uri).build();
  }

  @GetMapping("/bank-account/{accountId}")
  public ResponseEntity<BankAccount> getBankAccount(@PathVariable("accountId") String accountId) {

    BankAccount account = bankAccountService.retrieveBankAccount(accountId);
    log.info("retrieved bank account {}", account);
    return ResponseEntity.ok(account);
  }

}
The REST controller uses a simple BankAccountService to create and retrieve bank account details. When creating a new account, the service performs a check to see if the balance of the new account is between a set of minimum and maximum values.
/**
 * Add account to cache
 *
 * @param account
 */
public void createBankAccount(BankAccount account) {

  /* check balance is within allowed limits */
  if(account.getAccountBlance().doubleValue() >= config.getMinBalance() &&
      account.getAccountBlance().doubleValue() <= config.getMaxBalance()) {

    log.info("Account balance [{}] is is greater than lower bound [{}] and less than upper bound [{}]",
        account.getAccountBlance(), config.getMinBalance(), config.getMaxBalance());

    accountCache.put(account.getAccountId(), account);
  }
  else {

    log.info("Account balance [{}] is outside of lower bound [{}] and upper bound [{}]",
        account.getAccountBlance(), config.getMinBalance(), config.getMaxBalance());
    throw new InvalidAccountBalanceException("Bank Account Balance is outside of allowed thresholds");
  }
}
Bank Account Service Config
These minimum and maximum values are configurable and will be read from an injected Configuration object.
@Service
@Slf4j
public class BankAccountService {

  @Autowired
  private Configuration config;
The Configuration object is defined as follows.
@Component
@ConfigurationProperties(prefix="bank-account-service")
public class Configuration {

  @Setter
  @Getter
  private Double minBalance;

  @Setter
  @Getter
  private Double maxBalance;

}
There are two important things to note.
- the
@ConfigurationPropertiesprefix matches the name of the properties file in GitHub - the key for each property in the property file is <fileName>.<propertyName> where the property name is the same as the instance variable name in the
@Configurationclass.
A screenshot from GitHub shows the file name and property names corresponding to the values in the @Configuration class.

Bank Account Service Local Configuration
We're going to use the Config Service to retrieve the Bank Account Service configuration. There are however a few properties which must be set locally.
spring.application.name=bank-account-service
server.port=8080
spring.config.cloud.uri=htp://localhost:8888
spring.cloud.config.profile=uat
management.endpoints.web.exposure.include=*
Lines 1 and 2 are standard Boot configs and define the application name and port. Line 3 defines the URL of the Config Service. This is the URL that the Bank Account Service will call on startup to retrieve the minBalance and maxBalance properties. Line 4 defines the profile that will be used to call the Config Service. So given the configuration above, the Config Service will be called for the bank-account-service and UAT profile as follows.
http://localhost:8888/bank-account-service/uat.Testing the Bank Account Service
Start the Bank Account Service on the command line or in Eclipse. In the log, you should see a call to the Config Service on http://localhost:8888 using the uat profile configured in application.properties.
 Calling Config Service on startup
We can now test the application and confirm that the uat configuration was retrieved from the Config Service. Run the following cURL command to create a new bank account.
curl -i -H "Content-Type: application/json" -X POST -d '{"accountId":"B12345","accountName":"Joe Bloggs","accountType":"CURRENT_ACCOUNT","accountBlance":1250.38}' localhost:8080/bank-accountNote that we specify an account balance of £1250.38. This should be inside the allowed limits given that the UAT properties are defined as follows.

The log extract below shows an account object is created successfully and the min and max values are logged as 501.0 and 15002.0 respectively. These values match those defined in the uat properties in GitHub.

Updating Service Configuration
The main benefit of centralized configuration is that properties can be updated in one place (Git) and then those changes can be picked up by the Config Service right away. Every time an application requests properties from the Config Service, the Config Service will check if its locally cloned copy of the remote repository is up to date. If the local copy isn't up to date the Config Service will pull the latest properties from the remote repository and serve them back to the client. As a result, applications will always get the latest properties from the remote repository on startup. But what about updating properties for applications that are already running?
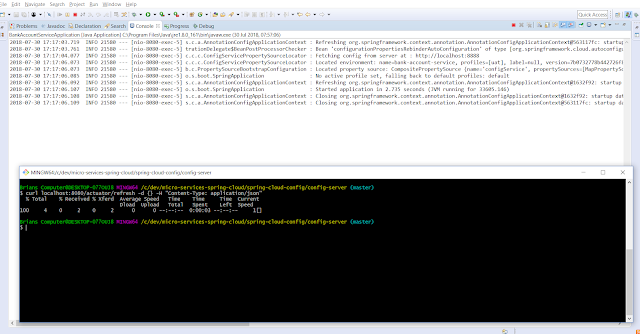
Thankfully, Spring Boot provides a way to reload application properties in a running application. The reload is triggered with a HTTP POST to the refresh actuator endpoint as follows.
curl localhost:8080/actuator/refresh -d {} -H "Content-Type: application/jsonThe screenshot below shows the /refresh endpoint being called. In the application log, you can see a call to the Config Service to retrieve the latest properties for the UAT profile.

Automating Service Configuration Updates
After pushing config changes to GitHub it would be tedious if we had to grab the IP of each service and call its /refresh endpoint manually. We could easily create a script to poll the properties repository for changes and then use some kind of service discovery mechanism to get all registered service instances and call their /refresh endpoint. Some simple scripting used alongside a centralized Config Service should allow you to push configuration changes out across your microservices with minimal effort.
Wrapping Up
In this post, we looked at how Spring Cloud Config can be used to create a centralized configuration service that uses GitHub as its property repository. We also saw how properties can be managed for different environments using profiles, how these properties can be retrieved by a simple service and how updates can be applied to running services. The full source code for this post is available on GitHub so feel free to pull it down and experiment. If you have any questions or suggestions please leave a comment below.
Published at DZone with permission of Brian Hannaway, DZone MVB. See the original article here.
Opinions expressed by DZone contributors are their own.

Comments