Connecting Sequelize to a PostgreSQL Cluster
In this tutorial, I connect a Node.js app with Sequelize to a PostgreSQL cluster to write to the primary node and read from standby nodes.
Join the DZone community and get the full member experience.
Join For FreePrologue
In a previous post, I showed how to automate a PostgreSQL fault-tolerant cluster with Vagrant and Ansible.
This kind of setup makes our database cluster resilient to server failure and keeps the data available with no need for human interaction. But what about the apps using this database? Are they fault-tolerant too?
ORMs like Sequelize have read replication features, which allows you to define your primary and standby nodes in the database connection. But what happens if your primary node, which is responsible for write operations, is offline and your app needs to continue saving data on your database?
One way to solve this is by adding an extra layer to the system - a load balancing layer - using PostgreSQL third-party tools like pgbouncer or Pgpool-II or even a properly configured HAproxy instance. Besides the complexity brought by this method, you could also be introducing an undesired single point of failure.
Another way is using a floating IP address/virtual IP address to assign to the current primary database node, so the application knows which node it must connect to when performing write operations even if another node takes up the primary role.
We will be using Digital Ocean for server creation and floating IP assignment, but the strategy also works with other cloud providers who support floating IP.
Objectives
- connecting a NodeJS application with Sequelize to a PostgreSQL cluster in order to write to the primary node and read from standby nodes;
- create and assign a Digital Ocean Floating IP (aka FLIP) to our current primary database node;
- make repmgr interact with Digital Ocean CLI to reassign FLIP to a new primary node on promotions;
- keep this switchover transparent to the NodeJS application, so the whole system works without human help.
Pre-Requisites
- A Digital Ocean account and API token (create an account using my referral to get free credits)
- A PostgreSQL cluster with repmgr on Digital Ocean (you can grab the Ansible playbook in this tutorial to configure it or just use a cluster with streaming replication and simulate failure + manual promotion);
- NodeJS and npm installed (I'm using NodeJS v12 with npm v6);
- A PostgreSQL user with password authentication which accepts remote connections from your application host (I'll be using
postgres:123456).
Set up Your Cluster
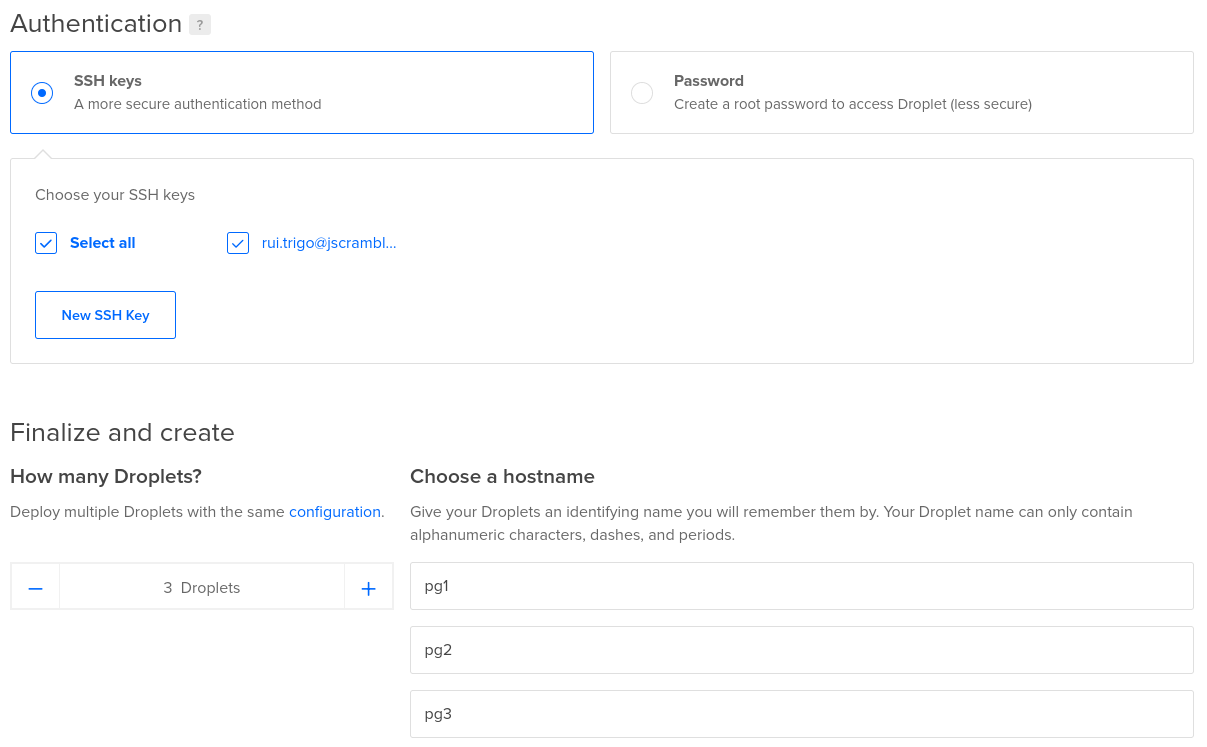
Create Your Droplets

Create 3 droplets, preferably with the Ubuntu 20.04 operating system:
- pg1 (primary)
- pg2 (standby)
- pg3 (witness)
To make configurations run smoother, add your public SSH key when creating the droplets. You can also use the key pair I provided on GitHub for testing purposes.
If you'd like to only use 2 droplets, you can ignore the third node as it will be a PostgreSQL witness.
Note: If you use an SSH private key which is shared publicly on the internet, your cluster can get hacked.
Assign a Floating IP To Your Primary Node
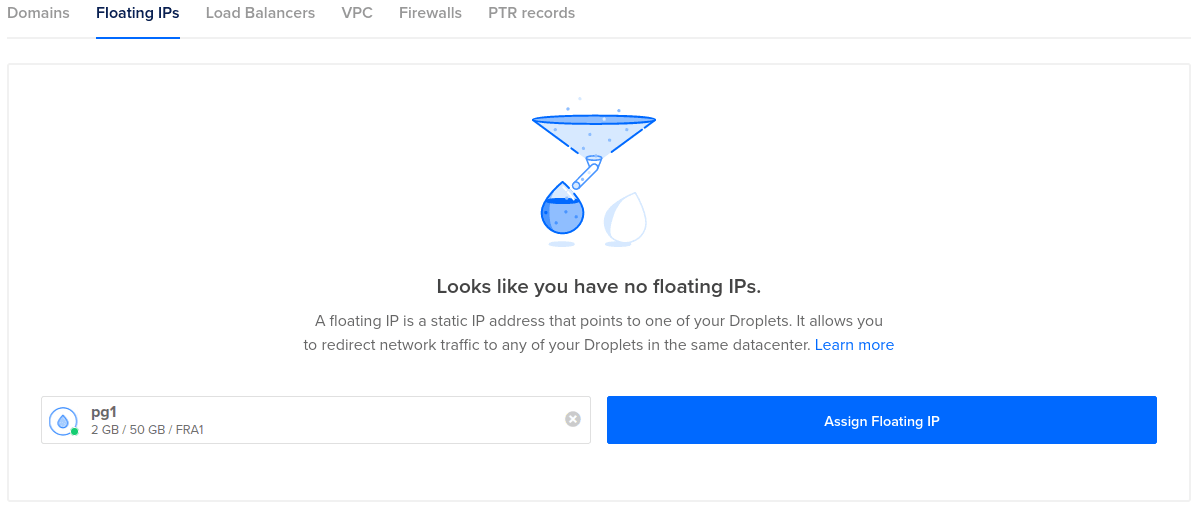
Create a floating IP address and assign it to your primary node (pg1).
Configure PostgreSQL With Repmgr
As previously stated, you can use the Ansible playbook from the last post to speed up the configuration. Download it from GitHub and insert your gateway and droplets IPv4 addresses on group_vars/all.yaml:
client_ip: "<your_gateway_public_ipv4>"
node1_ip: "<droplet_pg1_ipv4>"
node2_ip: "<droplet_pg2_ipv4>"
node3_ip: "<droplet_pg3_ipv4>"
pg_version: "12"
Note: I am assuming you will run your app locally on your computer and it will connect to your droplets through your network gateway
If you don't know your current public gateway address, you can run:
curl ifconfig.io -4
Create an Ansible inventory file and add the playbook host_vars for each host. I named mine digitalocean:
[all]pg1 ansible_host=<droplet_pg1_ipv4> connection_host="<droplet_pg1_ipv4>"
node_id=1 role="primary"
pg2 ansible_host=<droplet_pg2_ipv4> connection_host="<droplet_pg2_ipv4>"
node_id=2 role="standby"
pg3 ansible_host=<droplet_pg3_ipv4> connection_host="<droplet_pg3_ipv4>"
node_id=3 role="witness"
Add the droplets to the list of SSH known hosts:
ssh root@<droplet_pg1_ipv4> exit
ssh root@<droplet_pg2_ipv4> exit
ssh root@<droplet_pg3_ipv4> exit
Now, run the playbook with:
ansible-playbook playbook.yaml -i digitalocean -e "ansible_ssh_user=root"
-iargument tells Ansible to run on the hosts we specified-e "ansible_ssh_user=root”passes an environment variable to make Ansible connect as therootuser.
NodeJS Application
Let's write a simple app that manipulates a countries table. Keep in mind pluralization in Sequelize for JavaScript objects and default database table names. Set it up with:
mkdir sequelize-postgresql-cluster
cd sequelize-postgresql-cluster
npm init -ynpm install pg sequelize
Now, edit the index.js with the following:
const { Sequelize } = require('sequelize');
const primary_ipv4 = '<droplet_pg1_ipv4>'
const standby_ipv4 = '<droplet_pg2_ipv4>'
// new Sequelize(database, username, password)
const sequelize = new Sequelize('postgres', 'postgres', '123456', {
dialect: 'postgres',
port: 5432,
replication: {
read: [
{ host: standby_ipv4 },
{ host: primary_ipv4 }
// witness node has no data, only metadata
],
write: { host: primary_ipv4 }
},
pool: {
max: 10,
idle: 30000
},
})
// connect to DB
async function connect() {
console.log('Checking database connection...');
try {
await sequelize.authenticate();
console.log('Connection has been established successfully.');
} catch (error) {
console.error('Unable to connect to the database:', error);
process.exit(1);
}
}
The code above created a Sequelize connection object named sequelize and configured our servers’ addresses in it. The connect function tests the connection to the database. Make sure your app can connect to it correctly before proceeding.
xxxxxxxxxx
// model
const Country = sequelize.define('Country', {
country_id: {
type: Sequelize.INTEGER, autoIncrement: true, primaryKey: true
},
name: Sequelize.STRING,
is_eu_member: Sequelize.BOOLEAN
},
{
timestamps: false
});
async function create_table() {
await sequelize.sync({force: true});
console.log("create table countries")
};
// insert country
async function insertCountry() {
const pt = await Country.create({ name: "Portugal", is_eu_member: true });
console.log("pt created - country_id: ", pt.country_id);
}
// select all countries
async function findAllCountries() {
const countries = await Country.findAll();
console.log("All countries:", JSON.stringify(countries, null, 2));
}
async function run() {
await create_table()
await insertCountry()
await findAllCountries()
await sequelize.close();
}
run()
Country is our Sequelize model, a JavaScript object which represents the database table.create_table(), insertCountry() and findAllCountries() functions are self-explanatory. They will be called through the run() function.
Run your app with:
node index.js
This will create the countries table on the PostgreSQL database, insert a row in it, and read table data. Because of streaming replication, this data will automatically be replicated into the standby node.
(Optional) Current Status Primary Failure Test
If you perform this step, you'll need to revert the PostgreSQL promotion and go back to the cluster’s initial state. There are instructions for this in the mentioned tutorial.
Turn off your pg1 droplet (this can be done through Digital Ocean’s interface). Due to repmgrd configuration, the standby node (pg2) promotes itself to the primary role, so your database cluster keeps working. This promotion will make your app still able to read data, but not write. Proceed by reverting the cluster to the previous status, with pg1 being the primary node.
Use a Floating IP
Add the Floating IP Address To Your App Database Connection Object
To take advantage of floating IP, insert it into a variable and edit the write object of the sequelize object.
// insert this line
const floating_ipv4 = 'your_floating_ip_goes_here'
(...)
// change primary_ipv4 to floating_ipv4
write: { host: floating_ipv4 }
Digital Ocean CLI configuration
As we will configure pg2 node to interact with Digital Ocean and reassign the floating IP to its IPv4 address, we must configure doctl in this server. Access pg2 and do as following:
# as superuser
curl -sL https://github.com/digitalocean/doctl/releases/download/v1.46.0
/doctl-1.46.0-linux-amd64.tar.gz | tar -xzvsudo mv ~/doctl /usr/local/bin
# as postgres
doctl auth init
# insert Digital Ocean API token
Note: If using in production, secure the API token variable in Digital Ocean’s CLI configuration script and be careful with reassigning script permissions.
Place the script below on /var/lib/postgresql/promote-standby.sh with execution privileges. It promotes the standby node to primary, validates doctl project configuration and reassigns the floating IP to pg2.
#!/usr/bin/env bash
# assign digital ocean floating ip address to postgres cluster promoted standby node
# this script is expected to run automatically on a standby node during its automated promotion
# promote PostgreSQL standby to primary
repmgr standby promote -f /etc/repmgr.conf
PROJECT_EXISTS=$(doctl projects list | wc -l)
if [ 2 -gt $PROJECT_EXISTS ]; then
echo "doctl CLI is not properly configured. Exiting."
exit 1
fi
CURRENT_NODE_ASSIGNED_NAME=$(doctl compute floating-ip list | awk '{print $4}' | tail -n 1) # pg1
STANDBY_NODE_NAME=$(doctl compute droplet list | grep "pg2" | awk '{print $2}') # pg2
STANDBY_NODE_ID=$(doctl compute droplet list | grep "pg2" | awk '{print $1}') # <do droplet resource id>
FLOATING_IP_ADDRESS=$(doctl compute floating-ip list | awk '{print $1}' | tail -n 1) # <do flip ipv4>
echo "$FLOATING_IP_ADDRESS is currently assigned to $CURRENT_NODE_ASSIGNED_NAME. Reassigning to $STANDBY_NODE_NAME."
# remote address change
doctl compute floating-ip-action assign $FLOATING_IP_ADDRESS $STANDBY_NODE_ID
Add the Script To the Repmgr Promote Command
Now edit pg2 repmgr.conf file to invoke our promote-standby.sh script on promotion time.
promote_command = '/var/lib/postgresql/promote-standby.sh'
Run service postgresql restart && repmgrd to apply changes.
Final Status Primary Failure Test
Unlike before, when you turn off pg1, pg2 not only promotes itself but also takes over the floating IP, which the app is currently using to perform write operations. As pg2 was already in the sequelize variable’s read array, it is now capable and the sole responsible for data reads and writes. Wait a minute for the promotion to happen and test the app again:
node index.js
Conclusion
Picture yourself in a boat on a river (yes, it's a Beatles reference). If both your oars break loose and only one can be fixed on the spot, the boat motion will become defective and it will be hard to continue the trip.
In our specific case, before having a floating IP, your app would recover data read capability through database fault-tolerance behavior - but it wouldn't be able to perform writes in this condition. Now that your app follows the database's new primary node on automatic promotions, you can heal the cluster and revert it to the initial state in planned conditions and with no rush, as app features are safeguarded.
You can find the source code in this post on GitHub.
Published at DZone with permission of Rui Trigo. See the original article here.
Opinions expressed by DZone contributors are their own.
Comments