Cookie Authentication and Session Management
Find out the steps to learn how Mongoose handles cookie authentication and session management for apps.
Join the DZone community and get the full member experience.
Join For FreeCookie authentication and session management are important for web applications. Mongoose Embedded Web Server supports basic and digest authentication, which gets the job done, but, it doesn’t let the web app control the UI. It’s a simple prompt created by the browser and rarely blends well with the rest of the app.
Session management is necessary for applications to keep the server-side state of the user’s interaction with the app. For example, to store their preferences or progress.
Mongoose Embedded Web Server has all the parts necessary for building it, and today we’ll show you how to put them together to get a working web app.
When compiled, the cookie_auth example starts a server on port 8000.
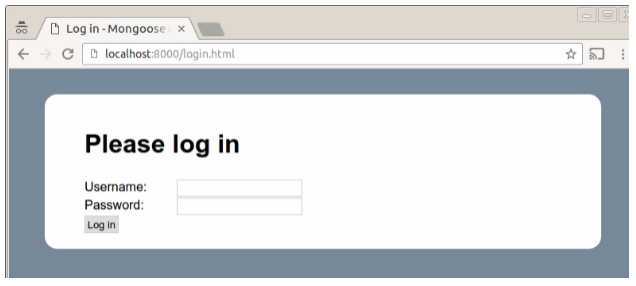
At first, the user has no session associated with them and will be taken to the login page:

The form is served by the login_handler function.
In our example, any username is accepted and everyone’s password is “password." A real-world app would need to provide its own implementation of the check_pass function.
Let’s go ahead and log in as “test." Clicking the “Login” button will send a POST request to /login.html, which will be handled by a different branch in the login_handler function. It uses the mg_get_http_var function to parse the form variables and, assuming we didn’t mistype the password and check_pass returns true, we proceed to create a new session (create_session).
It is important that session IDs that are generated are hard to guess so that it’s not easy to take over someone else’s session by just guessing its ID. In our example, the session ID is a 64-bit number created by mixing together a volatile state, including the current time and the user’s password, which should make generated IDs sufficiently difficult to predict.
A newly generated session is then inserted into the session storage. In our example, to keep things simple, we allow a small number of simultaneous sessions and do not store them persistently. This means sessions are lost on server restart. A real app may choose to store sessions in files or some sort of key-value store (an SQLite database, a BerkeleyDB map file, etc.).
Finally, a response to take the user back to the main page is constructed, and the session cookie is set as part of it.
Now, when the user arrives at the main page, they send the cookie that was set previously containing their session ID, which the get_session function extracts. It uses the mg_get_http_header function to get the value of the “Cookie” header. The header contains all the cookies sent by the user’s browser. There can be more than one. So it’s best to use the mg_http_parse_header function to find the one we set. Session ID from the cookie is then converted to a number and the session storage is searched for a session with that ID.
With a valid session, we are now ready to serve the application page:

The user’s name and the lucky number are template variables in the index.shtml page. When Mongoose Embedded Web Server serves an SSI-enabled file (by default, *.shtml files are SSI-enabled) and encounters a <!--#call XXX --> statement, it will generate an MG_EV_SSI_CALL event and pass the arguments (the XXX part) as the argument. Our example handles that event and prints the user name and their lucky number from the session data (properly HTML-escaped, if necessary, by mg_printf_html_escape).
From now on, you should be able to open http://localhost:8000/ and see the hello page straight away, without needing to log in. You’ll be able to do this until you restart the server or the session expires. Our example is configured to expire the session after just 30 seconds, mainly to demonstrate how this mechanism works. A real app would most definitely have this value higher.
So there it is, cookie authentication and session management with Mongoose Embedded Web Server explained. We hope this was useful and will save you time working on your web application.
Published at DZone with permission of Deomid Ryabkov, DZone MVB. See the original article here.
Opinions expressed by DZone contributors are their own.

Comments