Creating a Simple Spring Boot API From Scratch
Making an API using Spring Boot is actually pretty simple. In this post, we take a look at how to do just that from scratch!
Join the DZone community and get the full member experience.
Join For FreeCurrently, many technologies are based on APIs and Microservices, and, if they are not based on them yet, they are moving in that direction. From my experience as an Information Technologies engineer, most people in the IT segment know or have at least heard of APIs (Application Programming/Protocol Interface). It is also relatively clear that APIs should be somewhere in the middle layer, between the backend and frontend, or the database and backend, or something similar.
The aim of this post is to learn to create a simple API based on Spring Boot, which is a framework for creating Spring applications. Spring Boot is a project from Spring by Pivotal and, nowadays, is consumed quite widely in Java, Kotlin and Groovy. Developers use it for creating microservices, APIs, standalone applications, websites, etc.
First, go to https://start.spring.io, where you will see the following:

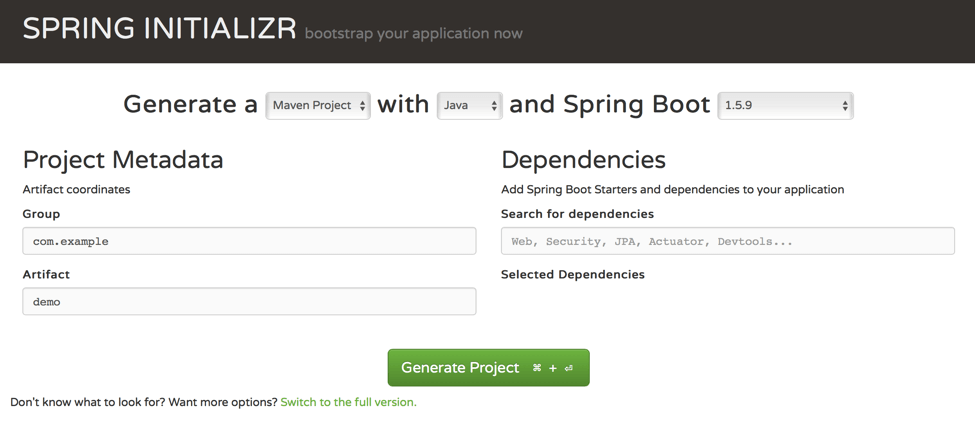
The next step is very simple - just click on the green button to generate a project. If you want to customize the project from scratch, meaning changing the Group and/or Artifact name, dev language, Spring Boot version, etc., feel free to do that, just KISS (Keep It Super Simple).
Let’s continue. After clicking the “Generate Project” button you will get a folder to your downloads with the following structure:
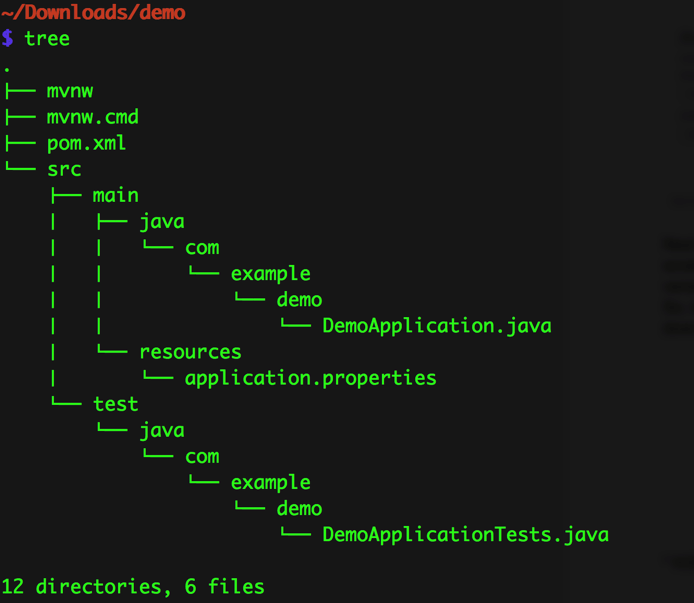
Oh, by the way, as you probably saw, I’m using Java as the development language for the project.
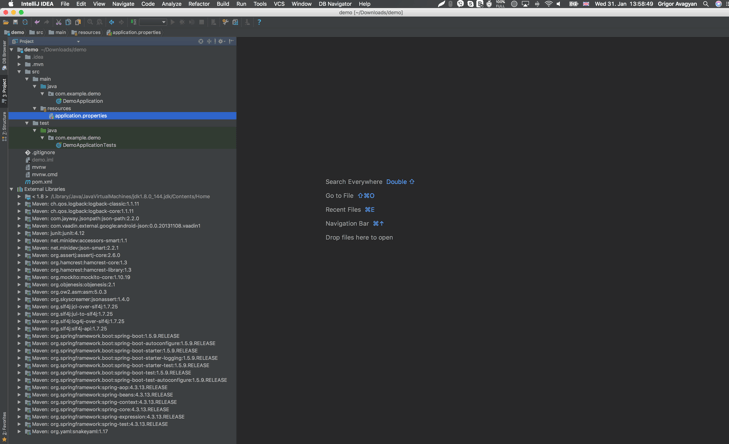
So now, open your project with your favorite IDE (I will use IntelliJ from JetBrains). After IntelliJ automatically created the project based on your pom.xml and downloaded all the dependencies (which you got from the “Generate Project” button), you should see the following:
Now, we can run an application to make sure everything so far is working correctly. Navigate to the DemoApplication file in your project, click the PLAY button on the left of the line “public class DemoApplication,” and make sure you have the following output in your IDE:

This is all fine because our API (application) so far is a dummy and empty. So it just starts, sees there is nothing more to do, and closes.
Now, let’s make it a bit smarter. Let’s say we need a simple endpoint (e.g. /demo) that will return the JSON {“hello”:”world”}.
As a first step, we need to add support for the Spring Boot starter web, the library that adds web functionality for SpringBoot apps. For that, add the following code to the pom.xml in the <dependencies> section.
   <dependency>
        <groupId>org.springframework.boot</groupId>
        <artifactId>spring-boot-starter-web</artifactId>
    </dependency>
The next step, in the com.example.demo package, create a folder controller in the demo folder, create the Java class DemoController, and insert the following code in it:
package com.example.demo.controller;

import org.springframework.stereotype.Controller;
import org.springframework.web.bind.annotation.RequestMapping;
import org.springframework.web.bind.annotation.ResponseBody;

import static org.springframework.web.bind.annotation.RequestMethod.GET;

@Controller
@RequestMapping("/demo")
public class DemoController {

   @ResponseBody
   @RequestMapping(method = GET, produces = "application/json")
   public String demo() {
       return "{\"hello\":\"world\"}";
   }
}
That’s all! Now run the DemoApplication file again and navigate to http://localhost:8080/demo in your browser. You should see the following:

That’s all folks, now we have a simple API with one endpoint (“/demo”) that returns a simple crafted JSON body.
You can add more endpoints, models, database classes, and more, to make your API more advanced and suited to your needs. To do that, add the required dependencies to your pom.xml file.
That’s it! You now know how to start creating your APIs in Spring Boot.
Published at DZone with permission of . See the original article here.
Opinions expressed by DZone contributors are their own.
Comments