Customized Rate Limiting for API Gateway by Path Parameter, Query Parameter, and More
Let's find out how to implement flexible rate limiting for your API using Amazon's API Gateway service.
Join the DZone community and get the full member experience.
Join For FreeAPI Gateway provides a feature to limit the number of requests a client can make per second (rate) and per day/week/month (quota). Rate limiting is very useful to protect your system from resource starvation caused by a client flooding your system with requests. Quotas are more useful to protect against data scrapers or to limit the number of expensive operations a client can perform without paying appropriately.
You have to combine two features of API Gateway to implement rate limiting: Usage plans and API keys. API keys are used to identify the client while a usage plan defines the rate limit for a set of API keys and tracks their usage. Clients are expected to send the API key as the HTTP X-API-Keyheader. However, what about using a path parameter to identify the client like /v1/some-client-id/task or a query parameter like /v1/task?clientId=some-client-id? In this article, you learn to use a Custom Authorizer to extract a parameter from the path and use the value as the API Key. You can follow the same approach to extract the API Key value from a query parameter or the body.
Custom Authorizer
A Custom Authorizer is implemented by a Lambda function to execute custom logic. Every request to the API Gateway first invokes the Custom Authorizer. The Custom Authorizer returns an access policy (policyDocument) and the API key value (usageIdentifierKey). API Gateway takes the result from the Custom Authorizer, checks if the API key exists and if the client is allowed to make the request according to the access policy.
Create the Lambda function:
- Author a Lambda function from scratch
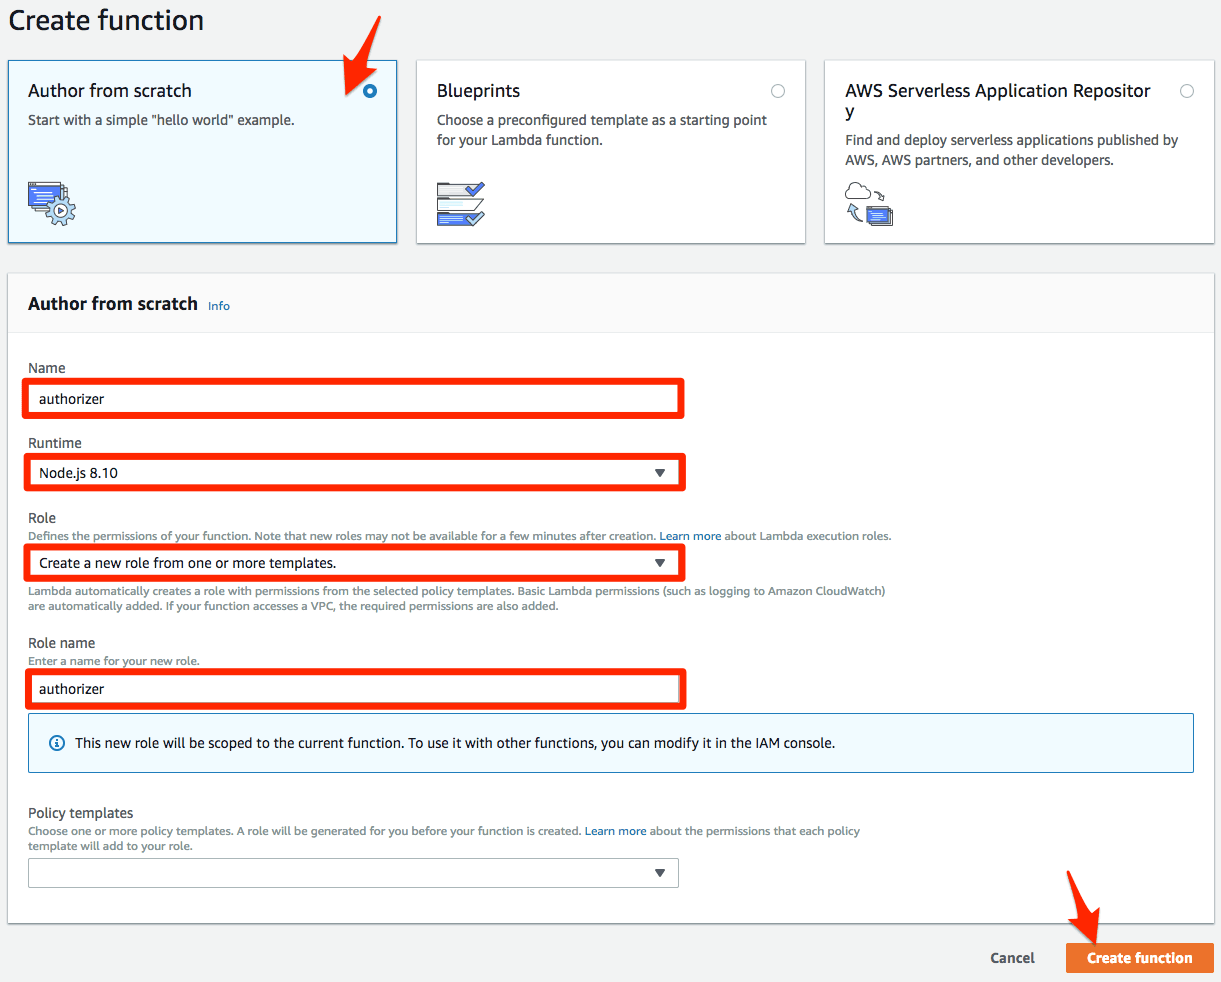
- Set a Name
- Set the Runtime to
Node.js 8.10 - Set Role to
Create a new role from one or more templatesto create a new IAM role for the Lambda function - Set a Role Name
- Click Create function to save
The following Lambda function code uses the value of the path parameter clientId as the API key value and allows access to all API resources and methods.
exports.handler = async (event) => {
  if ('pathParameters' in event && 'clientId' in event.pathParameters) { // check if the path parameter is present
    return {
      principalId: event.pathParameters.clientId,
      policyDocument: {
        Version: '2012-10-17',
        Statement: [{ // allow all HTTP methods on all resources
          Action: 'execute-api:Invoke',
          Effect: 'Allow',
          Resource: `arn:aws:execute-api:us-east-1:*:${event.requestContext.apiId}/*`
        }]
      },
      usageIdentifierKey: event.pathParameters.clientId // the value of path parameter clientId is used as the API key value
    };
  } else {
    throw new Error('path parameter clientId missing');
  }
};
Once the Lambda function is in place you can create the Custom Authorizer in API Gateway:
- Set a Name
- Select the Lambda Function you created earlier
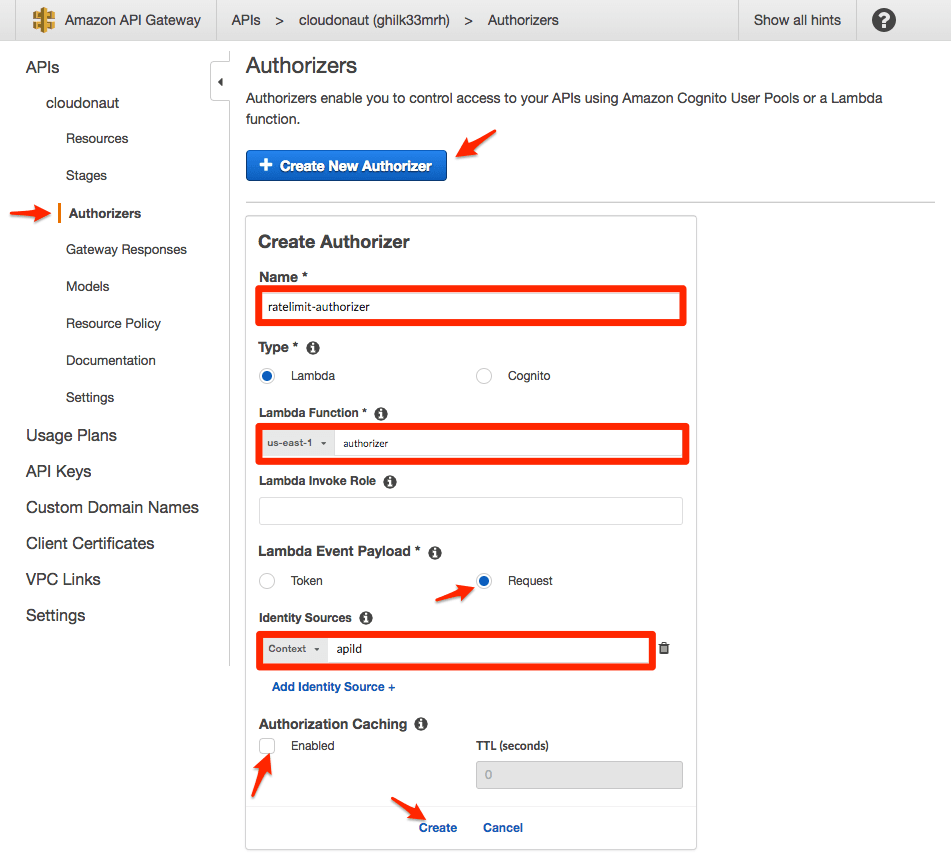
- Set the Lambda Event Payload to
Request - Set the Identity Sources to
Context apiId - Disable Authorization Caching
- Click Create to save
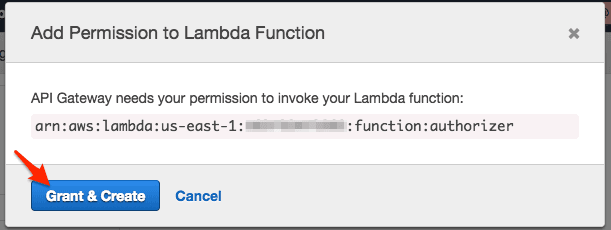
- You are asked to grant permissions
Unfortunately, you can not use a path parameter as an Identity Source. We use the API id which is the same for all requests. Therefore, it is important to disable Authorization Caching. Otherwise, all requests (no matter what path parameter used) would use the same API key value from the cached authorizer response. Confusingly, a query parameter is valid Identity Source.
Configuring API Gateway
By default, API Gateway does not use the usageIdentifierKey value of the Custom Authorizer. You have to turn this behavior on explicitly.

Protecting a Resource
To protect a resource with a Custom Authorizer, you have to configure the Method Request.
- Ensure that you have the path parameter
clientIdin the path of the resource
- Set Authorization to the authorizer you created
- Set API Key Required to
true
If you send a GET request to the resource /550e8400-e29b-11d4-a716-446655440000/task, you get a 403 error with the message Forbidden. The problem: The API Key with the value 550e8400-e29b-11d4-a716-446655440000 does not exist. Let’s change that.
Creating an API Key
To create an API Key:
- In the sub-navigation, click on API Keys

- Push the Actions button and click on Create API key
- Set a Name
- Select API key to
Customand provide the value that you want to use for the path parameterclientId(e.g.,550e8400-e29b-11d4-a716-446655440000) - Click Save
The HTTP request still doesn’t work. You have to assign the API Key with a Usage plan.
To create a Usage Plan:
- In the sub-navigation, click on Usage Plans
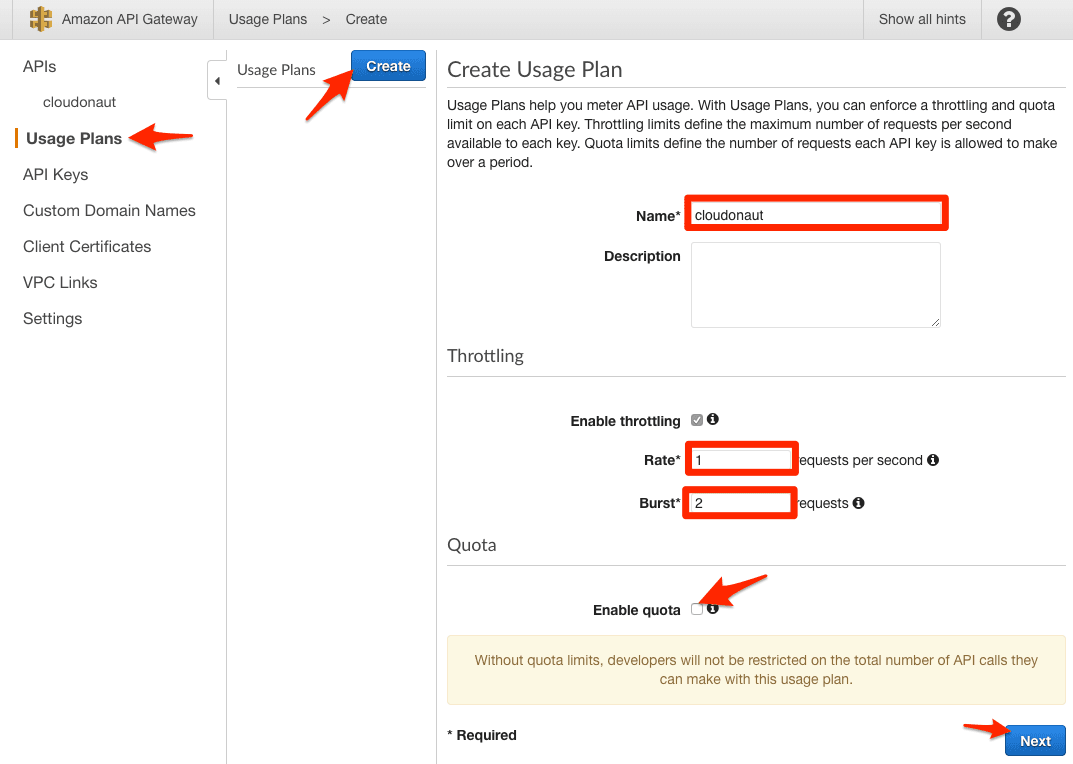
- Push the Create button
- Set a Name
- Imagine that each API Key can save future requests to an account. The Rate determines how many future requests are saved per second.
- The Burst value determines the maximum amount of future requests that an API Key can save. In other words: In the long run, an API Key cannot make more than Rate requests per second. However, short term, an API Key can make Burst requests per second.
- Disable quota
- Click Next to go to the next step
- Click Add API Stage
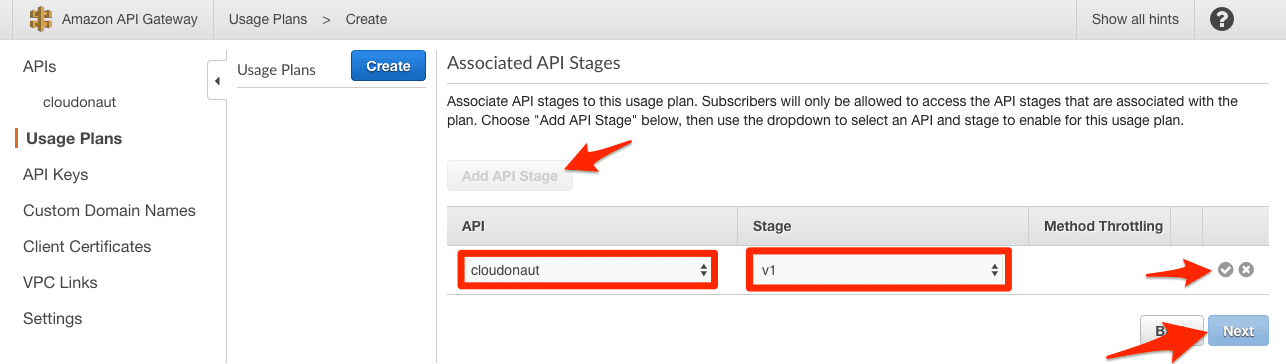
- Select the API and Stage
- Click on the OK icon to save and Next to go to the next step
- Click on Add API Key to Usage Plan
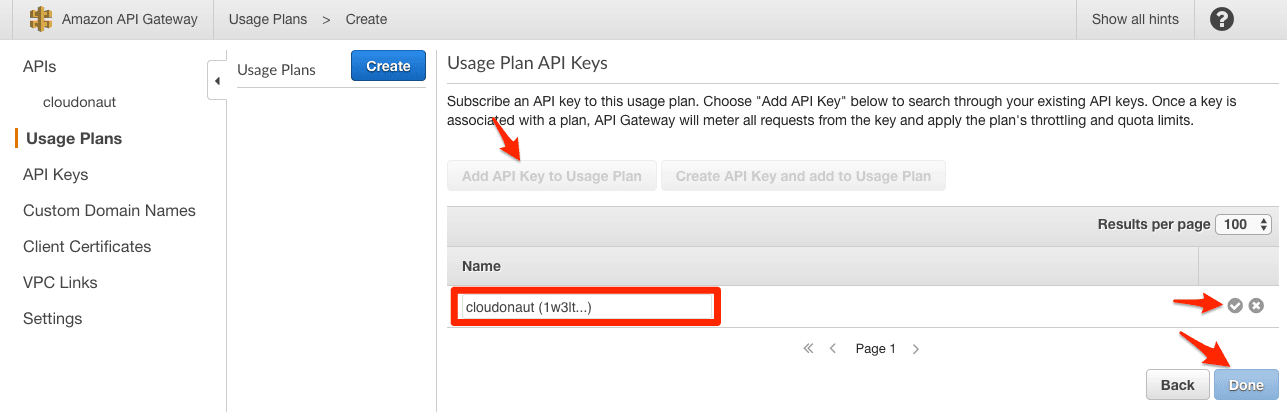
- Select the API Key
- Click on the OK icon to save and Done to finish
Now, if you send a GET request to the resource /550e8400-e29b-11d4-a716-446655440000/task, you get a 200 success. If you send more than 1 request per second for some time, you get a 429error with the message Too Many Requests. Just wait a few seconds, and you can continue with a new request that works.
Pitfalls
- You have to keep the API Keys in sync with your client database. Whenever you add a new client, don’t forget to create an API Key with the correct Usage Plan mapping as well.
- An API Key has a name, id, and value. The user of your API provides the API Key value while API Gateway cares about the id (e.g., to delete an API Key).
- If you run multiple APIs in a single region, make sure that your API Key values do not overlap. They all share the same namespace.
- SNS HTTPS subscriptions do not retry on 429. Only on 5XX responses. If you send requests to an API Gateway using SNS, that’s a problem. Workaround: You can configure API Gateway to return 5XX errors instead of 429 (which might or might not be a solution).
Summary
You can configure API Gateway to rate limit requests based on a parameter in the path with some tricks. The benefit of Usage Plans is that API Gateway itself protects your system without involving any datastore from your end. You don’t have to worry about an overloaded rate limiting system.
Published at DZone with permission of Michael Wittig. See the original article here.
Opinions expressed by DZone contributors are their own.
Comments