Setup Cypress Tests in Azure DevOps Pipeline
Step by step guide to configure and run Cypress tests in Azure DevOps pipeline and publish Cypress test results in Azure DevOps.
Join the DZone community and get the full member experience.
Join For FreeThis tutorial helps to integrate and run your Cypress tests with the Azure DevOps pipeline in an Easy Way
Pre-Requisite:
- You need to have already cypress framework up and running on your local machine
- Cypress Project should be checked into the repository
- Your framework should generate a JUnit XML file at the end of the execution of the test. If you are not sure how to do that refer to Generating JUnit XML article.
Step by Step Guide To Run / Set-Up Cypress Tests in Azure DevOps or TFS Pipeline CI/CD
This tutorial explains the easy way to configure and run Cypress Test Automation Framework into Azure DevOps.
Step 1: Create a New Pipeline
Since we are starting from scratch, let's start with creating a new pipeline in Azure DevOps
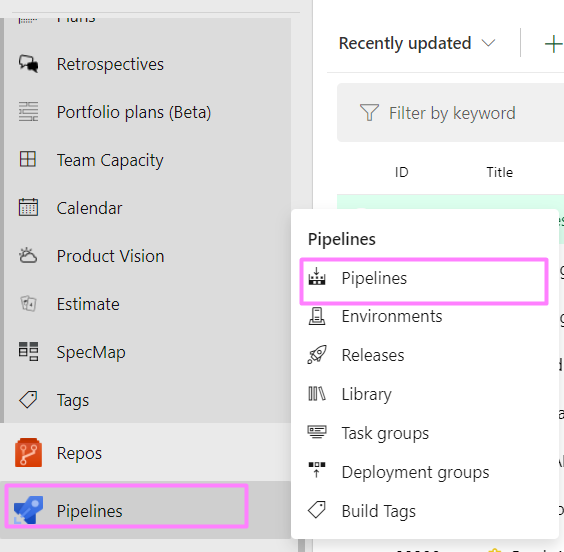
Create your new pipeline. Navigate to Azure DevOps > From your Azure DevOps home page, Hover on Pipelines and Click on Pipelines
Step 2: Click on New Pipeline
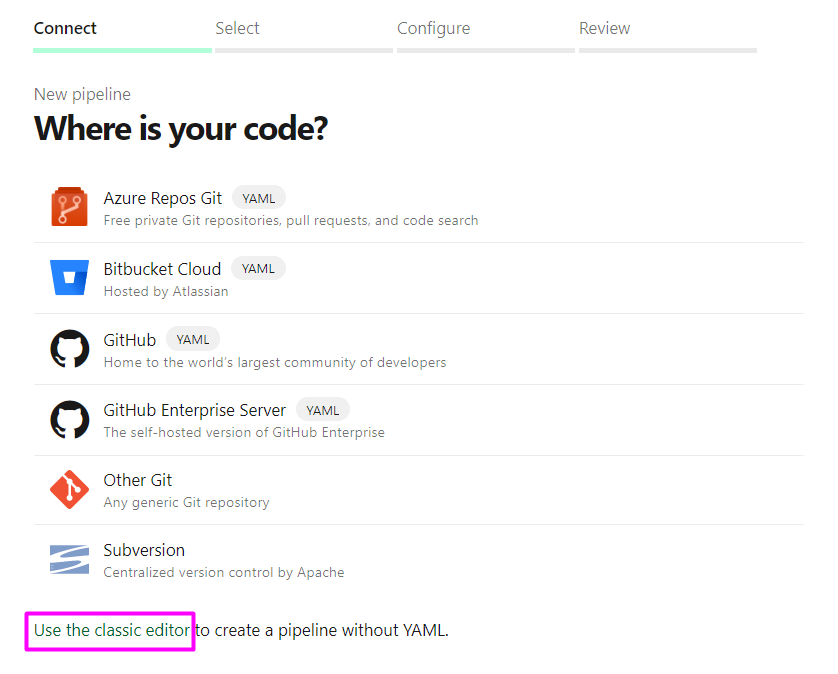
Click on the new pipeline as shown in the below image

Step 3: Click on Use the Classic Editor
Click on Use the classic editor as shown in the below image
Step 4: Choose the Correct Repository and Project
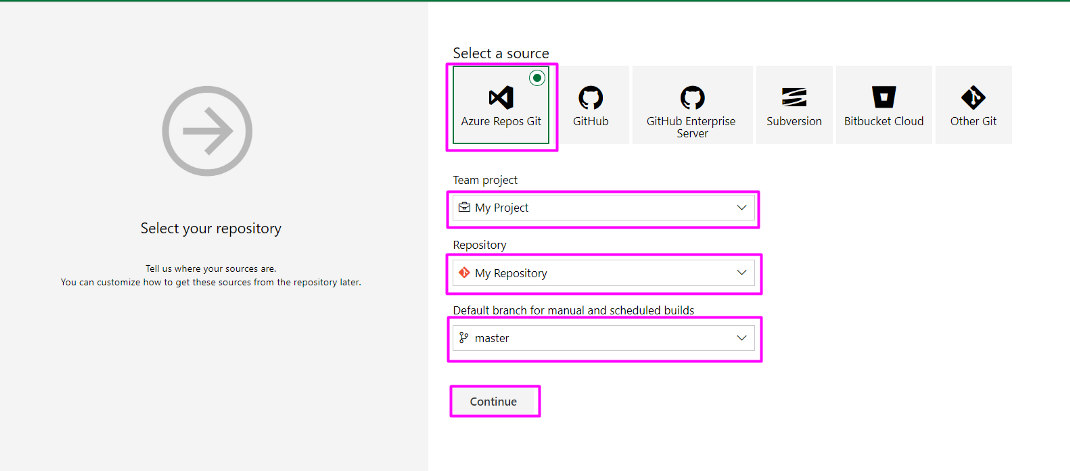
Source: Azure Repos Git
Team Project: Your Project Name
Repository: Your repository name where you have pushed Cypress Tests or code
Default branch: master (recommended) or any if you wish
Click on Continue
Step 5: Select Template
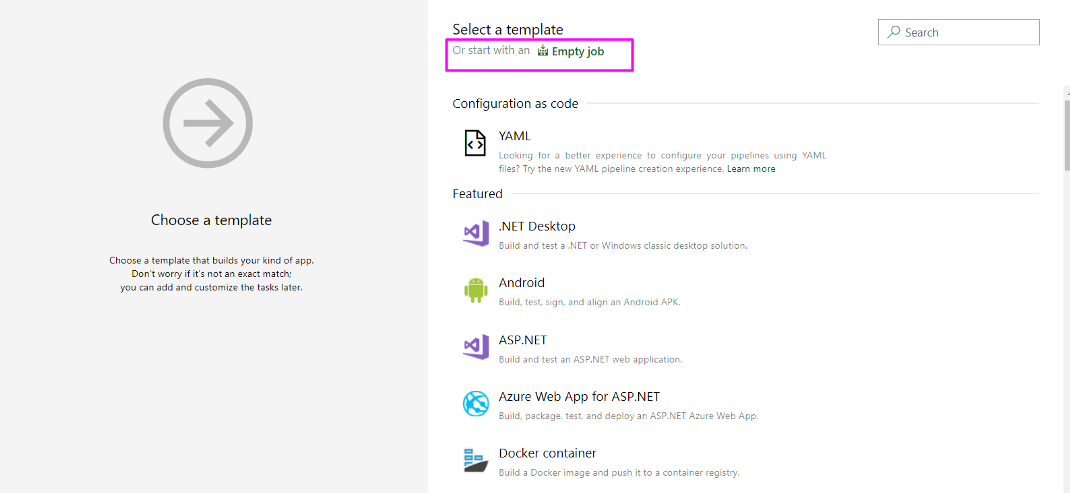
Choose Empty Job As shown in the below image.
Step 6: Choose Pipeline Options
Click on the pipeline, On the right side of your screen specify desired options
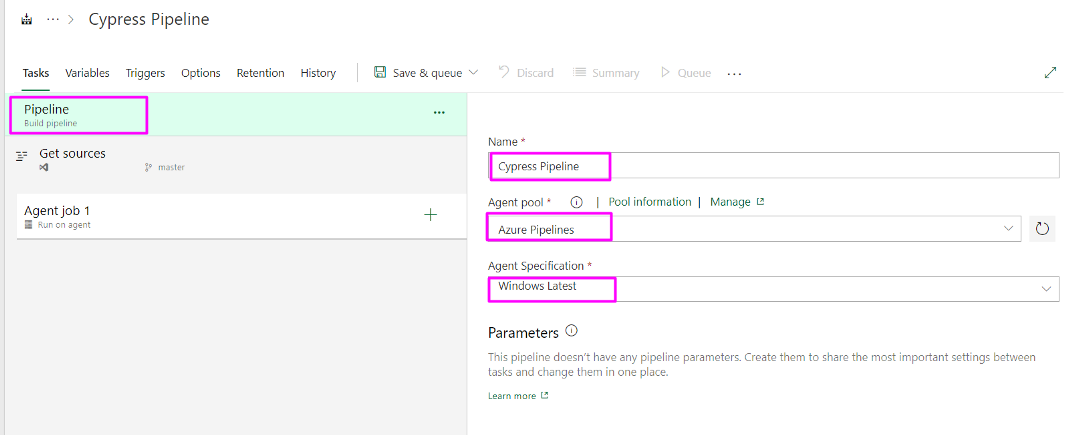
Name: Cypress Pipeline
Agent pool: Choose Agent pool (This will be as per your organization set up)
Agent Specification: Choose correct Specification (This will be as per your organization set up)
Step 7: Click on Agent Job1 From the Left Side and Choose Desired Options.
Display Name: Cypress or anything you wish
Agent pool: Choose Agent pool (This will be as per your organization set up)
Agent Specification: Choose correct Specification (This will be as per your organization set up)

Step 8: Click on Plus Icon (+) And Add the Node Install Task
Click on the (+) icon on the left side the list of tasks opens up
Search for Npm install or Install Packages
Click on Add

Step 9: Configure Install Packages Task
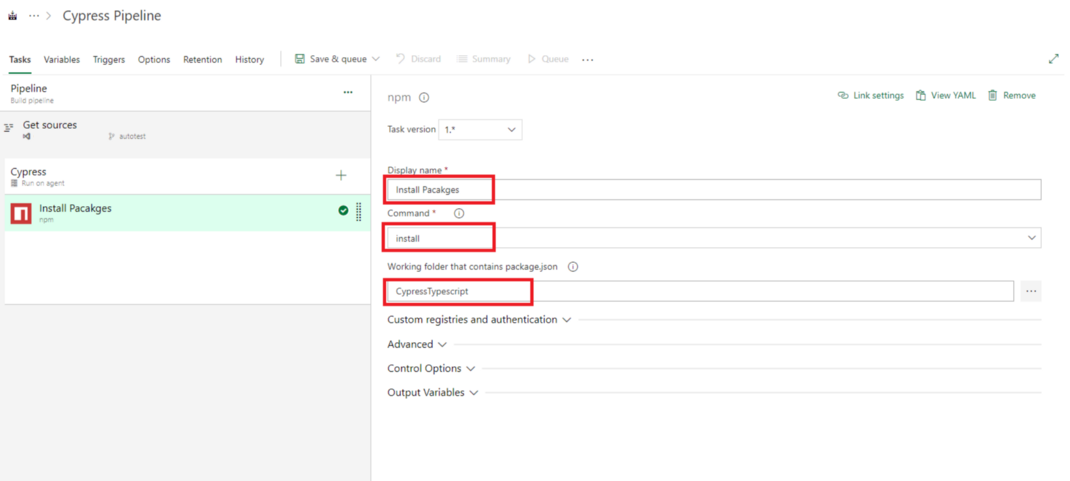
In the added Task fill the correct options
Display Name: Install Packages
Command: install
The working folder that contains package.json: Choose the correct working folder from the list (If you click on (…) it will show a list of folders in your repository, choose the correct one)
Step 10: Search and Add Powershell Task in Azure DevOps To Run Cypress Tests
Click on the (+) icon on the left side the list of tasks opens up
Search for Powershell
Click on Add

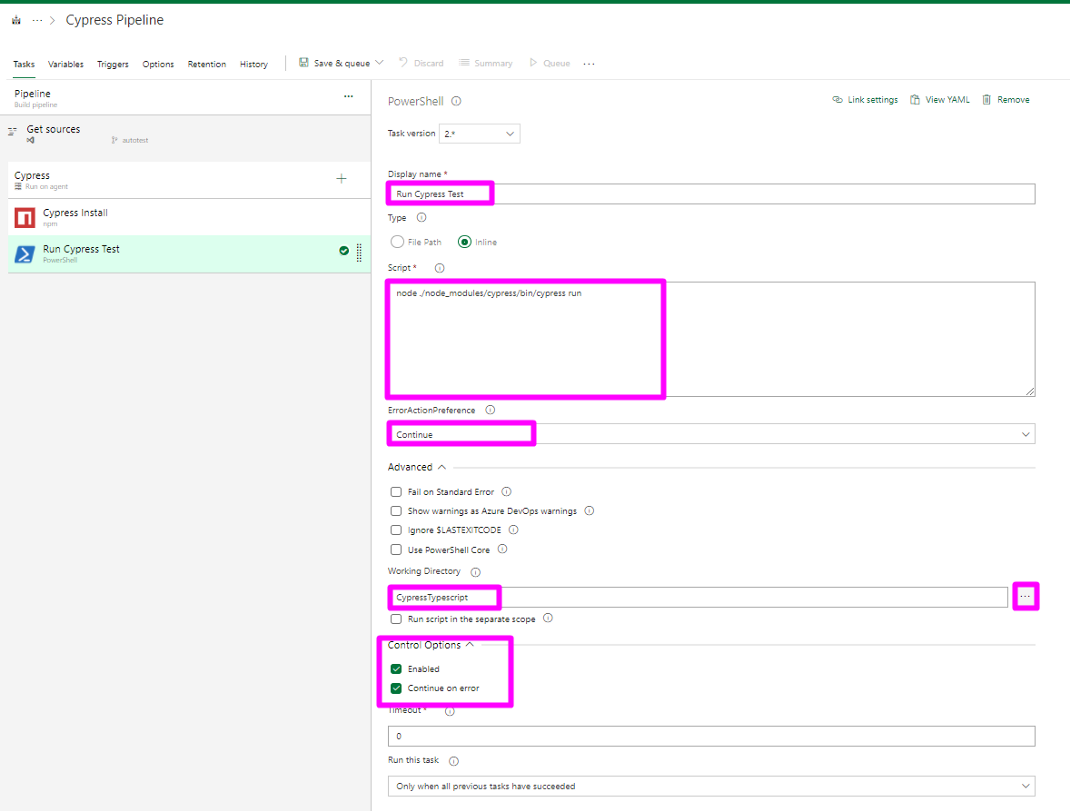
Step 11: Configure Powershell Task To Run Cypress Test in Azure DevOps
Display name: Run Tests
Type: Inline
Script: add this command ./node_modules/cypress/bin/cypress run
Error Action Preference: Continue
Advanced Tab Options
Working Directory: Choose the correct directory (Where your package.json is located)
Continue Options
Enabled: Check this checkbox
Continue On Error: Check this check box
Step 12: Add Publish Cypress Test Results in Azure DevOps
Click on the (+) icon, Tasklist opens up
In the Search box type Publish Test Results
Click on Add to add the task

Step 13: Configure Publish Cypress Test Results Task in Azure DevOps
Test Result Format: JUnit
Test Result Format:
This is important, If you give the wrong path it will pick the Junit XML and the result will not be displayed. If you follow my Generating JUnit XML article, it will be generated inside the cypress/reports folder.
Control options
Enabled: Check this check box
Continue on Error: Check this check box
Run this task: From the drop-down choose the “Even if a previous task has failed unless the build was canceled” option
Step 14: Run Cypress End to End Test Automation Pipeline in Azure DevOps
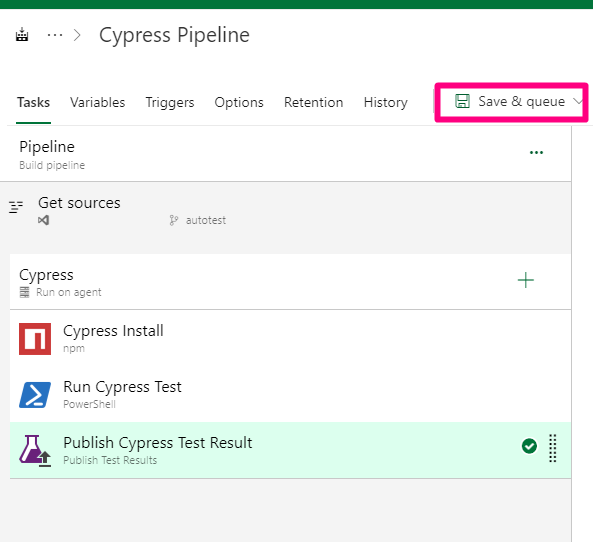
Once you are done with adding all tasks click on Save & Queue
Step 15: View Cypress Test Results in Azure DevOps
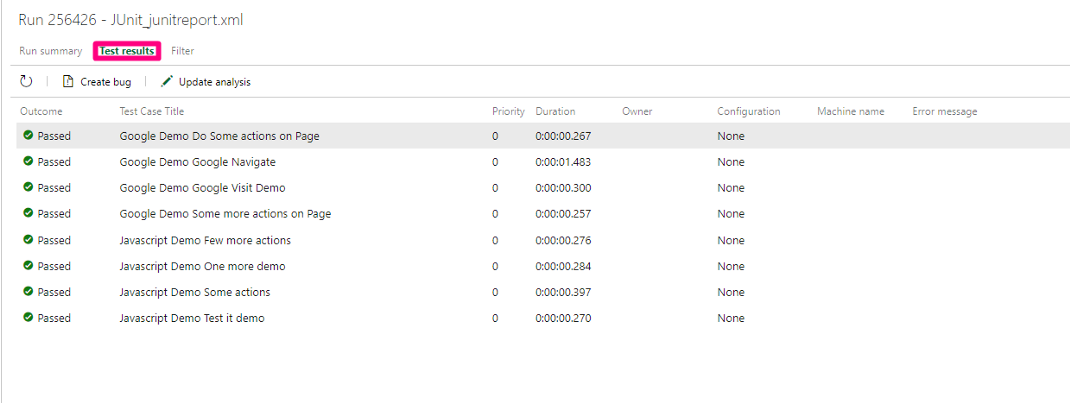
If you have configured everything correctly, then build will pass and test results link find in Publish Cypress Test Result Task

Test Results looks like this

Congrats!, You have successfully Integrated Cypress Tests with the Azure DevOps pipeline
Encourage me to write more articles by buying a coffee for me.
If you are looking for any help, support, guidance contact me on LinkedIn|https://www.linkedin.com/in/ganeshsirsi
Opinions expressed by DZone contributors are their own.


Comments