How to Set up Cypress and Typescript End-to-End Automation Testing Framework From Scratch
This tutorial explains easy way to set up Cypress and Typescript Automation Framework with page object model. Cypress is new tool alternative to Protractor.
Join the DZone community and get the full member experience.
Join For FreeThis article explains creating or setting up a cypress.io end-to-end testing framework from scratch using Typescript. Unlike another tutorial, this explains setting up the Cypress framework using Typescript in a simple and easy way. This article is helpful for whoever wants to set up the Cypress Typescript automation framework for the first time. Also, I know that there are many, migrating from different automation frameworks like Protractor, webdriver.io, etc. this will be helpful for them too.
This Tutorial shows page object model creation as well, however you can use it for any type of framework by skipping those steps.
Prerequisites
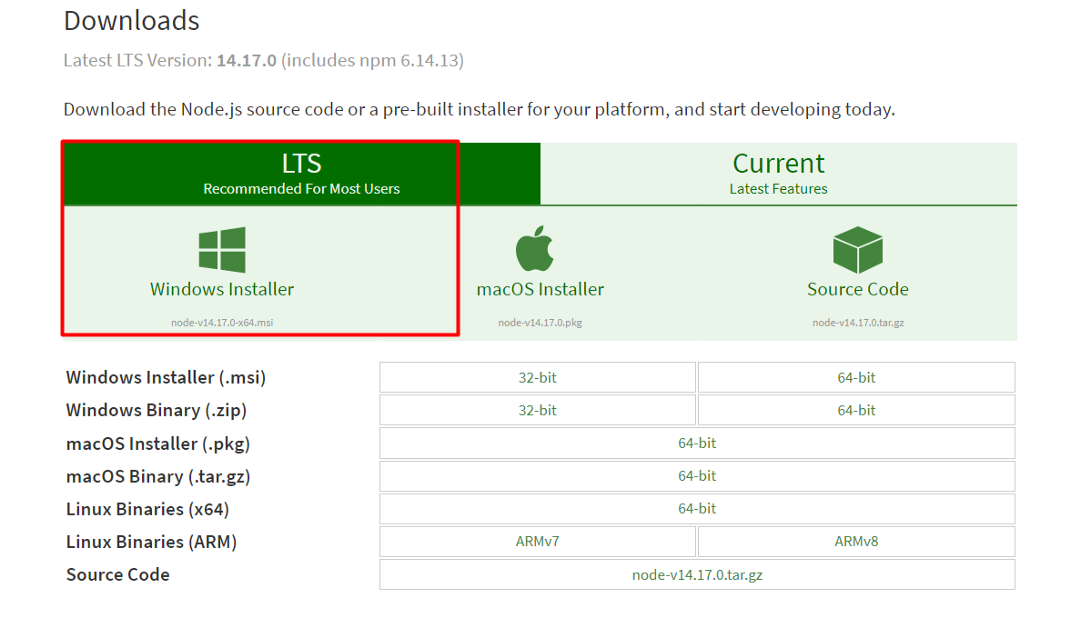
- Install NodeJS: If you don't have NodeJS installed in your system navigate to https://nodejs.org/en/download/ and choose LTS download and install.
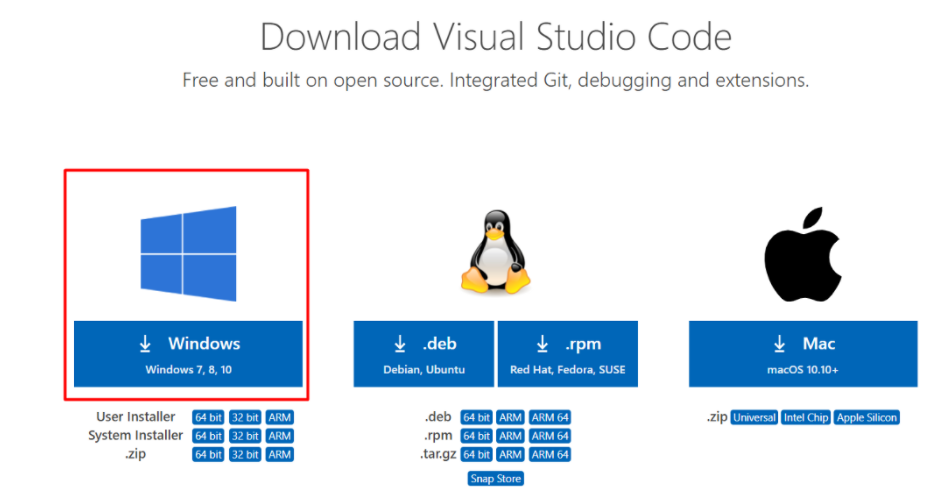
 2. Install Visual Studio Code: If you don’t have Visual Studio Code on your computer navigate to https://code.visualstudio.com/download download and install.
Step by Step Guide to Configure/Setup Cypress Typescript Automation Framework
Step 1: Create a Project Folder
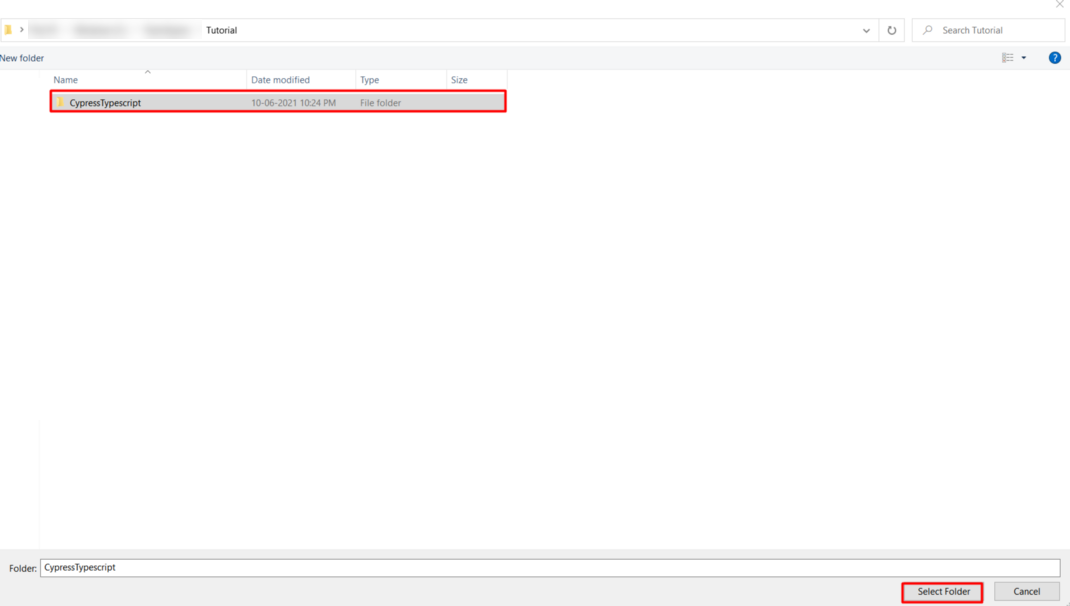
The first step is to create a new folder on your computer on a desired location. Below I am creating CypressTypescript as the project folder.
Step 2: Open Project Folder CypressTypescript in Visual Studio Code
i. Open, Visual Studio Code, Click on File > Open Folder
ii. Choose, CypressTypescript Folder and Click on Select Folder at the bottom
Step 3: Create pacakge.json File
Open Terminal, In Visual Studio Code by clicking on Terminal Menu > Choose New Terminal.
Note: Ensure New Terminal opened in the working directory as CypressTypescript.
npm init

ii. It will ask you a set of questions if you want, you can type the desired text, else hit [Enter] key one by one until you get the message Is this Ok?, then again hit enter it will create package.json for you.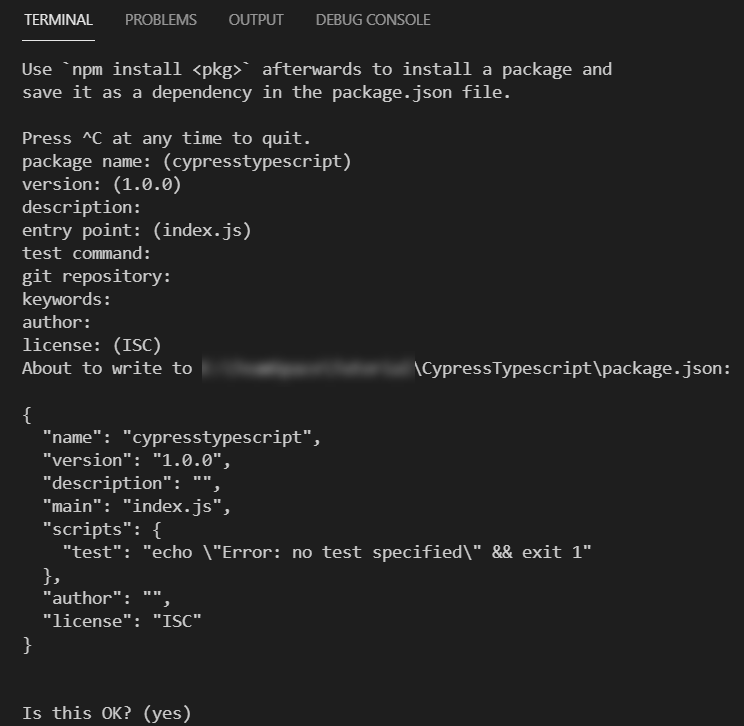
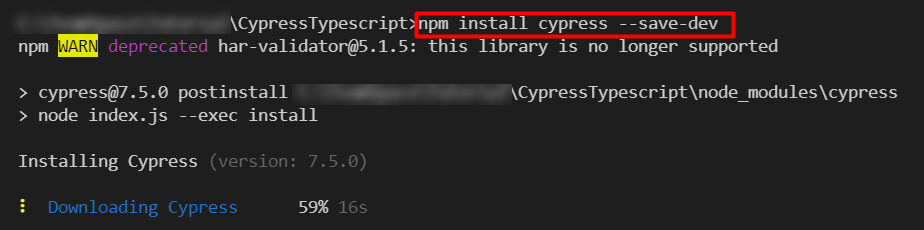
Step 4: Install Cypress
In the Visual Studio Code Terminal, you need to type below command:
npm install cypress --save-devThe above command may take some time so please wait until it finishes.
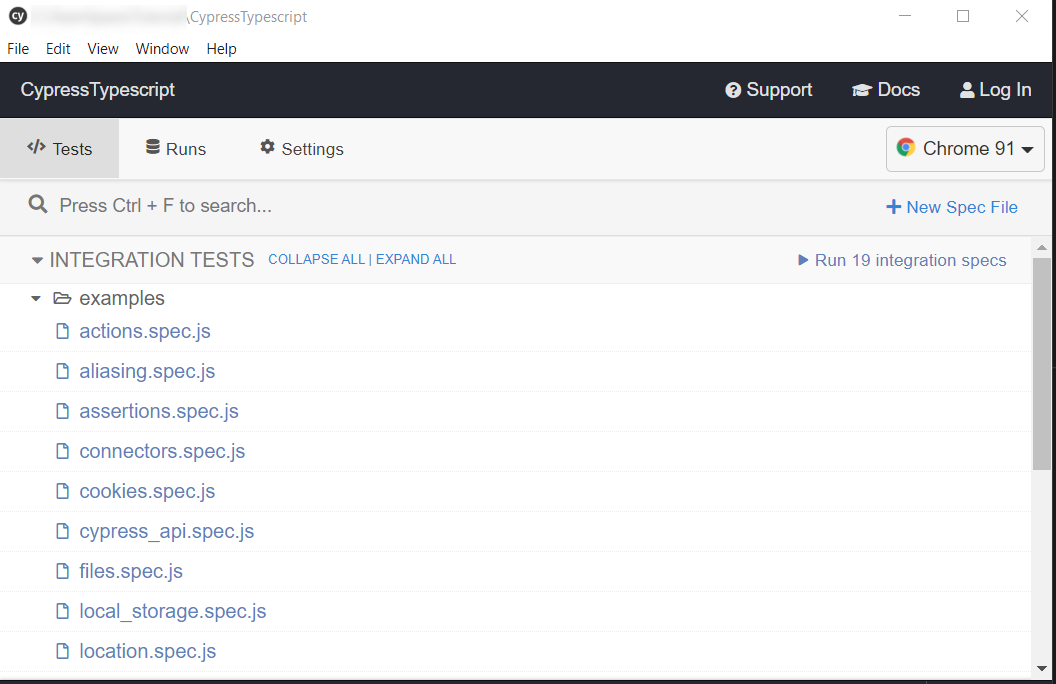
Step 5: Open Cypress
The first time when you enter the cypress open command it will create a default setup for you, which also includes directories like cypress, integration, fixtures, etc. To open cypress enter the below command in your Visual Studio Code terminal window.
npx cypress open

After the execution of the above command, it will create a default Cypress framework for you and also opens the Cypress window. At this point just close the Cypress window.
At this point, your CypressTypescript folder should look like below:

Note: Optionally, if you want you can play with a built-in example using the cypress window.
Step 6: Install Typescript Using the Below Command Typing in Terminal
In the Visual Studio Code Terminal type the below command.
npm i typescript
Step 7: Create Typescript Config File (tsconfig.json)
In the Visual Studio Code Terminal type the below command to create tsconfig.json file.
npx tsc --init
The above command will create the default tsconfig.json file, let it be, for now, we will configure that later stages in this tutorial.
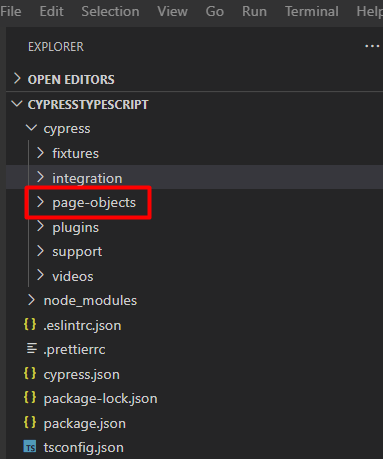
Step 8: Create page-objects Folder
Open cypress folder.
Note: cypress the folder is located inside your root of the project in our case its CypressTypescript
Create a folder inside cypress the folder, name it as page-objects . All your page object files should sit here.
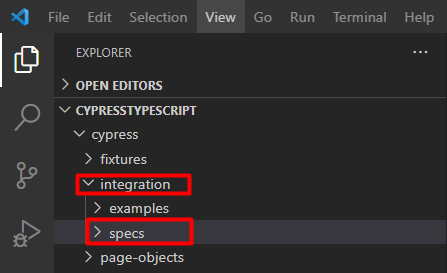
Step 9: Create specs Folder Inside Integration Folder
Note: The integration folder has already created by cypress, you don’t have to create your own. which is located inside CypressTypescript/cypress folder
Inside your CypressTypescript > Double Click on cypress Folder > Open Integration folder
The default integration folder looks like below.
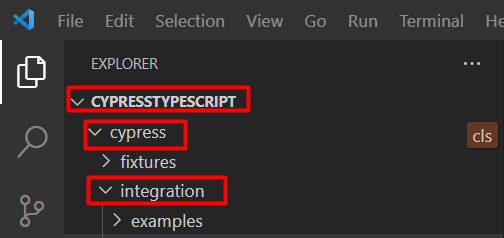
Now, Create a folder called specs inside the integration folder (Just reminding again integration folder is located inside the cypress folder
Optionally you can delete the examples folder unless you want to keep it as a reference.
Note:
1. example folder contains example tests, just to play around with some test cases, provided by cypress when you install the cypress package.
2. Your tests should be always inside the integration folder. However, you can create subfolders to arrange your specs but they should be inside the integration folder.
After the above step, we have created two folders namely specs and page-objects
1. specs folder inside integration folder
2. page-objects folder inside cypress folder
Below is the structure
CypressTypescript
-cypress
--integration
---specs
--page-objects
Note: Creating a separate folder for page objects and specs helps easy maintenance and managing the automation test. It is just a recommendation not mandatory.
Step 10: Create a First Page-Object File Inside the page-objects Folder
Using Visual Studio Code, Create a file named google-search.page.ts . This file should be created inside page-objects folder created in Step 8. Copy and paste the below code inside google-search.page.ts file.
//Inside your google-search.page.ts file. This is pageobject file.
/// <reference types="cypress" />
export class GoogleSearch{
   googleSearch(){
   return cy.get('input[name="q"]').first();
   }
   googleSearchBtn(){
    return cy.get('input[name="btnK"]').first();
    }
    searchResults(){
        return cy.get('h3').first();
    }
 }
Step 11: Create the First Spec Inside the Specs Folder
Using Visual Studio Code, Create a file named google-search.spec.ts . This file should be created inside spec folder created in Step 9,Copy and paste the below code into the file google-search.spec.ts
//This is spec file, inside your google-search.spec.ts
import { GoogleSearch } from '../../page-objects/google-search.page';
const search = new GoogleSearch();

describe('Google Navigation', () => {
    it('Google Search',() => {
        cy.visit('https://www.google.com');

        search.googleSearch().type('Something');
        search.googleSearchBtn().click({ force: true });
        search.searchResults().should('be.visible');
    });
});
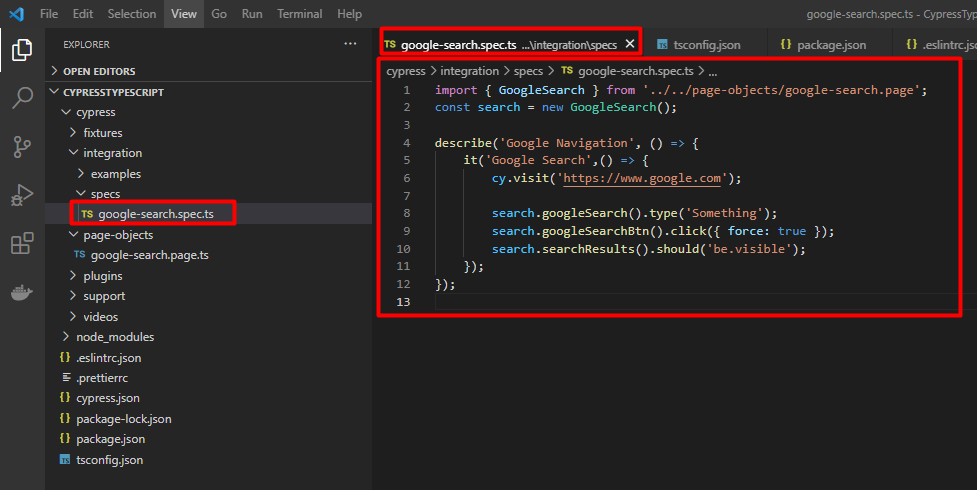
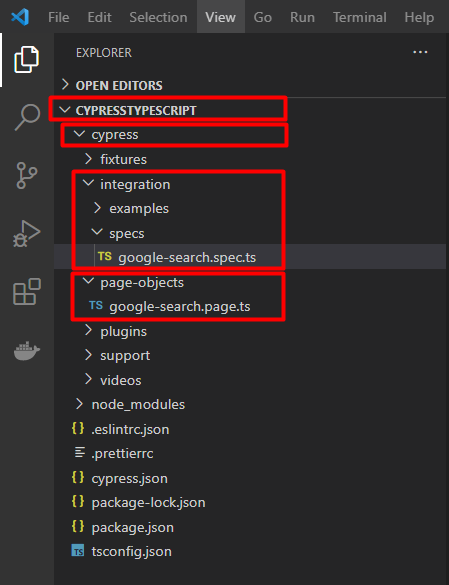
At this point, your framework should look like below.
Step 12: Configuring tsconfig.json File
So, You have completed, page-object file, spec file. If you see those files you have created file with a .ts extension, that means we are using typescript in this project. In order for Cypress to understand typescript, we need to configure tsconfig.json file. The tsconfig.json file will be located in the root of the project folder that is inside folder CypressTypescript
i. In Step 7 you have already created tsconfig.json file.
ii. Navigate to tsconfig.json file
iii. Remove all default settings inside it. (make it empty)
iv. Copy and paste the below code
{
   "compilerOptions": {
    "target": "es5",
    "lib": ["es5", "dom"],
    "types": ["cypress"]
  },
  "include": ["**/*.ts"]
}

Step 13: Execute Your First Test
In the VisualStudio Code Terminal, Make sure the terminal present working directory is CypressTypescript. Type below command
npx cypress open

Wait for the Cypress window to open. The below window appears.
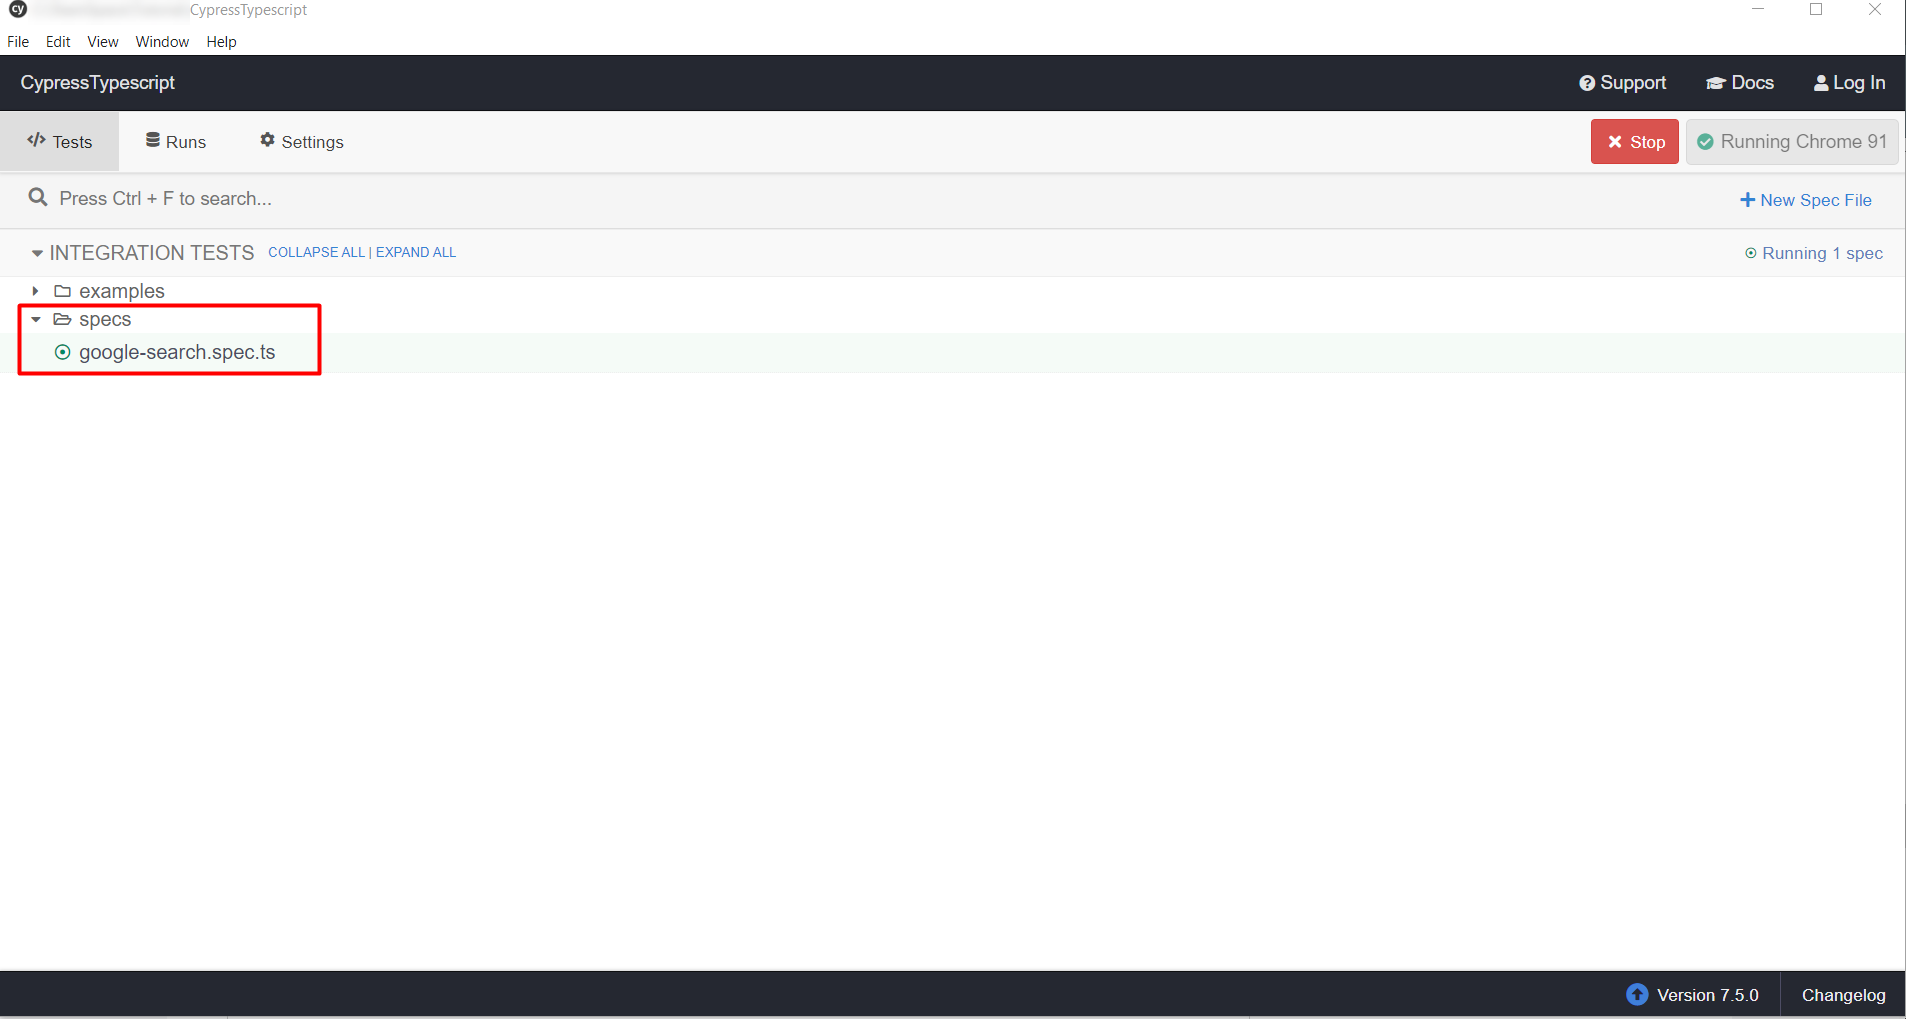
Now, click on the google.search.spec.ts file in the above window.
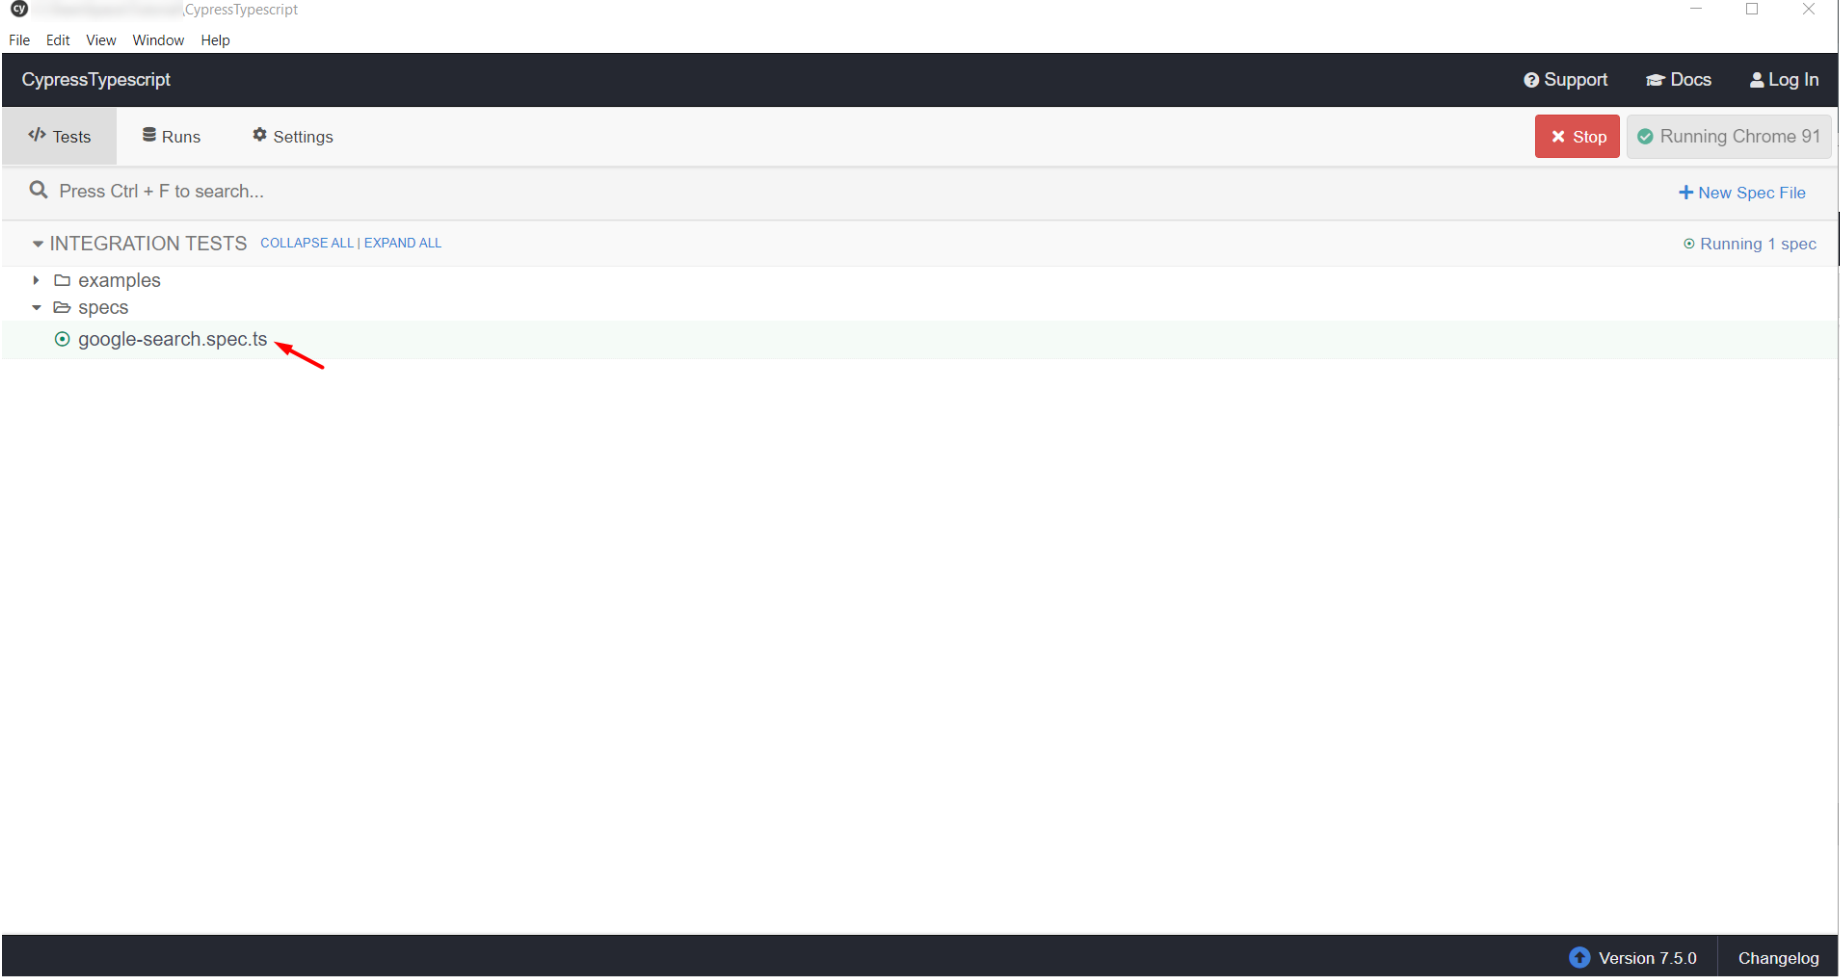
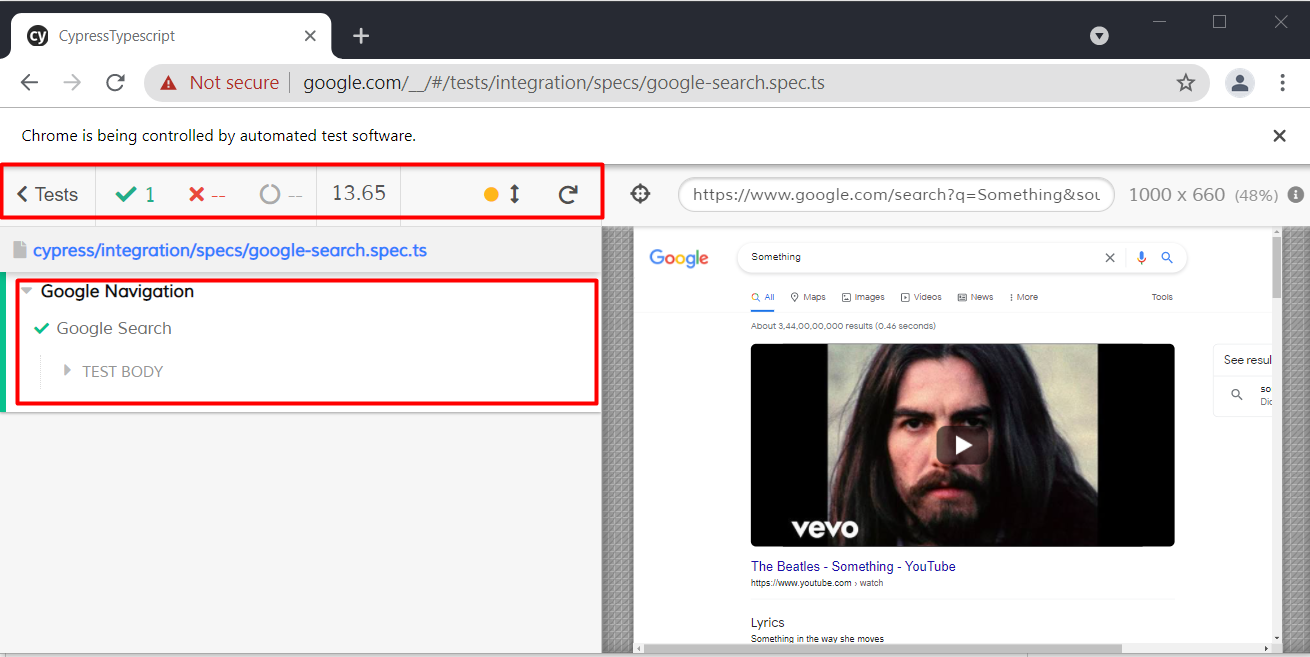
BOOM!!! Your test starts running in the browser.
Once it gets finished, you will see the result.
How to Execute Cypress Tests Using the Command-Line Interface Cypress CLI?
To execute cypress tests using the command line. Navigate to the CypressTypescript folder using the command line enter the below command:
npx cypress run --spec="./cypress/integration/specs/google-search.spec.ts"

Bonus:
By default, Cypress doesn’t support XPath as a selector, if you need XPath support please install the cypress-xpath npm package:
npm i cypress-xpath
To get support for the typescript uses the line /// <reference types=”cypress-xpath” /> in your spec file. Below is the example:
/// <reference types="cypress-xpath" />
describe('Example', () => {
 it('Example', () => {
    //test something
  });
});

If you are looking for any help, support, guidance contact me on LinkedIn|https://www.linkedin.com/in/ganeshsirsi/.
Opinions expressed by DZone contributors are their own.
Comments