How to Set up TestCafe and TypeScript JavaScript End-to-End Automation Testing Framework From Scratch
This tutorial explains an easy way to set up TestCafe and TypeScript or JavaScript Automation Framework with a page object model.
Join the DZone community and get the full member experience.
Join For FreeWhat is TestCafe?
TestCafe is a non-selenium-based open-source JavaScript End to End Automation Testing Framework built with NodeJS. TestCafe supports JavaScript, CoffeeScript, and TypeScript.
TestCafe is nowadays very popular since it is very stable and follows an easy setup.TestCafe does not depend on Selenium or other testing software. TestCafe runs on the popular Node.js platform and makes use of the browsers that you already have.
TestCafe Supports Javascript, Typescript, and CoffeeScript with no additional setup. Additionally, TestCafe Automatically compiles JavaScript, TypeScript, CoffeeScript no need to compile manually.
In this tutorial, We are creating a TypeScript file with a .ts extension. If you want to use JavaScript just create test scripts with .js extension and follow Javascript standards. There is no additional setup required
Features of Testcafe
Easy setup: Compared to any other automation tool in the market, Testcafe setup is very easy and quick. Those who know the basics can do it on their own.
No Third-Party Dependency: Test café doesn’t depend on any third-party libraries like web-driver, or external jars, etc.
Easy to Write Tests: Test cafes command chaining techniques makes teams more productive. the usual 20 lines of code in other frameworks can be written in just 10 to 12 lines of code by using Testcafe syntax.
Fast and Stable: Because a test is executed inside a browser the tests are fast compared to other frameworks and its tests are stable as events are simulated internally using Javascript.
Multiple Tab/Windows Support: Unlike Cypress, Testcafe provides functionality like the switch to a window or multiple tab support.
Iframe Support: Testcafe supports Iframes and you can switch to and from iFrame in your tests.
Parallel Testing: With concurrency mode enabled, the Testcafe tests can be run parallelly.
Automated Waiting: Test Cafe waits automatically for elements to appear, there is no need to put external waits.
Cross Browser Testing: Testcafe supports all major browsers like old and new Edge, Firefox, IE, and all Chrome family browsers.
Step by Step Guide to Configure/Setup TestCafe JavaScript / Typescript Automation Framework
Prerequisites
- Install NodeJS: If you don't have NodeJS installed in your system navigate to https://nodejs.org/en/download/ and choose LTS download and install.
- Install Visual Studio Code: If you don’t have Visual Studio Code on your computer navigate to https://code.visualstudio.com/download to download and install.
As I mentioned earlier, both JavaScript and Typescript framework setup remains the same, the only thing you need to do is create test script and page object as JavaScript files instead of Typescript file. You need to follow JavaScript standards in case you are using JavaScript and TestCafe.
In this tutorial, we are using TestCafe and Typescript
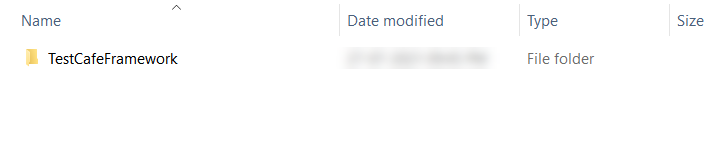
Step 1: Create a New Project Folder
Navigate to your desired directory and create a new Project Folder (ex: TestCafeFramework)
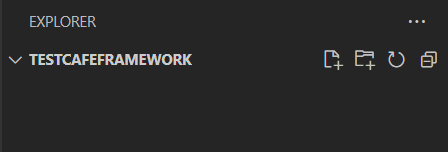
Step 2: Open Project Folder in Visual Studio Code IDE
Since we are using Visual Studio Code as IDE in this tutorial, Open the Project Folder in Visual Studio Code
Visual Studio Code > File menu > Open Folder > Choose newly created Project Folder (ex: TestCafeFramework)
Step 3: Create a Package.json File
Package.json helps in anyways, It tracks all dependencies installed, allows us to create a shortcut for running tests, etc.
To create pacakge.json file, From Visual Studio Code > Terminal > New Terminal
Enter the below command
npm init
Once you entered the above command in Terminal, It will ask for the set of questions, You can just hit the [Enter] key or you can type the desired value if you wish.

After the successful execution of the npm init command, you can see the package.json created in your Project Folder.

Step 4: Install TestCafe using NPM
Testcafe can be installed as npm package, using npm install command we can install testcafe.
To use Visual Studio Code Terminal, enter the below command to install TestCafe npm package on your system.
npm install --save-dev testcafe
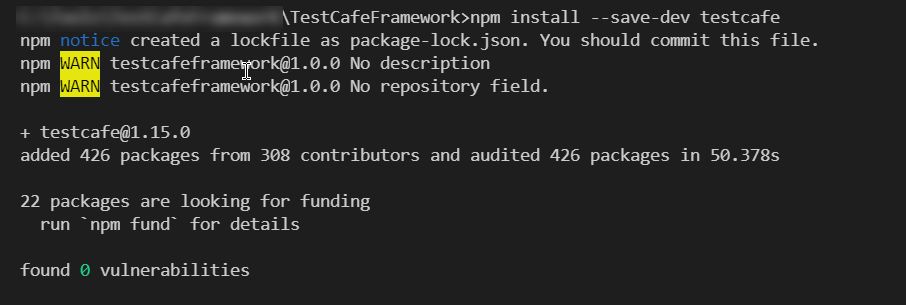
After successful installation of the above command, the folder named node_modules should be created in your Project Folder.
Step 5: Create Folders to Manage Page Objects and Specs
We are creating the page object model in this tutorial so we need to create separate folders for specs and page objects, this folder structure helps us to manage the tests and selectors in an easy way.
We are creating 3 folders.
Tests: This is the main folder, which will have subfolders named pages and specs
Pages: This folder contains all the page object files needed for your project
Specs: This folder contains all the test scripts
The directory structure will look like the following:
TestCafeFramework
-tests
--pages
--specs
Create Test Folder Under The Project Folder
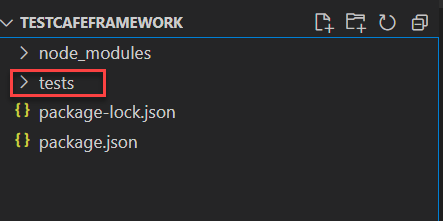
Create Two Folders Inside The tests Folder and Name Them As pages and specs

Step 6: Create your first TestCafe page object file
Under pages folder, create a new file and name it as example-page.ts, This is our page-object file, which will contain all selectors that we need for our TestCafe Automation Scripts
Note: Since we are creating a Typescript project, we are creating the file with .ts extension but if you want to create a Javascript project, create the file with .js extension

Step 7: Add Page Object Selectors to Your Page-Object File
In the above step, we have created page-object file example.page.ts, its time to add some selectors.
In this tutorial, we are going to create a sample TestCafe Project with the following test case:
- Navigate to google.com
- Search for text TestCafe
- Clicks on the first Result with link text having “Testcafe”
- Ensures home page is loaded
Copy and paste the below code snippet into example.page.ts:
//example.page.ts
import { Selector } from 'testcafe';
class GoogleSearch{
   get searchInput() {return Selector("input[name='q']")}
   get searchResult(){return Selector("h3").withText('TestCafe')}
   get homepageLogo(){return Selector('div[class="logo"]')}
}
export default new GoogleSearch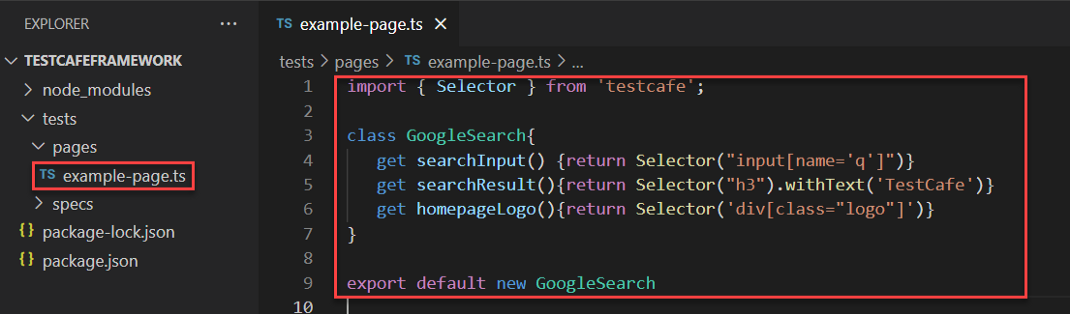
Step 8: Create The First Test Script File For Your TestCafe Automation Framework
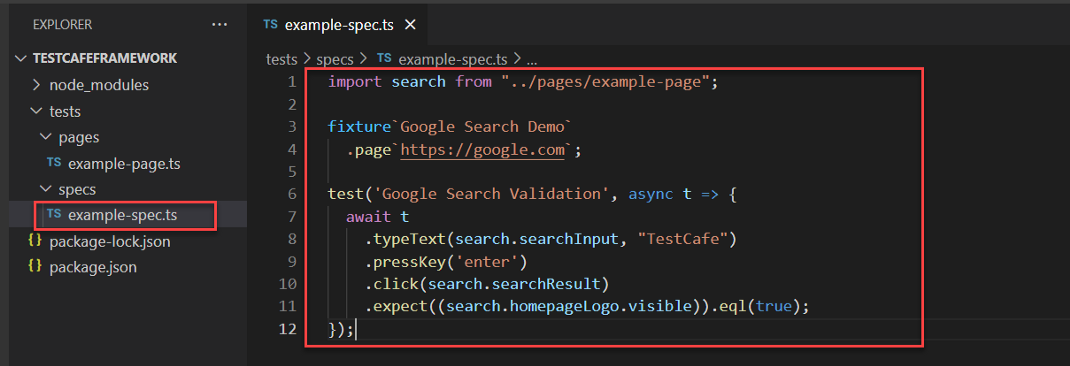
Inside the specs, folder create a new file with the name example-spec.ts
example-spec.ts contains your actual code of tests like navigating to the desired URL, performing some of the actions, etc.

Step 9: Create Your First Test Script With TestCafe
We have created a spec file and we have already discussed test cases or automation scripts we are going to write.
Copy and Paste the below code snippet into your example-spec.ts
import search from "../pages/example-page";
fixture`Google Search Demo`
  .page`https://google.com`;
test('Google Search Validation', async t => {
  await t
    .typeText(search.searchInput, "TestCafe")
    .pressKey('enter')
    .click(search.searchResult)
    .expect((search.homepageLogo.visible)).eql(true);
});
Step 10: Execute or Run your TestCafe tests
TestCafe runs on the browser specified in the command, So if you want to run your tests on chrome just use the below command and
npx testcafe chrome
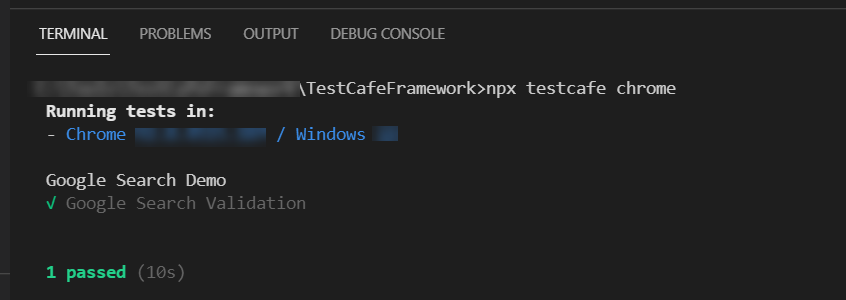
Once you execute the above command your tests start running in chrome browser using TestCafe and results will be displayed in the console.
How To Execute Single Tests in TestCafe?
If you want to execute single using TestCafe you just need to specify the file name in the command line like below:
npx testcafe chrome ./tests/specs/example-spec.ts
With that, you have successfully built the TestCafe Framework from Scratch! Hope this helps.
Encourage me to write more articles by buying a coffee for me.

If you are looking for any help, support, guidance contact me on LinkedIn|https://www.linkedin.com/in/ganeshsirsi
Opinions expressed by DZone contributors are their own.
Comments