Introduction to Salesforce DX With Salesforce CLI and DevHub
Salesforce Developer Experience (DX) is the continuous development environment to manage the Lightning Applications.
Join the DZone community and get the full member experience.
Join For FreeIntroduction
Salesforce Developer Experience (DX) is the continuous development environment to manage the Lightning Applications. In this paper, the Environment setup for DevHub, Salesforce-CLI, and Visual Code is done, and a simple lightning component is created and the process of pulling and pushing from scratch org to IDE and vice versa is done.
Environment Setup
- Dev Hub setup
Step-1: login into the Salesforce
Step-2: Click on setup -> type DevHub in Quickfind or search and click on Dev Hub under Develop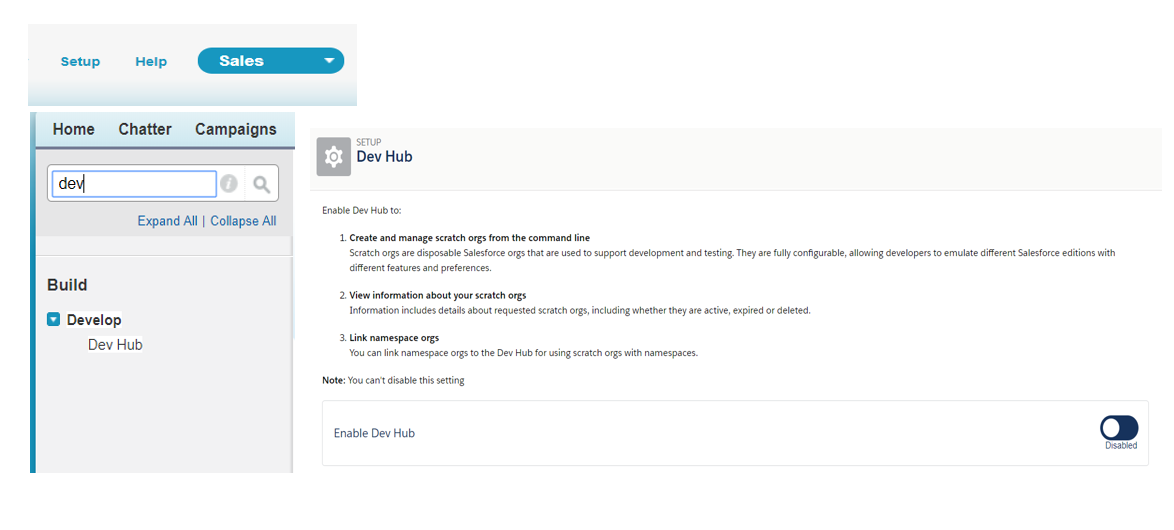
Step-3: Enable the Dev Hub (once enabled and later cannot be disabled)

Salesforce CLI Setup
Step-1: Download Salesforce CLI and install from below link
https://developer.salesforce.com/tools/sfdxcli
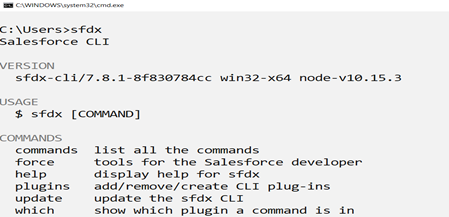
Step-2: Verify the installation type “sfdx” command in the command window and will get the following message.
Step-3: To install the salesforce dx plugin type the following command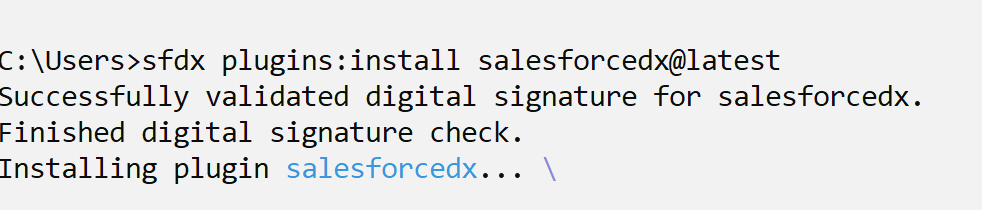
Visual Studio Setup
Step1: Download Visual Studio code and install from below link
https://code.visualstudio.com/Download
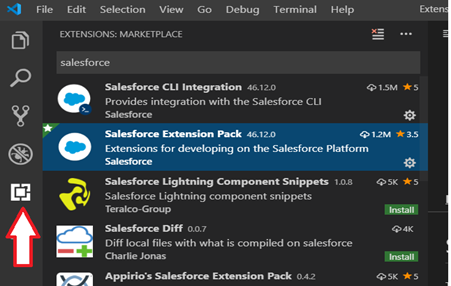
Step-2: Add the Salesforce Extension as follows
- Click on Extension Icon -> type salesforce in search and install
Create a Hello World Lightning Web Component
- Create a Salesforce DX Project
Step-1: In Visual Studio Code, open the Command Palette by pressing Ctrl+Shift+P and type SFDX.
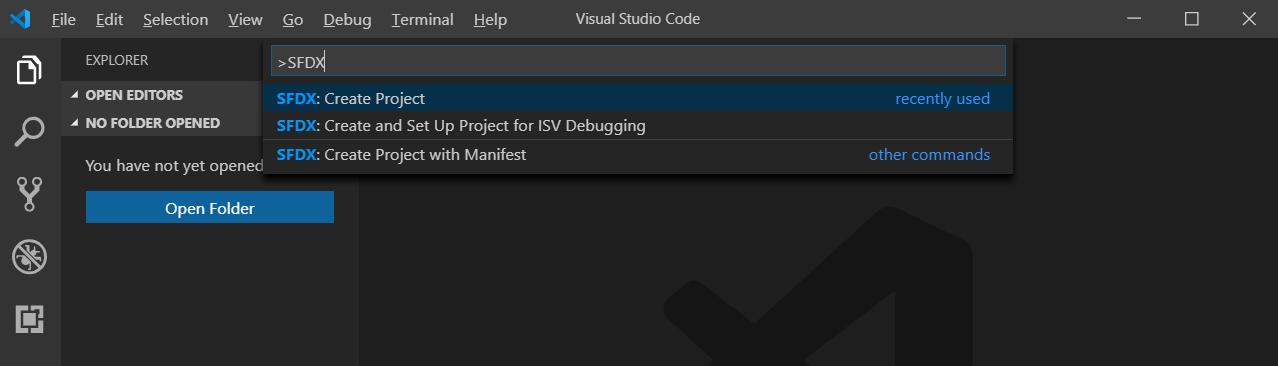
Step-2: Select SFDX: Create Project.
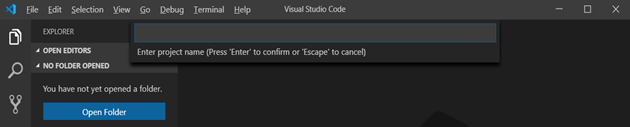
Step-3: Enter HelloWorldLightningWebComponent as the project name and press enter

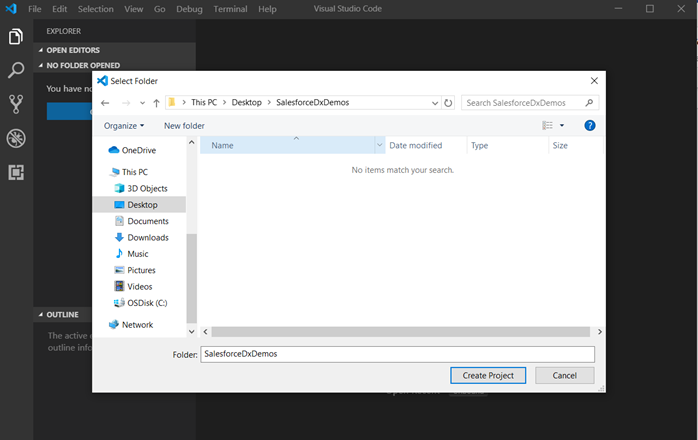
Step-4: Select a folder to store the project and click “Create Project ”
Once clicked Create Project the following message will display at the bottom

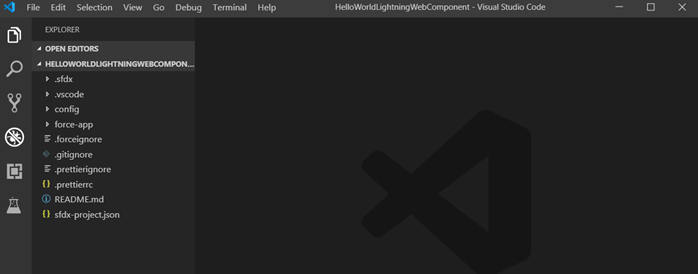
The following project structure is created automatically after successful creation of the project
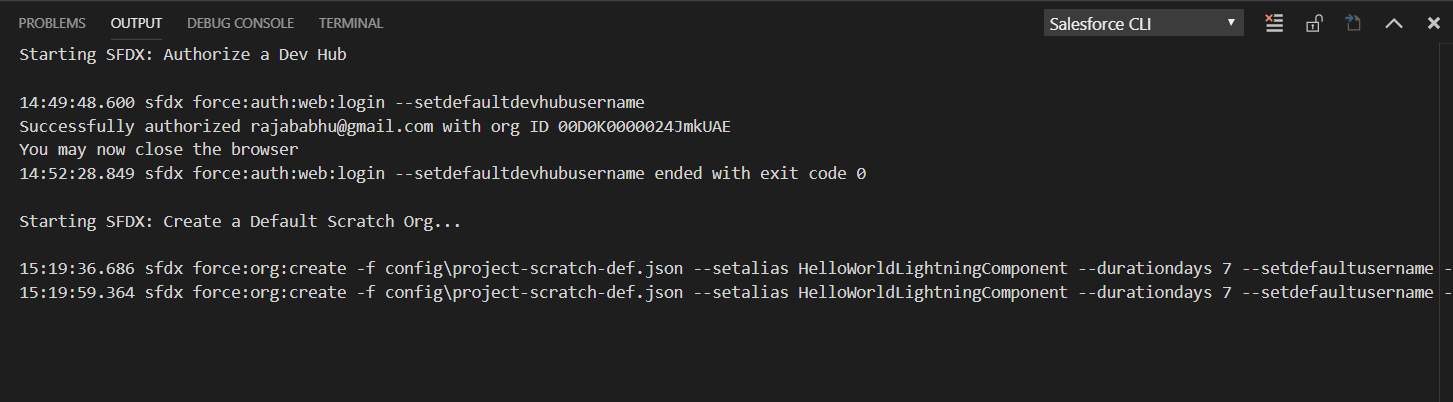
Authorizing the Dev Hub
Step-1: In Visual Studio Code, open the Command Palette by pressing Ctrl+Shift+P and type SFDX.

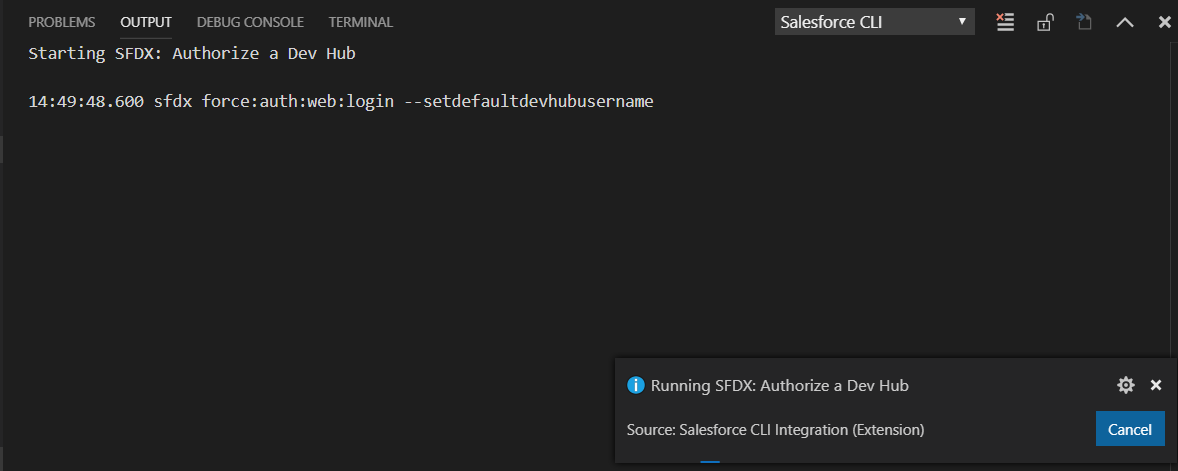
Step-2: In Visual Studio Code, open the Command Palette by pressing Ctrl+Shift+P. Type SFDX and click on SFDX: Authorize a Dev Hub option.

Step-3: once clicked on SFDX: Authorize a Dev Hub option then follow the steps
- Now salesforce CLI tries to connect salesforce org as follows
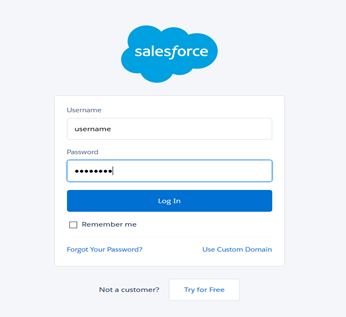
- Once org is opened it will ask credentials as follows
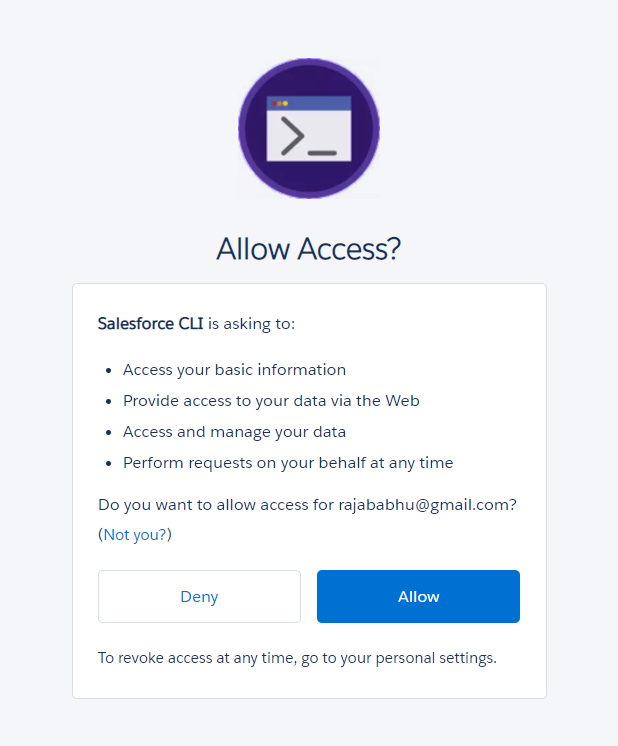
- Once correct given correct credentials, Salesforce CLI will ask for Allow Access as follows
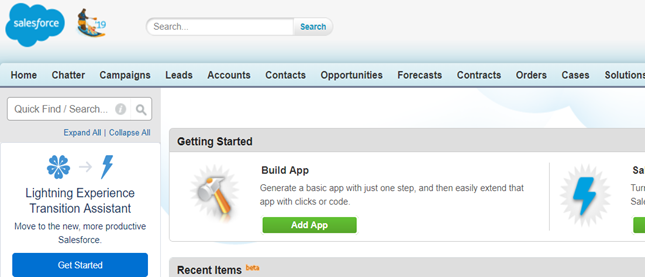
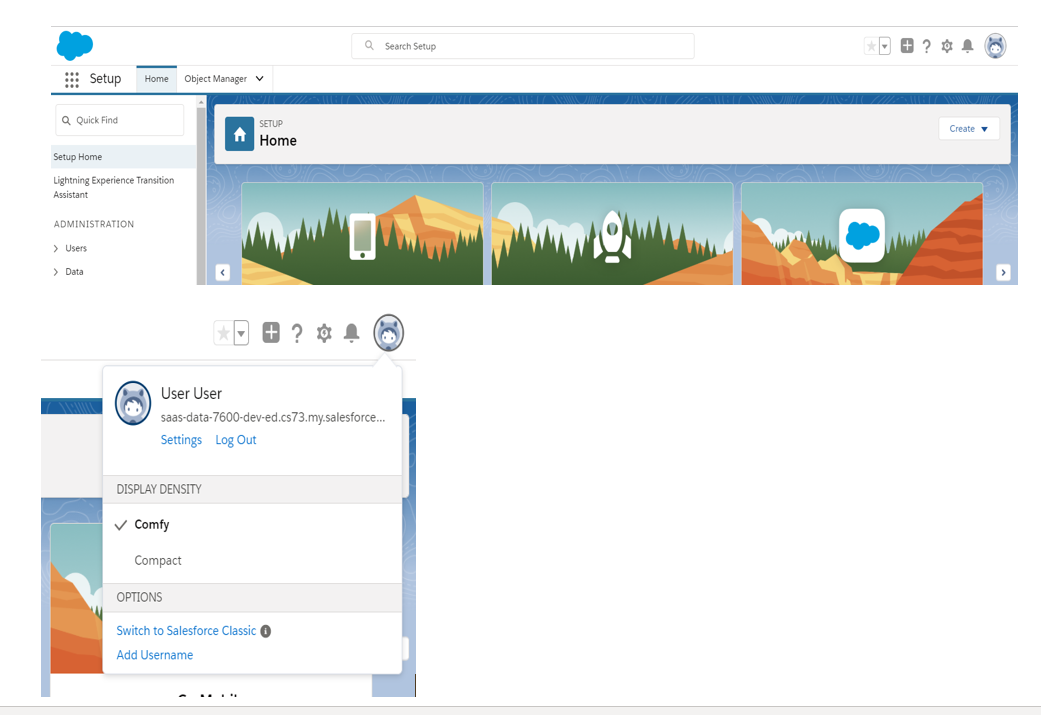
- Once given Allow Successful message is displayed in the console and the home page will open as follows

Creating Scratch Org
Step-1: In Visual Studio Code, open the Command Palette by pressing Ctrl+Shift+P and type SFDX.

Step-2: In Visual Studio Code, open the Command Palette by pressing Ctrl+Shift+P. Type SFDX and click on SFDX: Create a Default Scratch Org

Step-3: once clicked on SFDX: Create a Default Scratch Org option then select the default scratch org definition file as follows

Step-4: Once clicked on default scratch org definition file then it ask to enter org Alias or use a default alias name

Step-5: Once clicked on entering then it will expiration value from 1 to 30 (default is 7) and give default as follows

Step-6: Once clicked on enter the default value then it will successful creation message as follows.
Step-7: To open scratch org type “SFDX: Open Default Org” as follows

When clicked on “SFDX: Open Default Org”, salesforce cli will open salesforce org
Opening message in VS code Console as follows

- When it is successful the salesforce org opened and with a different username (here it is scratch org).
Creating Application and Pushing/Pulling From Scratch Org
- Creating a Lightning Component as follows
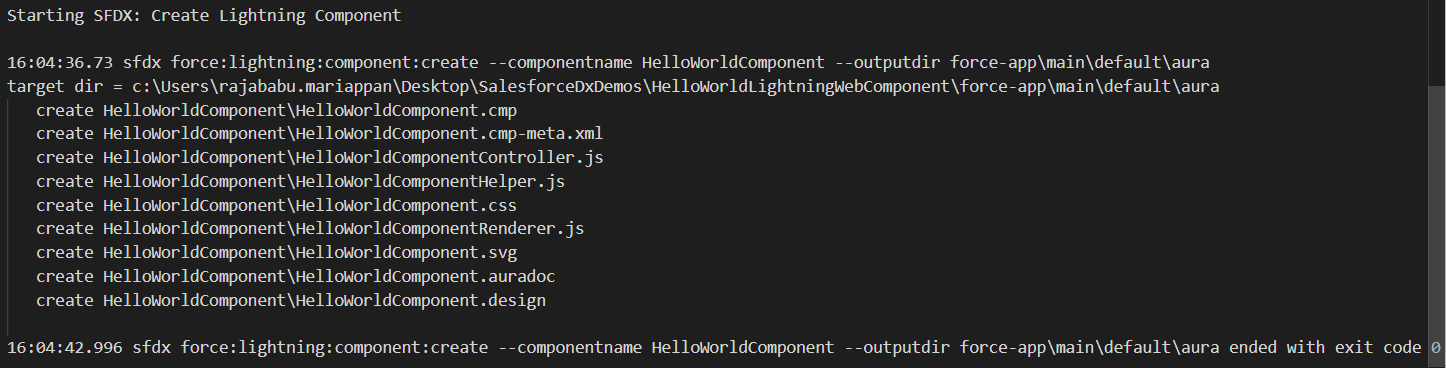
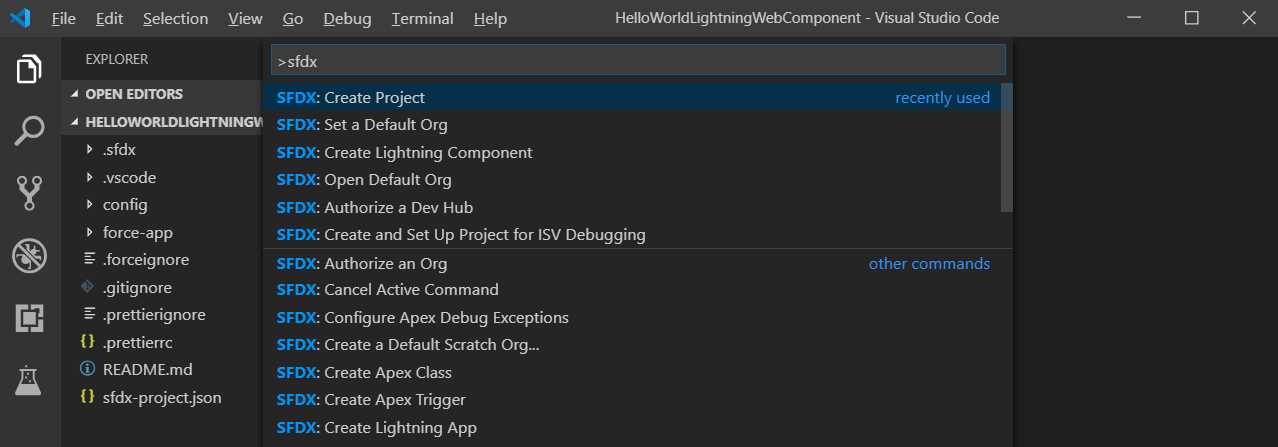
Step-1: In Visual Studio code, open the Command Palette by pressing Ctrl+Shift+P and type SFDX.

Step-2: To create Simple Lightning Component select “SFDX: Create Lightning Component”.


Step-4: Select the location as follows(default)

- Once default location is selected then the following structure is created as follows
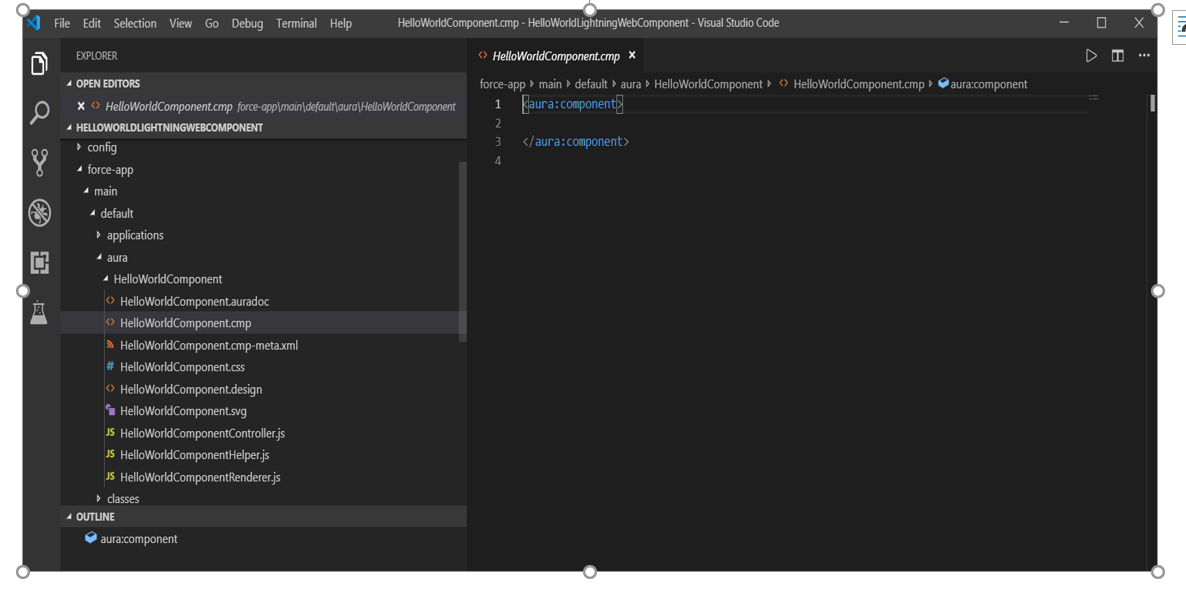
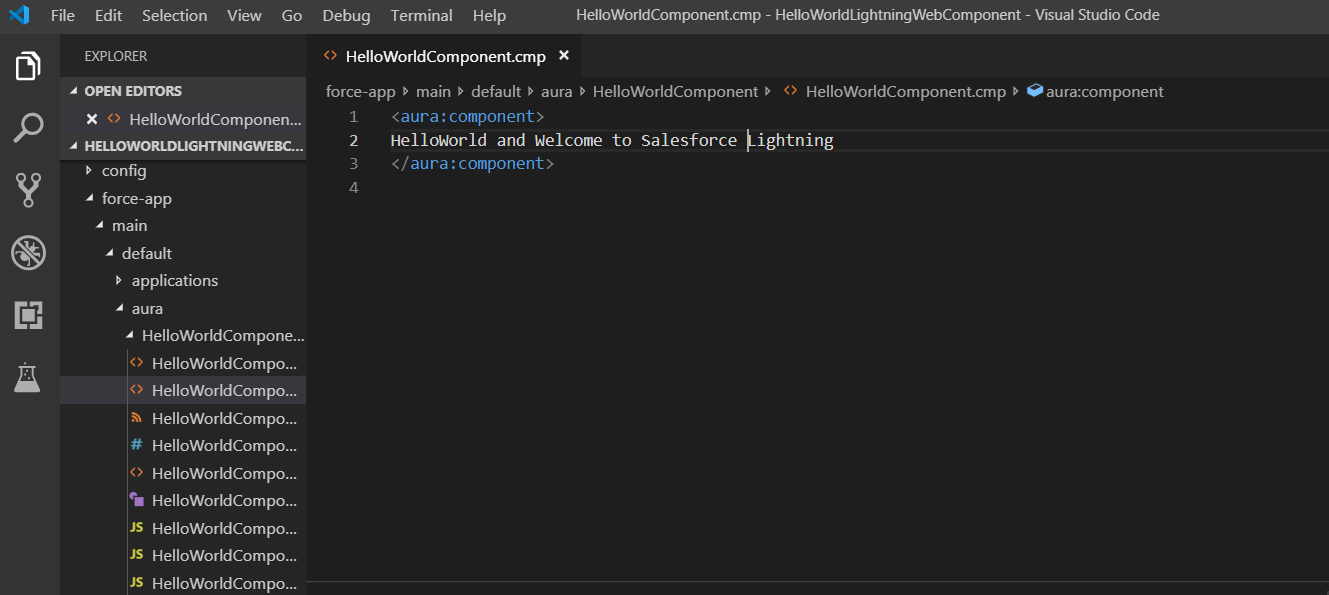
Step-4: As per now write some code in the component as follows.
Pushing to Scratch Org From Visual Studio Code
Step-1: In Visual Studio code, open the Command Palette by pressing Ctrl+Shift+P and type SFDX.
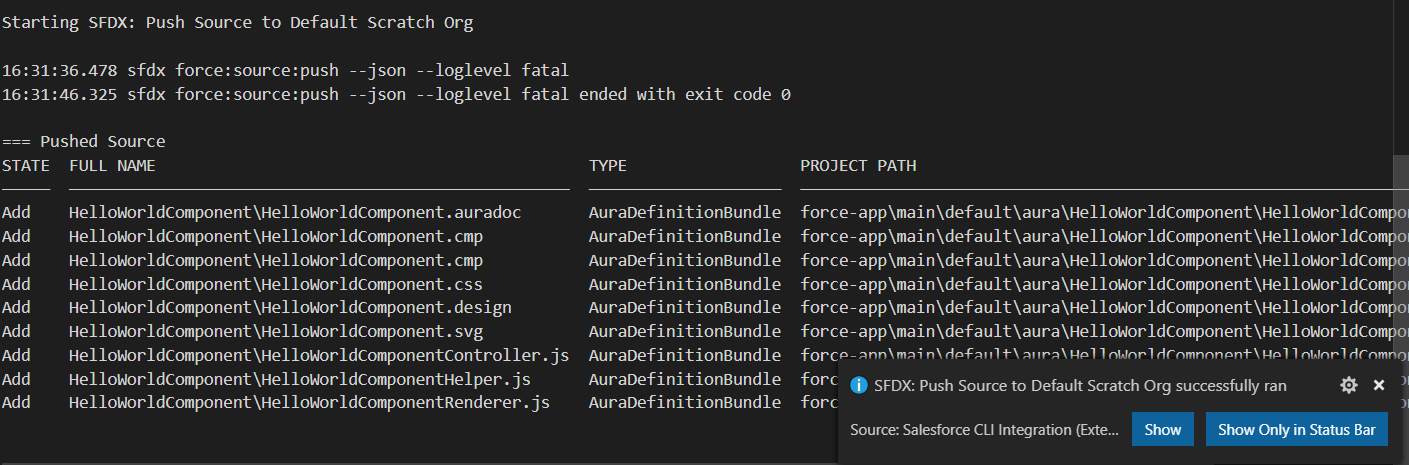
Step-2: Push the created component into the scratch org as follows.

Step-3: Once clicked on SFDX: Push Source to Default Scratch Org the Salesforce CLI will display as follows.
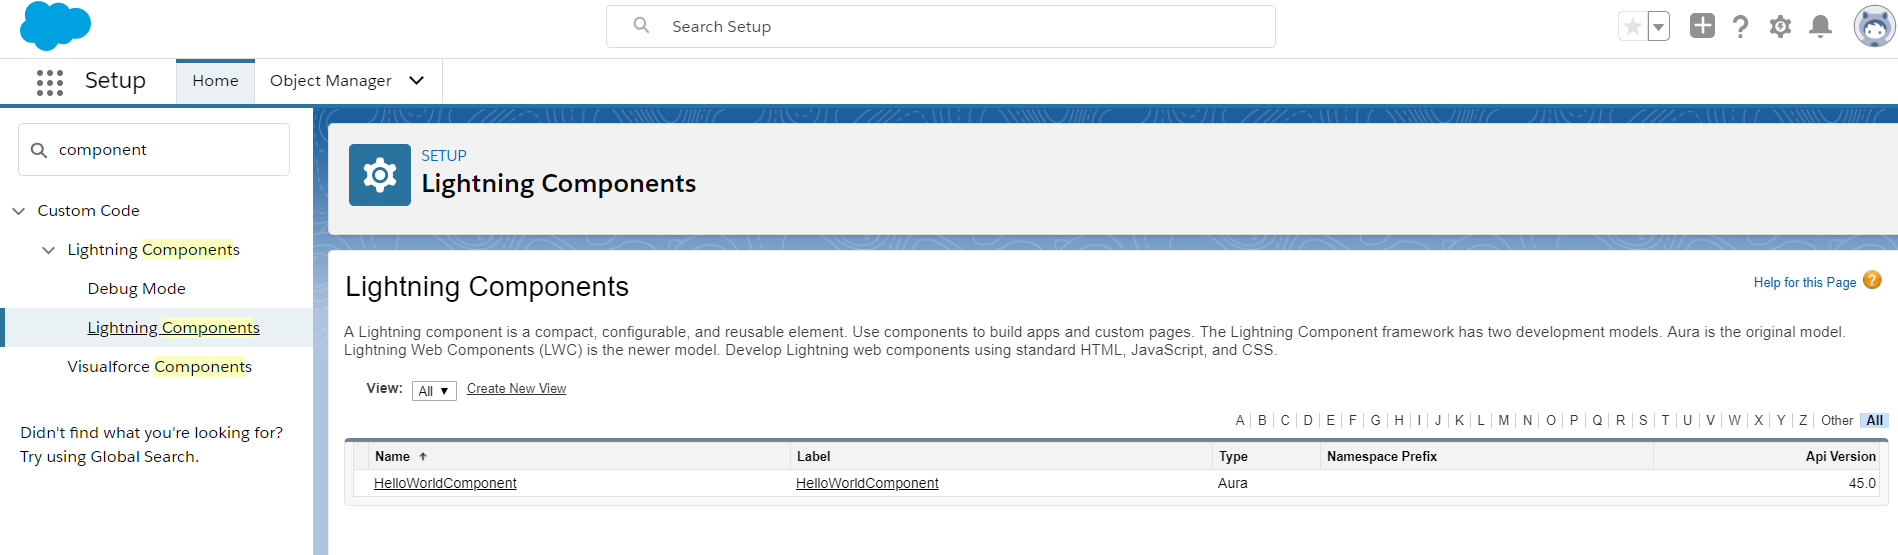
Step-4: Once done, verify the component in the Scratch as follows:
- Open scratch org in the browser (here the org is already opened in the 2.1.3 (step-6)).
- Type lightning component in quick find search.
- The newly created component is added successfully in the scratch org.
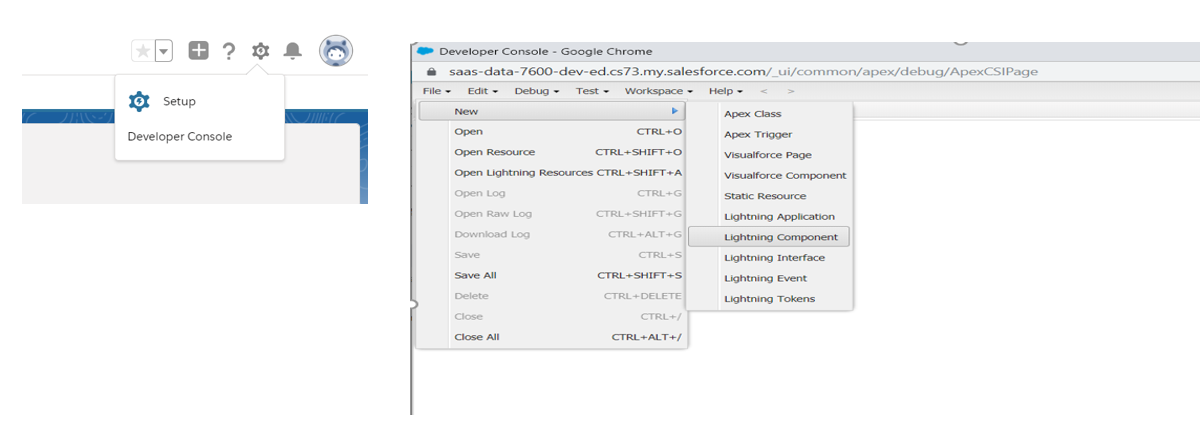
Pulling From Scratch Org to Visual Studio Code
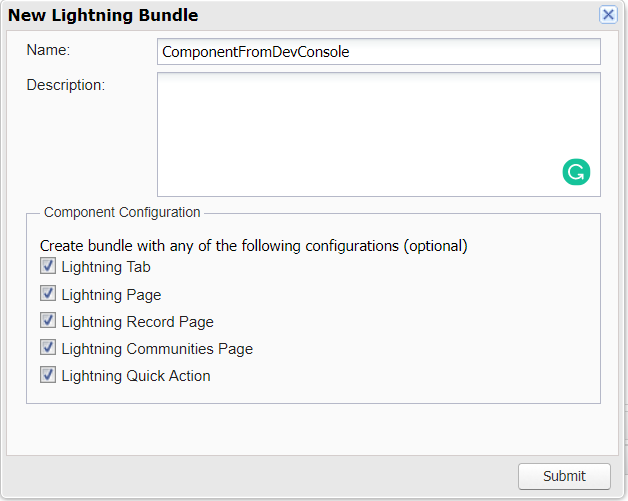
Step-1: Open Developer Console and create Lightning Component as follows
Step-2: Name the Component as follows
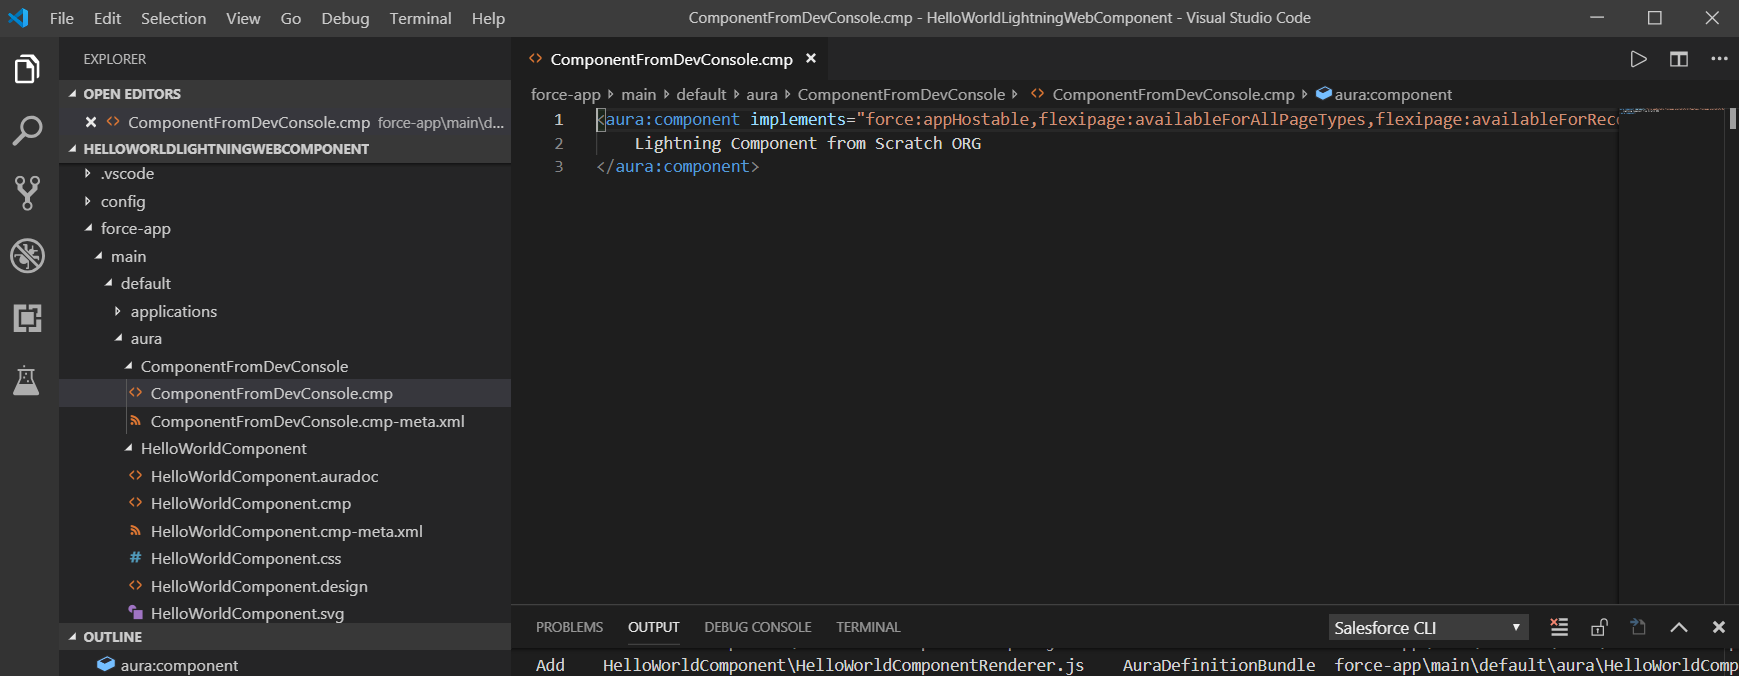
Step-3: Change the code as follows:

Step-3: Open Visual Studio Code and type sfdx and click “SFDX: Pull Source from Default Scratch Org”.
- Once clicked then following output will display in the console

- In the Project structure Successfully pulled the newly created component as follows:
Summary
Successfully done with Salesforce DX implementation using Salesforce CLI, Dev hub, and Visual code Studio.
Opinions expressed by DZone contributors are their own.
Comments