How to Generate HTML Reports With Screenshots in Cypress
This tutorial explains an easy way to set up and generate HTML reports with screenshots in Cypress End to End automation framework.
Join the DZone community and get the full member experience.
Join For FreeYou might have written thousands of test cases but what makes you proud of it is, when you visualize the test results to stakeholders in an understandable way. There is a lot of articles over the internet to Integrate HTML reports into Cypress but when it comes to screenshot integration it's very difficult and time-consuming. The complexity is more.
In this article, I am presenting you step by step guide to integrate HTML results into your Cypress Automation Framework with screenshots in an easy way.
This article explains Integrating HTML Results or reports with embedded Screenshots using Cypress Mochawesome Reporter.
This plugin is built on top of the mocha awesome report just to make life easy, so some of the options available in the mocha awesome reports are available here too.
Let’s start!
Assumptions: You already have set up a Cypress framework with a few test cases running.
Demonstration
Step by step guide to integrate HTML results with screenshot into your cypress automation framework using Cypress Mochawesome Reporter.
Step 1: Install cypress-mochawesome-reporter
In Visual Studio Code, Navigate to Terminal (Ensure present working directory is your Project root level directory) type below command.
npm i --save-dev cypress-mochawesome-reporter
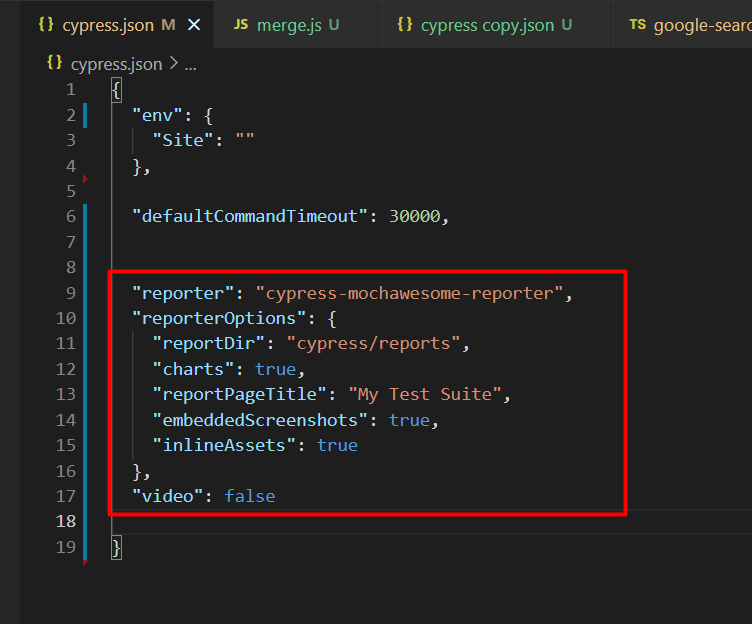
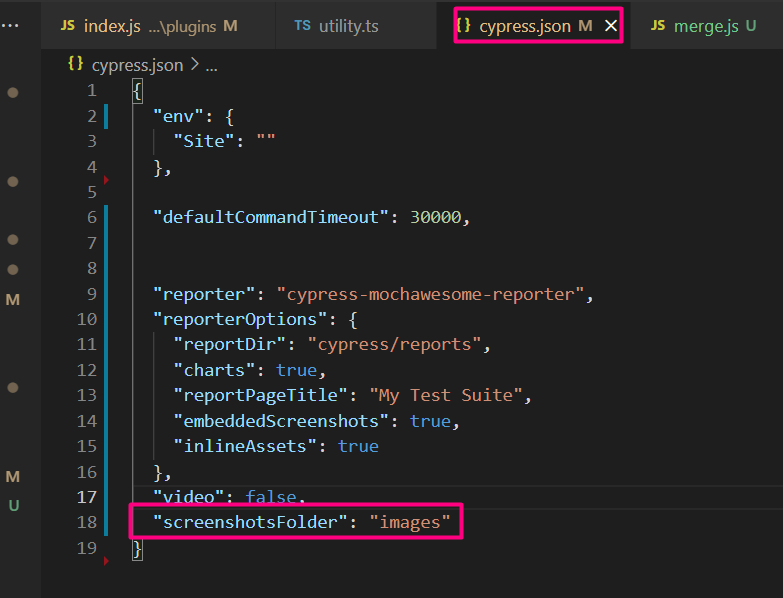
Step 2: Add an Entry to Your cypress.json File
Open, cypress.json file which is located in your project root directory, add the below entries
"reporter": "cypress-mochawesome-reporter",
  "reporterOptions": {
    "reportDir": "cypress/reports",
    "charts": true,
    "reportPageTitle": "My Test Suite",
    "embeddedScreenshots": true,
    "inlineAssets": true
  },
  "video": false
Sample Image of Report configuration in cypress.json:
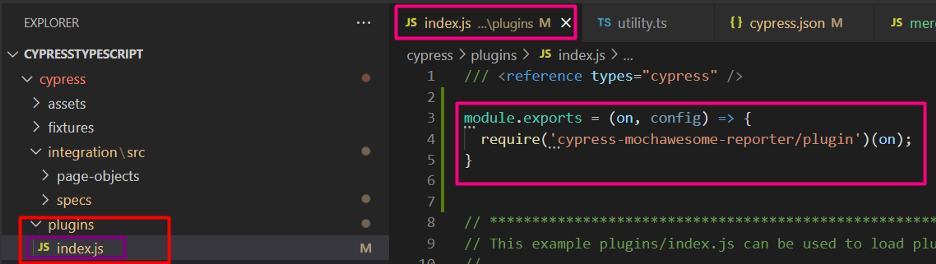
Step 3: Add an Entry In plugin/index.js
From your Project Root Folder, Navigate to cypress folder > plugin folder > index.js file.
Open the index.js file located inside the plugin folder. add the below code:
module.exports = (on, config) => {
  require('cypress-mochawesome-reporter/plugin')(on);
};
Example Screenshot:
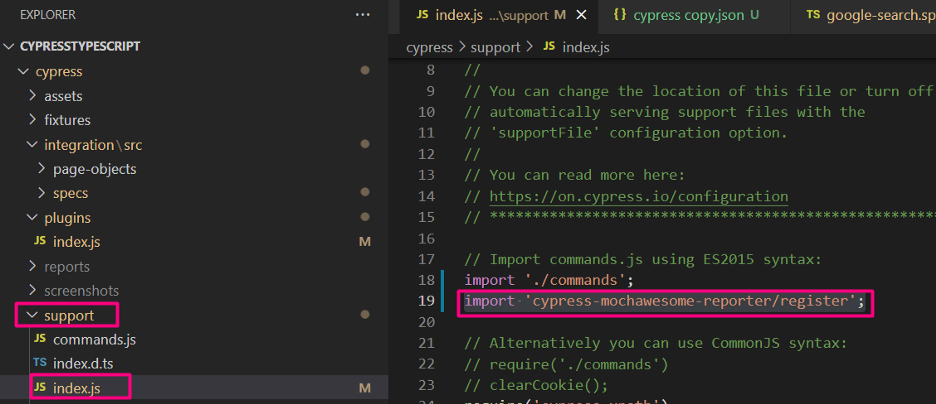
Step 4: Add an Entry In support/index.js
From the Project root folder > Navigate to cypress folder > support folder> index.js file.
Add below entry:
import 'cypress-mochawesome-reporter/register';Example Screenshot:
That’s all you are done with Set up!!!
Step 5: Execute Your Test in The Command-Line Using the Below Command
npx cypress run
Alternatively, you can also run using your package.json config, if you have configured it already.
Step 6: View the Result File
The results file is located in the reportDir option value which we mentioned in Step 2. In our example, we have mentioned cypress/reports
So, From your Project Root Directory > Navigate to cypress folder > reports folder > index.html file
The index.html is your result file, just open in chrome or any browser
Index.html file looks like below:
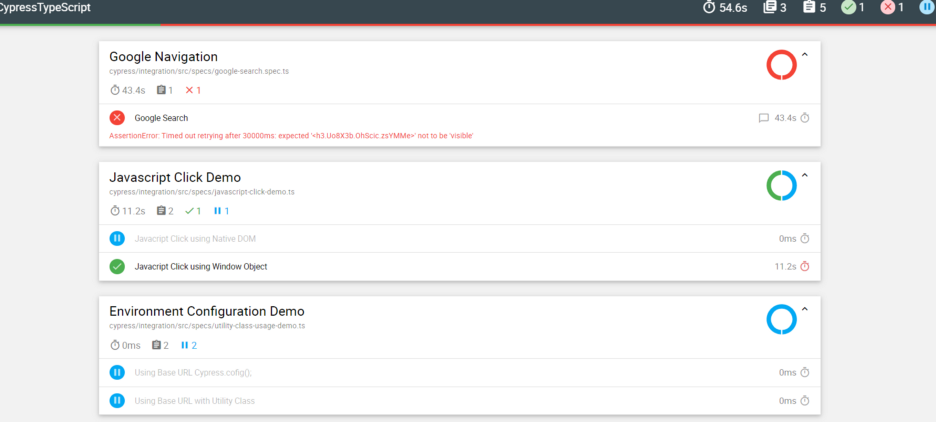
Step 7: Look for The Attached Embedded Screenshot
The screenshot will be captured for all failed tests, so in order to view the screenshot Just click on Failed Test. The screenshot will appear.
Example Screenshot of Failed Test and embedded screenshot:

Frequently Asked Questions
1. Can I Disable the Screenshot?
Yes, You can disable screenshots, In the cypress.json file change the below code.
"embeddedScreenshots": false,
2. How Can Change the Default Screenshot Folder?
You can change the default screenshot folder using the below command:
"screenshotsFolder": "images"
Here, images is the folder name you can change it to any valid path like cypress/images, etc.
It looks like below:
3. Can I Use This Plugin With cypress-multi-reporters to Configure Both Junit and HTML Results?
Yes, you can use this plugin to configure multiple reporters.
If you want to configure multiple reports you should use the below code in cypress.json the folder.
Below is an example code, you can configure with options.
"reporter": "cypress-multi-reporters",
  "reporterOptions": {
    "reporterEnabled": "cypress-mochawesome-reporter, mocha-junit-reporter",
    "mochaJunitReporterReporterOptions": {
      "mochaFile": "cypress/reports/junit/results-[hash].xml"
    },
    "cypressMochawesomeReporterReporterOptions": {
      "charts": true,
      "reportPageTitle": "custom-title"
    }
  },
  "video": false
4. How to Enable Inline CSS and Styles in Mocha Awesome HTML Reports?
To enable inline styles and a single HTML file (without any assets files) you need to turn on the option
"inlineAssets": true
Hope you enjoyed this…
Reference:
npm: https://www.npmjs.com/package/cypress-mochawesome-reporter
git: https://github.com/LironEr/cypress-mochawesome-reporter#readme
If you need any help, support or guidance feel free to reach me on LinkedIn.
LinkedIn | https://www.linkedin.com/in/ganeshsirsi/
Opinions expressed by DZone contributors are their own.
Comments