Deno JS: CRUD and MySQL Connection
A complete guide for developing a backend application with CRUD operations along with database connection to MySQL.
Join the DZone community and get the full member experience.
Join For FreeDeno.js is a new backend language based on the javascript framework. Deno is a simple, modern, and secure runtime for JavaScript and TypeScript that uses V8 and is built in Rust. In this tutorial, we'll learn how to develop a complete CRUD web application using Deno js (Oak as a framework) and using Mysql as database.

Overview
This project takes an example of an Employee object having four attributes id, name, department, and isActive. We will proceed with adding an employee object in our DB and then performing further operations.
Dependencies
No dependency required. Just install Deno using curl -fsSL https://deno.land/x/install/install.sh | shand set up your DENO_INSTALL path in .bashrc.
Configuration File(server.ts):
server.ts is the main configuration file where all the configuration combines such as route definitions, port, and even logging component.
x
const app = new Application();
const port: number = 8080;
app.use(logger.logger);
app.use(logger.responseTime);
app.use(employeeRouter.routes());
app.use(employeeRouter.allowedMethods());
app.addEventListener("listen", ({ secure, hostname, port }) => {
const protocol = secure ? "https://" : "http://";
const url = `${protocol}${hostname ?? "localhost"}:${port}`;
console.log(
`${yellow("Listening on:")} ${green(url)}`,
);
});
await app.listen({ port });
Interface Layer(Employee.ts):
Define your models here for persisting in the database. Here we have created an Employee model in Employee.ts file
xxxxxxxxxx
export default interface Employee {
id?: number,
name?: string,
department?:string,
isActive?:boolean
}
Database Layer(client.ts):
Define your SQL Connection and Create table script here.
xxxxxxxxxx
const client = await new Client();
client.connect({
hostname: "127.0.0.1",
username: "your db username",
password: "your db password",
db: "",
});
const run = async () => {
await client.execute(`CREATE DATABASE IF NOT EXISTS ${DATABASE}`);
await client.execute(`USE ${DATABASE}`);
};
run();
export default client;
Service Layer(employeeService.ts):
Define your business logic here and it also acts as a midpoint between database and controller layer.
xxxxxxxxxx
export default {
doesExistById: async ({ id }: Employee) => {
const [result] = await client.query(
`SELECT COUNT(*) count FROM ${TABLE.EMPLOYEE} WHERE id = ? LIMIT 1`,
[id],
);
return result.count > 0;
},
getAll: async () => {
return await client.query(`SELECT * FROM ${TABLE.EMPLOYEE}`);
},
getById: async ({ id }: Employee) => {
return await client.query(
`SELECT * FROM ${TABLE.EMPLOYEE} WHERE id = ?`,
[id],
);
},
add: async ({name,department,isActive}: Employee,) => {
return await client.query(
`INSERT INTO ${TABLE.EMPLOYEE}(name, department,isActive) values(?, ?, ?)`,
[
name,
department,
isActive,
],
);
},
updateById: async ({ id, name,department, isActive }: Employee) => {
const result = await client.query(
`UPDATE ${TABLE.EMPLOYEE} SET name=?, department=?, isActive=? WHERE id=?`,
[
name,
department,
isActive,
id,
],
);
return result.affectedRows;
},
deleteById: async ({ id }: Employee) => {
const result = await client.query(
`DELETE FROM ${TABLE.EMPLOYEE} WHERE id = ?`, [id],
);
return result.affectedRows;
},
};
Controller Layer (employeeController.ts):
To perform CRUD operations using HTTP methods(GET,POST,PUT,DELETE).
x
// GET
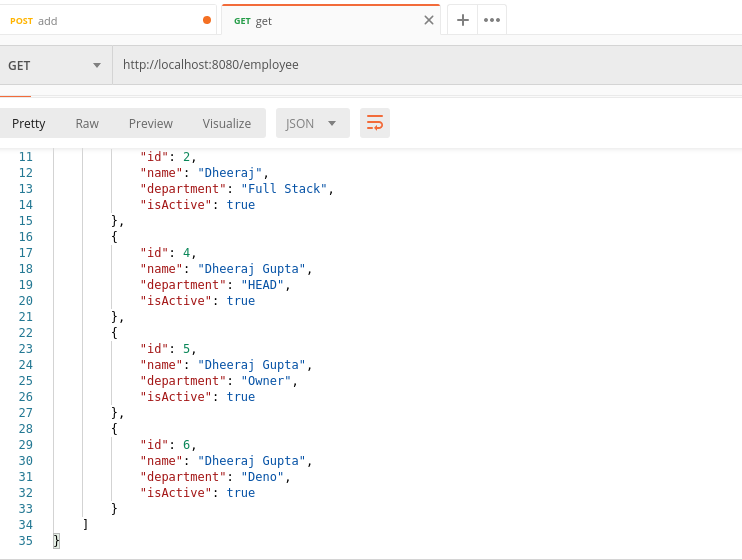
getAllEmployees: async ({ response }: { response: any }) => {
const data = await EmployeeService.getAll();
response.status = 200;
response.body = {
success: true,
data,
};
},
// POST
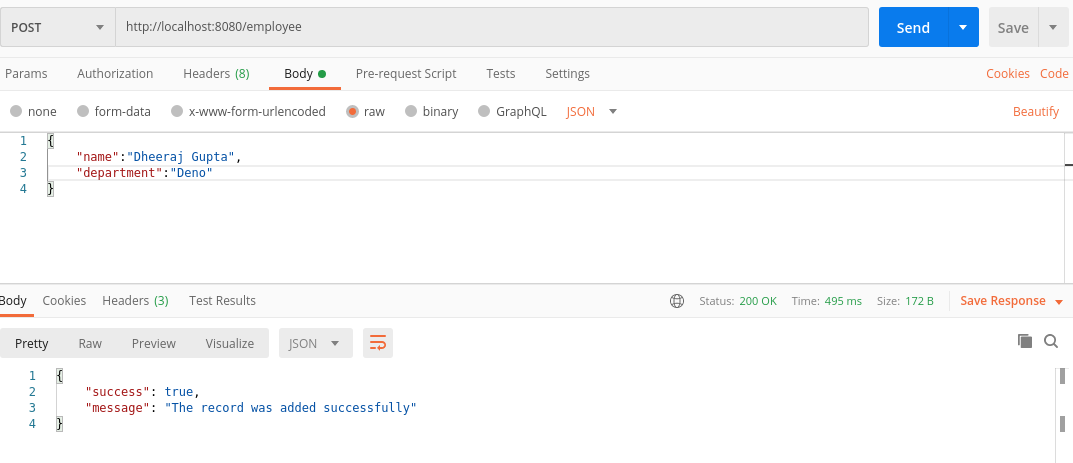
createEmployee: async ({ request, response }: { request: any; response: any },) => {
const body = await request.body();
await EmployeeService.add(
{ name: body.value.name,
department:body.value.department,
isActive: true },
);
response.body = {
success: true,
message: "The record was added successfully",
};
},
// GET by ID
getEmployeeById: async (
{ params, response }: { params: { id: string }; response: any },
) => {
const isAvailable = await EmployeeService.doesExistById(
{ id: Number(params.id) },
);
const employee: Employee = await EmployeeService.getById({ id: Number(params.id) });
response.status = 200;
},
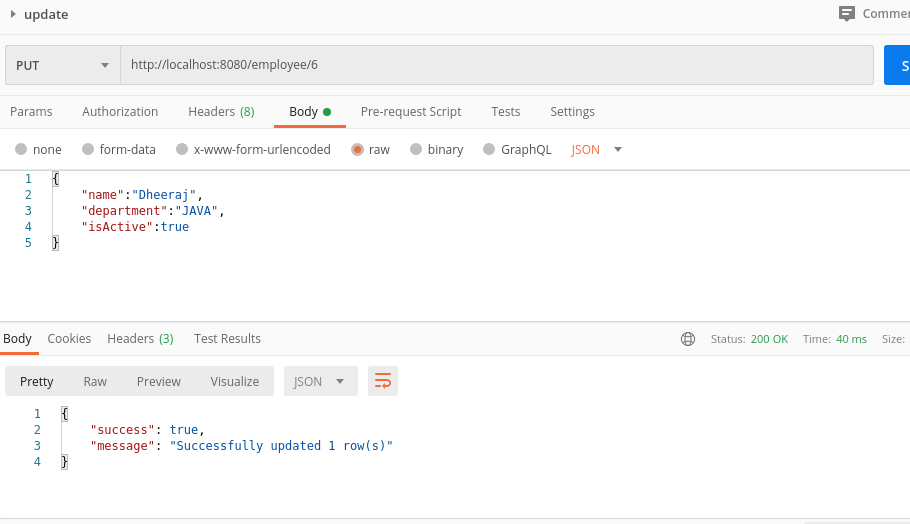
//PUT
updateEmployeeById: async ({ params, request, response }: {params: { id: string };
request: any;
response: any;
},) => {
const isAvailable = await EmployeeService.doesExistById(
{ id: Number(params.id) },
);
const body = await request.body();
const updatedRows = await EmployeeService.updateById({
id: Number(params.id),
body.value,
});
response.status = 200;
},
//DELETE
deleteEmployeeById: async (
{ params, response }: { params: { id: string }; response: any },
) => {
const updatedRows = await EmployeeService.deleteById({
id: Number(params.id),
});
response.status = 200;
},
};
Routes Layer(employee.route.ts):
Define the endpoints in an application and connects to the HTTP methods in a controller.
xxxxxxxxxx
const router = new Router();
router
.get("/employee", employeeController.getAllEmployees)
.post("/employee", employeeController.createEmployee)
.get("/employee/:id", employeeController.getEmployeeById)
.put("/employee/:id", employeeController.updateEmployeeById)
.delete("/employee/:id", employeeController.deleteEmployeeById);
export default router;
Running the Application
Run your application by the following command: deno run --allow-env --allow-net server.ts
The application will come up at base URL localhost:8080.
Test your application by appending the endpoints to base URL, PLease find the postman snapshot below:
Update Employee by Id:
Get Employee By Id: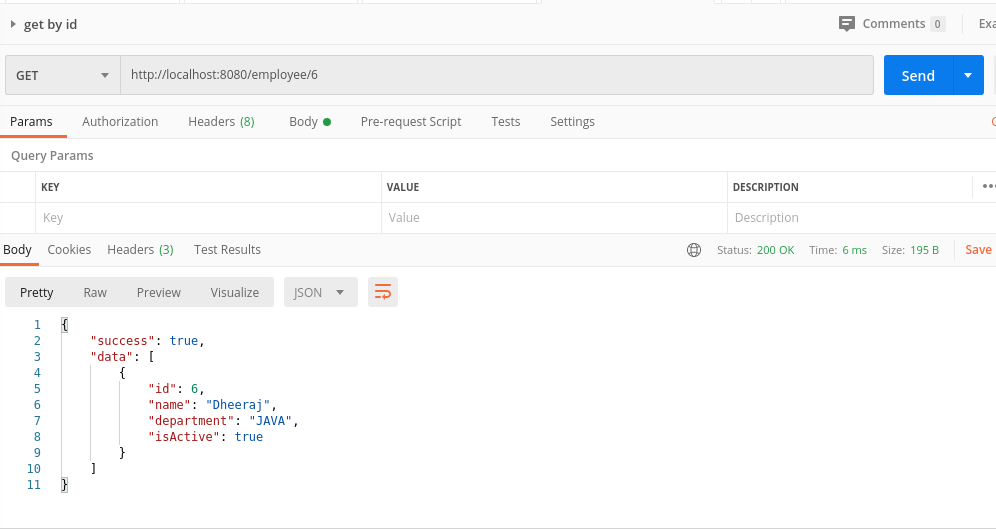
Delete Employee By Id:

Conclusion
In this tutorial, we learned how to build a CRUD REST-API using Deno js. The complete project can be found at my Github repository: https://github.com/dheerajgupta217/getting-started-with-deno
Opinions expressed by DZone contributors are their own.
Comments