Deploying Spring Cloud Microservices on Hashicorp's Nomad
There's a life outside Kubernetes and Docker Swarm. Here's a tutorial on Nomad from Hashicorp as a simple microservices deployment solution.
Join the DZone community and get the full member experience.
Join For FreeNomad, HashiCorp's cloud product, is a little less popular than Consul, Terraform, or Vault. It is also not as popular as a competitive software like Kubernetes or Docker Swarm. However, it has its advantages. While Kubernetes is specifically focused on Docker, Nomad is more general-purpose. It supports containerized Docker applications as well as simple applications delivered as executable JAR files. Besides that, Nomad is architecturally much simpler. It is a single binary, both for clients and servers, and does not require any services for coordination or storage.
In this article, I'm going to show you how to install, configure, and use Nomad in order to run microservices created in the Spring Boot and Spring Cloud frameworks. Let's move on.
Step 1: Installing and Running Nomad
HashiCorp's Nomad can be easily started on Windows. You just have to download it from this site, and then add the nomad.exe file to your PATH. Now you are able to run Nomad commands from your command line. Let's begin by starting the Nomad agent. For simplicity, we will run it in development mode (-dev). With this option, it is acting both as a client and a server. Here's the command that starts the Nomad agent on my local machine:
nomad agent -dev -network-interface="WiFi" -consul-address=192.168.99.100:8500Sometimes, you could be required to pass a selected network interface as a parameter. We also need to integrate the agent node with Consul discovery for the purpose of inter-service communication, discussed in the next part of this article. The most suitable way to run Consul on your local machine is through a Docker container. Here's the command that launches a single node Consul discovery server and exposes it on port 8500. If you run Docker on Windows, it is probably available under address 192.168.99.100.
docker run -d --name consul -p 8500:8500 consulStep 2: Creating a Job
Nomad is a tool for managing a cluster of machines and running applications on them. To run the application there, we should first create a job. A job is the primary configuration unit that users interact with when using Nomad. A job is a specification of tasks that should be run by Nomad. The job consists of multiple groups, and each group may have multiple tasks.
There are some properties that have to be provided, for example, datacenters. You should also set the type parameter that indicates the scheduler type. I set the type as service, which is designed for scheduling long-lived services that should never go down, like an application exposing an HTTP API.
Let's take a look at Nomad's job descriptor file. The most important elements of that configuration have been marked by the sequence numbers:
- Property
countspecifies the number of the task groups that should be running under this group. In practice it scales up the number of instances of the service started by the task. Here, it has been set to2. - Property
driverspecifies the driver that should be used by Nomad clients to run the task. The driver name corresponds to a technology used for running the application. For example, we can setdocker,rktfor containerization solutions orjavafor executing Java applications packaged into a Java JAR file. Here, the property has been set tojava. - After settings the driver we should provide some configuration for this driver in the job spec. There are some options available for
javadriver, but I decided to set the absolute path to the downloaded JAR and some JVM options related to the memory limits. - We may set some requirements for the task including memory, network, CPU, and more. Our task requires max 300 MB or RAM, and enables dynamic port allocation for the port labeled "http."
- Now, it is required to point out a very important thing. When the task is started, it passes an additional environment variable named
NOMAD_HOST_PORT_http, which indicates the host port that the HTTP service is bound to. The suffixhttprelates to the label set for the port. - Property
serviceinside a task specifies integrations with Consul for service discovery. Now, Nomad automatically registers a task with the provided name when a task is started and de-registers it when the task dies. As you probably remember, the port number is generated automatically by Nomad. However, I passed the label HTTP to force Nomad to register in Consul with an automatically generated port.
job "caller-service" {
 datacenters = ["dc1"]
 type = "service"
 group "caller" {
  count = 2#(1)
  task "api" {
   driver = "java"# (2)
   config {#
    (3)
    jar_path = "C:\\Users\\minkowp\\git\\sample-nomad-java-services\\caller-service\\target\\caller-service-1.0.0-SNAPSHOT.jar"
    jvm_options = ["-Xmx256m", "-Xms128m"]
   }
   resources {#
    (4)
    cpu = 500
    memory = 300
    network {
     port "http" {}#(5)
    }
   }
   service {#
    (6)
    name = "caller-service"
    port = "http"
   }
  }
  restart {
   attempts = 1
  }
 }
}
Once we saved the content visible above as job.nomad file, we may apply it to the Nomad node by executing the following command.
nomad job run job.nomadStep 3: Building Sample Microservices
The source code of sample applications is available on GitHub in my repository sample-nomad-java-services. There are two simple microservices: callme-service and caller-service. I have already used that sample for in the previous articles for showing the inter-service communication mechanism. The microservice callme-service does nothing more than exposing endpoint GET /callme/ping that displays service's name and version.
@RestController
@RequestMapping("/callme")
public class CallmeController {

 private static final Logger LOGGER = LoggerFactory.getLogger(CallmeController.class);

 @Autowired
 BuildProperties buildProperties;

 @GetMapping("/ping")
 public String ping() {
  LOGGER.info("Ping: name={}, version={}", buildProperties.getName(), buildProperties.getVersion());
  return buildProperties.getName() + ":" + buildProperties.getVersion();
 }

}
Implementation of the caller-service endpoint is a little bit more complicated. First, we have to connect our service with Consul in order to fetch the list of registered instances of callme-service. Because we use Spring Boot for creating sample microservices, the most suitable way to enable Consul client is through Spring Cloud Consul library.
<dependency>
	<groupId>org.springframework.cloud</groupId>
	<artifactId>spring-cloud-starter-consul-discovery</artifactId>
</dependency>
We should override auto-configured connection settings in application.yml. In addition to host and property we have also set spring.cloud.consul.discovery.register property to false. We don't want the discovery client to register the application in Consul after startup, because it has been already performed by Nomad.
spring:
  application:
    name: caller-service
  cloud:
    consul:
      host: 192.168.99.100
      port: 8500
      discovery:
        register: false
Then we should enable the Spring Cloud discovery client and RestTemplate load balancer in the main class of the application.
@SpringBootApplication
@EnableDiscoveryClient
public class CallerApplication {

 public static void main(String[] args) {
  SpringApplication.run(CallerApplication.class, args);
 }

 @Bean
 @LoadBalanced
 RestTemplate restTemplate() {
  return new RestTemplate();
 }

}
Finally, we can implement the method GET /caller/ping that calls the endpoint exposed by callme-service.
@RestController
@RequestMapping("/caller")
public class CallerController {

 private static final Logger LOGGER = LoggerFactory.getLogger(CallerController.class);

 @Autowired
 BuildProperties buildProperties;
 @Autowired
 RestTemplate restTemplate;

 @GetMapping("/ping")
 public String ping() {
  LOGGER.info("Ping: name={}, version={}", buildProperties.getName(), buildProperties.getVersion());
  String response = restTemplate.getForObject("http://callme-service/callme/ping", String.class);
  LOGGER.info("Calling: response={}", response);
  return buildProperties.getName() + ":" + buildProperties.getVersion() + ". Calling... " + response;
 }

}
As you probably remember, the port of the application is automatically generated by Nomad during task execution. It passes an additional environment variable named NOMAD_HOST_PORT_http to the application. Now, this environment variable should be configured inside application.yml as the value of the server.port property.
server:
  port: ${NOMAD_HOST_PORT_http:8090}
The last step is to build the whole project sample-nomad-java-services with mvn clean install command.
Step 4: Using Nomad Web Console
During the two previous steps, we have created, built, and deployed our sample applications on Nomad. Now, we should verify the installation. We can do it using the CLI or by visiting web console provided by nomad. The web console is available under the address http://localhost:4646.
In the main site of the web console, we may see a summary of existing jobs. If everything goes fine, the field status is equal to RUNNING and the bar Summary is green.

We can display the details of every job in the list. The next screen shows the history of the job, reserved resources, and the number of running instances (tasks).

If you would like to check out the details related to the single task, you should navigate to Task Group details.

We may also display the details related to the client node.

To display the details of allocation select the row in the table. You would be redirected to the following site. You may check out there an IP address of the application instance.

Step 5. Testing a Sample System
Assuming you have successfully deployed the applications on Nomad, you should see the following services registered in Consul.

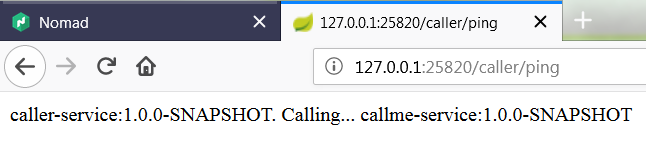
Now, if you call one of two available instances of caller-service, you should see the following response. The address of the callme-service instance has been successfully fetched from Consul through the Spring Cloud Consul Client.
Published at DZone with permission of Piotr Mińkowski. See the original article here.
Opinions expressed by DZone contributors are their own.
Comments