Driving a DC Motor With an Arduino and the L293D Motor Driver
This handy tutorial will teach you how to work a DC motor with an Arduino and an L293D motor driver with some quick connections and a bit of code.
Join the DZone community and get the full member experience.
Join For FreeIn this tutorial, we'll be looking at how to power and drive a DC motor with an L293D and an Arduino (we're using the Arduino MKR 1000 here, but you can use any Arduino that provides enough voltage for your motor and has 2 digital output pins).
The L293D is a 16-pin Motor Driver IC which can control up to two DC motors simultaneously, in any direction.
You will need:
- Arduino board of your choice
- Micro USB cable
- L293D motor driver
- DC motor
- Breadboard
- Jumper wires
- Arduino IDE
Connecting the Components
First, let's hook up the components on the breadboard. Below, you'll see a pin diagram of the L293D — note the location of each of the pins, relative to the notch at the top.

Since we're just driving one motor for this tutorial, we won't be using all of the motor driver's pins.
- Start by plugging your Arduino into a power source (such as your computer).
- Connect the
GNDand5Von the Arduino to one side of the breadboard, and extend them to the other side with jumper wires. - Place the L293D in the center of the breadboard, with half of the pins on either side of the breadboard.
- Connect
5VtoEnable 1,Vss, andVson the L293D. - Connect digital output pins (we're using 6 and 7) to
input 1andinput 2on the L293D. - Connect your Arduino's
GNDto bothGNDpins on the same side of the L293D. - Finally, connect
output 1andoutput 2of the L293D to your motor pins.
Note: The Vs pin on the motor driver supplies power to the motor. If your motor requires more voltage than your Arduino can provide, you can hook up an external battery or battery pack. Simply connect the negative lead to GND on the breadboard, and the positive lead to the Vs pin of the L293D.
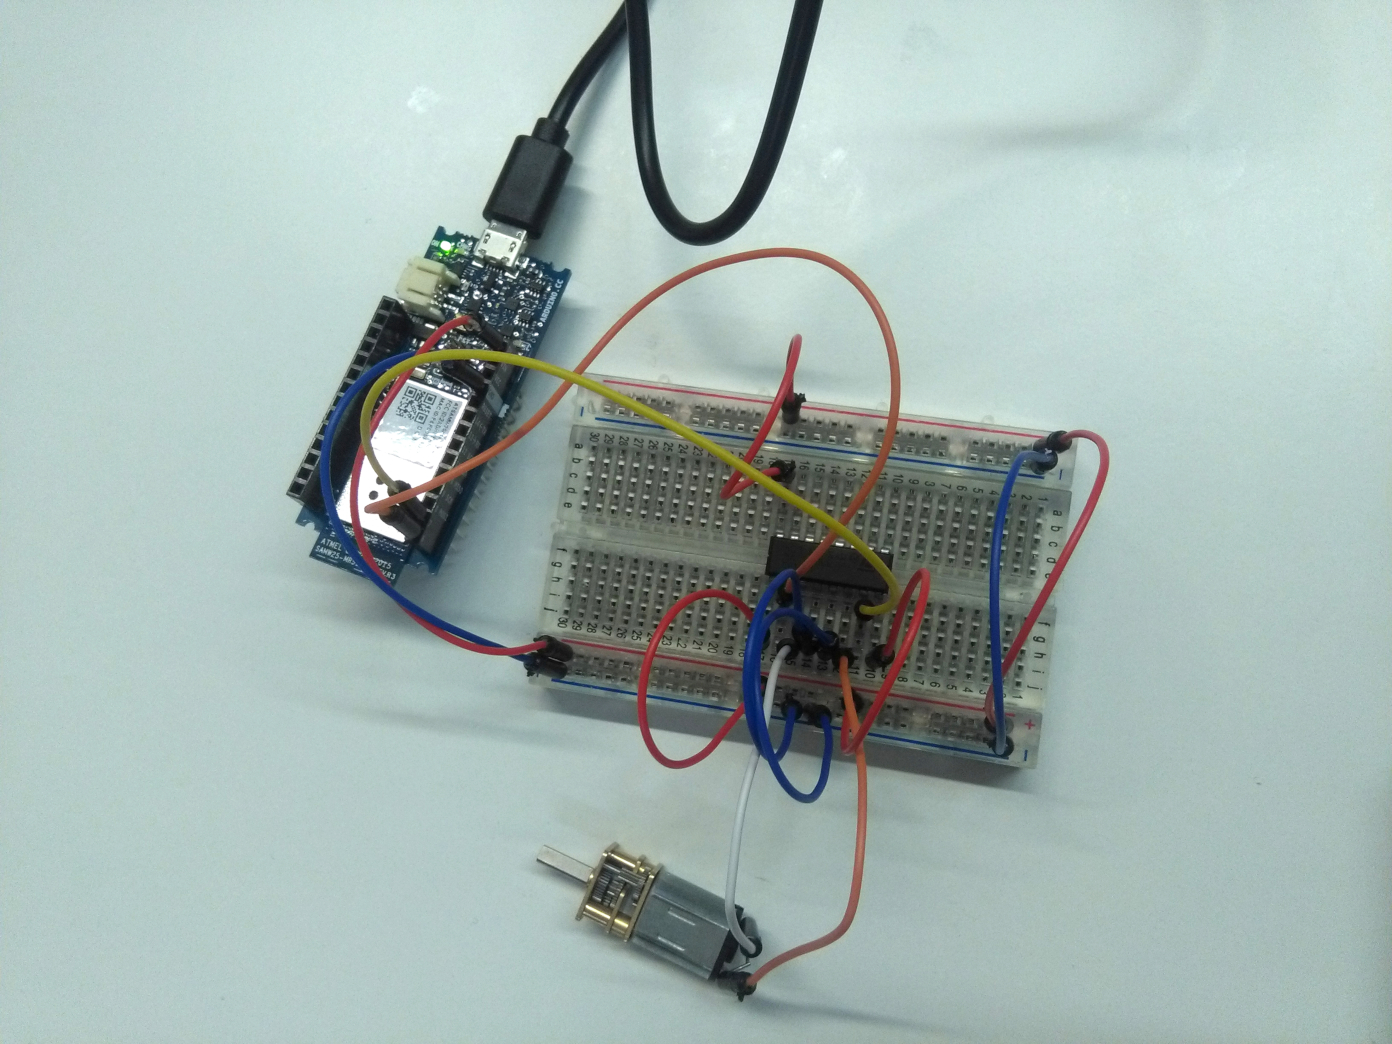
Once that's all connected, it should look a little something like this:
The Code
Note: If you are completely unfamiliar with the Arduino IDE, watch this video to give you a better understanding of how it works.
In the Arduino IDE:
- Make sure the correct port is selected under
Tools > Port - Make sure the correct Arduino board is selected under
Tools > Board - Click on File > New to create a new Sketch
- Copy and paste the code below, replacing the
motorPin1andmotorPin2values if you're using output pins other than 6 and 7 on your Arduino
// Define the pin numbers
int motorPin1 = 6;
int motorPin2 = 7;

void setup() {
    // Set the pin modes of the above IO pins to OUTPUT
    pinMode(motorPin1, OUTPUT);
    pinMode(motorPin2, OUTPUT);
}

void loop() {
    // Turn the motor in one direction
    digitalWrite(motorPin1, LOW);
    digitalWrite(motorPin2, HIGH);
}- Go to
Sketch > Uploadto upload the code to your Arduino
Once the sketch is uploaded successfully, the motor will turn in one direction.
If you want to change the direction, simply reverse HIGH and LOW in the loop function.
To take this one step further, connect your device to Wia and add Commands and Flows. If you have any questions, reach out to us using the chat icon at the bottom right hand side of our site!
Published at DZone with permission of Austin Spivey. See the original article here.
Opinions expressed by DZone contributors are their own.
Comments