Dynamically Change Logging Level of Application in Mule Run-Time
Use a JMX approach to create a Mule application that runs on Mule standalone and changes logging levels during runtime.
Join the DZone community and get the full member experience.
Join For FreeIn this article, I am going to create a Mule application that runs on Mule Standalone and changes logging levels dynamically (during runtime.). I am going to use the JMX approach.
Requirements
Mule EE Standalone to run your application.
Anypoint Studio to develop the application.
VisualVM.
Creating a Simple Application
Create a new project in Anypoint studio.
Add an HTTP listener in a new flow and configure it (I have configured it to listen to port 8081 with requests over the path "http://localhost:8081/hello").
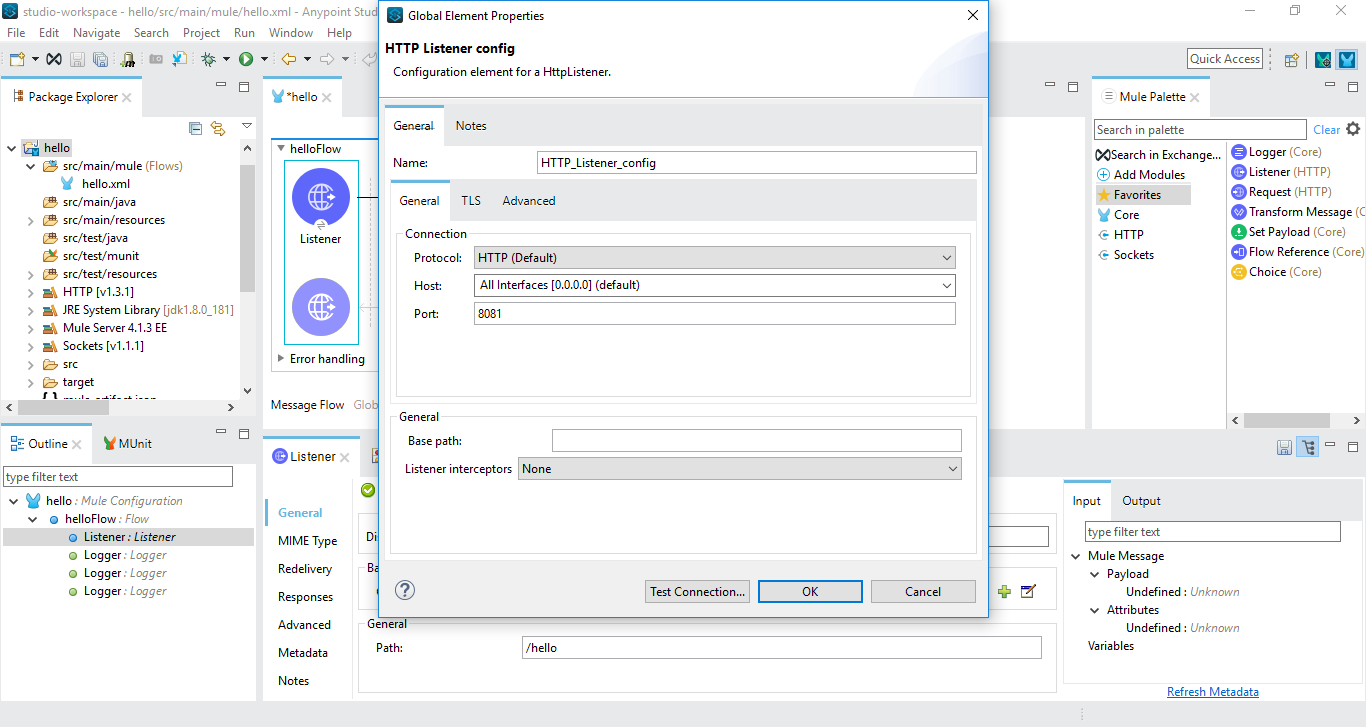
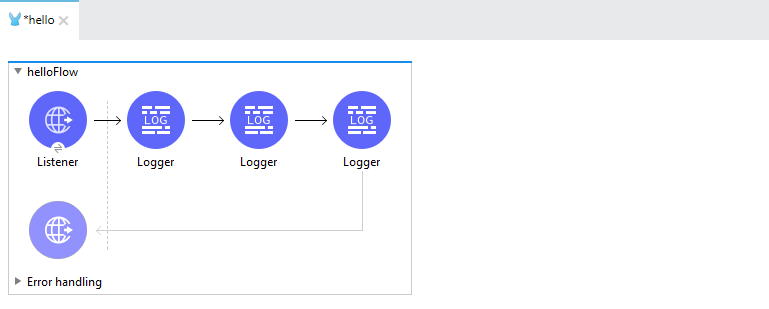
Add 3 logger components to the flow and set the logging level of all the 3 loggers to "ERROR", "INFO" and "DEBUG". You can add corresponding log messages to each of the loggers (like the message "this is info logger" to logger component with log level = INFO and like this to other logger components).
That's it. we are done with creating the sample project. Go to project explorer, right-click on the project, and export it as a Mule deployable Archive.
Enabling JMX for Mule Runtime
To enable JMX, we need to update wrapper.conf file which sits in the directory ${MULE_HOME}/conf/wrapper.conf. Add the following lines to it.
# Dynamic logging
wrapper.java.additional.22=-Dcom.sun.management.jmxremote
wrapper.java.additional.23=-Dcom.sun.management.jmxremote=true
wrapper.java.additional.24=-Dcom.sun.management.jmxremote.port=1099
wrapper.java.additional.25=-Dcom.sun.management.jmxremote.access.file=C:\mule-enterprise-standalone-4.1.4\conf/jmxremote.access
wrapper.java.additional.26=-Dcom.sun.management.jmxremote.password.file=C:\mule-enterprise-standalone-4.1.4\conf/jmxremote.password
wrapper.java.additional.27=-Dcom.sun.management.jmxremote.authenticate=true
wrapper.java.additional.28=-Dcom.sun.management.jmxremote.ssl=false
Next thing to do is, create two files "jmxremote.access " and "jmxremote.password " and make sure that access to "jmxremote.password" is restricted.
Making .password file access restricted (on windows):
- change the owner to be 'you' (required step!!)
Select jmx.password, Right-Mouse-Cick -> Properties -> Security -> Advanced -> Owner -> Edit
Select the single owner of this to be your username.
Select jmx.password, Right-Mouse-Cick -> Properties -> Security -> Advanced -> Change Permissions
Uncheck "Include inheritable permissions" and click Remove to remove all inherited permissions
Then click Add... to add read/write permissions for only your user: Enter your username as object name, and select for example 'Full Control'. Click Ok and exit out of properties.
Deploying the Application and Changing Logging Level Dynamically Using VisualVM
Copy and paste the Mule deployable archive of the sample project we created earlier, in the directory "${MULE_HOME}/apps".
Open the command prompt in the directory "${MULE_HOME}/bin" and type command "mule" and hit enter. This should start mule server and your application must be deployed and started.
Open visualVM, navigate to tools ----> plugins ----> Available plugins and add MBeans plugin.
On visualVM applications tab, under local, we can find our running application. Double click on it.
On the MBeans tab of our application, you can traverse to the component at org.apache.logging.log4j2, under Loggers, you can change any log4j2 bean's log level here.

You can check log files in your Mule runtime. Changes made here are reflected there.
Opinions expressed by DZone contributors are their own.
Comments