Easily Write a GOTO Statement in JMeter
In this post, we take a look at how you can setup a GOTO statement in JMeter with ease! Read on for details on GOTO statements and instructions.
Join the DZone community and get the full member experience.
Join For FreeWhat happens if you need to modify your Apache JMeter™ script’s flow according to an event? For example, going back to the homepage because a particular request failed, or skipping to a future step if a condition was fulfilled. This is where the GOTO statement comes in.
What Is a GOTO Statement?
The aim of a GOTO statement is to perform a reassignment to another line of code. In other words, the GOTO statement is very useful when you need to jump to another part of the flow, which is usually identified by a particular label.
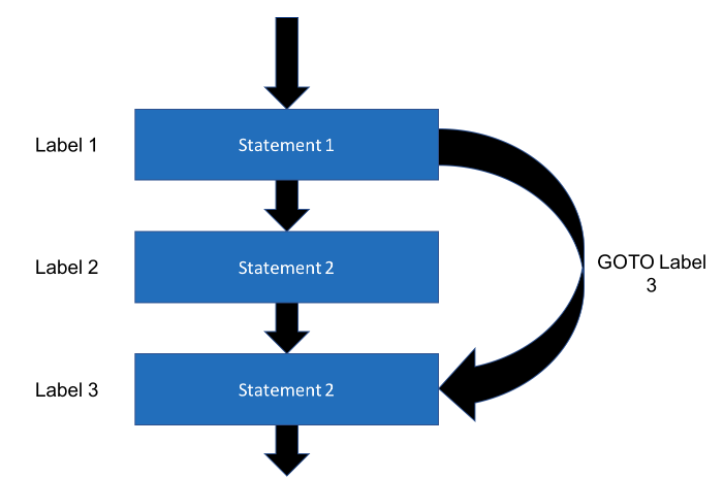
Creating a GOTO Statement in JMeter
The first step to creating a GOTO statement in JMeter is realizing there is no predefined GOTO structure in JMeter. So, what we can do is to nest a Module Controller within an If Controller. The If Controller lets you choose whether the child elements below it are run or not. The Module Controller enables substituting test plan fragments.
Let’s use a dummy scenario where we first log into a certain bank page, and then we go to the credit cards section where we perform some validations. If the login action goes wrong we would like to go back and try to log in again - this is the moment our GOTO statement will take place.
In this scenario, the If Controller will check if the login was successful. If it failed, the Module Controller will redirect the user to the login page.
1. Add the If Controller from the Logic Controller list:
Right Click on the Thread Group → Add → Logic Controller → If Controller
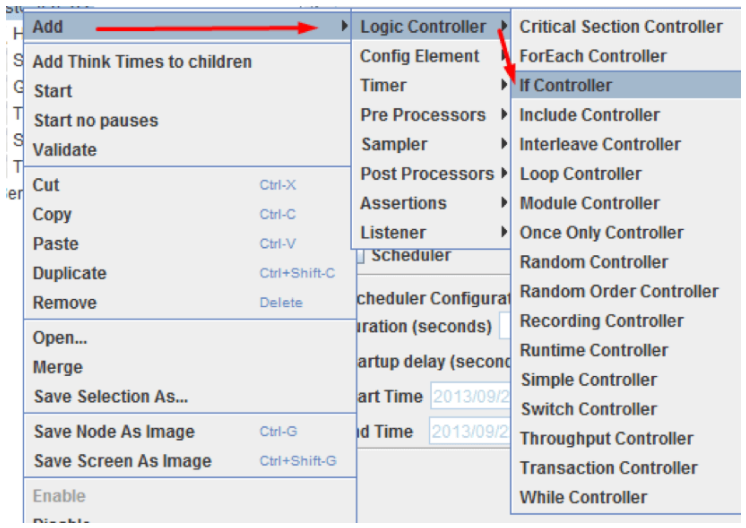
2. Make sure to establish a condition that will redirect the flow when fulfilled. The condition has to be a Javascript condition returning “true” or “false,” or a JMeter function that evaluates to “true.”
For example: "${JMeterThread.last_sample_ok}==true" where JMeterThread.last_sample_ok is a function that returns true or false depending on whether the last sample was OK or not.
3. In order to establish the desired condition, the “Condition (default javascript)“ field has to be filled inside the If Controller. We named the controller "GoTo."

In this case, we will check whether the login sampler was successful or not, by using “${JMeterThread.last_sample_ok}==false.” If it fails, i.e. this condition was fulfilled, the Module Controller will go into action. If it does not fail and the condition isn’t false, the flow will advance towards the credit card section.
4. Now that the If Controller is properly configured with an appropriate condition, it’s time to nest the Module Controller within the If Controller as follows:
Right Click on the If Controller → Add → Logic Controller → Module Controller

5. Once the Module Controller is created, tell the controller which flow to take in case the previous condition has been fulfilled, i.e the login failed. So, inside the Module Controller pick an existing flow. In this example, I named the Module Controller “goTo_mainPage” and directed it to the main event page.
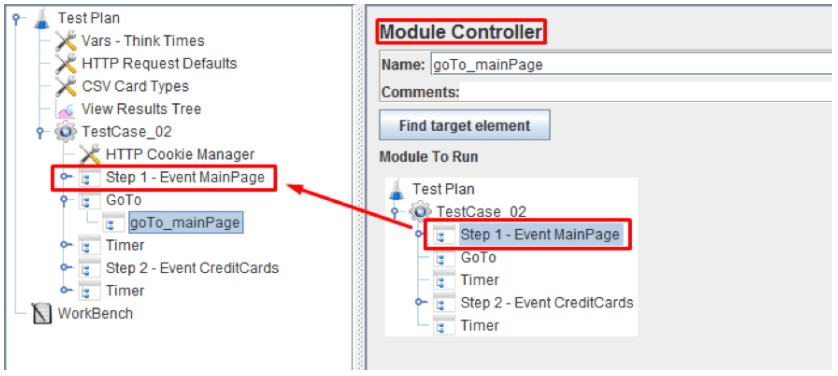
If the login does not fail, the GOTO statement will evaluate the If Controller condition, and as it wasn’t fulfilled, the flow will follow as in the below image.
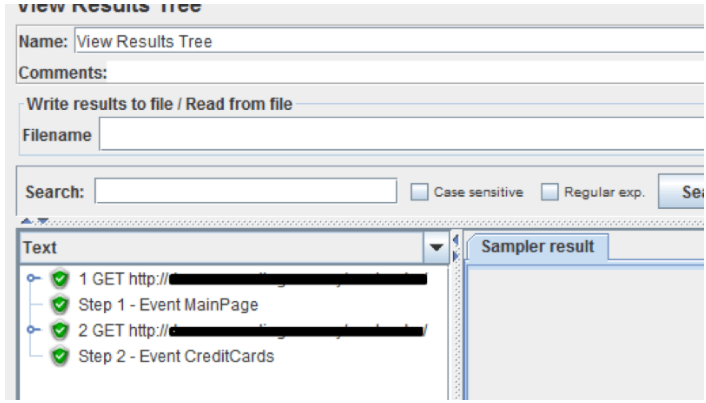
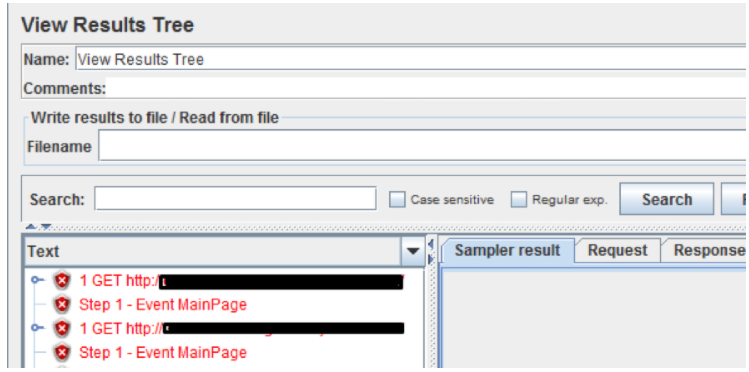
But, if the login fails we will observe the following result. In the View Results Tree, we will see the login failed and the If Controller and the Module Controller directed the user back to the main page, to log in again.
And that’s it! You have set your own GOTO statement, very easily.
Published at DZone with permission of , DZone MVB. See the original article here.
Opinions expressed by DZone contributors are their own.

Comments