Elasticsearch TLS Activation: X-Pack Security
In this article, learn more about what the Elasticsearch TLS structure is used to ensure, and also how to activate the x-pack-security module.
Join the DZone community and get the full member experience.
Join For FreeTLS (Transport Layer Security) is the general name of a standardized encryption protocol for inter-network communications. Transfer Protocol, on the other hand, is a special name that Elasticsearch uses for data transfer.
On the Elasticsearch side, the TLS structure is used to ensure data transfer between clusters (nodes) in an encrypted manner and to prevent nodes that do not provide the relevant encryption certificate from connecting to the existing cluster structure unannounced. Along with this, we will also activate the xpack.security module.
Process Steps
When we use the Elasticsearch basic license, security mode is installed by default as disabled. For this process, we first need to activate the xpack.security module. To do this, on the computer with Elasticsearch installed, we need to add the following two lines of code into the elasticsearch.yml file in the C:\elastic\config directory (in which directory you installed it).
If you have a cluster consisting of more than one node, we need to do this on all nodes.

xpack.security.enabled: true
xpack.security.transport.ssl.enabled: true
After this process, we need to restart the service in order to detect the changes and move on to other configurations. After restarting the service, we enter the bin folder in the directory where Elasticsearch is installed and open the command line here.
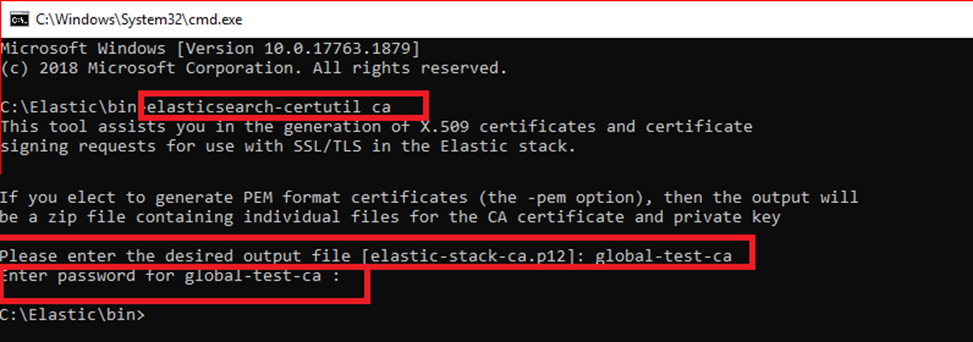
Then we create a certificate using elasticsearch-certutil ca command.
When we enter this command, it asks us to give a name to the certificate we will create. If you press enter directly, it creates a certificate named default elastic-stack-ca.p12 (p12 extension).
After renaming, we set a password for the certificate. Be sure to take note of the password here, as we will also use it when creating the keystore and adding other nodes to the cluster.
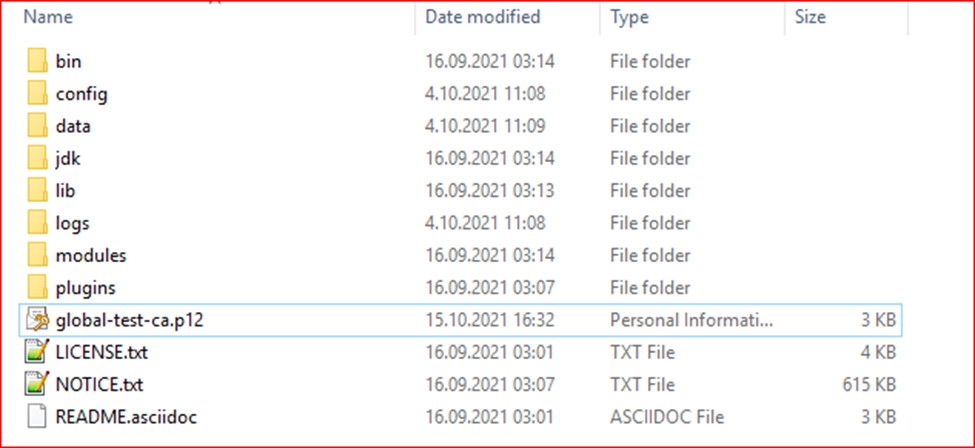
After the above operations, a certificate will be created with the name we gave to the Elasticsearch main directory. We are moving this certificate to the config folder in the Elasticsearch home directory.
After the migration, we run the command line while in the bin folder in the Elasticsearch main directory. At this stage, we will create our keystore files as follows:
elasticsearch-keystore add xpack.security.transport.ssl.keystore.secure_password: Enter the command and press enter. It is waiting for a password from us. We create our keystore file with the password we gave to the certificate.elasticsearch-keystore add xpack.security.transport.ssl.truststore.secure_password: Enter the command and press enter. When it asks for a password, we enter the same password again and press enter.

After this step, we make the relevant certificate and keystore definitions in the elasticsearch.yml file as follows.
xpack.security.transport.ssl.verification_mode: certificate
xpack.security.transport.ssl.client_authentication: required
xpack.security.transport.ssl.keystore.path: global-test-ca.p12
xpack.security.transport.ssl.truststore.path: global-test-ca.p12
The latest version of elasticsearch.yml file:
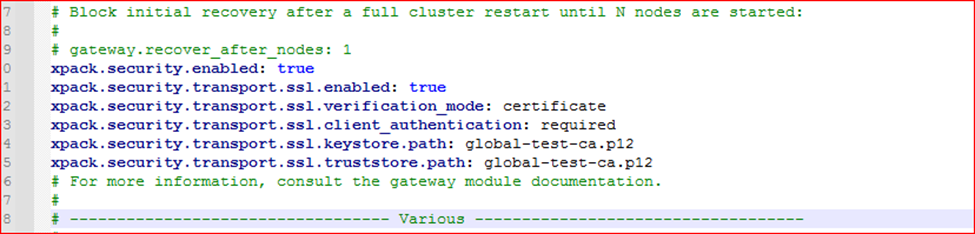
With this process, we now specify our certificate and keystore files to be used in data transfer between nodes.
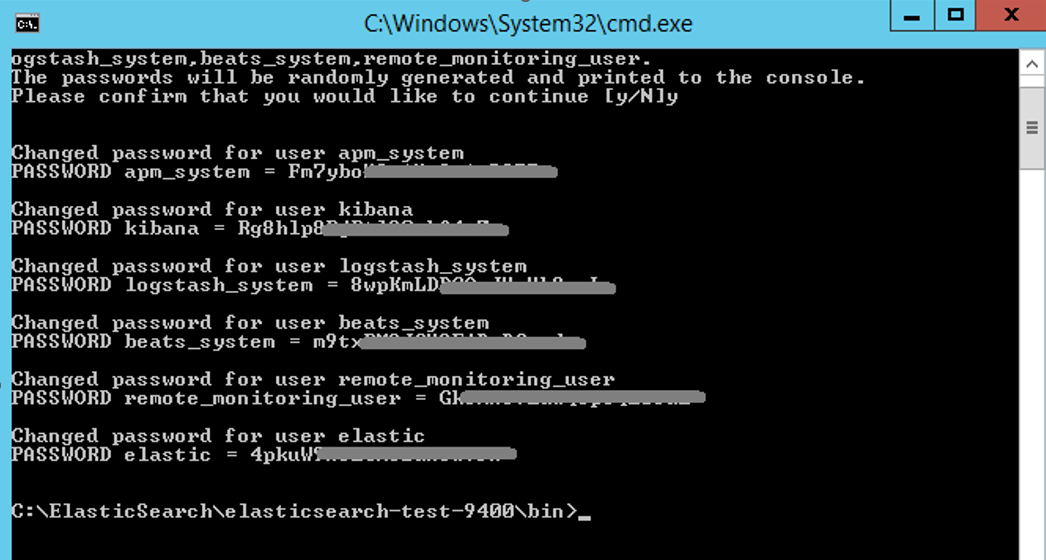
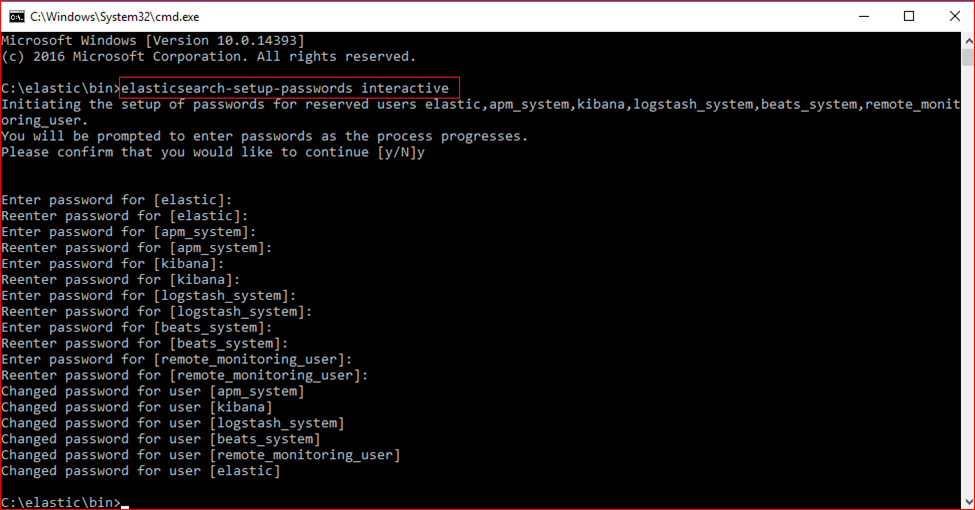
Now, finally, let's run the command line again in the bin folder to determine the password to be used in HTTP requests. After running the command line, we can set two types of passwords:
elasticsearch-setpassword auto: It automatically determines the passwords and displays them on the console at the end of the process.
elasticsearch-setpassword interactive: You have to enter and verify the password for each module one by one.
Finally, we just need to restart the services on each node.
PS: If we have a cluster consisting of more than one node, we need to perform these operations on all nodes.
Opinions expressed by DZone contributors are their own.
Comments