

Automating FastAPI Deployments With a GitHub Actions Pipeline
In this post, you’ll learn how to automate FastAPI deployments with GitHub Actions so every push runs tests and triggers a clean, hands-off deployment.
Join the DZone community and get the full member experience.
Join For FreeDeploying FastAPI apps manually gets old fast. You SSH into a server, pull the latest code, restart the service, and hope nothing breaks. Maybe you remember to run tests first. Maybe you don't.
One forgotten environment variable or skipped test, and your API is down. Users get 500 errors. You're frantically SSHing back in to fix it.

GitHub Actions can automate the entire deployment process. Push to your main branch, tests run automatically, and if they pass, your app deploys. No SSH. No manual steps. No forgotten checks.
Here's how to set it up.
The FastAPI App Structure
We'll use a simple FastAPI app to demonstrate the pipeline. Your actual app will be more complex, but the deployment process stays the same.
my-fastapi-app/
├── app/
│   ├── __init__.py
│   ├── main.py
│   └── routes.py
├── tests/
│   ├── __init__.py
│   └── test_api.py
├── requirements.txt
├── .github/
│   └── workflows/
│       └── deploy.yml
└── .env.example
Here's a basic FastAPI app in app/main.py:
from fastapi import FastAPI

app = FastAPI()

@app.get("/")
def read_root():
    return {"status": "healthy"}

@app.get("/api/users")
def get_users():
    return {"users": [{"id": 1, "name": "John"}]}
And a simple test in tests/test_api.py:
from fastapi.testclient import TestClient
from app.main import app

client = TestClient(app)

def test_root():
    response = client.get("/")
    assert response.status_code == 200
    assert response.json() == {"status": "healthy"}
def test_get_users():
    response = client.get("/api/users")
    assert response.status_code == 200
    assert "users" in response.json()
Your requirements.txt should include at least:
fastapi==0.104.1
uvicorn==0.24.0
pytest==7.4.3
httpx==0.25.1
Setting Up Your Deployment Target
Before building the pipeline, you need somewhere to deploy. There are many options like Vercel, Netlify, Seenode, Railway, or a VPS. For this guide, we'll use Seenode as our cloud provider of choice because it has a straightforward API for triggering deployments.
First, create a new Web Service on Seenode and connect your GitHub repository. The platform detects FastAPI projects automatically. Configure your build and start commands:
- Build command:
pip install -r requirements.txt - Start command:
uvicorn app.main:app --host 0.0.0.0 --port 80 - Port:
80
Deploy the service once manually to make sure everything works. You can follow the full FastAPI deployment guide if you need more details.
Once your service is running, grab your API credentials:
- Generate an API token: Go to your Seenode dashboard, navigate to your user profile, and select the API tab. Click "Create new secret" and give it a name like "GitHub Actions Deploy". Copy the token because you'll only see it once. Here's the official guide for getting an API token.
- Get your Application ID: In the Seenode dashboard, open your FastAPI application. The Application ID appears in the application settings or in the URL.

Now add these as secrets in your GitHub repository:
- Go to your repo's Settings > Secrets and variables > Actions.
- Click "New repository secret."
- Add
SEENODE_API_TOKENwith your API token. - Add
SEENODE_APPLICATION_IDwith your application ID.
These secrets let GitHub Actions trigger deployments without exposing credentials in your code.
Building the GitHub Actions Pipeline
Create .github/workflows/deploy.yml in your repository:
name: Deploy FastAPI to Seenode

on:
  push:
    branches:
      - main

jobs:
  test:
    runs-on: ubuntu-latest

    steps:
      - name: Checkout code
        uses: actions/checkout@v4

      - name: Set up Python
        uses: actions/setup-python@v4
        with:
          python-version: '3.11'

      - name: Install dependencies
        run: |
          python -m pip install --upgrade pip
          pip install -r requirements.txt

      - name: Run tests
        run: pytest tests/ -v

  deploy:
    needs: test
    runs-on: ubuntu-latest

    steps:
      - name: Trigger Seenode Deployment
        run: |
          Curl --fail-with-body -X POST \
            -H "Authorization: Bearer ${{ secrets.SEENODE_API_TOKEN }}" \
            -H "Content-Type: application/json" \
            -d '{"gitCommitSha": "${{ github.sha }}"}' \
            "https://api.seenode.com/v1/applications/${{ secrets.SEENODE_APPLICATION_ID }}/deployments"
It's a horrible practice to run scripts blindly, so let's break down what this does.
The trigger: on: push: branches: - main means the workflow runs every time you push to the main branch. You can change this to develop or add multiple branches if you want.
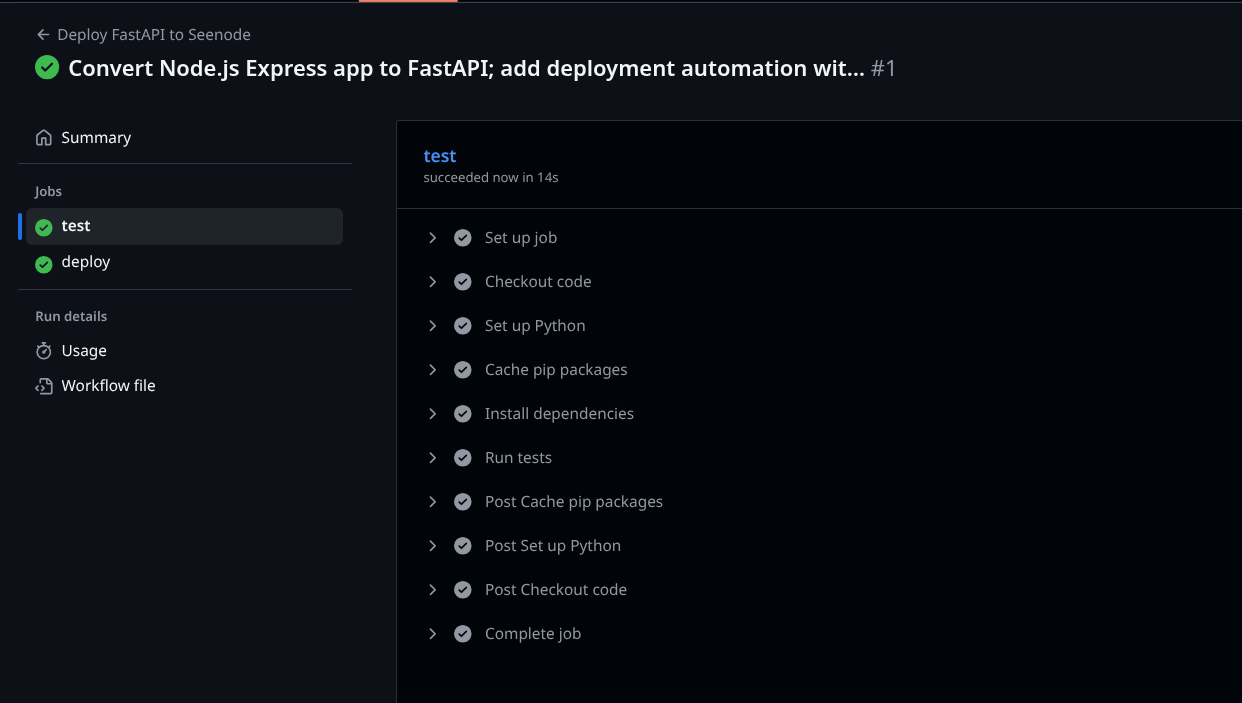
The test job: This runs first. It checks out your code, sets up Python 3.11, installs your dependencies, and runs pytest. If any test fails, the entire workflow stops. The deployment never happens.
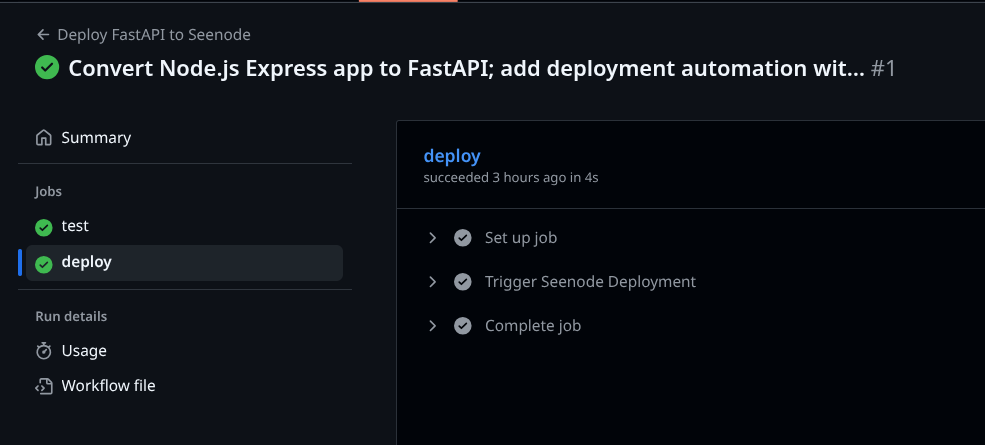
The deploy job: needs: test means this only runs if the test job passes. It makes a single API call to Seenode with your commit SHA. Seenode pulls that specific commit, builds your FastAPI app, and deploys it.
The ${{ github.sha }} variable is the commit hash that triggered the workflow. Seenode uses this to know exactly which version of your code to deploy.
Why this structure works: Tests act as a gate. Bad code never reaches production because the pipeline stops at the test stage. You can push confidently knowing broken changes won't deploy.
How the Pipeline Works in Practice
Here's what happens when you push code:
- You make changes to your FastAPI app and push to the main branch
- GitHub Actions starts the workflow automatically
- The test job runs (installing dependencies and executing your test suite)
- If tests pass, the deploy job triggers
- GitHub Actions sends a POST request to Seenode's API with your commit SHA
- Seenode receives the trigger, pulls your latest code from GitHub, and starts a deployment
- Seenode builds your application, handles database connections, and rolls out the new version with zero downtime
You can watch all of this happen in real-time from the Actions tab in your GitHub repository. Each step shows logs, so if something fails, you see exactly where and why.
On the Seenode side, the Deployments tab in your application dashboard shows the deployment progress. You'll see build logs, deployment status, and when the new version goes live.
The whole process takes 2–5 minutes, depending on your app size and test suite. But here's the key part: you don't have to watch it. Push your code and move on. The pipeline will handle the rest.
Common Issues and Fixes
Tests Fail and Block Deployment
This is working as intended. Check the Actions logs to see which test failed. Fix the issue locally, push again, and the pipeline reruns. Don't skip tests just to deploy faster. That's how bugs reach production.

"Authentication Error" in the Deploy Step
Your SEENODE_API_TOKEN or SEENODE_APPLICATION_ID is wrong. Double-check that you copied them correctly when adding secrets. Secrets can't have extra spaces or line breaks. Regenerate the API token if needed.
Workflow Doesn't Trigger
Make sure you're pushing to the branch specified in the workflow file. If your workflow says branches: - main but you pushed to master or develop, nothing happens. Either push to main or update the workflow to match your branch name.
Dependencies Install Slowly
GitHub Actions reinstalls your dependencies on every run. Add caching to speed this up:
- name: Cache pip packages
  uses: actions/cache@v3
  with:
    path: ~/.cache/pip
    key: ${{ runner.os }}-pip-${{ hashFiles('requirements.txt') }}

- name: Install dependencies
  run: |
    python -m pip install --upgrade pip
    pip install -r requirements.txt- name: Cache pip packages
This caches your pip packages between runs. First run is slow, subsequent runs are much faster.
Wrapping Up
You now have a deployment pipeline that runs on every push to main. Tests protect production. Deployments happen automatically. You never SSH into a server again.
The basic pattern here, that is to test and then deploy, can also scale to more complex scenarios. Add a staging environment by creating a second workflow that deploys from a develop branch. Add database migrations by running them in a separate job before deployment. Add Slack notifications when deployments succeed or fail.
Once you get the idea of automating the deployment, it really doesn't matter how large your setup is. You can make it work.

Cheers!
Opinions expressed by DZone contributors are their own.
Comments