From Prompt to Running Microservice: ServiceBricks Step-By-Step
Using ServiceBricks and this step-by-step guide, create modular microservices from scratch with artificial intelligence, source code generation, and a prompt.
Join the DZone community and get the full member experience.
Join For FreeMicroservices have become a popular architectural style for building scalable and modular applications. However, setting up a microservice from scratch can still feel complicated, especially when juggling frameworks, templates, and version support. ServiceBricks aims to simplify this by allowing you to quickly generate fully functional, open-source microservices based on a simple prompt using artificial intelligence and source code generation. In this tutorial, we’ll walk through the entire process — from signing up to running your newly created microservice locally.
Getting Started
Prerequisites
- A web browser
- Visual Studio 2022
Step 1: Register for an Account
Begin by registering for an account on the ServiceBricks.com website. Once you’ve signed up and logged in, you’ll have access to the platform’s microservice generation features and receive 10 free credits to evaluate the product.
Step 2: Create a New Microservice
After logging in:
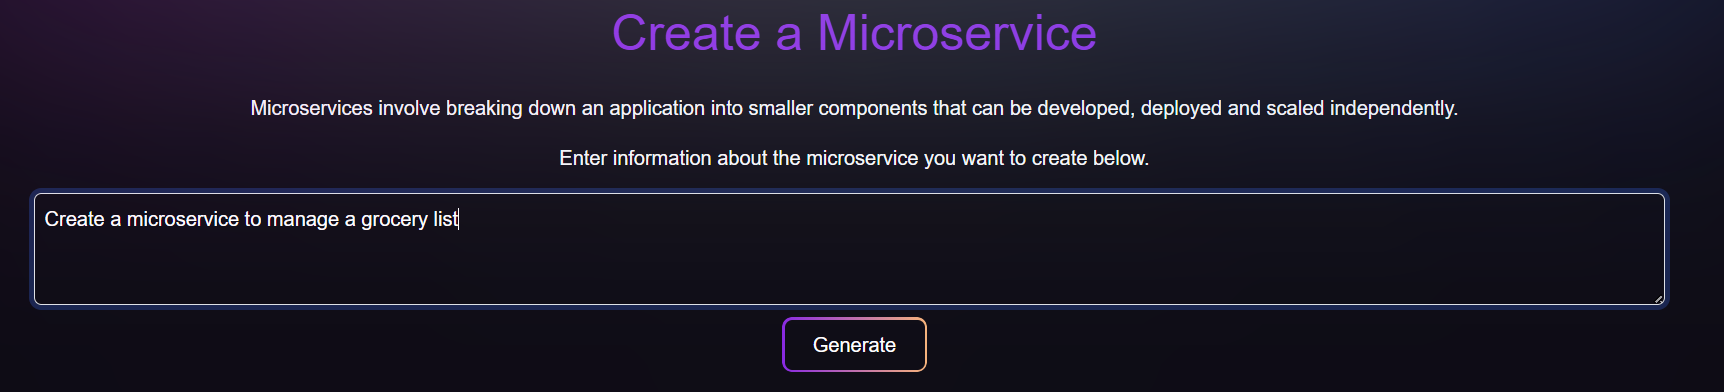
- Locate and click the button to "Create Microservice."
- Enter a prompt or description of what you want your microservice to accomplish. For example, this could be “Create a microservice to manage a grocery list.”
- Click the "Generate" button.
Step 3: Download the Generated Source Code
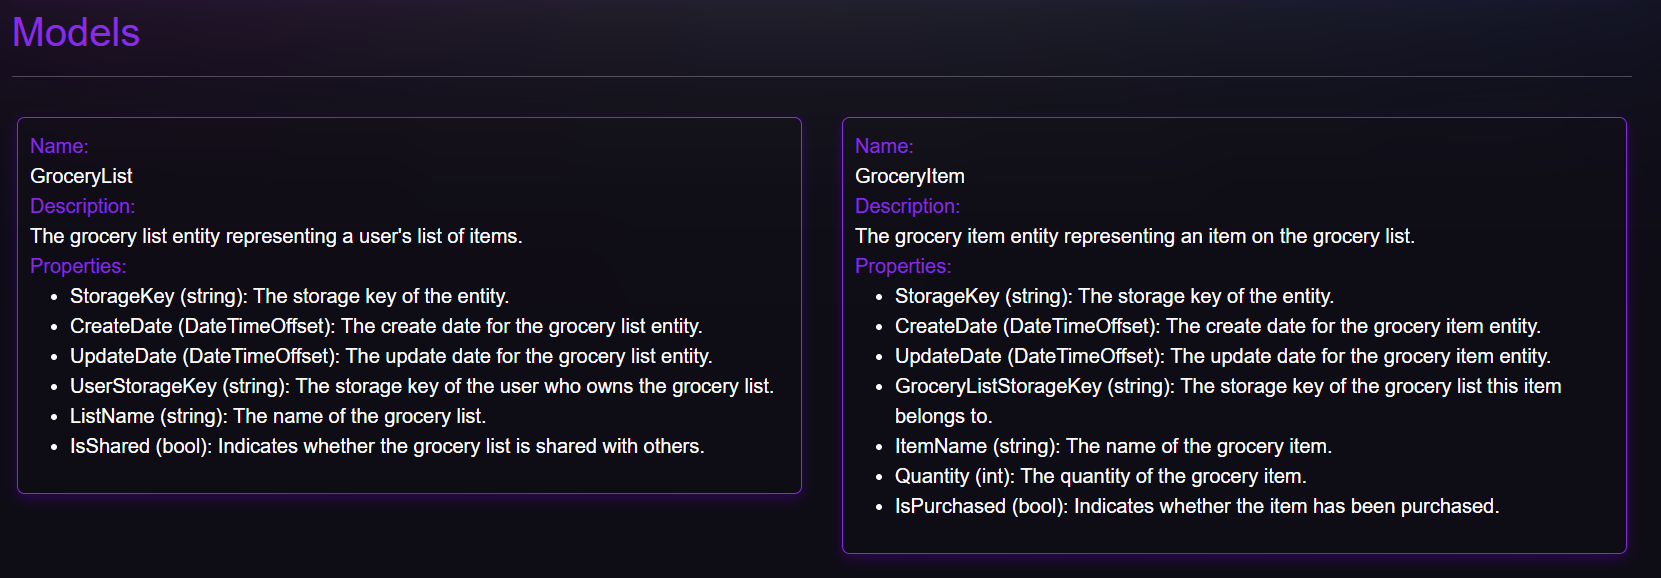
The generation process will create a tailored microservice solution for you. On the summary screen:
- Review the key details provided to ensure the microservice meets your requirements.
- Click the "Download Source Code" button. This will download a zip file that contains a complete solution containing multiple application projects including unit and integration tests for different .NET Core versions.
![Models results]() Running Your Microservice Locally
Running Your Microservice Locally
 Running Your Microservice Locally
Once you have the source code, open the solution in Visual Studio 2022.
Step 1: Set the Startup Project
- In the Solution Explorer, find the project for your chosen .NET Core version (e.g.,
WebAppNet8). - Right-click the project and select "Set as Startup Project."
Step 2: Run the Application
- Once the startup project is set, click the "Start" button (or press F5) in Visual Studio.
- Visual Studio will build and run the application. By default, it should start running at
https://localhost:7000.
Step 3: Explore the Home Page Instructions
With the microservice running locally, the home page provides instructions on how to interact with your new microservice, as well as details on configuring storage providers or other backend services.
By default, the web application will use the InMemory database provider. To use any of the relational database providers, you will need to create migrations so that the database can be created.
Step 4: Create Migrations for Relational Databases
Run the Batch File
Within the source code folder of your project, run the CreateMigrations.cmd file. This will:
- Trigger a solution build.
- Generate database migrations for the following providers:
Now that your microservice is up and running, you can begin experimenting by sending requests to the endpoints defined in your service. You can also modify the underlying code to add new features, integrate custom logic, or switch out the default storage provider.
Conclusion
By following these steps, you’ve seen how to take a prompt and transform it into a running microservice, ready for integration into a larger application ecosystem. You’ve learned how to register, generate code, download the source, run the application, and manage database migrations. With this solid starting point in place, you can now focus on refining and extending your service’s functionality, adjusting storage providers, and tailoring it to fit the unique requirements of your project.
Opinions expressed by DZone contributors are their own.
Comments