Getting Started With Longhorn Distributed Block Storage and Cloud Native Distributed SQL
Join the DZone community and get the full member experience.
Join For FreeLonghorn is cloud native distributed block storage for Kubernetes that is easy to deploy and upgrade, 100 percent open source, and persistent. Longhorn’s built-in incremental snapshot and backup features keep volume data safe, while its intuitive UI makes scheduling backups of persistent volumes easy to manage. Using Longhorn, you get maximum granularity and control, and can easily create a disaster recovery volume in another Kubernetes cluster and fail over to it in the event of an emergency.
Cloud Native Infrastructure Stack: Computing, deployment, administration, storage and database.
YugabyteDB is a cloud native, distributed SQL database that runs in Kubernetes environments, so it can interoperate with Longhorn and many other CNCF projects. If you’re not familiar with YugabyteDB, it is an open source, high-performance distributed SQL database built on a scalable and fault-tolerant design inspired by Google Spanner. Yugabyte’s SQL API (YSQL) is PostgreSQL wire compatible.
If you are an engineer looking for a way to easily start your application development on top of a 100 percent cloud native infrastructure, this article is for you. In this article, we’ll give you step-by-step instructions on how to deploy a completely cloud native infrastructure stack. The stack will consist of Google Kubernetes Engine, Rancher enterprise Kubernetes management tooling, Longhorn distributed block storage, and a YugabyteDB distributed SQL database.
Why Longhorn and YugabyteDB?
YugabyteDB is deployed as a StatefulSet on Kubernetes and requires persistent storage. Longhorn can be used for backing YugabyteDB local disks, allowing the provisioning of large-scale persistent volumes. Here are a few benefits to using Longhorn and YugabyteDB together:
- There’s no need to manage the local disks — they are managed by Longhorn.
- Longhorn and YugabyteDB can provision large-sized persistent volumes.
- Both Longhorn and YugabyteDB support multi-cloud deployments, helping organizations avoid cloud lock-in.
Additionally, Longhorn can do synchronous replication inside a geographic region. In a scenario where YugabyteDB is deployed across regions, and a node in any one region fails, YugabyteDB would have to rebuild this node with data from another region, which would incur cross-region traffic. This could prove to be more expensive and yield lower recovery performance. With Longhorn and YugabyteDB working together, you can rebuild the node seamlessly because Longhorn replicates locally inside the region. This means YugabyteDB does not end up having to copy data from another region, which ends up being less expensive and higher in performance. In this deployment setup, YugabyteDB would only need to do a cross-region node rebuild if the entire region failed.
Prerequisites
Below is the environment that we’ll use to run a YugabyteDB cluster on top of a Google Kubernetes cluster with Longhorn.
- YugabyteDB (Using Helm Charts) – version 2.1.8
- Rancher (Using Docker Run) – version 2.4.5
- Longhorn (Using Rancher UI) – version 1.0
- A Google Cloud Platform account
Setting Up a Kubernetes Cluster and Rancher on Google Cloud Platform
Rancher is an open source project that provides a container management platform built for Kubernetes. Rancher makes it easy to run Kubernetes everywhere, meet IT requirements, and empower DevOps teams.
Rancher requires a Linux host with 64-bit Ubuntu 16.04 or 18.04 and at least 4GB of memory. In this example, we will set up a Google Kubernetes Engine (GKE) cluster using the Rancher UI that we will first install on a GCP VM instance.
A summary of the steps required to set up a Kubernetes Cluster on GCP with Rancher includes:
- Create a Service Account with the required IAM roles in GCP
- Create a VM instance running Ubuntu 18.04
- Install Rancher on the VM instance
- Generate a Service Account private key
- Set up the GKE cluster through the Rancher UI
Creating a Service Account with the Required IAM Roles, and a VM Instance Running Ubuntu
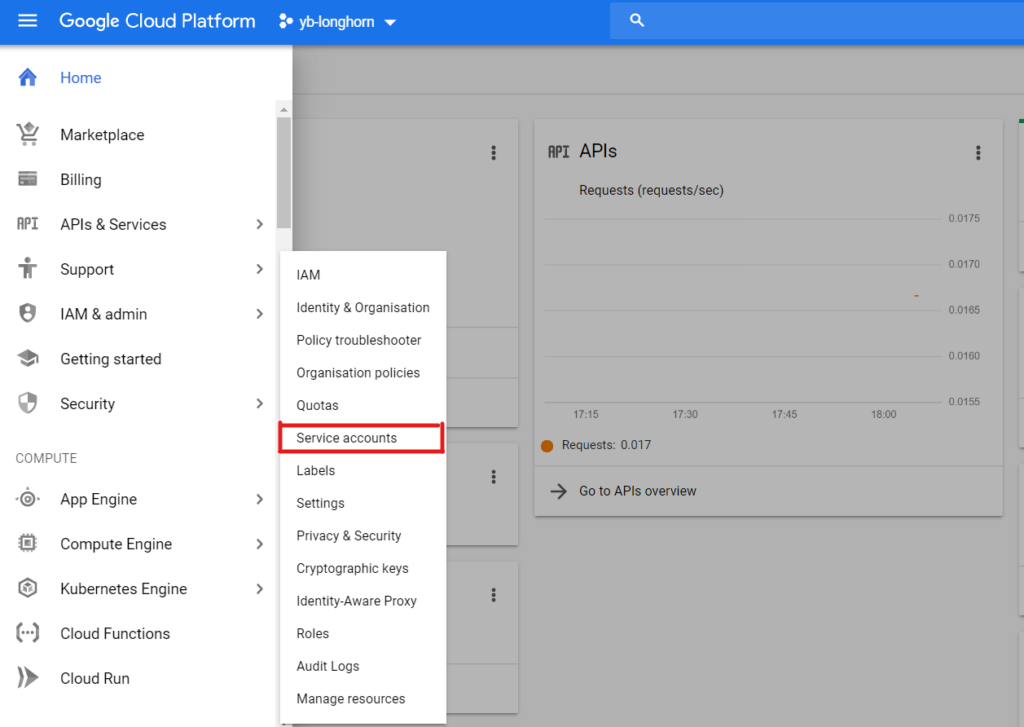
The first thing we need to do is create a Service Account attached to a GCP project. To do this, go to IAM & admin > Service accounts.
Select Create New Service Account, give it a name and click create.
Next, we then need to add the required roles to the Service Account to be able to set up the Kubernetes cluster using Rancher. Add the roles shown below and create the Service Account.

Once the roles have been added, click Continue and Done.
Now we now have to create an Ubuntu VM instance that is hosted on the GCP. To do this, go to Compute Engine > VM Instances > Create New Instance.
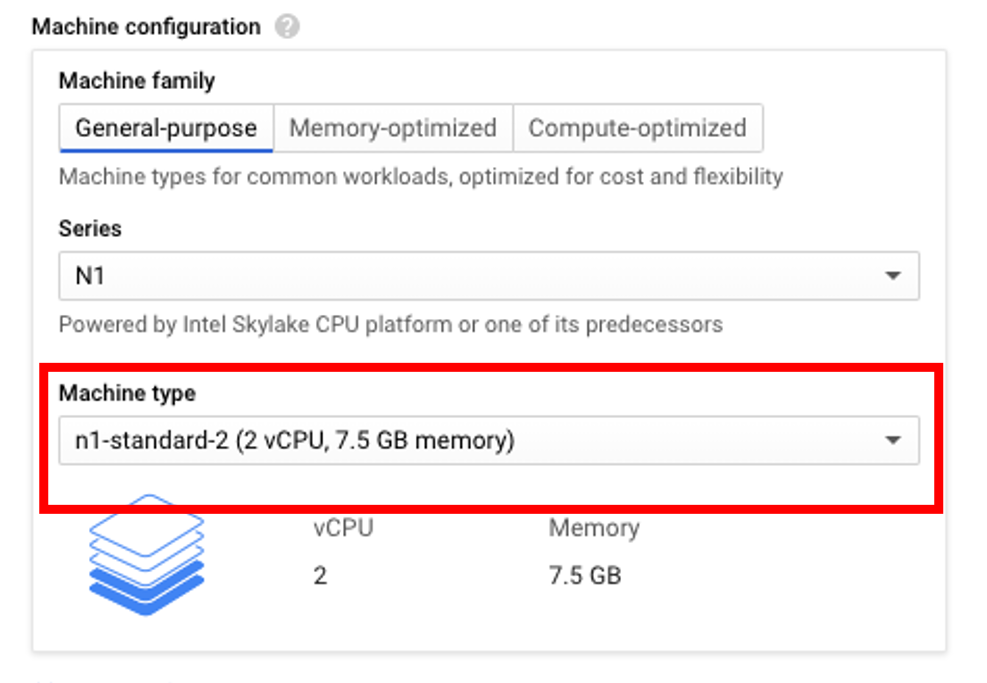
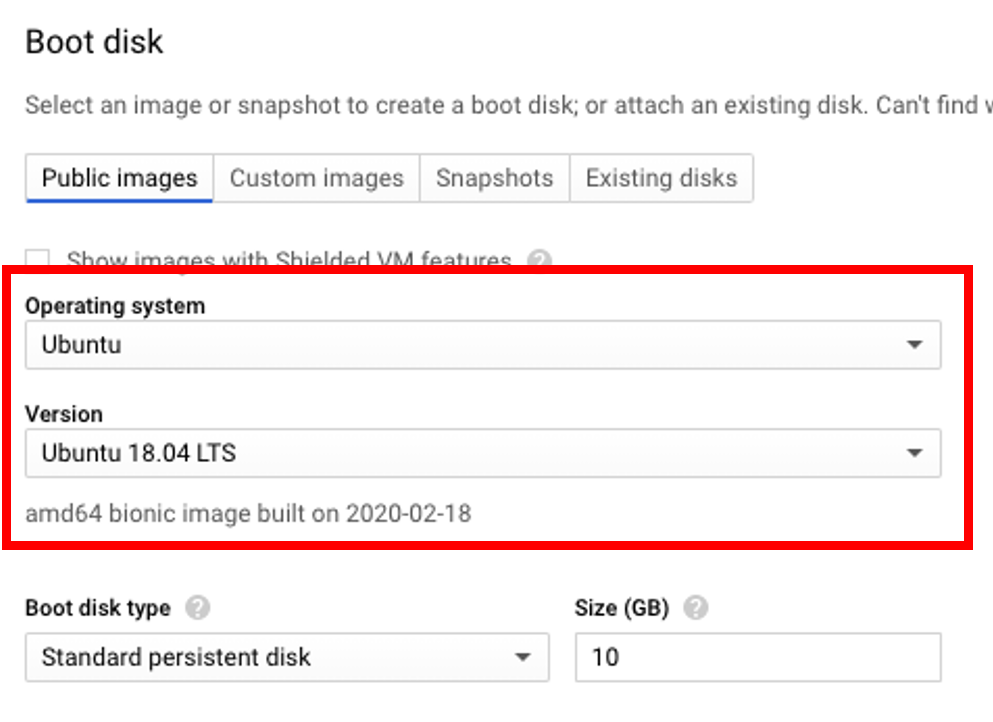
For the purposes of this demo I’ve selected an n1-standard-2 machine type. To select the Ubuntu image, click Boot Disk > Change and choose Ubuntu under Operating System and Ubuntu 18.04 LTS under Version.
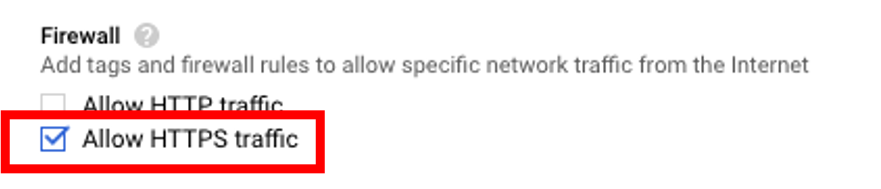
Make sure to check Firewall > Allow HTTPS traffic.
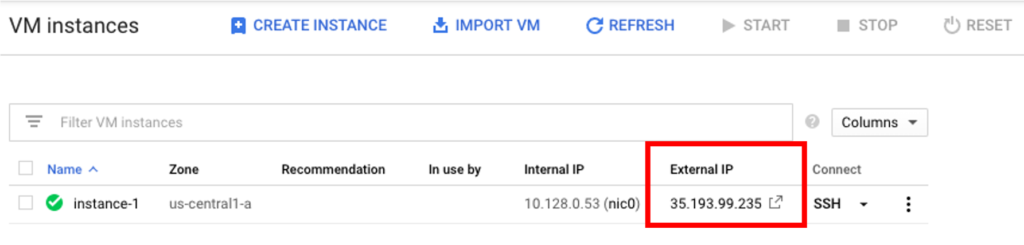
Creating the VM instance with the above settings may take a few minutes. Once created connect to the VM using SSH. With a terminal connected to the VM, the next step is to install Rancher by executing the following command.
$ sudo docker run -d --restart=unless-stopped -p 80:80 -p 443:443 rancher/rancher
Note: If Docker is not found, follow these instructions here to get it installed on your Ubuntu VM.
Installing Longhorn
To access the Rancher server UI and create a login, open a browser and go to the IP address where it was installed.
For example: https://<external-ip>/login
Note: If you run into any issues attempting to access the Rancher UI, try to load the page using Chrome Incognito mode or disable the browser cache, more info here.
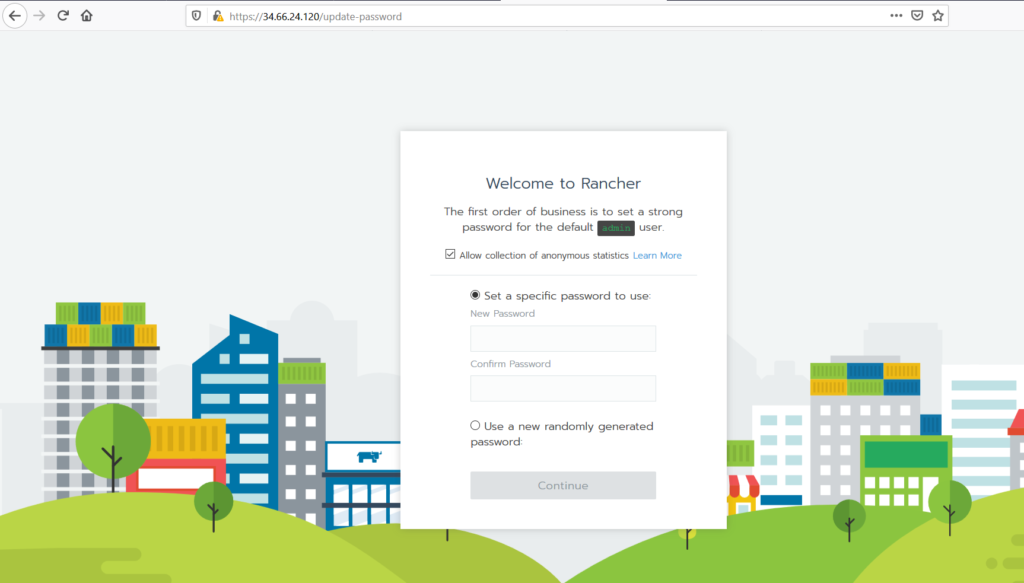
Follow the prompts to create a new account.
Once you’ve created the account, go to https://<external-ip>/g/clusters and click on Add Cluster to create a GKE cluster.
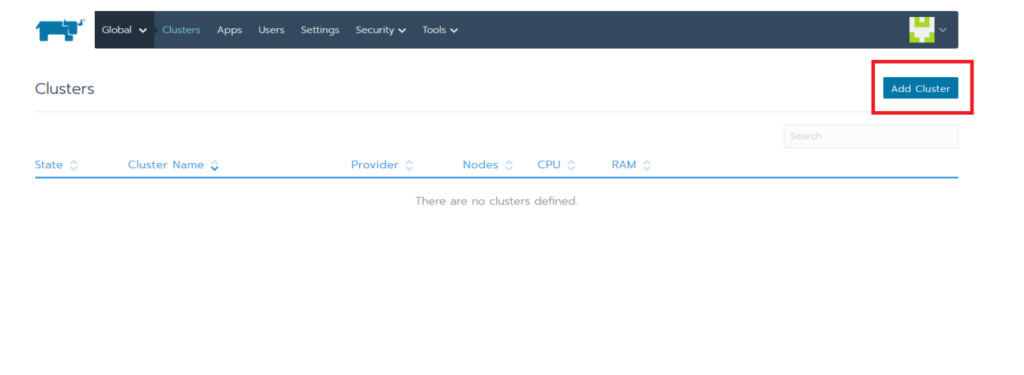
Select GKE and give the cluster a name.
We now have to add the private key from the GCP service account that we created earlier. This can be found under IAM & admin > Service Accounts > Create Key.
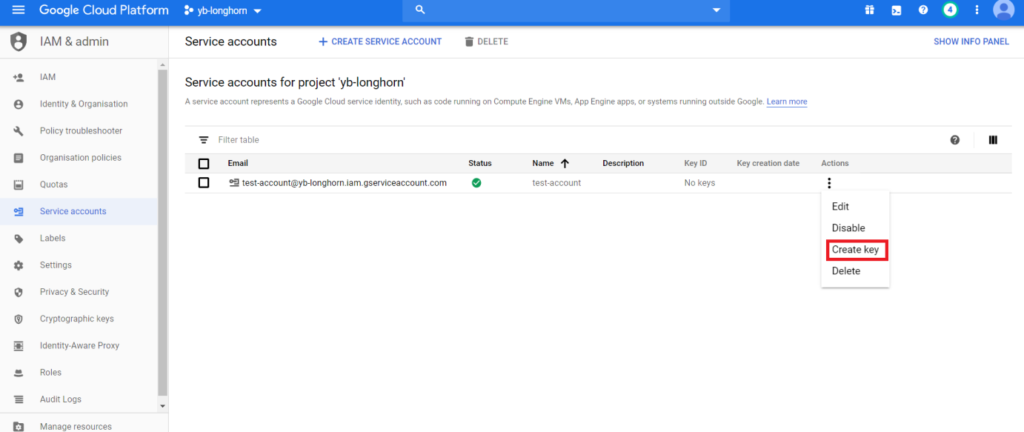
This will generate a JSON file that contains the details of the private key.
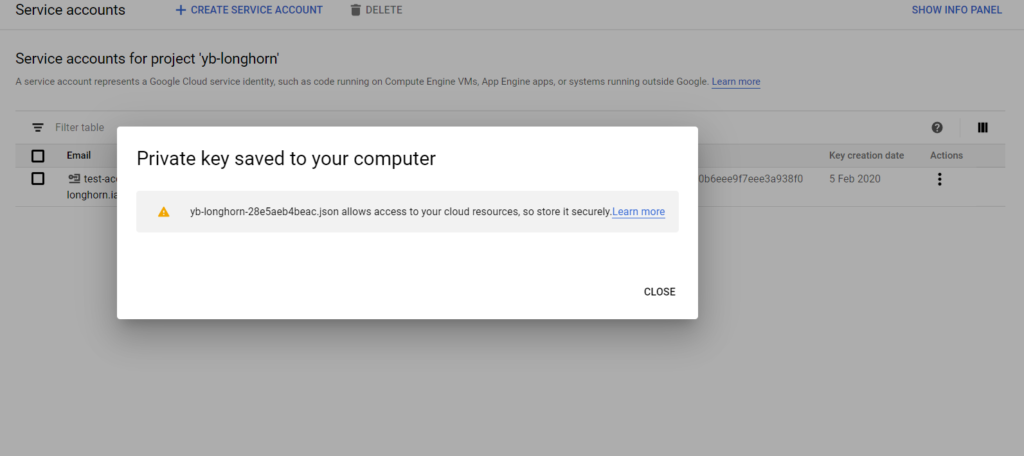
Copy the contents of the JSON file into the Service Account section in the Rancher UI and click Next.
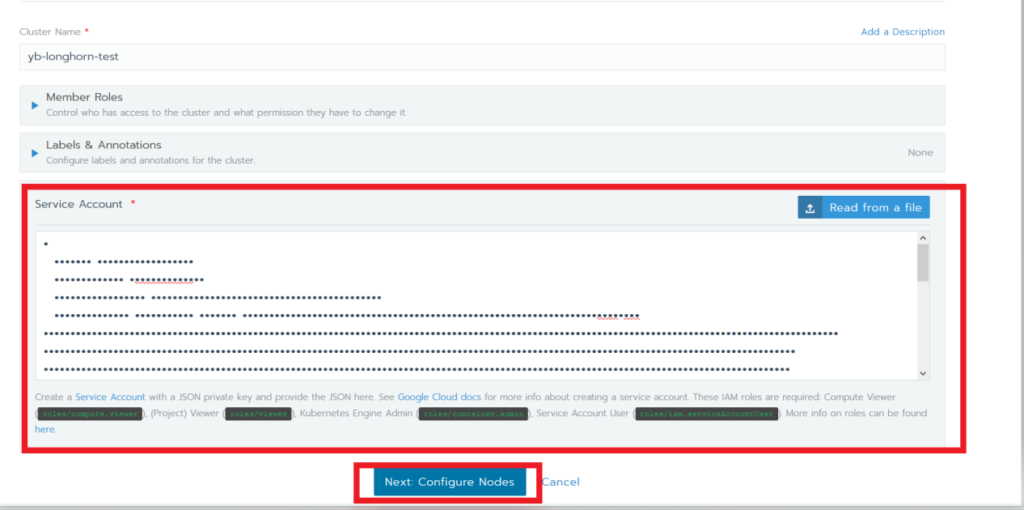
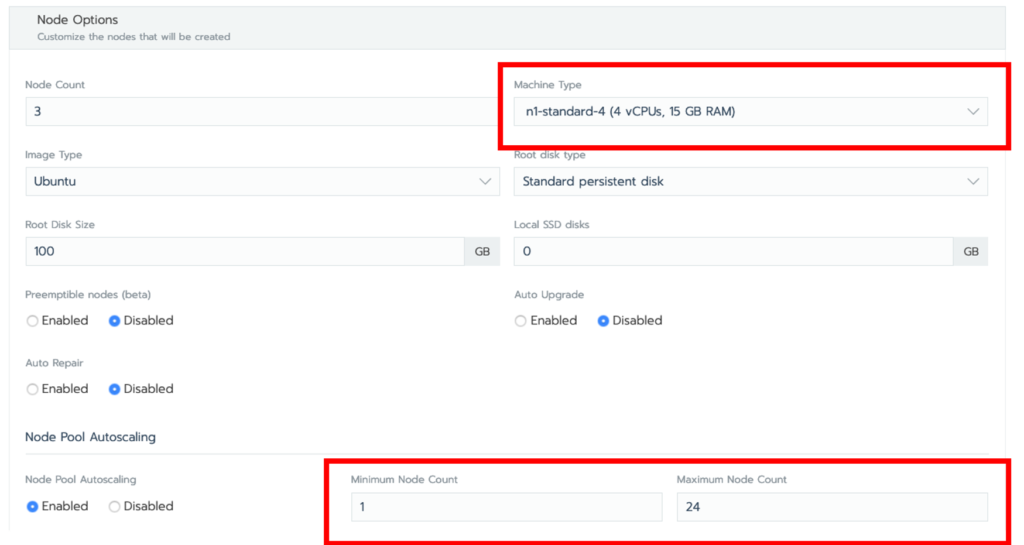
For the purposes of this tutorial I have selected an n1-standard-4 machine type, turned on Node Pool Autoscaling, and set the max node count to 24. Click Create.
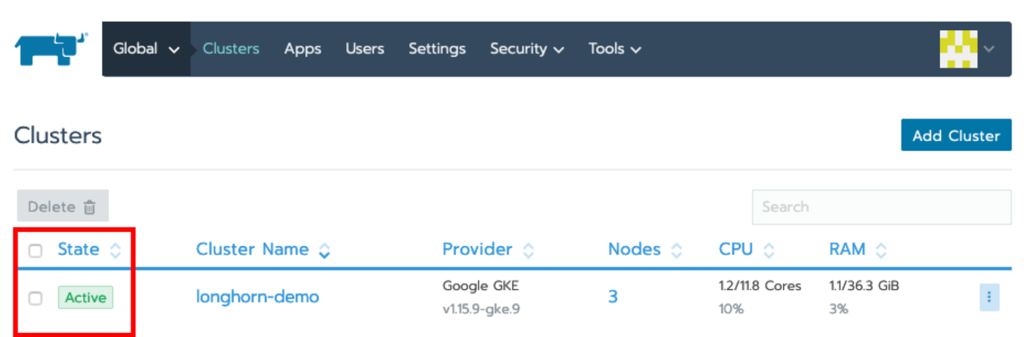
Verify that the cluster has been created by ensuring that the status of the cluster is set to Active. Be patient this will take several minutes.
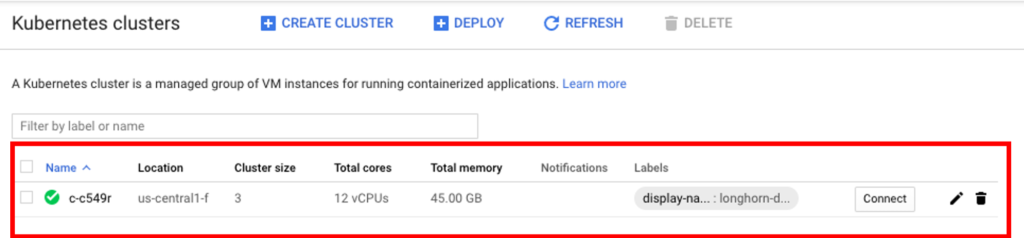
The cluster should also be accessible from the GCP project by going to Kubernetes Engine > Clusters.
Installing Longhorn on GKE
With Rancher now installed, we can use its UI to install and set up Longhorn on the GKE Cluster.
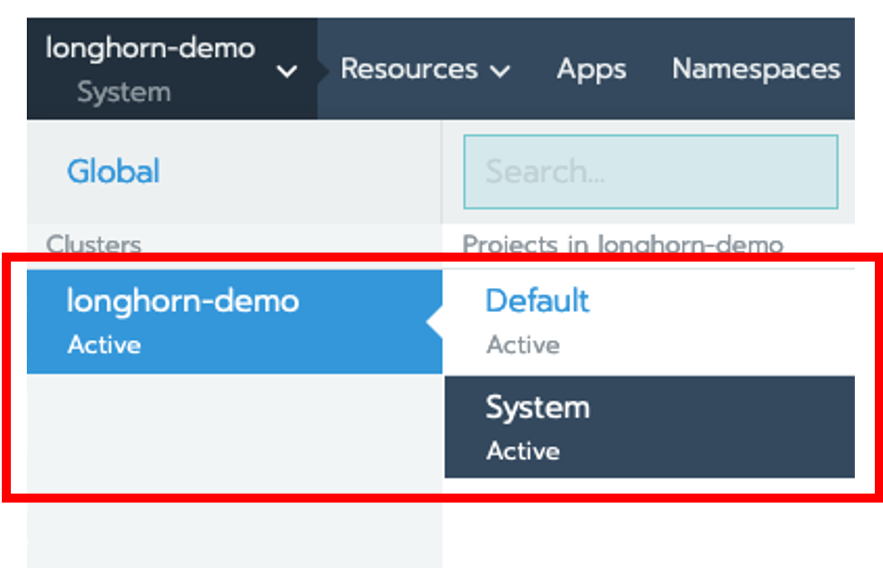
Click on the cluster, in case longhorn-demo, and then select System.
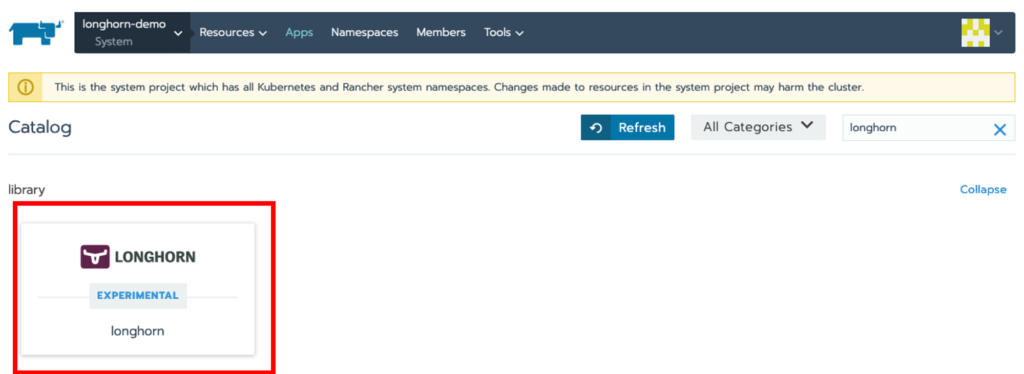
Next click on Apps > Launch, search for Longhorn and click on tile.
Stick with the defaults and click on Launch. Once installed, you can access the Longhorn UI by clicking on the /index.html link.

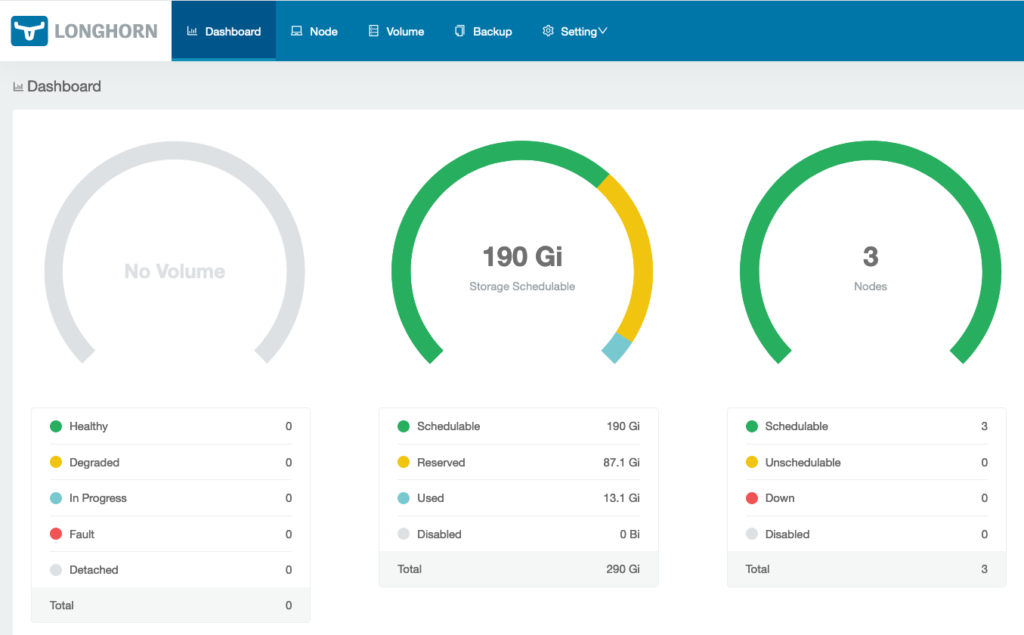
Verify that Longhorn is installed and that the GKE cluster nodes are visible.
Installing YugabyteDB on the GKE Cluster Using Helm
The next step is to install YugabyteDB on the GKE cluster. This can be done by completing the steps here, which are summarized below:
Verify and upgrade Helm
First, check to see if Helm is installed by using the Helm version command:
xxxxxxxxxx
$ helm version
From the output below, you can see that we are running Helm 3.
xxxxxxxxxx
version.BuildInfo{Version:"v3.2.1", GitCommit:"fe51cd1e31e6a202cba7dead9552a6d418ded79a", GitTreeState:"clean", GoVersion:"g
o1.13.10"}
Add the yugabytedb chart
xxxxxxxxxx
$ helm repo add yugabytedb https://charts.yugabyte.com
Fetch repository updates
xxxxxxxxxx
$ helm repo update
Validate the chart version
xxxxxxxxxx
$ helm search repo yugabytedb/yugabyte
To output you should be able to verify that you will be installing the latest version of YugabyteDB. In this case, version 2.1.8.
xxxxxxxxxx
NAME CHART VERSION APP VERSION
yugabytedb/yugabyte 2.1.8 2.1.8.2-b1
Create the yb-demo namespace
xxxxxxxxxx
$ kubectl create namespace yb-demo
Install YugabyteDB
Next, let’s install YugabyteDB by passing options for low resource environments and specifying thelonghornstorage class. This will take awhile, so again, please be patient! You can find detailed Helm instructions in the Docs.
xxxxxxxxxx
$ helm install yb-demo yugabytedb/yugabyte --set resource.master.requests.cpu=0.5,resource.master.requests.memory=0.5Gi,resource.tserver.requests.cpu=0.5,resource.tserver.requests.memory=0.5Gi,enableLoadBalancer=True,storage.master.storageClass=longhorn,storage.tserver.storageClass=longhorn --namespace yb-demo --wait
Check the status of the YugabyteDB cluster
To check the status of the YugabyteDB cluster, execute the command below:
xxxxxxxxxx
$ helm status yb-demo -n yb-demo
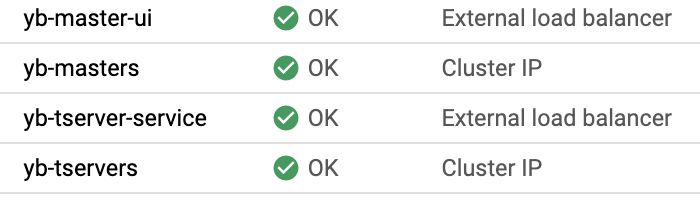
You can also verify that all the components are installed and communicating by visiting GKE’s Services & Ingress and Workloads pages.
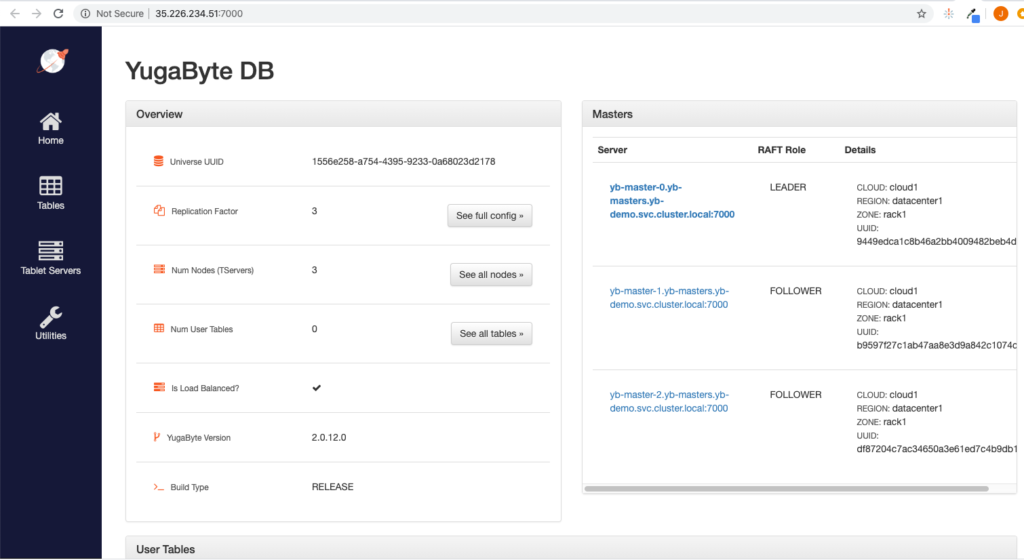
You can view the YugabyteDB install in the administrative UI by visiting the endpoint for the yb-master-ui service on port 7000.
You can also log into the PostgreSQL compatible shell by executing:
xxxxxxxxxx
$ kubectl exec -n yb-demo -it yb-tserver-0 -- ysqlsh -h yb-tserver-0.yb-tservers.yb-demo
ysqlsh (11.2-YB-2.1.8.2-b0)
Type "help" for help.
yugabyte=#
You are now ready to start creating database objects and manipulating data!
Managing YugabyteDB Volumes Using Longhorn
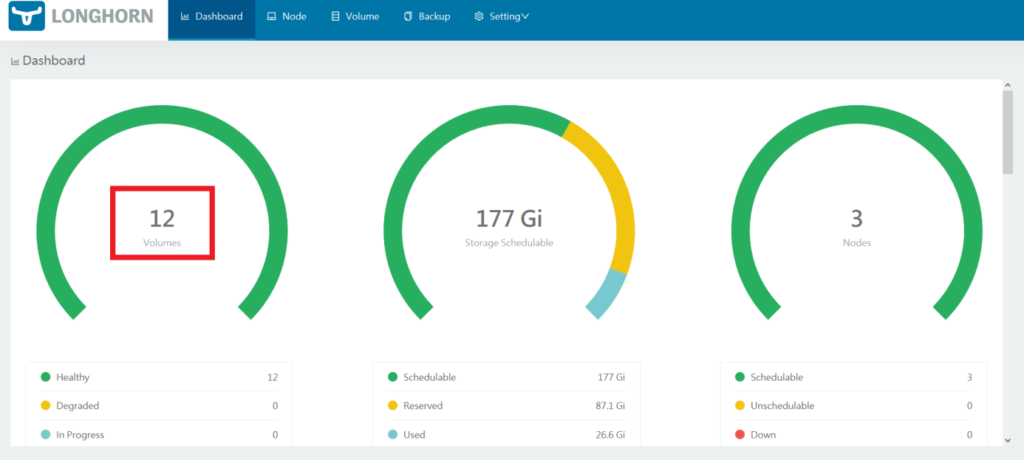
Next, reload the Longhorn dashboard page to verify that the YugabyteDB volumes are correctly set up. The number of volumes should now be visible.
To manage the volumes, click on Volume. The individual volumes should be visible.
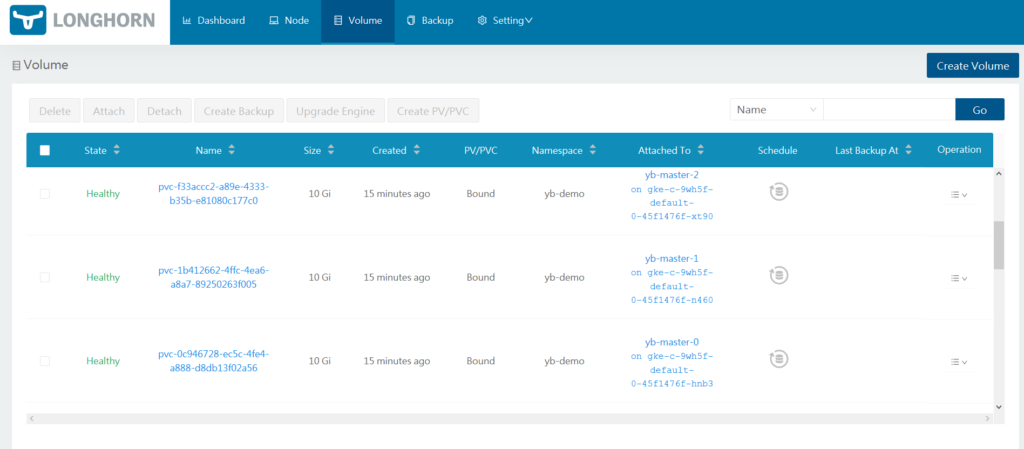
The volumes can now be managed by selecting them and choosing the required operations.
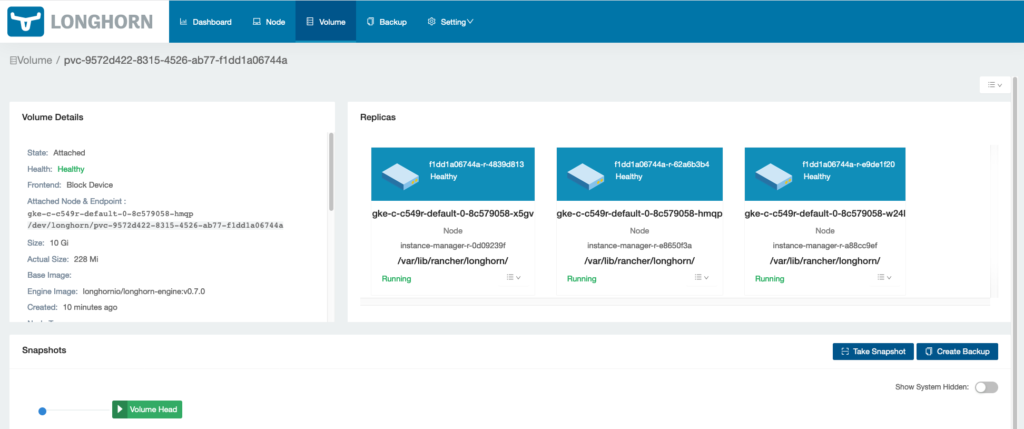
That’s it! You now have a three node YugabyteDB cluster running on GKE with Longhorn as its distributed block store.
Published at DZone with permission of Jimmy Guerrero. See the original article here.
Opinions expressed by DZone contributors are their own.
Comments