Create a Kubernetes Cluster With Centos
Let's stand up some clusters.
Join the DZone community and get the full member experience.
Join For FreeIntroduction
It's yet another blog regarding the installation of a Kubernetes cluster. However, in this article, I want to start everything from scratch to explain the overall process to create a workable Kubernetes cluster using kubeadm tool.
Necessary Softwares
1. Virtual Box
2. CentOS - 7 (https://wiki.centos.org/Download)
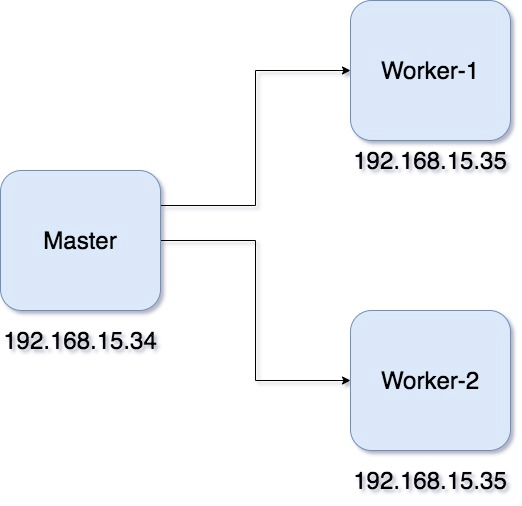
High-Level Architecture
We will have a Master node and 2 worker nodes as shown in the diagram below. All the machines are CentOS-7 Virtual Machines.
VM Creation
In this part, I will try to explain the step-by-step process to create VMs for the K8s cluster.
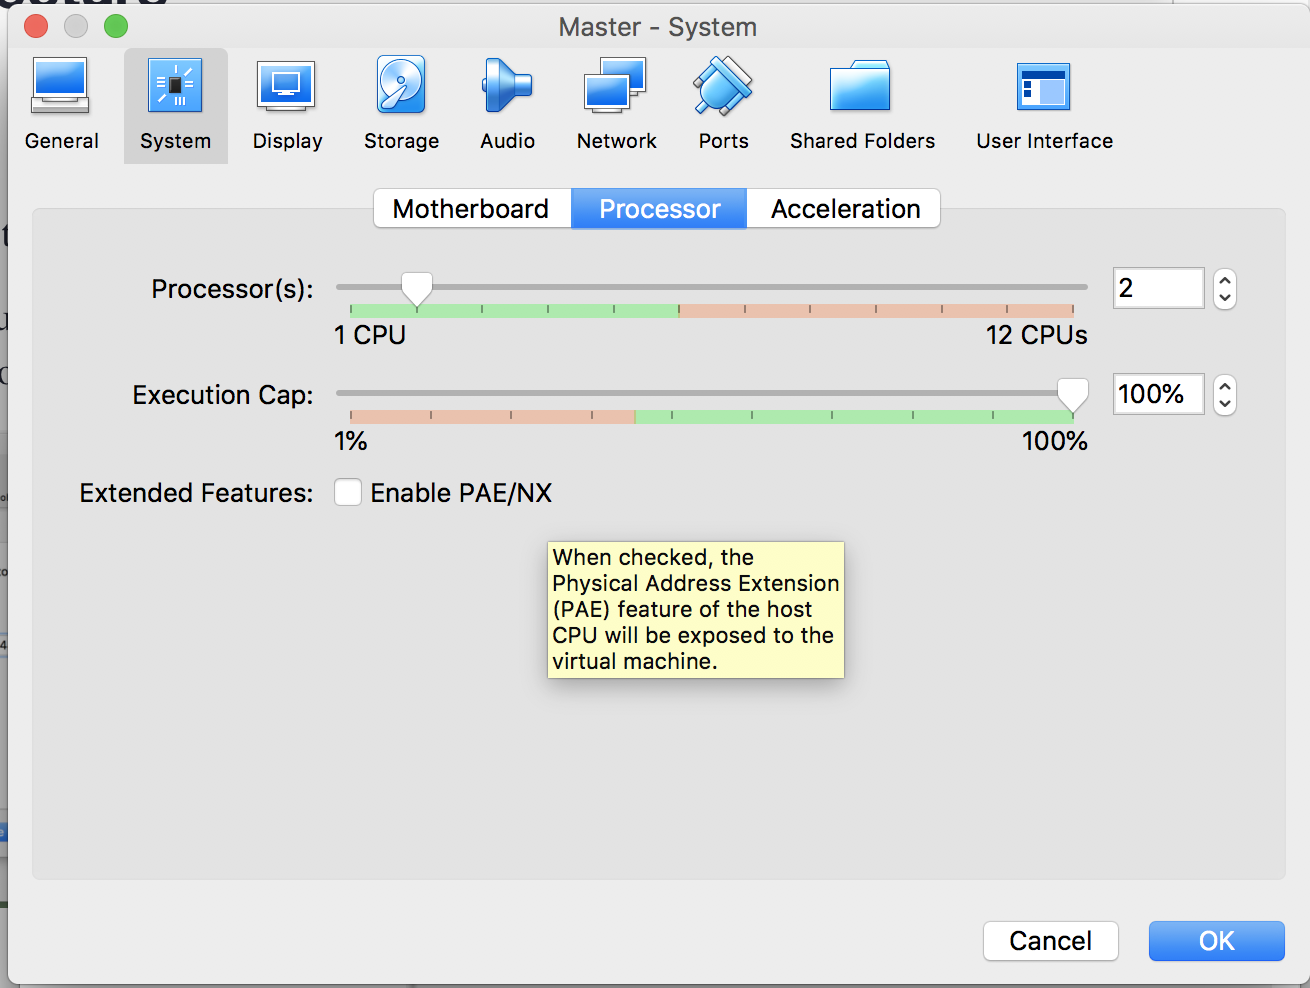
CPU
While defining the VM, make sure to allocate a minimum of 2CPUs to the Master VM. Otherwise, you won't be able to run kubeadm tool.
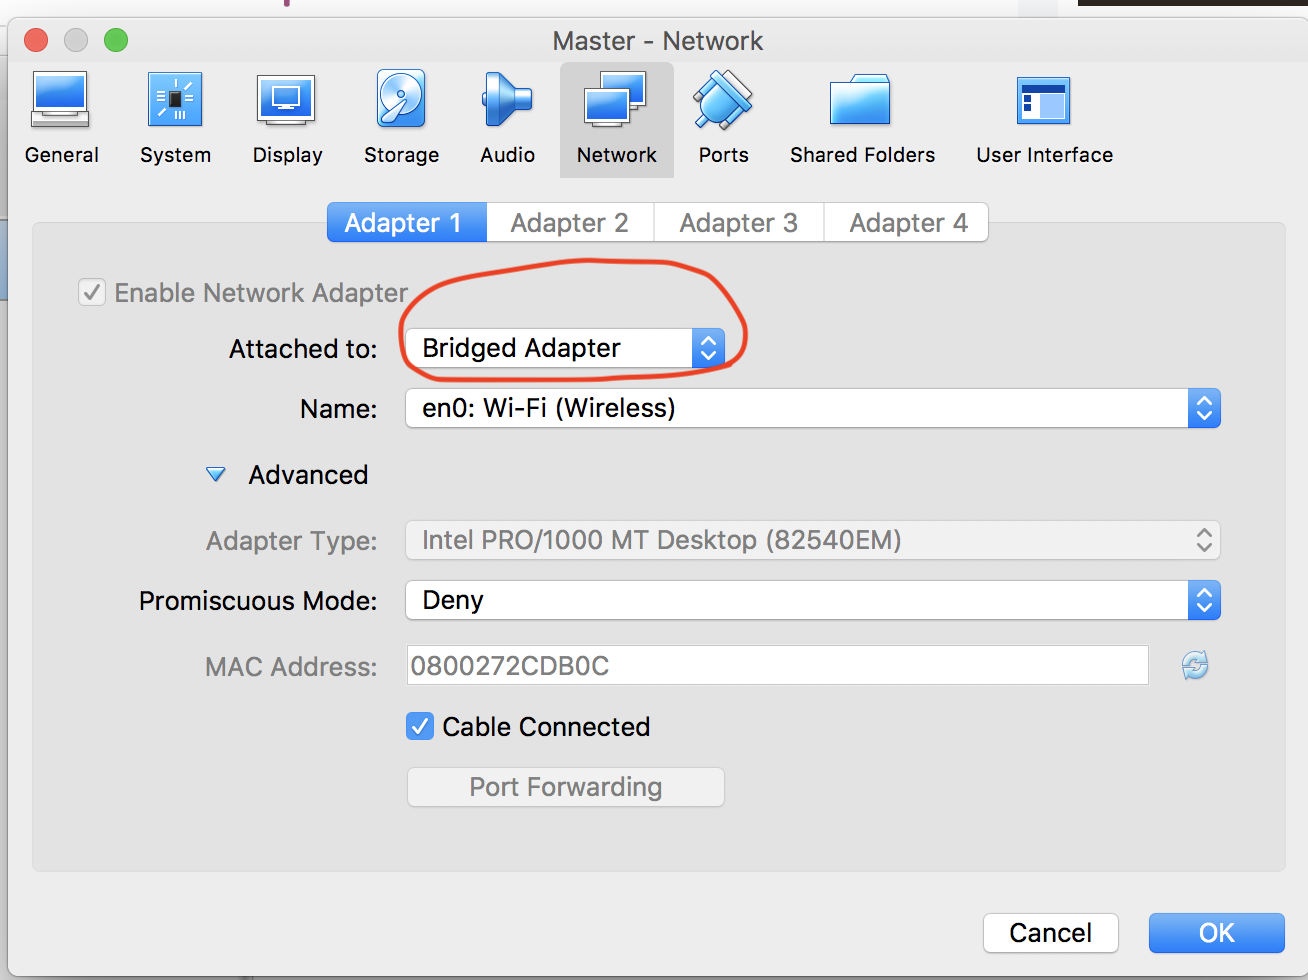
Network
Define the following Network Adapter for the VM.
During the installation process make sure to enable the Network Interface and also put the hostname e.g master.
Note: You can change the hostname later using hostnamectl command later too.
Continue the installation process.
At this moment we have our Master VM ready. Now, let's assign a Static IP address to the Master VM. It's very simple. By default in CentOS, the nmcli is automatically installed.
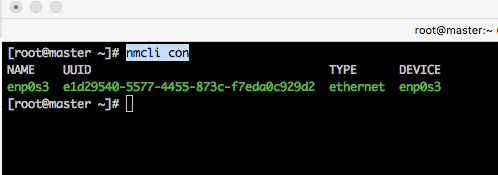
Execute the following command to check the Network interfaces installed in the VM.
xxxxxxxxxx
nmcli con
We have configured only one Network Adapter, so we will have only one network interface installed in our VM. Below will be the output.
Now execute the below commands.
x
nmcli con mod enp0s8 ipv4.addresses 192.168.15.34/24
nmcli con mod enp0s8 ipv4.gateway 192.168.15.1 # You can find the Gateway IP
# of your Host machine from # network configuration
nmcli con mod enp0s8 ipv4.method manual
nmcli con mod enp0s8 connection.autoconnect yes
nmcli con up enp0s8
systemctl restart network
Now do a ping inside the machine if internet access is available.
xxxxxxxxxx
ping www.google.com
Done! We have our Master node ready with a static IP of 192.168.15.34.
The same process can be repeated for creating the Worker nodes too. But for simplicity, we will clone this Master VM to create the worker nodes.
Install Kubeadm in the Master
At this moment, we have our brand new Master VM ready. Let's do SSH to it. Below are the steps to install Kubeadm.
Disable SELinux
setenforce 0
sed -i --follow-symlinks 's/SELINUX=enforcing/SELINUX=disabled/g' /etc/sysconfig/selinux
Disable Firewall
Disable firewall is not recommended. However, this set-up is only for demo purposes and we can simply disable the firewall.
systemctl disable firewalld
Also, do the below settings.
modprobe br_netfilter
echo '1' > /proc/sys/net/bridge/bridge-nf-call-iptables
Set Kubernetes Repo
cat <<EOF > /etc/yum.repos.d/kubernetes.repo
[kubernetes]
name=Kubernetes
baseurl=https://packages.cloud.google.com/yum/repos/kubernetes-el7-x86_64
enabled=1
gpgcheck=1
repo_gpgcheck=1
gpgkey=https://packages.cloud.google.com/yum/doc/yum-key.gpg https://packages.cloud.google.com/yum/doc/rpm-package-key.gpg
EOF
Install Kubeadm and Docker
yum install kubeadm docker -y
Enable and Start docker and kubelet
systemctl enable kubelet
systemctl start kubelet
systemctl enable docker
systemctl start docker
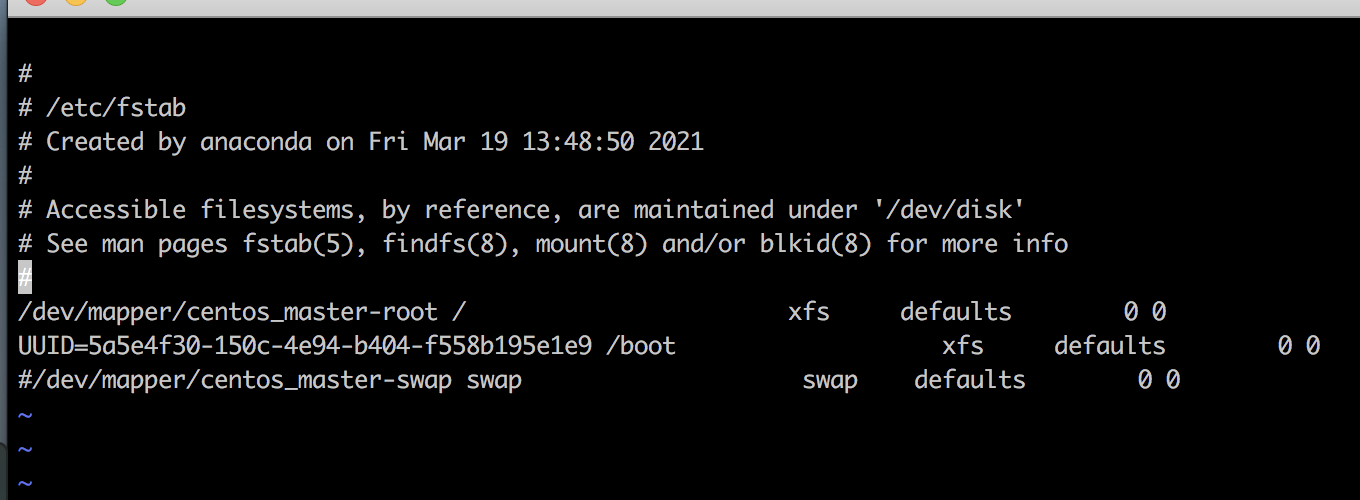
Disable SWAP
Open this file:
vi /etc/fstab
Comment the line that has swap keyword.
At this moment, our Master VM has got everything to run. Just before proceeding, let's clone this VM to create the Worker nodes.
Create Worker Nodes
Stop the Master VM and create 2 clones of it.
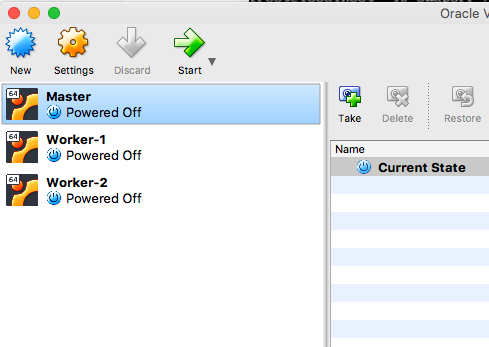 Now start each of the Worker nodes and set hostnames as worker-1 and worker-2 using the hostnamectl command
hostnamectl set-hostname worker-1
Also, set static IP addresses to the Worker nodes as described in the previous section when we configured the Master node.
At this moment we have 3 VMs ready
| Machine | IP |
| Master | 192.168.15.34 |
| Worker-1 | 192.168.15.35 |
| Worker-2 | 192.168.15.36 |
Update /etc/hosts
Update /etc/hosts of all the 3 nodes (Master, Worker-1 and Worker-2) with the below content.
x
master 192.168.15.34
worker-1 192.168.15.35
worker-2 192.168.15.36
Initialize the Kubernetes Cluster
Enter in the Master node and execute the following command.
kubeadm init
After Kubeadm is initialized you should see this information.
xxxxxxxxxx
Your Kubernetes control-plane has initialized successfully!
To start using your cluster, you need to run the following as a regular user:
mkdir -p $HOME/.kube
sudo cp -i /etc/kubernetes/admin.conf $HOME/.kube/config
sudo chown $(id -u):$(id -g) $HOME/.kube/config
Alternatively, if you are the root user, you can run:
export KUBECONFIG=/etc/kubernetes/admin.conf
You should now deploy a pod network to the cluster.
Run "kubectl apply -f [podnetwork].yaml" with one of the options listed at:
https://kubernetes.io/docs/concepts/cluster-administration/addons/
Then you can join any number of worker nodes by running the following on each as root:
kubeadm join 192.168.15.34:6443 --token ep2tut.omiv4tsuqphknxmc \
--discovery-token-ca-cert-hash sha256:dc99eda11bc5a8fa2c749d3969387b07ef96c8ed77293f44a4ff8f158b44ad45
Keep aside the generated token. This command should be executed on each Worker node to join the cluster.
Running the cluster
To start using your cluster, you need to run the following as a regular user:
mkdir -p $HOME/.kube
cp -i /etc/kubernetes/admin.conf $HOME/.kube/config
chown $(id -u):$(id -g) $HOME/.kube/config
Now check the cluster with the below command in the Master node.
xxxxxxxxxx
kubectl get nodes
You should see the below output.
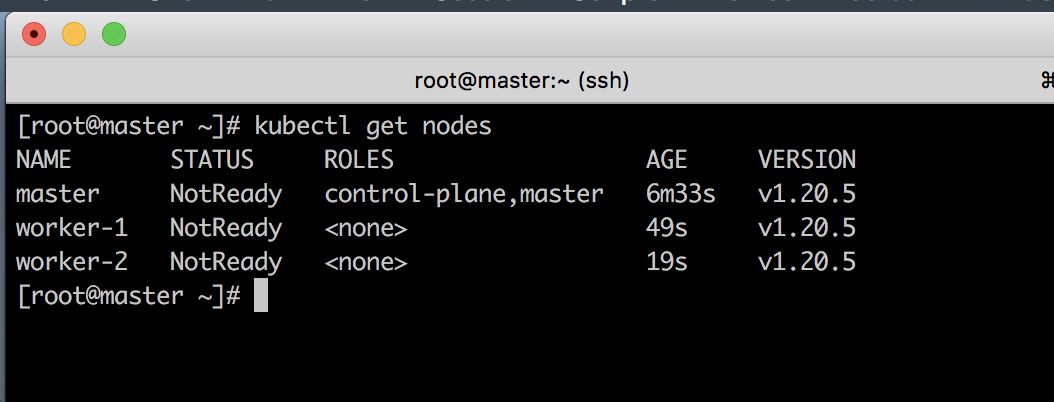
The nodes are in NotReady state because we are yet to install a Pod Network. We will do it in the next section.
Installing a Pod Network
We are going to use Calico as the Pod Network. It's straightforward. Check this documentation for the installation process. Install the Pod network in the Master node.
Download the Calico networking manifest for the Kubernetes API datastore.
xxxxxxxxxx
curl https://docs.projectcalico.org/manifests/calico.yaml -O
Apply the manifest using the following command.
xxxxxxxxxx
kubectl apply -f calico.yaml
Wait for some moments until all pods are up in the kube-system namespace.

Now execute the below command in the Master node.
xxxxxxxxxx
kubectl get nodes
You should get the below output.
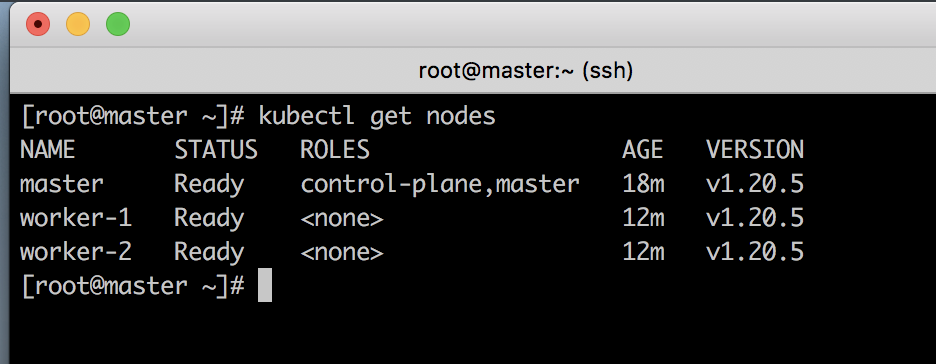
At this moment we have a fully functional Kubernetes cluster running.
Additional Configuration
Try executing kubectl get nodes in either of the Worker nodes. You should see the below output.
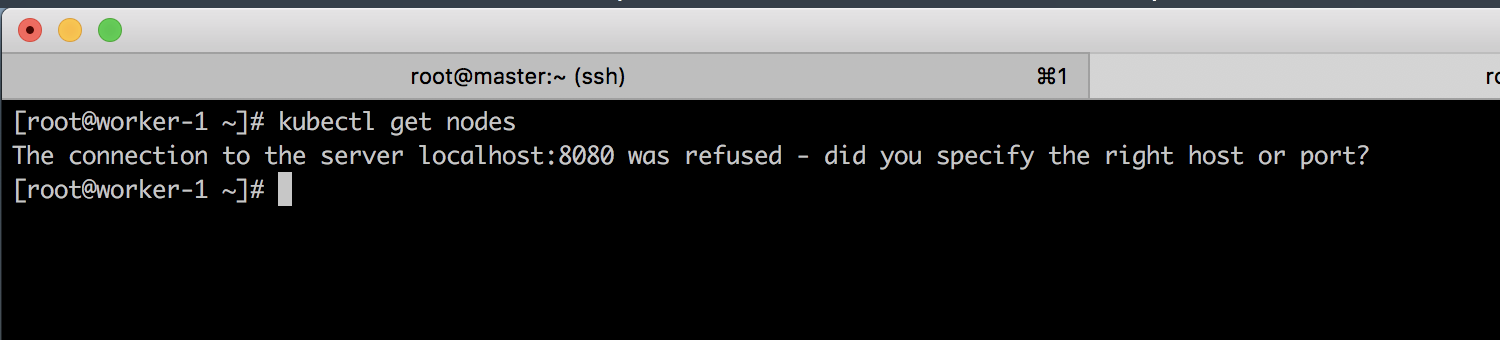
To be able to execute the kubectl commands across all Worker nodes, follow the below steps.
1. Create the following directory in Worker nodes.
mkdir -p $HOME/.kube
2. Copy the config file from the Master node from the below location to the target location created in step 1.
mkdir -p $HOME/.kube/config
3. Execute the below command in Worker nodes
chown $(id -u):$(id -g) $HOME/.kube/config
Now you can use kubectl commands in worker nodes too.
Conclusion
In this article, I have explained how to create a Kubernetes cluster using Kubeadm. I have used the minimal configuration to set up the cluster. Please feel free to let me know if you could set up this minimal cluster.
Opinions expressed by DZone contributors are their own.
Comments