Getting Started With React.js, Babel 7, Webpack 4, and MobX 5
We take a look at how to build a web app using MobX 5 for application state management, and React to create our front-end UI.
Join the DZone community and get the full member experience.
Join For FreeI used to use Redux for application state management, but due to complex code patterns and a lot of boilerplate code, it was not friendly to me at all. Recently, I've started exploring MobX. MobX is a clean and handy framework for state management. All my recent development efforts have been with MobX.
Getting my first project set up with the latest versions of MobX 5, I found some difficulties in packaging and wiring everything together with MobX decorators or annotations. Finally, I was able to resolve the issues and thought of sharing my experience in a blog post.
This article explains the steps to create a project using React.js 16, Babel 7, Webpack 4, and MobX 5. I'm using the latest versions available of these technologies as I'm writing this article.
Before we get started, please make sure you have the latest versions of npm and Node.js installed.
λ npm -v
6.9.0

λ node -v
v10.15.0
Let's start fresh with a new project folder.
Create a New Project Folder
First things first, let's create a new folder for our new application:
λ mkdir sample-react-mobx-app

λ cd sample-react-mobx-app
Now we have an empty project folder in which we are going to develop the application. For the next step, let's add a package.json file to it.
npm init -yThis will create a package.json file with basic configuration details. If you want to go through the verbose initialization process, run the above command without the -yflag.
package.json
{
  "name": "sample-react-mobx-app",
  "version": "1.0.0",
  "description": "",
  "main": "index.js",
  "scripts": {
    "test": "echo \"Error: no test specified\" && exit 1"
  },
  "keywords": [],
  "author": "",
  "license": "ISC"
}
Now it's time to add our first source code. For that, we will create an src folder in which we will structure all our source code.
mkdir src
touch src/index.html
touch src/index.js
Add the following code to index.html and index.js files.
index.html
<!DOCTYPE html>
<html lang="en">

<head>
    <meta charset="utf-8">
    <meta name="viewport" content="width=device-width, initial-scale=1, shrink-to-fit=no">
    <meta name="theme-color" content="#000000">
    <title>React Tutorial</title>
</head>

<body>
    <noscript>
        You need to enable JavaScript to run this app.
    </noscript>
    <div id="root"></div>
    <!--
      This HTML file is a template.
      If you open it directly in the browser, you will see an empty page.

      You can add webfonts, meta tags, or analytics to this file.
      The build step will place the bundled scripts into the <body> tag.
    -->
</body>

</html>
index.js
(function () {
    console.log("hello.... :)");
}());
Here's what we have done so far:
 Project folder structure
Add Webpack to the Project
Let's add all the Webpack packages required for the project. Those will get installed as dev dependencies, as they will be only used in development mode.
webpack: used to configure the new application.
webpack-cli: allows us to use Webpack in the command line.
webpack-dev-server: allows Webpack to listen for any modifications or changes to the files inside the application and trigger a browser page refresh automatically. It's a server that is running in the background.
npm install --save-dev webpack webpack-cli webpack-dev-serverAfter successfully installing those packages, they should appear in the package.json file as follows. This installs the latest version of the above packages:
  "devDependencies": {
    "webpack": "^4.29.6",
    "webpack-cli": "^3.3.0",
    "webpack-dev-server": "^3.2.1"
  }
The installation of these plugins made some changes to our project folders. It added a node_modules folder and package-lock.json to it.
Now, we need to add a config file to Webpack.
touch webpack.config.jsBefore we modify the Webpack config file, let's first install some modules to it.
npm install --save-dev path
npm install --save-dev html-webpack-plugin
This will install the path plugin since we are going to work with some paths, and the html-webpack-plugin to inject the index.js file inside the HTML file without manual operation.
Add the following snippet into the package.json file inside the scripts object.
"webpack": "webpack",
"start": "webpack-dev-server --open"
The package.json file should look like this:
{
  "name": "sample-react-mobx-app",
  "version": "1.0.0",
  "description": "",
  "main": "index.js",
  "scripts": {
    "webpack": "webpack",
    "start": "webpack-dev-server --open",
    "test": "echo \"Error: no test specified\" && exit 1"
  },
  "keywords": [],
  "author": "",
  "license": "ISC",
  "devDependencies": {
    "html-webpack-plugin": "^3.2.0",
    "path": "^0.12.7",
    "webpack": "^4.29.6",
    "webpack-cli": "^3.3.0",
    "webpack-dev-server": "^3.2.1"
  }
}
Run the below command to compile and generate the output to the dist folder with minified code.
npm run webpack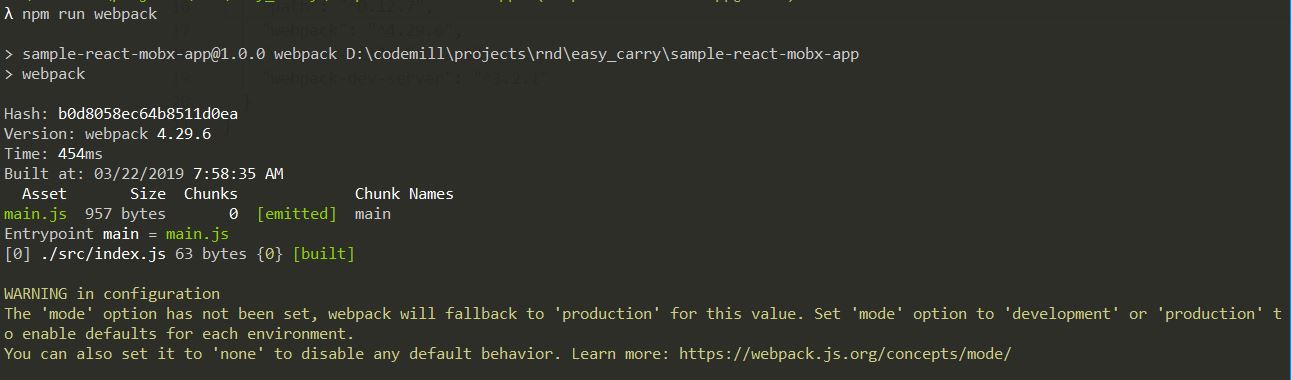
Use the start command to start the dev server automatically and open the default browser with the application page.
npm start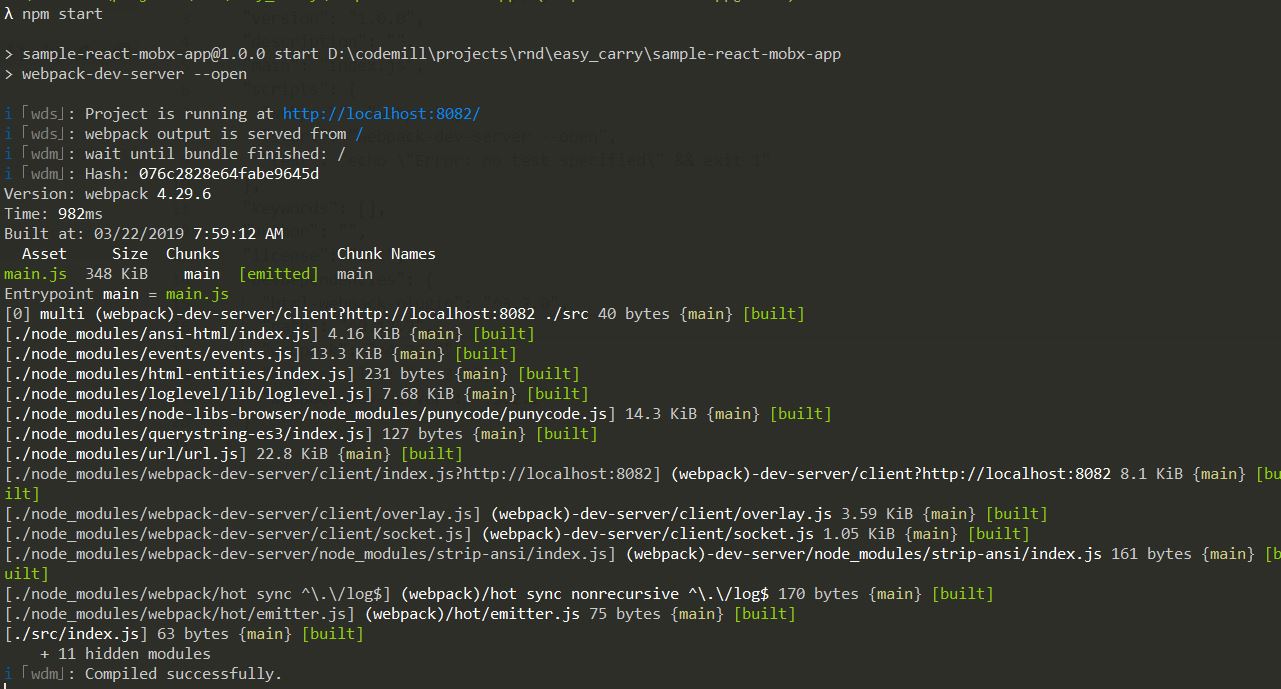

As we haven't configured the webpack.config.js output, what you see above is simply a defaul display. You can stop the server CTRL + C .
Add the following to webpack.config:
const path = require('path');

const HtmlWebpackPlugin = require('html-webpack-plugin');

module.exports = {
  entry: path.join(__dirname,'src','index.js'),
  output: {
    path: path.join(__dirname,'build'),
    filename: 'index.bundle.js'
  },
  mode: process.env.NODE_ENV || 'development',
  resolve: {
    modules: [path.resolve(__dirname, 'src'), 'node_modules']
  },
  devServer: {
    contentBase: path.join(__dirname,'src')
  },
  plugins: [
    new HtmlWebpackPlugin({
      template: path.join(__dirname,'src','index.html')
    })
  ]
};
entry and output: These are used to provide information to the compiler, such as where to find the source files and where to put the output compiled version.
mode: Mode of the development environment. Here we are setting it to 'development' as a default mode, otherwise it will take the specified value.
resolve: This is used to resolve any dependencies or imports.
devServer: When the webpack-dev-server runs it tells what files needs to be served. Here, we're running everything from the src folder.
plugins: configure what plugins you need in your app.
Now, if we run the following command, you will see some differences:
npm run webpack
Now the build output goes to the build folder and it is not minified. Let's start up our app and see.
npm startIt will open up the browser and you will see a blank page. But if you look a the browser console you will see our JavaScript has been executed while the page was loading. The webpack-dev-server serves the content from the src folder.

So far we are on the right path. But, we have only added Webpack; next we will be adding React and Babel.
React and Babel
Let's add React and ReactDOM to our project as dependencies:
npm install --save react react-domNow if we add React code inside our src file, Webpack will throw an error. It doesn't know how to compile the React code inside the bundle.js file. We need Babel for that.
Let's modify the index.js file:
import React from "react";
import ReactDOM from "react-dom";

let HelloWorld = () => {
    return <div>
              <h1>Hello World!</h1> by Amila Silva ([email protected])
           </div>;
}

ReactDOM.render(
    <HelloWorld />,
    document.getElementById("root")
);
If you start it now with npm start, it will throw an error
Let's install Babel. It will instruct Webpack on how to compile our React code. Add the following dev dependencies.
npm install --save-dev @babel/core @babel/node @babel/preset-env @babel/preset-react babel-loader@babel/core: used to compile ES6 and above into ES5.
@babel/node: helper package to import our plugins and packages inside the webapck.config.js.
@babel/present-env: this will determine which transformations or plugins to use and which polyfills to use as well.
@babel/preset-react: compile React code into ES5 code.
babel-loader: Webpack helper that transforms your JavaScript dependencies with Babel.
Usually, you add some styles to the project. We are going to add a loader and then will import and use CSS and SCSS files.
npm install --save-dev style-loader css-loader sass-loader node-sassstyle-loader: This will inject the <style> tag inside the HTML file.
css-loader: import CSS files into the project.
scss-loader: import SCSS files into the project.
node-sass: this will compile the SCSS files to CSS.
We are going to create an SCSS file to keep our style sheets in:
touch src/index.scssAdd some styling:
body {
    div#root{
      background-color: #dedfe0;
      color: #ff9c39;
    }
  }
Import our styling into index.js:
import React from "react";
import ReactDOM from "react-dom";

// some nice styles on our react app
import "index.scss";

let HelloWorld = () => {
    return <div>
              <h1>Hello World!</h1> by Amila Silva ([email protected])
           </div>;
}

ReactDOM.render(
    <HelloWorld />,
    document.getElementById("root")
);
Time to glance through the package.json:
{
  "name": "sample-react-mobx-app",
  "version": "1.0.0",
  "description": "",
  "main": "index.js",
  "scripts": {
    "webpack": "webpack",
    "start": "webpack-dev-server --open",
    "test": "echo \"Error: no test specified\" && exit 1"
  },
  "keywords": [],
  "author": "Amila Silva ([email protected])",
  "license": "ISC",
  "devDependencies": {
    "@babel/core": "^7.4.0",
    "@babel/node": "^7.2.2",
    "@babel/preset-env": "^7.4.2",
    "@babel/preset-react": "^7.0.0",
    "babel-loader": "^8.0.5",
    "css-loader": "^2.1.1",
    "html-webpack-plugin": "^3.2.0",
    "node-sass": "^4.11.0",
    "path": "^0.12.7",
    "sass-loader": "^7.1.0",
    "style-loader": "^0.23.1",
    "webpack": "^4.29.6",
    "webpack-cli": "^3.3.0",
    "webpack-dev-server": "^3.2.1"
  },
  "dependencies": {
    "react": "^16.8.5",
    "react-dom": "^16.8.5"
  }
}
Next, wire up Babel and Webpack to compile our React and SCSS code.
Add a configuration file for Babel. For this, we need to create a file named .babelrc in which we will configure Babel.
touch .babelrcAdd the following loaders to .babelrc so that babel-loader will know what to use to compile the code.
{
    "presets": [
        "@babel/env",
        "@babel/react"
    ]
}
I would like to add some helper plugins that will let us load or import all sorts of files such as images and enable us to work with Object-Oriented Programming.
npm install --save-dev file-loader @babel/plugin-proposal-class-propertiesNow we need to modify webpack.config.js so that Webpack will able to use Babel.
// old
// const path = require('path');
// const HtmlWebpackPlugin = require('html-webpack-plugin');

// new
import path from 'path';

import HtmlWebpackPlugin from 'html-webpack-plugin';

module.exports = {
  entry: path.join(__dirname,'src','index.js'),
  output: {
    path: path.join(__dirname,'build'),
    filename: 'index.bundle.js'
  },
  mode: process.env.NODE_ENV || 'development',
  resolve: {
    modules: [path.resolve(__dirname, 'src'), 'node_modules']
  },
  devServer: {
    contentBase: path.join(__dirname,'src')
  },
  module: {
    rules: [
      {
        // this is so that we can compile any React,
        // ES6 and above into normal ES5 syntax
        test: /\.(js|jsx)$/,
        // we do not want anything from node_modules to be compiled
        exclude: /node_modules/,
        use: ['babel-loader']
      },
      {
        test: /\.(css|scss)$/,
        use: [
          "style-loader", // creates style nodes from JS strings
          "css-loader", // translates CSS into CommonJS
          "sass-loader" // compiles Sass to CSS, using Node Sass by default
        ]
      },
      {
        test: /\.(jpg|jpeg|png|gif|mp3|svg)$/,
        loaders: ['file-loader']
      }
    ]
  },
  plugins: [
    new HtmlWebpackPlugin({
      template: path.join(__dirname,'src','index.html')
    })
  ]
};
There is one more update to package.json which tells the app to use Babel with Webpack.
{
  "name": "sample-react-mobx-app",
  "version": "1.0.0",
  "description": "",
  "main": "index.js",
  "scripts": {
    "test": "echo \"Error: no test specified\" && exit 1",
    "webpack": "babel-node ./node_modules/webpack/bin/webpack",
    "start": "babel-node ./node_modules/webpack-dev-server/bin/webpack-dev-server --open"
  },
  "keywords": [],
  "author": "Amila Silva ([email protected])",
  "license": "ISC",
  "devDependencies": {
    "@babel/core": "^7.4.0",
    "@babel/node": "^7.2.2",
    "@babel/plugin-proposal-class-properties": "^7.4.0",
    "@babel/preset-env": "^7.4.2",
    "@babel/preset-react": "^7.0.0",
    "babel-loader": "^8.0.5",
    "css-loader": "^2.1.1",
    "file-loader": "^3.0.1",
    "html-webpack-plugin": "^3.2.0",
    "node-sass": "^4.11.0",
    "path": "^0.12.7",
    "sass-loader": "^7.1.0",
    "style-loader": "^0.23.1",
    "webpack": "^4.29.6",
    "webpack-cli": "^3.3.0",
    "webpack-dev-server": "^3.2.1"
  },
  "dependencies": {
    "react": "^16.8.5",
    "react-dom": "^16.8.5"
  }
}
Now are almost done. Let's run the code to see our progress:
npm run webpack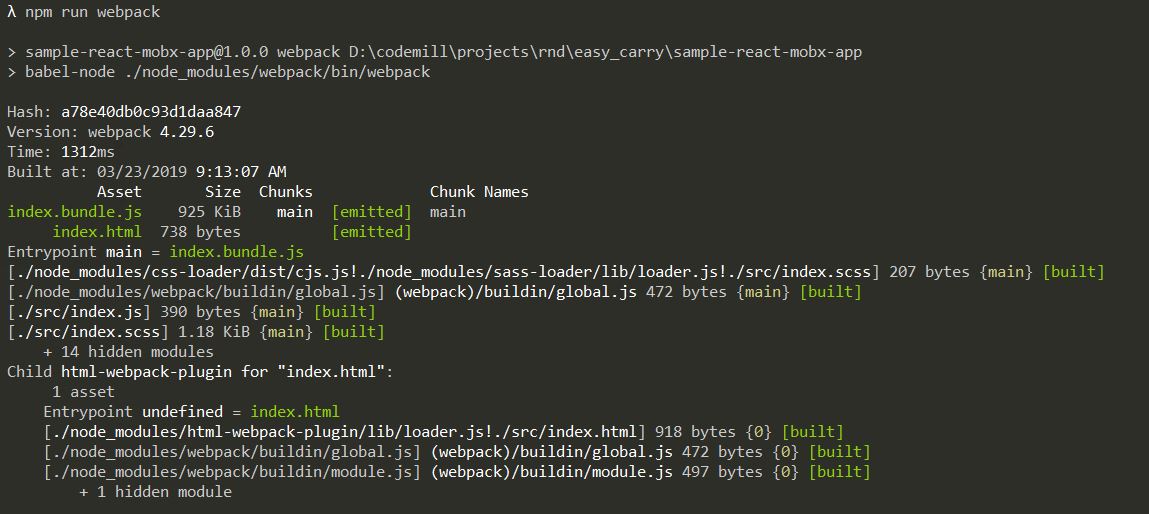
And now let's see our app. The following should open the browser and display our index.html page:
npm start
Final Step: Add MobX 5
According to their docs, "MobX is a library that makes state management simple and scalable by transparently applying functional reactive programming (TFRP). The philosophy behind MobX is very simple: anything that can be derived from the application state, should be derived. Automatically. which includes the UI, data serialization, server communication, etc. React and MobX together are a powerful combination."
Let's enable MobX by adding the following MobX dependencies:
npm install mobx mobx-react mobx-react-devtools --saveAdd the following plugins to .babelrc to enable MobX decorators:
{
  "presets": [
    "@babel/env",
    "@babel/react"
  ],
  "plugins": [
    [
      "@babel/plugin-proposal-decorators",
      {
        "legacy": true
      }
    ],
    [
      "@babel/plugin-proposal-class-properties",
      {
        "loose": true
      }
    ]
  ]
}
Now you can create your MobX stores and start injecting those using annotations or decorators.
npm run webpack
npm start
This will start your React.js application with MobX.
We have learned how to create a small Node.js application from scratch and how to improve it step by step using Webpack, Babel, React.js, and MobX. Webpack will help you to build and package your basic node applications and in addition to that Babel is used to instruct Webpack on how to load and compile specific modules in your code. React will help you build front-end applications and MobX takes control of application state management.
You can download the code from here.
If you enjoyed this article and want to learn more about React, check out this collection of tutorials and articles on all things React.
Opinions expressed by DZone contributors are their own.
Comments