Handling Core Dumps Across Clusters
Keep all your core dumping processes in one place with the help of GCP.
Join the DZone community and get the full member experience.
Join For FreeCentralized Core Dump Processing in Kubernetes Applications in GCP
Managing centralized information like logs and core dumps can be a challenge, even with various tools for managing Logs like Logstash, and FluentD. However, we don’t really have an end solution for managing core dumps from our application.
In the Kubernetes ecosystem, every node in a cluster can launch one or many pods. Each Pod can launch as many as one or many container applications.
There will be many circumstances where the application might fail like a memory dump issue.
The definition of Core Dump is as follows:
“Core dumps are generated when the process receives certain signals, such as SIGSEGV, which the kernels sends it when it accesses memory outside its address space. Typically, that happens because of errors in how pointers are used. That means there's a bug in the program. The core dump is useful for finding the bug.”
Hence, by the definition itself, it can really be made out, how important is to understand and debug the issues of Core Dump to make a robust application.
In this blog, I will be describing how we can manage core dumps from a Kubernetes cluster deployed in GCP.
Managing Core Dump in Kubernetes Cluster in GCP

Phase 1 Approach
The issue with managing the core dumps in each pod is that if the pod, container, or node restarts, then we will be losing all the data which was generated in the core-dump folder. This are important data which cannot be compromised. Also, we would like to manage the core-dumps from every node in a centralized manner to understand the behavior of core-dumps so that we can make our application more robust.
As per the diagram above, we are proposing to introduce a Core Dump Collector Agent in each Node. This Core Dump collector agent will exist as a Daemon Pod/Sidecar container which will collect the data from the location where the core dumps are created and upload the same data to an external piece of storage device.
Each application running inside the pod will write the core dumps in a said location in its file structure. This location will be Mounted Persistent Volume within the Kubernetes cluster. The Core Dump Agent will watch the Mounted Volume Location, so as soon as some files are getting created in Persistent Volume, the same file gets uploaded in the Google Storage which is outside the cluster and we are able to get a centralized path where we can get all core dumps across multiple clusters.
We can also mount to an empty directory as well rather than Persistent Volume. Persistent Volume is taken so that we do not lose any core-dumps in some unforeseen circumstances.
Later, we can create some shell scripts to do housekeeping on the Persistent Volume data as well.
The storage device can be anything: AWS Cloud Storage, Google Storage, Local File Storage, etc. Here, we will discuss how we can manage by storing and centralizing with Google Storage.
We are assuming that your container is generating the core dumps in the path “/var/lib/systemd/coredump.” This path can vary as per the core dump pattern defined in your container. We can create the core dump location specified in the file “/proc/sys/kernel/core_pattern” by doing something like below.
$> mkdir -p /tmp/cores
$> chmod a+rwx /tmp/cores
$> echo "/tmp/cores/core.%e.%p.%h.%t" > /proc/sys/kernel/core_pattern
Here, the core dump will be created in “/tmp/cores” directory. In our exercise, we are assuming that core files are located in “/var/lib/systemd/coredump”.
Creation of Service Account to Access Google Storage Bucket.
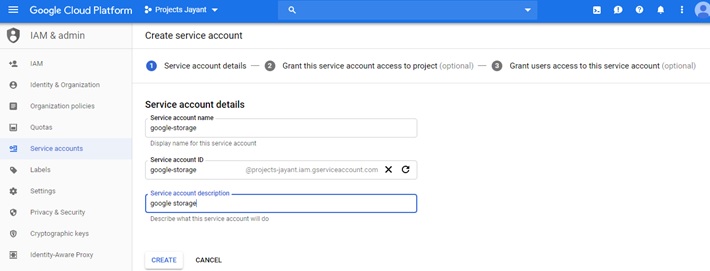
Create a service account in GCP console by clicking on IAM & Admin > Service Account > Create Service Account.
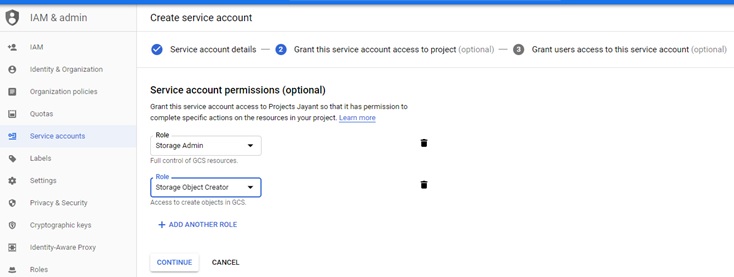
Select Service Account Permission Roles and select the “Storage Object Creator” role.
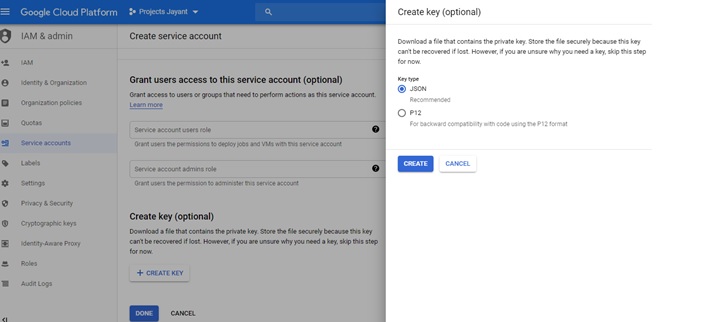
Store the key as a JSON key and save it locally in your system. In our case, we have saved the file as “projects-jayant-82544f23332b.json” in the local system.
Note: A service account can also be created with GCP scripts with the command gcloud iam service-accounts create.
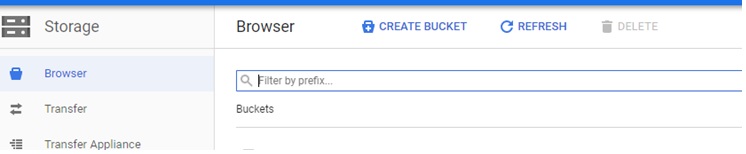
Create the Google Storage External Bucket
Create the Google Storage where you want to upload the core dumps from multiple pods across multiple nodes in different clusters.
Once the Google Storage Bucket is created, assign the permission by selecting “Add members.” Here, you will add the Service Account information which you created above in Step 1.

Also assign ”Storage Object Creator” role to it.

Note: Creation of Google Storage Bucket can also be done by GCP scripts like below. I went with the GUI based concepts so that it is understood by a wider audience.
“gsutil mb -p [PROJECT_NAME] -c [STORAGE_CLASS] -l [BUCKET_LOCATION] -b on gs://[BUCKET_NAME]/”Step 3: Persistent Volume Mount on CoreDump Location Inside Application Container
If the Persistent Volume is already created, then ignore the below YAML script. In this case, the Persistent Volume name is “storage-pvc”.
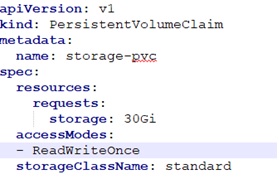
Reference the Persistent Volume name in your Application Pod/Deployment YAML file. Mount the file location where core dump is created to the Persistent Volume.
In the below application pod, we are mounting the core-dump path “/var/lib/systemd/coredump” and mapping it to a persistent volume “storage-pvc” as created above.
You can have your corresponding image in place of “gcr.io/kubeapps-xyz/appshell:1.0” below.

Core-Dump Agent Collector Dockerfile
In order to create a Core Dump Agent Collector, we will use the Google SDK-Alpine Image and install INOTIFY-TOOLS so that the Core Dump Agent Collector can watch on the specified directory. Google SDK is used as we need to use the Google CLI command to trigger the watch notification.
In this Dockerfile, we will copy the Service Account JSON Key created in step 1 and copy it into Alpine Directory.
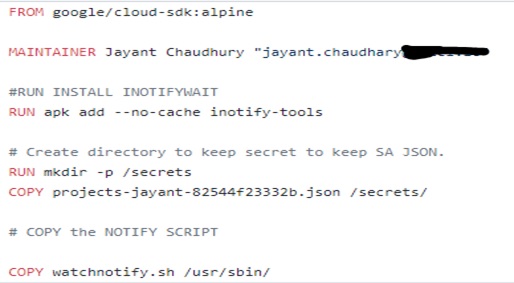
If you'll see above in the screenshot, we also created a “watchnotify.sh” script which will trigger the INOTIFY EVENT whenever there is some file created in core-dump persistent disk location and kept it inside the “/usr/sbin” directory.
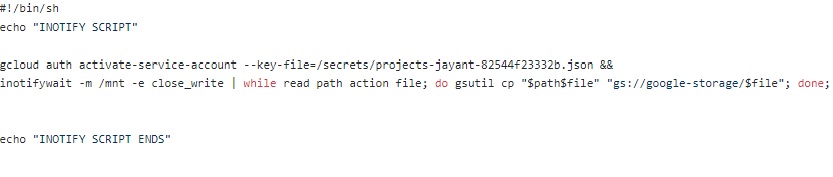
NOTE: If you want to sync the Storage Bucket with the Core-Dump directory, then replace the “inotify –m …xxxx..gsutil cp..” line with the below hightlighted line.
”inotifywait -m /mnt -e close_write | while read path action file; do gsutil -m rsync -d -r "$path" "gs://google-storage/"; done;”.
Later, we can use similar “gsutil” command to copy from Google Storage to Amazon S3 bucket as well. For example:: “gsutil –m rsync –d –r “gs://<your-storage>” “s3://<amazon-bucket>”.
Just remember, we have given the Google Storage Bucket a name in the “watchnotify.sh” which we have created in Step 2. In this case, it is “google-storage.” And we have passed the service-account JSON key which we had put in the Alpine directory in the Dockerfile. Here, it is “secrets/projects-jayant-82xxxx.json.” In your case, it will be a different JSON file.
Now, build the Docker image. I have done it from my GCP console.
And, push it in Image Repository. In your case it will vary, I pushed in gcr.io repository from my GCP console.
docker build . -t gcr.io/projects-jayant/coredump/coredump0.1:1docker push gcr.io/projects-jayant/coredump/coredump0.1:1Executing Core-Dump Agent as A DaemonSet
We want to run the Core-Dump Agent Collector Agent as a sidecar container. We will create it as a DaemonSet so that the Core Dump Agent Collector container is up and running as soon as the cluster comes alive in the K8s cluster. This DaemonSet will call the Core Dump Agent Image created in step 4. Also, it will call the “watchnotify.sh” script to watch the core-dump file location. The file location (“/mnt”) is mapped to the same Persistent Volume created in Step 3.
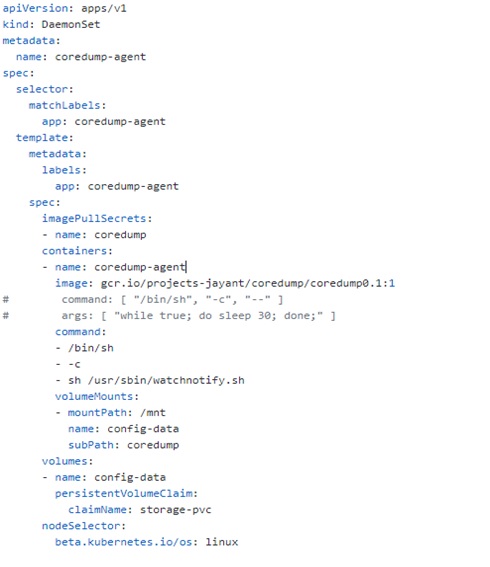
Now, deploy both the Daemon Set and Application Pod in your Kubernetes Cluster.
In your Google Storage Bucket, you will start seeing the core-dumps files getting created.
In my case, I pushed some dummy files in my application container core-dump path “/var/lib/systemd/coredump” and it gets automatically created on “gs://google-storage.”

Phase 2 Approach
In this phase, we can plan how to consume the data captured in Google Storage and what benefits we can get from those data.
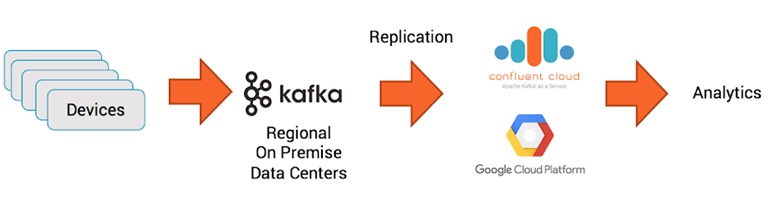
One option is that we can use Kafka Streaming to capture live data and then use this data in multiple ways.
But we'll save that for another day.
Opinions expressed by DZone contributors are their own.
Comments