Handling Password-Protected PDFs in JavaScript
Handling password-protected PDFs in JavaScript isn’t as hard as it seems. This guide shows how to use OSS libraries to open secured PDFs in the browser.
Join the DZone community and get the full member experience.
Join For FreePDF is one of the simplest formats for sharing documents. They are portable and can provide basic access control through password protection. In this post, we will discuss one of many ways to unlock and open password-protected PDF documents in JavaScript.
This post uses PDF.js and client-side JavaScript tools built into modern browsers to:
- Read a PDF file from a user’s device.
- Prompt for passwords only when the PDF is password-protected.
- Display feedback for failed attempts to unlock a PDF file.
- Render pages of the decrypted PDF using the browser’s Canvas API.
Start a New JavaScript Project
As a first step, let’s set up scaffolding for a vanilla JavaScript application using Vite. Run the below command in your terminal to create a new vanilla JavaScript web app named pdf-password and install its dependencies.
npm create vite@latest -- --template vanilla pdf-password && cd pdf-password && npm install
Next, install PDF.js as a project dependency:
npm install pdfjs-dist
Then, open the newly created pdf-password folder in your preferred code editor to begin building the PDF viewer.
Create HTML Elements to Handle User Input and PDF Rendering
Replace the contents of the project’s index.html file with the following.
<!-- pdf-password/index.html -->
<!DOCTYPE html>
<html lang="en">
  <head>
    <meta charset="UTF-8" />
    <link rel="icon" type="image/svg+xml" href="/vite.svg" />
    <meta name="viewport" content="width=device-width, initial-scale=1.0" />
    <title>Locked PDF Viewer</title>
  </head>
  <body>
    <form class="pdf-form">
      <label for="pdf-form__input" class="pdf-form__label"
        >View a PDF file in your browser</label
      >
      <input type="file" name="pdf-file" id="" class="pdf-form__input" />
    </form>

    <div class="password-form-backdrop">
      <form class="password-form">
        <label for="" class="password-form__label"
          >The PDF is password-protected. Please enter its password.</label
        >
        <p class="password-incorrect">Incorrect password. Please try again.</p>
        <input
          type="password"
          name="password"
          class="password-input"
          placeholder="PDF Password"
          autocomplete=""
          autofocus
        />
        <button type="submit" class="password-submit">Unlock</button>
      </form>
    </div>

    <canvas class="pdf-canvas"></canvas>

    <script type="module" src="/src/main.js"></script>
  </body>
</html>
The first form in the above markup handles file uploads from the user’s device, while the second form collects a PDF’s password. The canvas element will be used to render the PDF’s pages.
Since we’re aiming for a visually pleasing PDF upload form (even though it’s just a demo), let’s replace the contents of the project’s src/style.css file with the following style rules:
/* pdf-password/src/style.css */
*,
::before,
::after {
  box-sizing: border-box;
  margin: 0;
  padding: 0;
}

body,
input,
input::placeholder,
button,
.pdf-form__input::file-selector-button {
  font-family: system-ui, -apple-system, BlinkMacSystemFont, 'Segoe UI', Roboto,
    Oxygen, Ubuntu, Cantarell, 'Open Sans', 'Helvetica Neue', sans-serif;
}

body {
  background-color: rgb(239, 246, 253);
  min-height: 100vh;
  display: flex;
  justify-content: center;
  align-items: center;
  padding: 1em;
  max-width: 100%;
}

form {
  background-color: white;
  border-radius: 1em;
  padding: 4em 2em;
  flex-basis: 400px;
  max-width: 100%;
}

label {
  font-size: 1.5rem;
  display: inline-block;
  margin-bottom: 12px;
}

.pdf-form__input::file-selector-button {
  border: 2px solid rgba(0, 0, 0, 0.1);
  border-radius: 0.5em;
  padding: 0.75em;
  font-size: 1rem;
  background-color: transparent;
  cursor: pointer;
}

.password-form-backdrop {
  display: none;
  position: fixed;
  background-color: rgba(0, 0, 0, 0.5);
  top: 0;
  right: 0;
  bottom: 0;
  left: 0;
  justify-content: center;
  align-items: center;
}

.password-incorrect {
  color: rgb(220, 20, 60);
  display: none;
}

.password-input,
.password-submit {
  border: 2px solid rgba(0, 0, 0, 0.1);
  border-radius: 0.5em;
  padding: 0.75em;
  font-size: 1rem;
  width: 100%;
  margin-bottom: 20px;
}

.password-submit {
  border: none;
  background-color: dodgerblue;
  color: white;
  cursor: pointer;
}

.pdf-canvas {
  max-width: 100%;
  margin: 0 auto;
  display: none;
  justify-content: center;
  align-items: center;
  flex-direction: column;
}/* pdf-password/src/style.css */
*,
::before,
::after {
box-sizing: border-box;
margin: 0;
padding: 0;
}
body,
input,
input::placeholder,
button,
.pdf-form__input::file-selector-button {
font-family: system-ui, -apple-system, BlinkMacSystemFont, 'Segoe UI', Roboto,
Oxygen, Ubuntu, Cantarell, 'Open Sans', 'Helvetica Neue', sans-serif;
}
body {
background-color: rgb(239, 246, 253);
min-height: 100vh;
display: flex;
justify-content: center;
align-items: center;
padding: 1em;
max-width: 100%;
}
form {
background-color: white;
border-radius: 1em;
padding: 4em 2em;
flex-basis: 400px;
max-width: 100%;
}
label {
font-size: 1.5rem;
display: inline-block;
margin-bottom: 12px;
}
.pdf-form__input::file-selector-button {
border: 2px solid rgba(0, 0, 0, 0.1);
border-radius: 0.5em;
padding: 0.75em;
font-size: 1rem;
background-color: transparent;
cursor: pointer;
}
.password-form-backdrop {
display: none;
position: fixed;
background-color: rgba(0, 0, 0, 0.5);
top: 0;
right: 0;
bottom: 0;
left: 0;
justify-content: center;
align-items: center;
}
.password-incorrect {
color: rgb(220, 20, 60);
display: none;
}
.password-input,
.password-submit {
border: 2px solid rgba(0, 0, 0, 0.1);
border-radius: 0.5em;
padding: 0.75em;
font-size: 1rem;
width: 100%;
margin-bottom: 20px;
}
.password-submit {
border: none;
background-color: dodgerblue;
color: white;
cursor: pointer;
}
.pdf-canvas {
max-width: 100%;
margin: 0 auto;
display: none;
justify-content: center;
align-items: center;
flex-direction: column;
}Import the Project’s Dependencies
Delete the contents of the project’s src/main.js file, then import and configure PDF.js and the project’s stylesheet into the src/main.js script as shown below:
// pdf-password/src/main.js
import './style.css';

// Import pdfJs
import {
  GlobalWorkerOptions,
  getDocument,
  PasswordResponses,
} from 'pdfjs-dist';

// Setup pdfJs' worker from the package's node_modules folder
GlobalWorkerOptions.workerSrc = new URL(
  'pdfjs-dist/build/pdf.worker.mjs',
  import.meta.url
).toString();
At this point, the project’s index page should look similar to the following image if you run npm run dev -- --open from the root folder of the project.
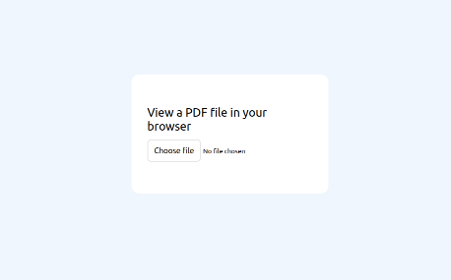
Display the PDF’s Contents
Copy the following code into the src/main.js file. It attaches an event listener to the file input field of the pdf-form element defined in the index.html file. The event listener detects when a user selects a PDF and its handler attempts to display the document’s contents on the screen.
// Display an uploaded PDF file
document.querySelector('.pdf-form__input')
.addEventListener('change', viewPDF);
Now let’s define the viewPDF event handler, which is passed as the second argument of the addEventListener method. Copy the following code into the src/main.js file. Check out the comments in the function definition for some insight into what each statement and expression does.
function viewPDF(e) {
  // Get the File object of the uploaded PDF.
  const file = e.target.files[0];

  // Continue only if the user has uploaded a PDF document
  if (file.type !== 'application/pdf') {
    alert(`Error: ${file.name} is not a PDF file`);
    return;
  }

  // Read the contents of the PDF file from the user's device
  const reader = new FileReader();
  reader.readAsArrayBuffer(file);

  // Handle error(s) encountered while reading the contents of the PDF file
  reader.onerror = () => {
    alert(`Unable to read ${file.name} to an ArrayBuffer`);
    console.error(reader.error);
  };

  // Wait till FileReader has read all contents of the PDF file before proceeding
  reader.onload = async () => {
    // Transform the contents of the PDF file to a generic byte array
    const bytes = new Uint8Array(reader.result);

    // Using PDF.js, start loading the PDF contents from the above byte array
    const loadingTask = getDocument(bytes);

    // Prompt for a password only if PDF.js detects password protection while loading the document
    loadingTask.onPassword = handlePDFPassword;

    // Complete the process of loading the PDF document
    const pdfDocument = await loadingTask.promise;

    // Hide the PDF upload form since we don't need it anymore
    document.querySelector('.pdf-form').style.display = 'none';

    renderPage(pdfDocument);
  };
}
Prompt for a Password and Unlock Password-Protected PDFs
The handlePDFPassword function set as the loadingTask’s onPassword event handler is undefined at this point. Let’s define it by adding the below function to the src/main.js file.
function handlePDFPassword(setPassword, reason) {
  const passwordForm = document.querySelector('.password-form-backdrop').style;
  const passwordIncorrect = document.querySelector('.password-incorrect').style;

   // Prompt for a password if PDF.js needs the file’s password to proceed
  if (reason === PasswordResponses.NEED_PASSWORD) {
    passwordForm.display = 'flex';
    passwordIncorrect.display = 'none';

    document.querySelector('.password-form').addEventListener('submit', (e) => {
      e.preventDefault();
      setPassword(document.querySelector('.password-input').value);

      // Hide password prompt after the correct password is submitted
      passwordForm.display = 'none';
      passwordIncorrect.display = 'none';
    });
  }

   // Display incorrect password error message if the entered password doesn’t unlock the PDF file
  if (reason === PasswordResponses.INCORRECT_PASSWORD) {
    passwordForm.display = 'flex';
    passwordIncorrect.display = 'block';
  }
}
handlePDFPassword gets called only if PDF.js detects password protection when loading a PDF document. Users trying to view non-password-protected PDFs won’t be prompted for a password.
Render the Unlocked PDF’s Pages
Finally, copy the following function definition to the src/main.js file. Like its name suggests, the renderPage function renders a page of the loaded PDF onto the web page.
async function renderPage(pdfDocument) {
// Load the first page of the document.
const page = await pdfDocument.getPage(1);
// Use the page's dimensions (in pixels) to set the
// dimensions of the canvas on which the page will be rendered
const viewport = page.getViewport({ scale: 1 });
const canvas = document.querySelector('.pdf-canvas');
const canvasContext = canvas.getContext('2d');
canvas.style.display = 'block';
canvas.height = viewport.height;
canvas.width = viewport.width;
// Render the PDF page on the site
const renderTask = page.render({
canvasContext,
viewport,
});
await renderTask.promise;
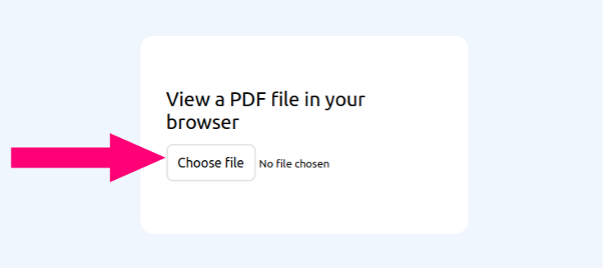
}Try It Out!
Open the app in your browser (by running npm run dev -- --open), click the Choose file button, and select a password-protected PDF file.
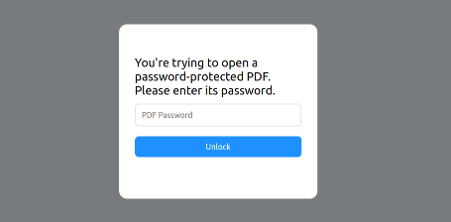
The app will prompt for the PDF’s password using the pop-up form shown below before displaying the PDF’s contents.
Go Further
The renderPage function defined above renders only the first page of the PDF document. See https://mozilla.github.io/pdf.js/examples for guidance on adding pagination and/or better error handling to the app.
Published at DZone with permission of John Pagley. See the original article here.
Opinions expressed by DZone contributors are their own.
Comments