Hands-On with Azure Local via the Azure Portal
This guide explains how to deploy LocalBox with Azure Bicep and create Azure VMs, covering setup, networking, images, and deployment without physical hardware.
Join the DZone community and get the full member experience.
Join For FreeSteps to Create a Virtual Machine on Azure Local Using the Azure Portal
1. Definition of Keywords
LocalBox
LocalBox is an Azure Local lab environment created by Microsoft’s Azure Jumpstart team. You do not need to buy hardware such as Dell AX nodes or other vendors' nodes for practice.
Where does LocalBox run?
1.1 On a user's Azure subscription:
This creates a large VM (32 vCPU or 16 vCPU depending on the template). LocalBox runs inside the created VM.
1.2 On a user's laptop/desktop using Hyper-V
If the user’s laptop has:
- Windows 11
- 32–64 GB RAM
- SSD
Then LocalBox can be deployed locally.
Azure Bicep
Azure Bicep is used to deploy LocalBox into your Azure subscription.
2. Deploy LocalBox Infrastructure with Azure Bicep
Log in to https://portal.azure.com. For this demo, I am using my personal account. Create an account if you do not already have one.
Register the required Azure resource providers. Make sure your Azure subscription is registered for the required resource providers. To register them, you must be an Owner or Contributor on your subscription.
Click on Cloud Shell.

Register the following providers using Azure CLI:
az provider register --namespace Microsoft.HybridCompute

az provider register --namespace Microsoft.GuestConfiguration

az provider register --namespace Microsoft.HybridConnectivity

az provider register --namespace Microsoft.AzureStackHCI

az provider register --namespace Microsoft.Kubernetes

az provider register --namespace Microsoft.KubernetesConfiguration

az provider register --namespace Microsoft.ExtendedLocation

az provider register --namespace Microsoft.ResourceConnector

az provider register --namespace Microsoft.HybridContainerService

az provider register --namespace Microsoft.Attestation

az provider register --namespace Microsoft.Storage

az provider register --namespace Microsoft.Insights

az provider register --namespace Microsoft.Keyvault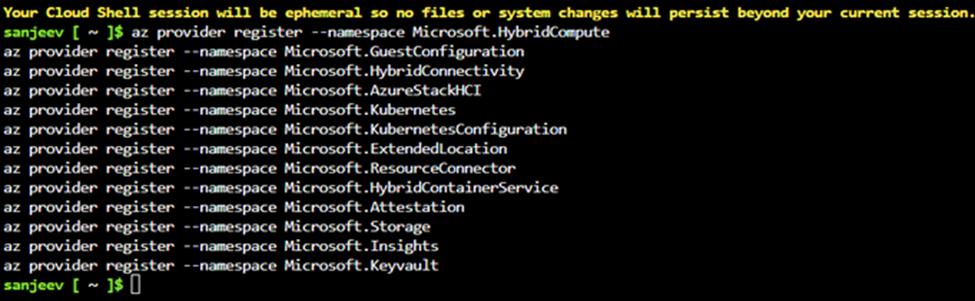
Clone the Arc Jumpstart GitHub repository
git clone https://github.com/microsoft/azure_arc.git
Install or update Azure CLI
Install or update Azure CLI to version 2.65.0 or later. Use the following command to check your installed version:
az --version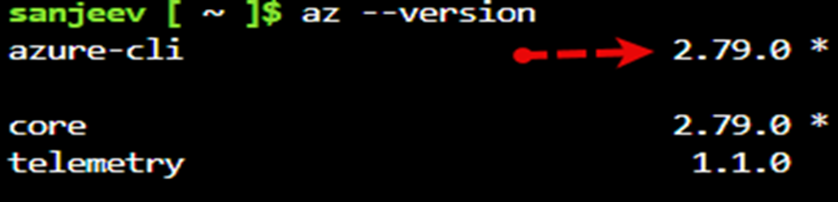
Log in to Azure CLI
az login
Ensure that you have selected the correct subscription where you want to deploy LocalBox by using:
az account list --query "[?isDefault]" 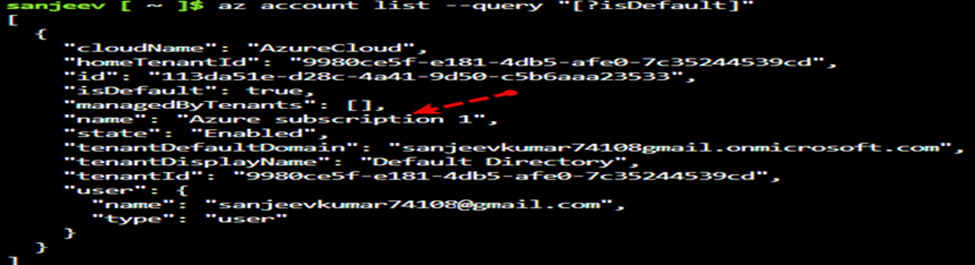
You can deploy LocalBox in any Azure region that has sufficient compute capacity (vCPU quota) for the selected VM SKU (Standard E32s v5 or v6). By default, a LocalBox deployment requires 32 ESv6-series vCPUs.
Ensure that your Azure subscription has sufficient vCPU quota available in the target region before deploying LocalBox. You can use the following command to check your vCPU utilization:
az vm list-usage --location centralindia --output table


Deploy the Bicep Template
Upgrade to the latest Bicep version:
az bicep upgrade
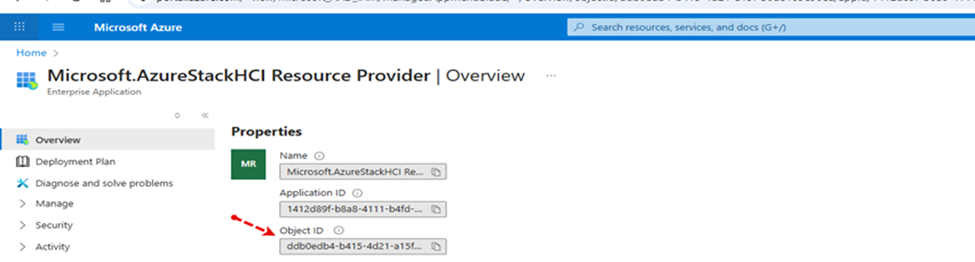
Retrieve the object ID of your directory's Azure Local resource provider
Retrieve the object ID of your directory's Azure Local resource provider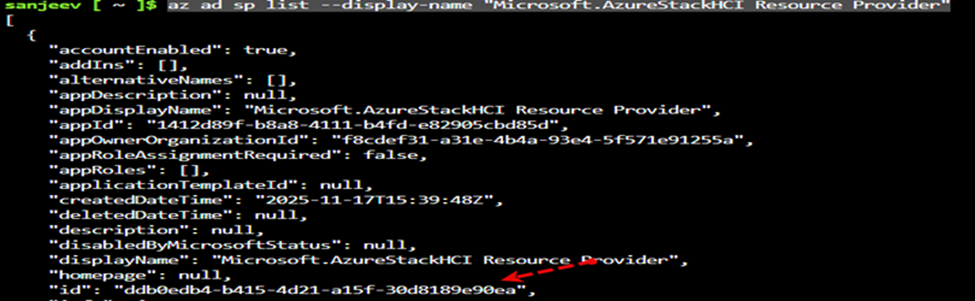
Update main.bicepparam
cd azure_arc/azure_jumpstart_localbox/bicep
Open main.bicepparam using vi and provide the following values according to your environment:
param tenantId = '9980ce5f-e181-4db5-afe0-7c35244539cd'

param spnProviderId = 'ddb0edb4-b415-4d21-a15f-30d8189e90ea'

param windowsAdminUsername = 'arcdemo'

param windowsAdminPassword = '@Arcdemo123456'

param location = 'centralindia'

param azureLocalInstanceLocation = 'centralindia'
Note: To find the value of spnProviderId, go to https://portal.azure.com, search for Microsoft.AzureStackHCI Resource Provider, and copy the Object ID.
Create a new resource group
az group create --name "localbox-rg" --location "centralindia"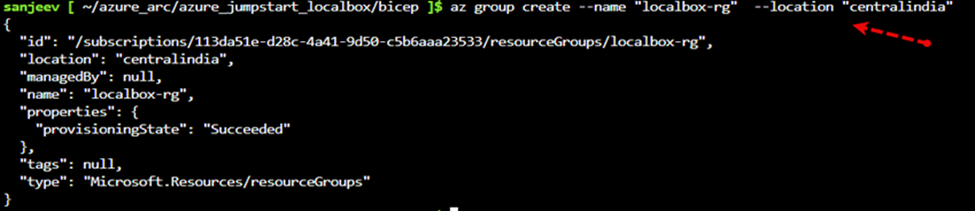
Deploy the Bicep file
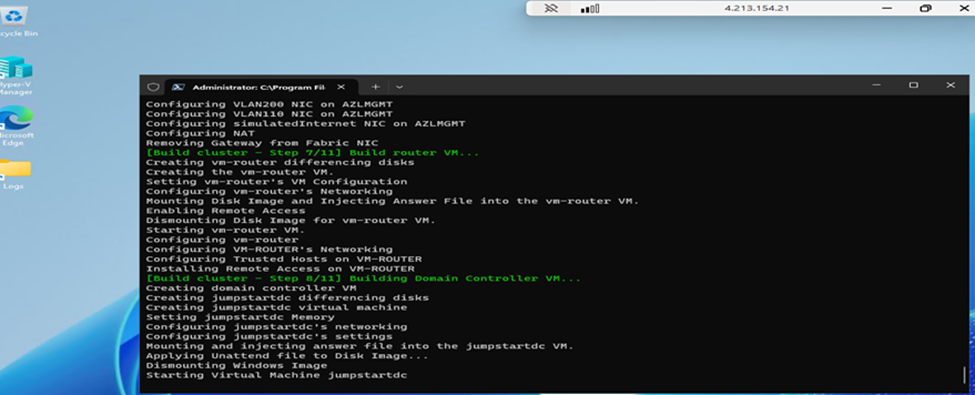
az deployment group create -g "localbox-rg" -f "main.bicep" -p "main.bicepparam"
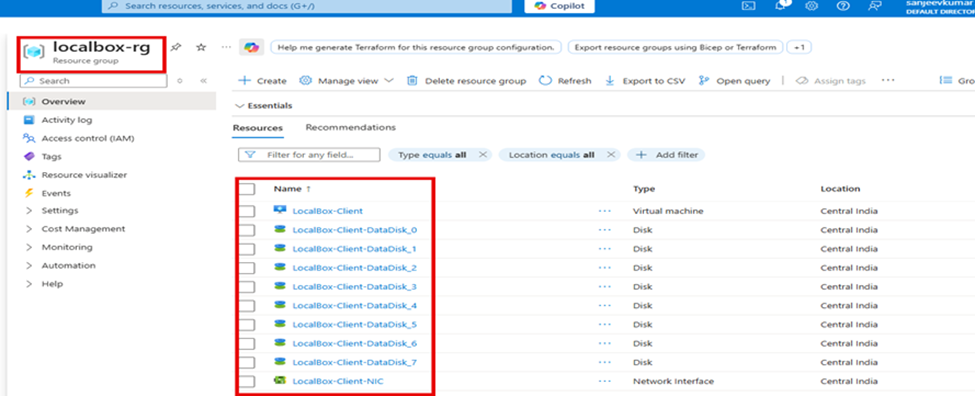
Once deployment is complete, open the Azure portal to see the initial LocalBox resources inside your resource group.
Connecting to the LocalBox Client Virtual Machine
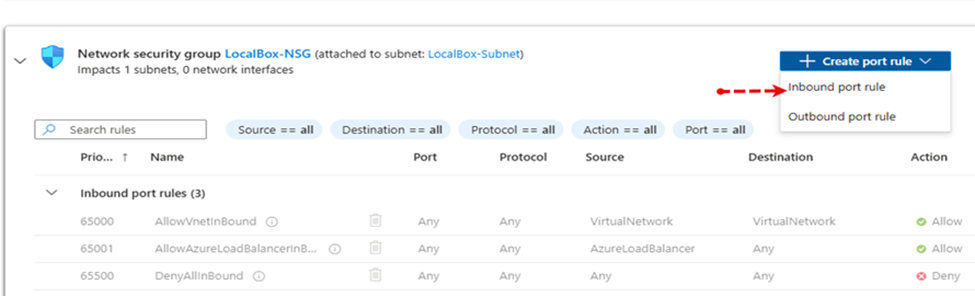
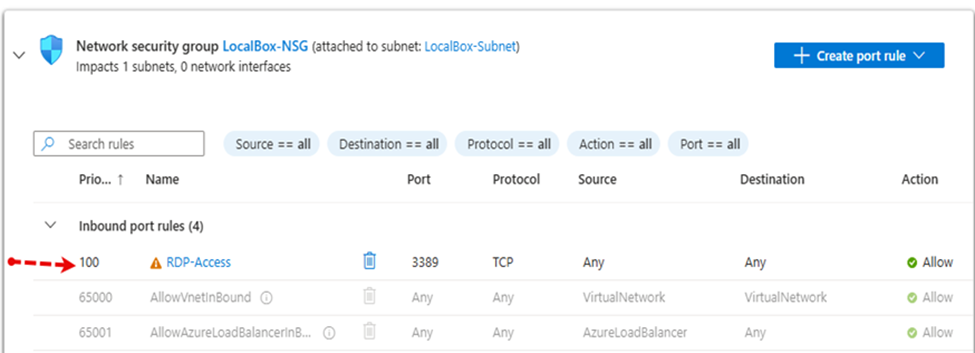
Note: RDP (port 3389) and SSH (port 22) are not open by default in LocalBox deployments. The user needs to create a Network Security Group (NSG) rule to allow access to port 3389.
Enable RDP (3389) on the Client Virtual Machine
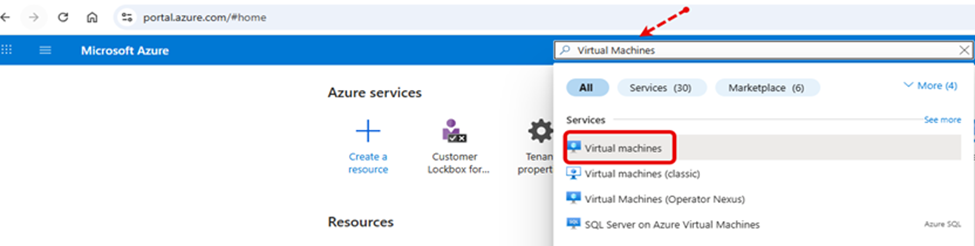
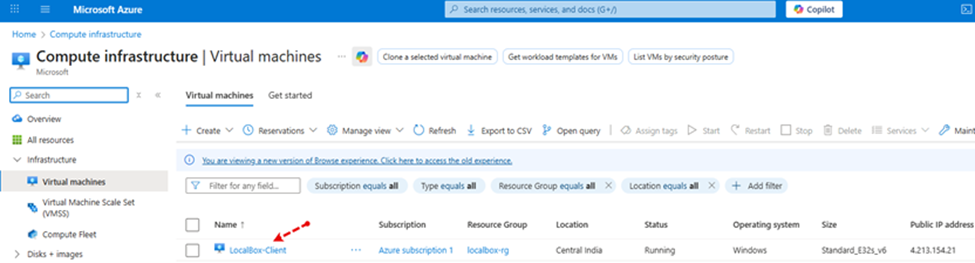
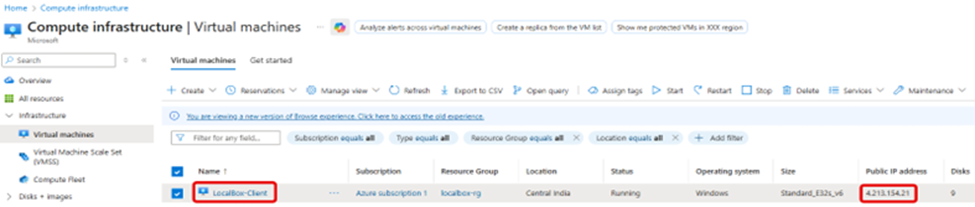
Log in to https://portal.azure.com if you are not already logged in. Search for Virtual Machines and click on it.
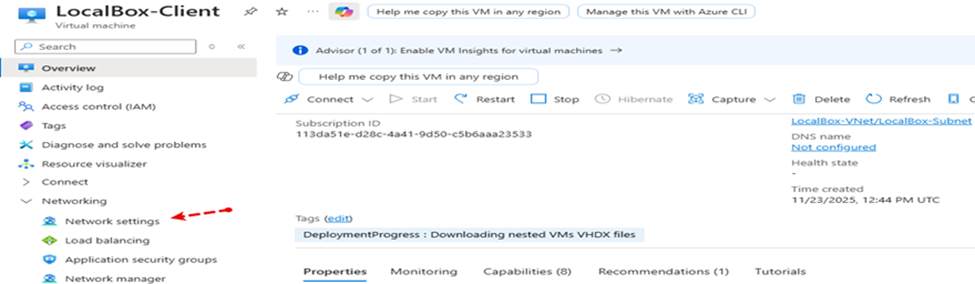
Click on LocalBox-Client.
Click on Network settings.
Click on Inbound port rules.
Select:
- Service: RDP
- Action: Allow
- Priority: 100
- Name: RDP-Access
Click Add.
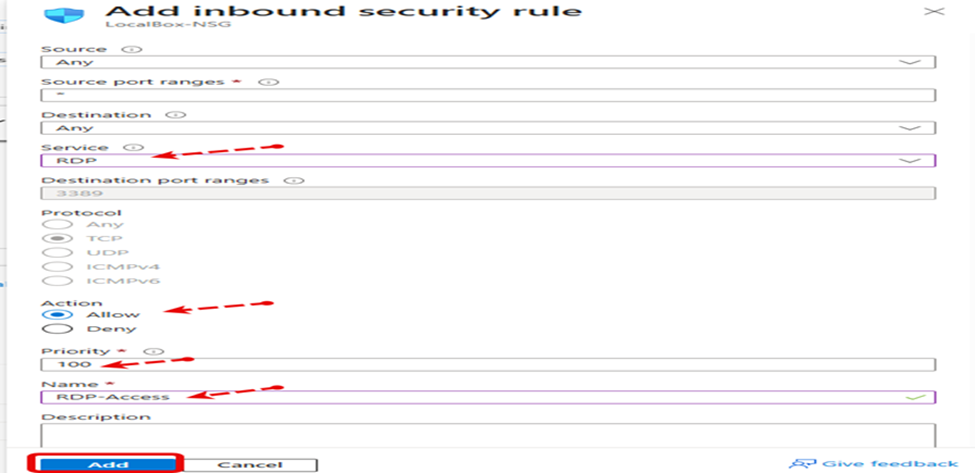
The security rule is now created to access the virtual machine on port 3389.
Click on Overview, then click Connect → Connect.
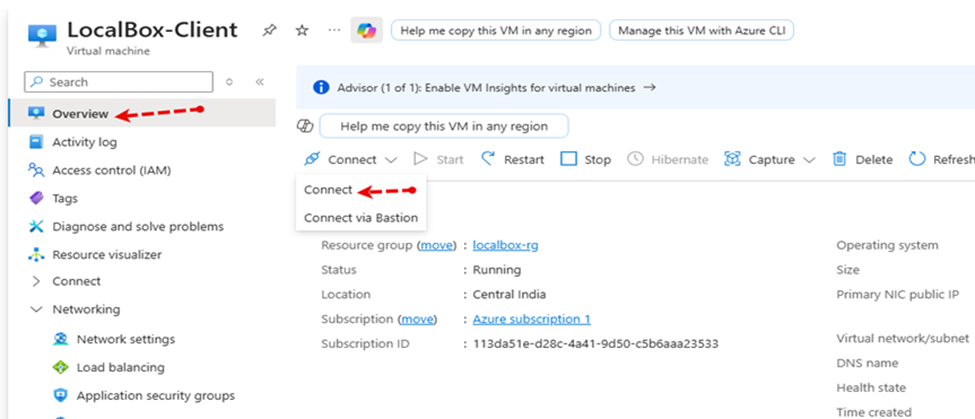
Click Download RDP file.
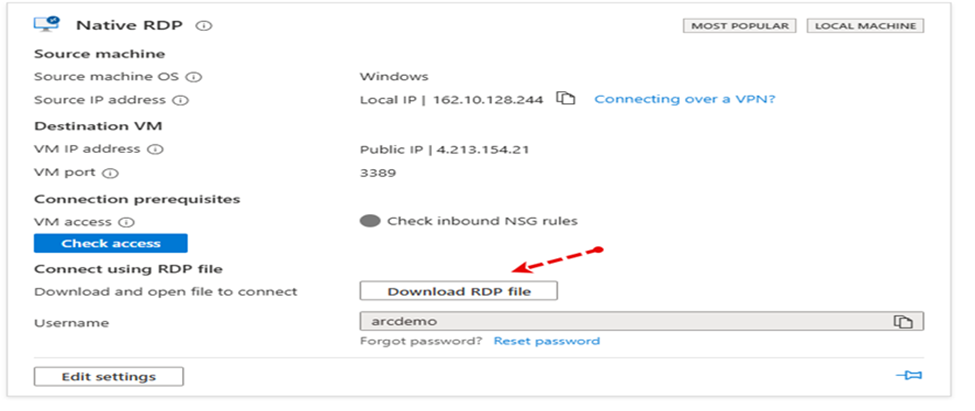
Open the downloaded file and log in to the virtual machine using the password provided in the main.bicepparam file during VM creation.
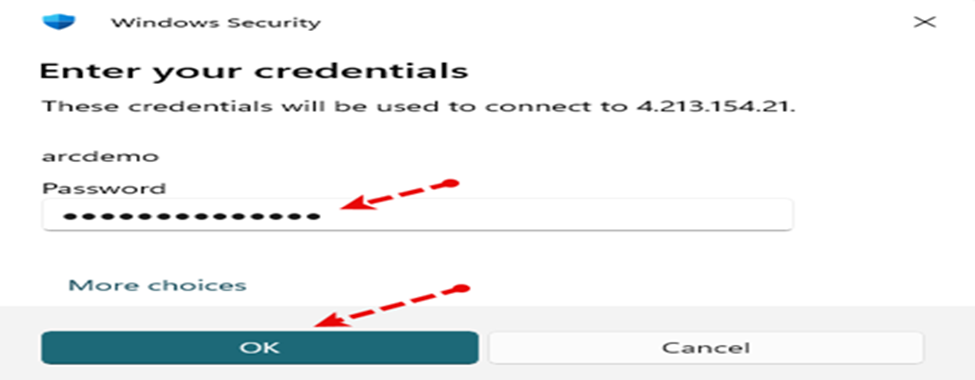
You should now be able to log in.
How to Create a Virtual Machine on the Created LocalBox
Azure Local allows you to create and manage virtual machines and other services directly from the Azure portal. The LocalBox instance comes preconfigured with the components required for VM management through the Azure portal.
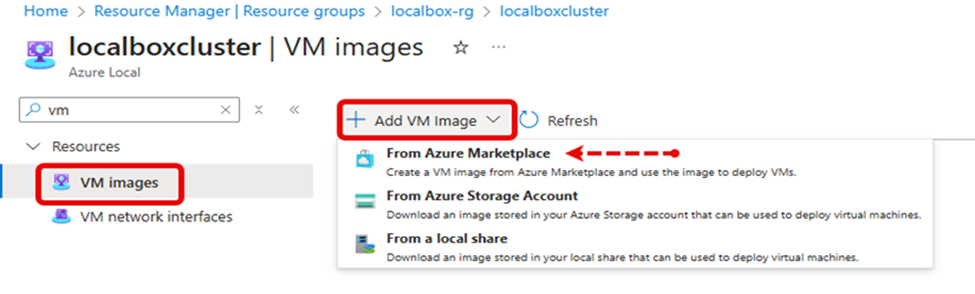
Create Virtual Machine Images from Azure Marketplace
Before creating virtual machines on your Azure Local instance from the Azure portal, you need to create VM images that can be used as a base. These images can be imported from Azure Marketplace or provided directly by the user. In this use case, we will create an image from Azure Marketplace.
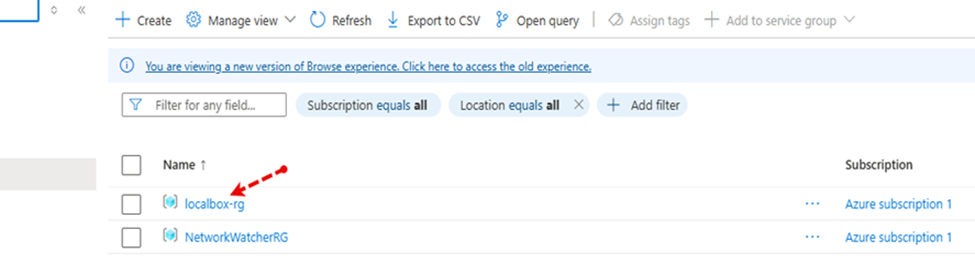
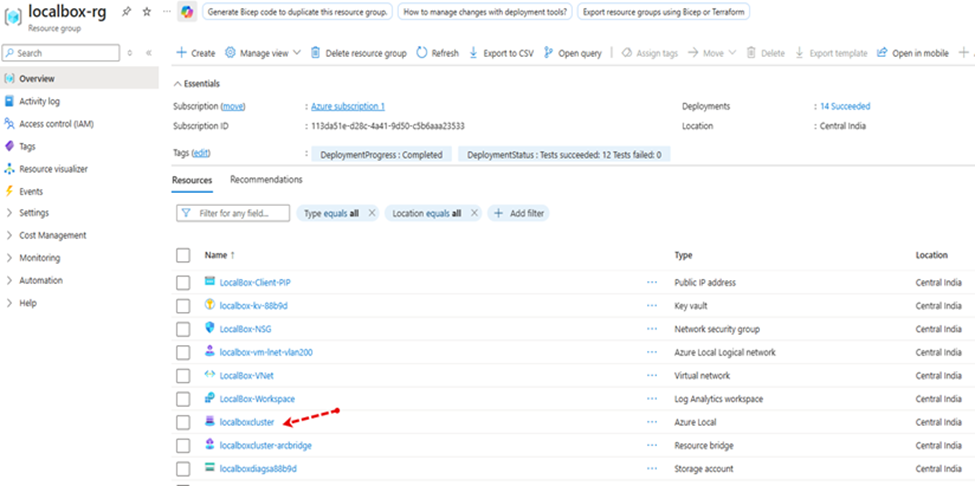
Click on localbox-rg in the Azure portal.
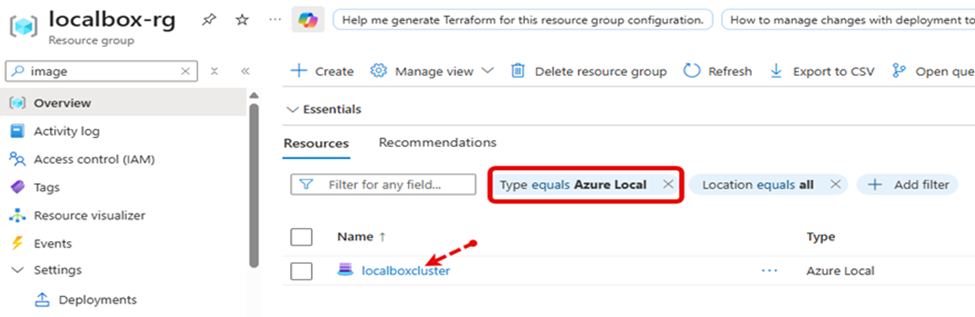
Click on localboxcluster.
Click on VM Images in the menu. Then click the Add VM image dropdown and select From Azure Marketplace.
Provide:
- VM image name
- Default custom location (from dropdown)
- Leave storage path set to Choose automatically
Click Review + Create.
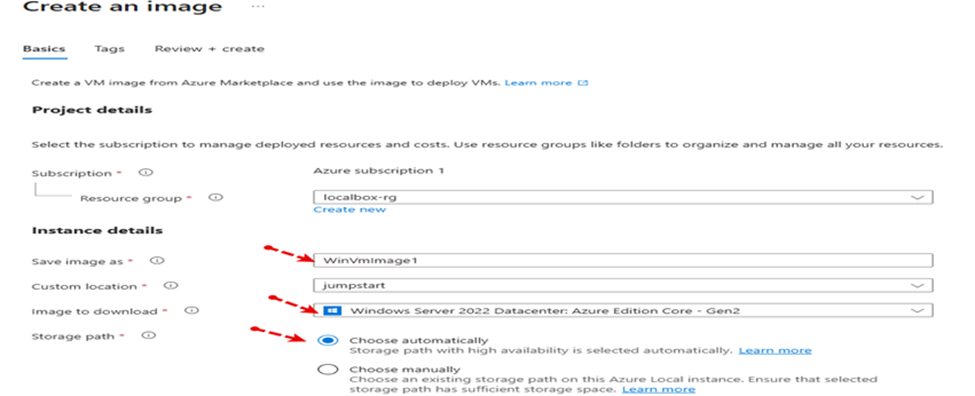

Click Create.
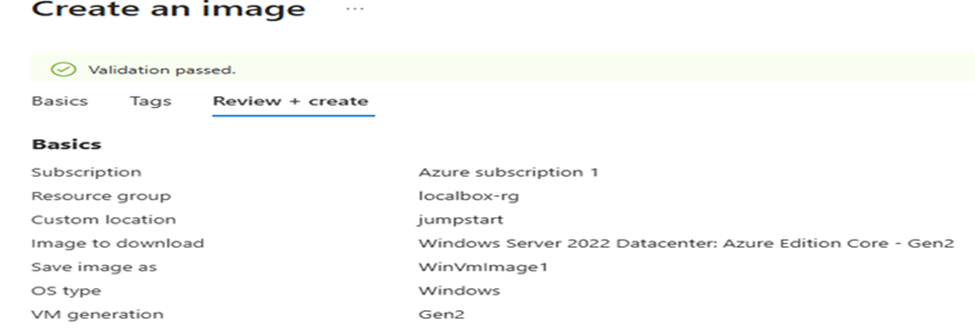

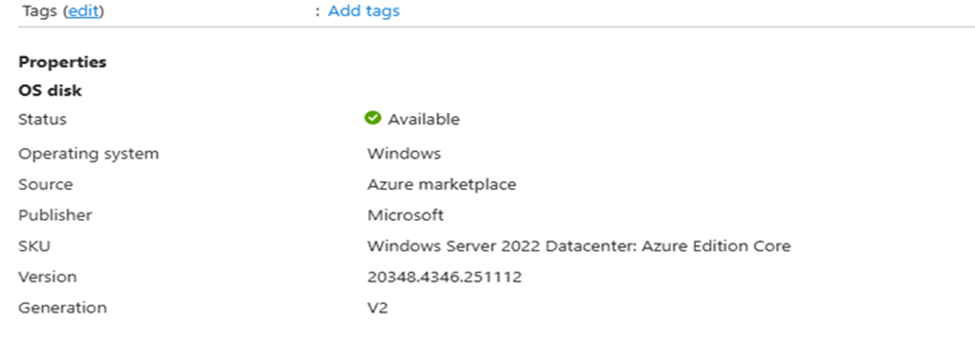
The image will now be deployed.
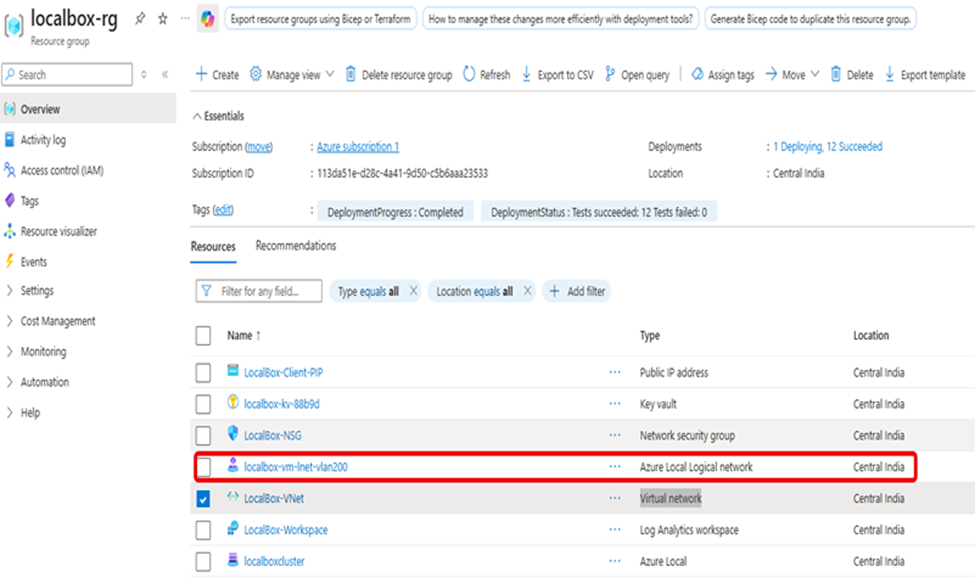
Create a Logical Network on Your Azure Local Instance
As shown in the table below, this LocalBox networking includes a 192.168.200.0/24 subnet tagged to VLAN 200. This network is designed for use with Arc-enabled VMs on LocalBox.
To use this preconfigured network, you need to create a logical network resource that maps to this subnet.
| Network detail | Value |
|---|---|
|
Subnet |
192.168.200.0/24 |
|
Gateway |
192.168.200.1 |
|
VLAN id |
200 |
|
DNS Server |
192.168.1.254 |
Log in to LocalBox-Client (LocalBox-Client VM) and get the IP address from the Azure portal.
Open File Explorer and navigate to C:\LocalBox.
Right-click on Configure-VMLogicalNetwork.ps1 and choose Run with PowerShell.
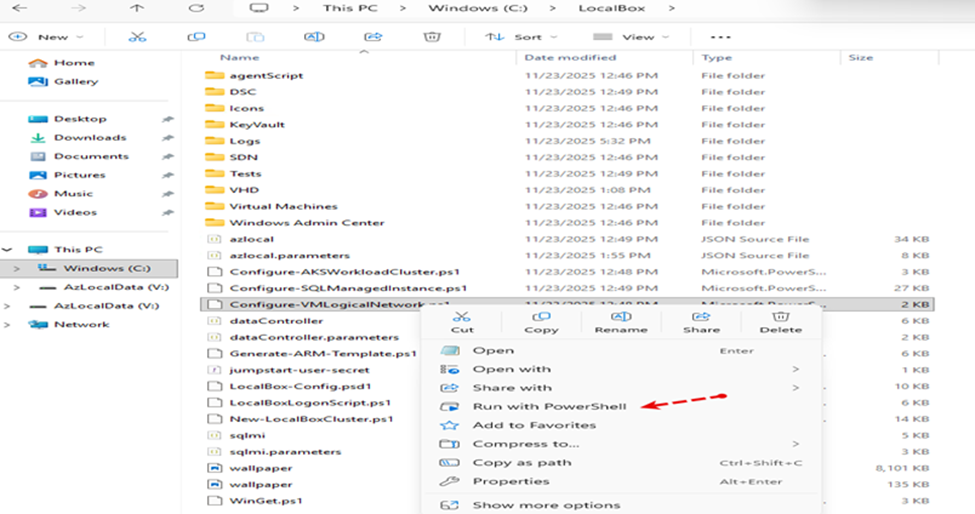
Alternatively:
- Right-click the file
- Select Open with Visual Studio Code
- Click the Run button
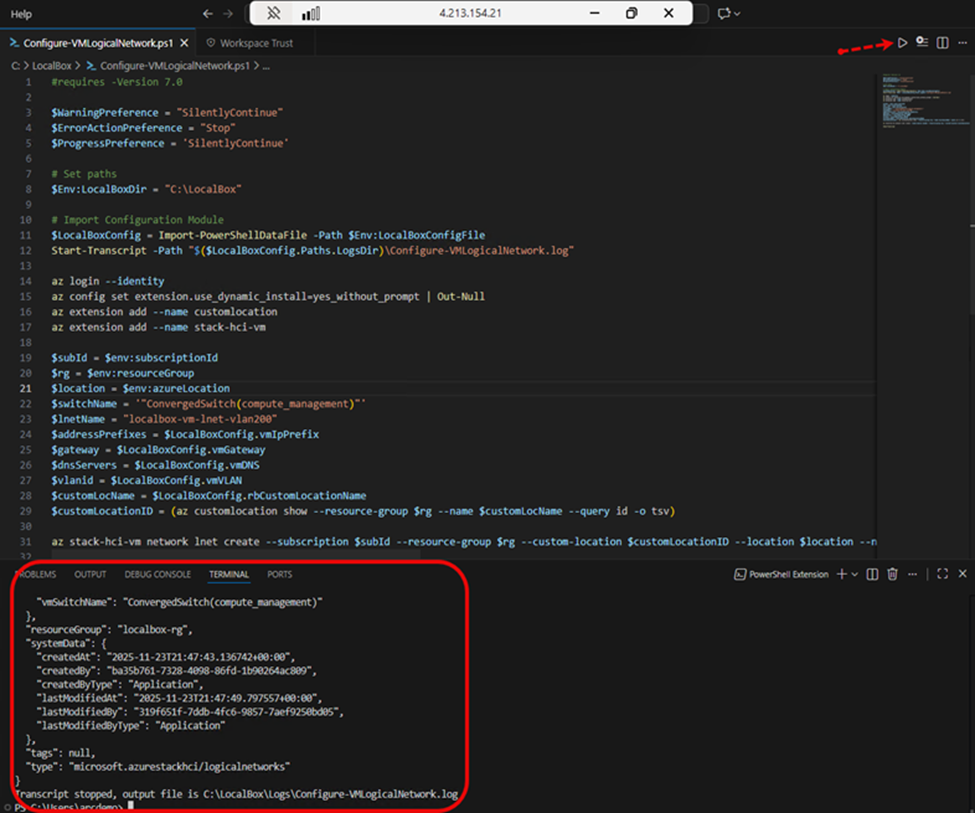
Once the script completes, check your resource group in the Azure portal to verify that the logical network resource has been created.
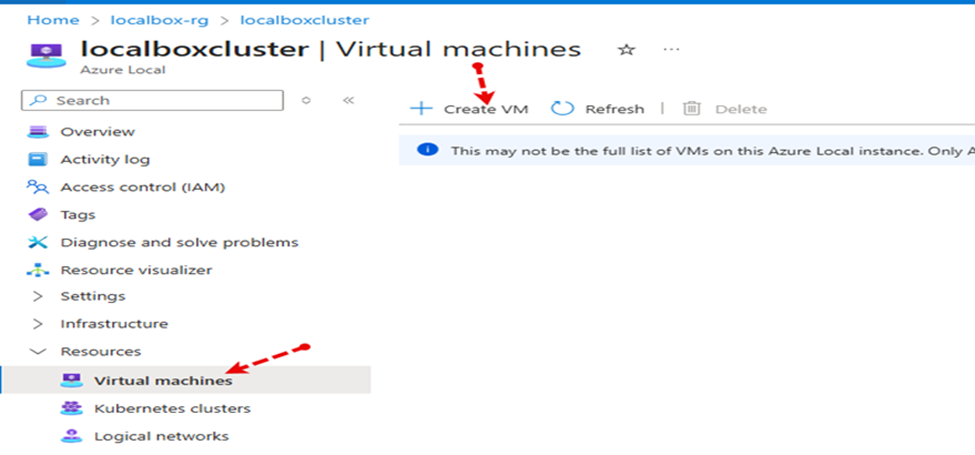
Create a Virtual Machine
Click on localboxcluster.
Click on the Virtual machines blade, then click Create VM.
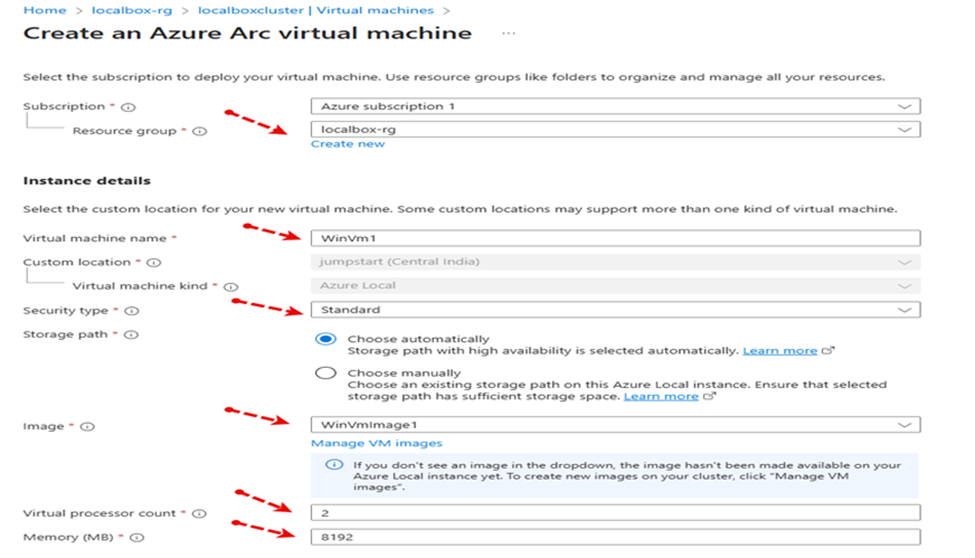
Select:
- Resource Group: localbox-rg
- VM Name: WinVm1
- Security type: Standard
- VM image: WinVmImage1
- Processor count: 2
- Memory: 8192 MB
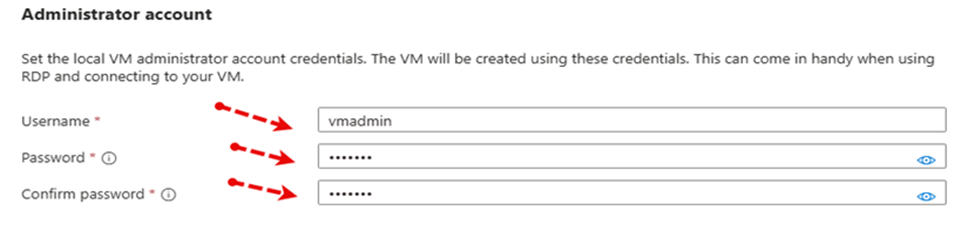
- Username and Password
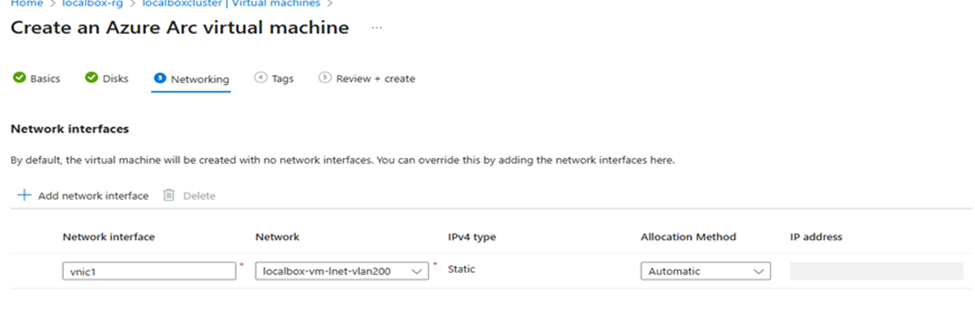
Click Next, then Next again to go to the Network tab.

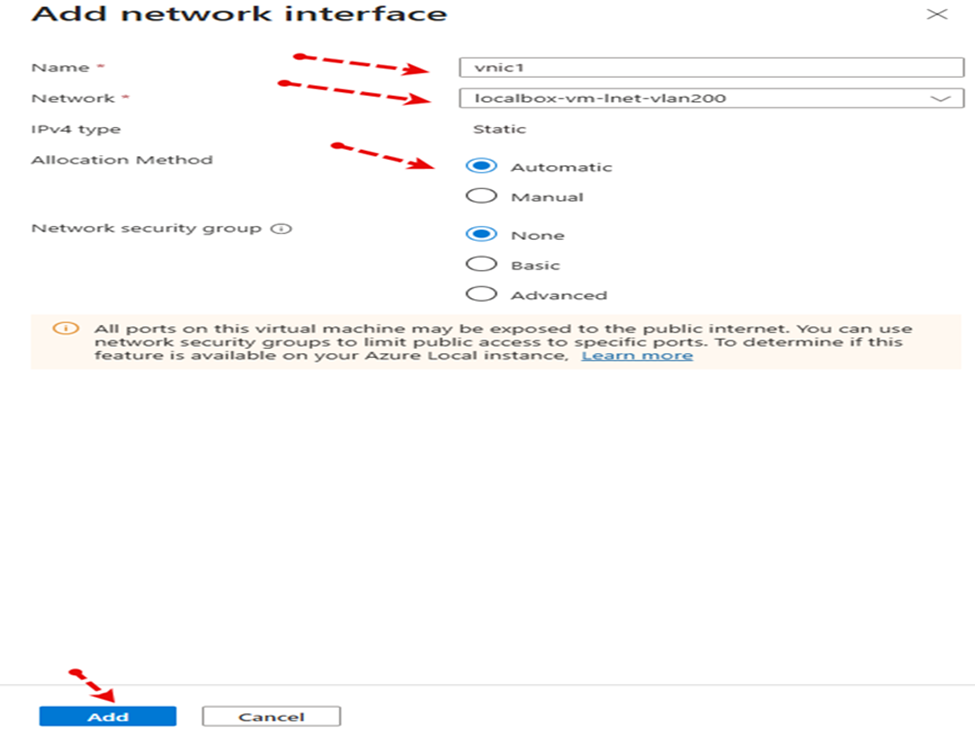
Click Add network interface.
Provide:
- Interface name
- Select the previously created network from the dropdown
- Allocation method: Automatic
Add the network card.
Click Next.

Review the virtual machine details and click Review + Create, then click Create.
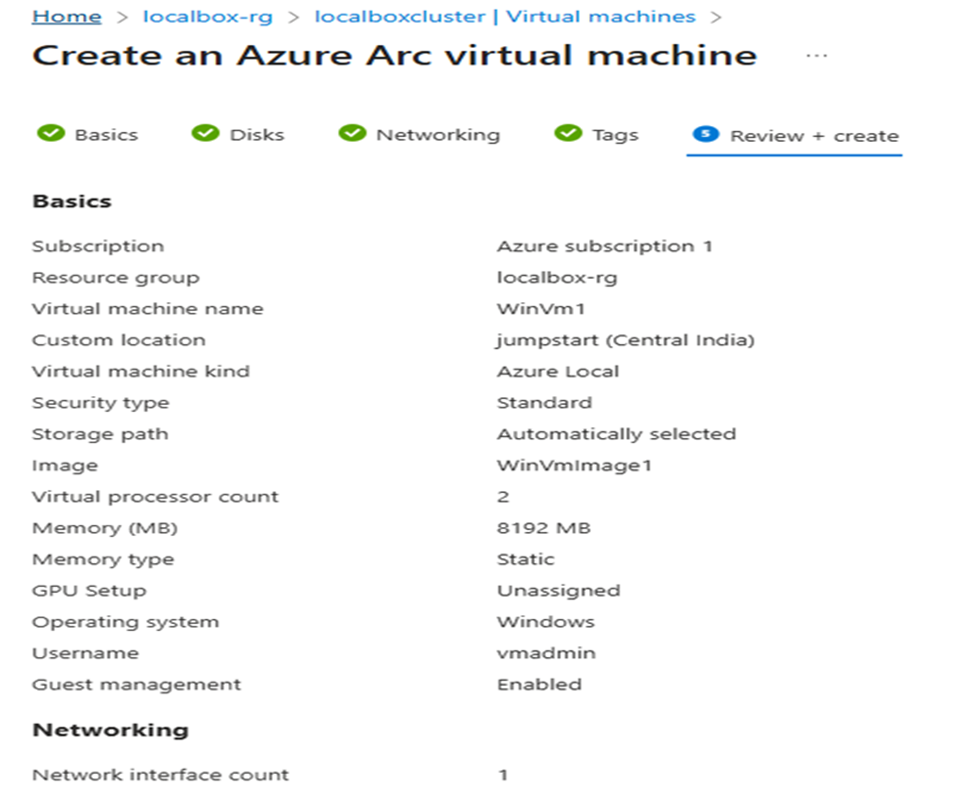

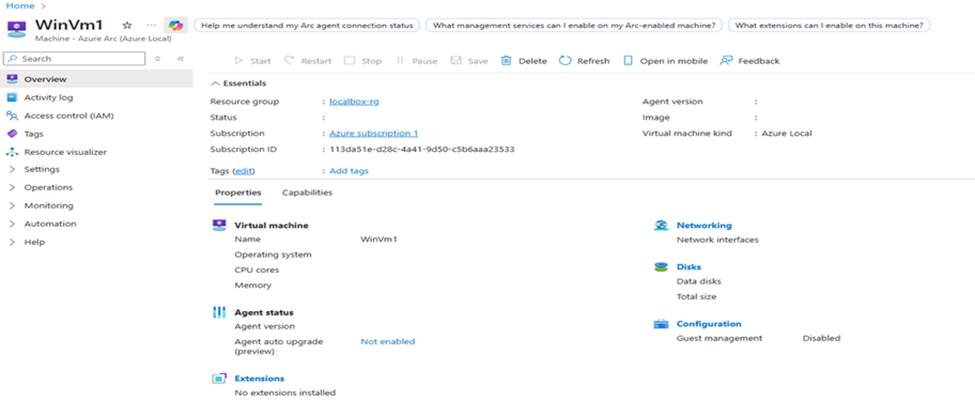
The VM is now created.
Summary
First, we deploy LocalBox using Azure Bicep.
Next, we clone the Arc Jumpstart GitHub repository through Azure Cloud Shell.
Then, we create virtual machine images from Azure Marketplace.
Finally, we create a virtual machine using the generated image.
Opinions expressed by DZone contributors are their own.
Comments