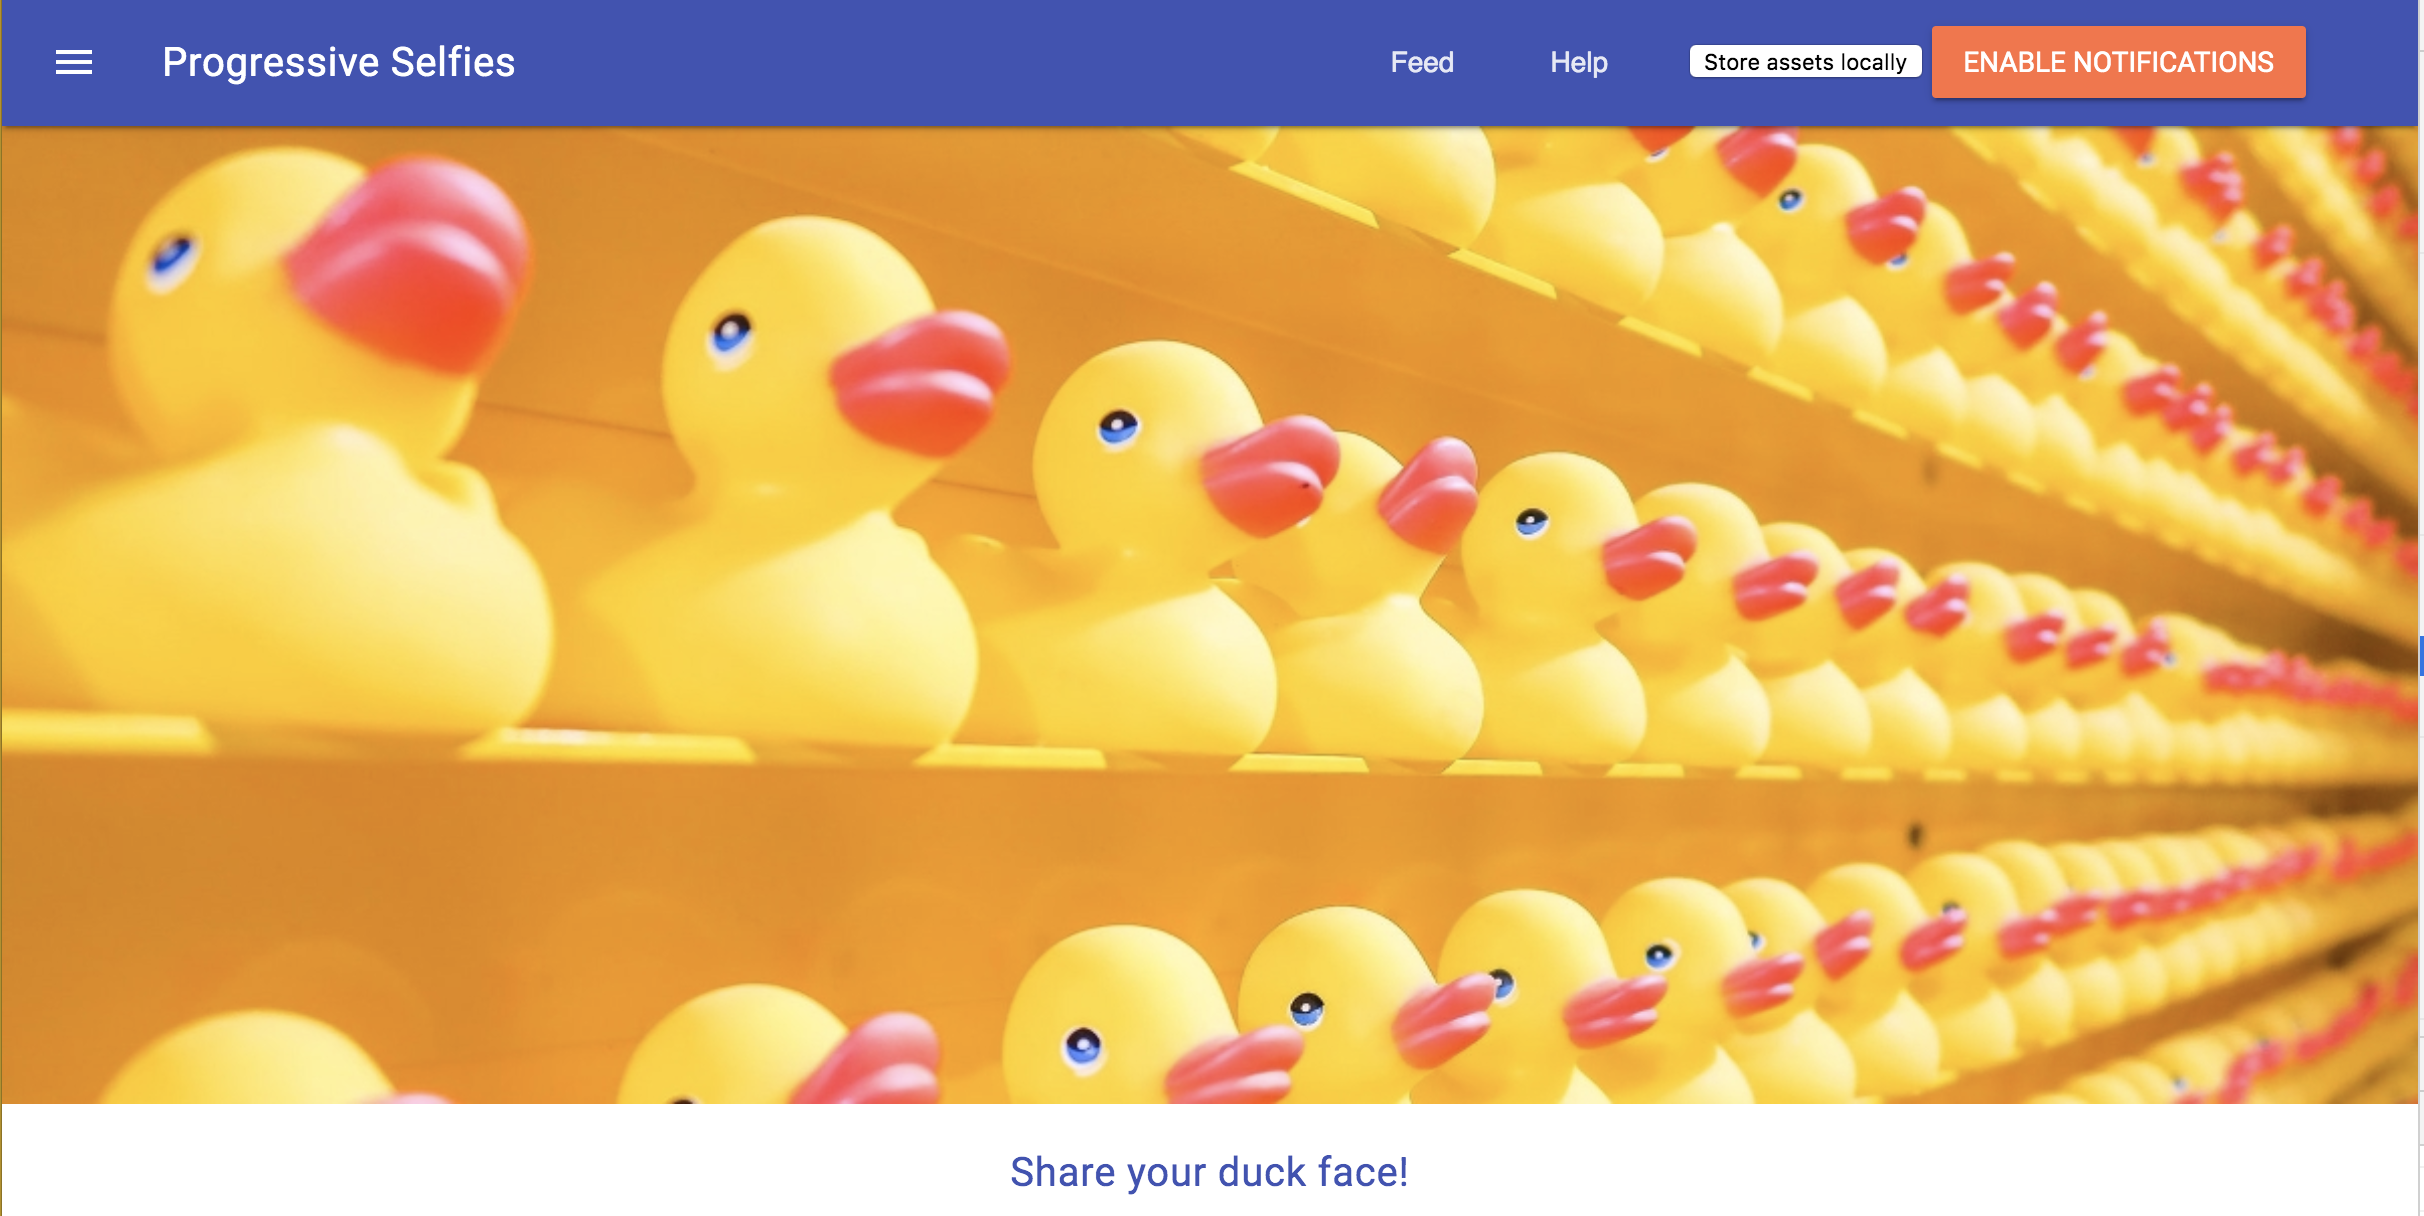
Enable Background Sync, Media Capture, and Geolocation APIs in Your PWA
In this tutorial, I will discuss advanced PWA features that provide access to your hardware APIs. We are going to build an app for making selfies with the Media Capture API and posting selfies with the BackgroundSync Api.
Join the DZone community and get the full member experience.
Join For FreeIf you're looking to build a powerful PWA that takes advantage of the hardware on a device, things are only going to get better. In my previous post, I explained the fundamental concepts of PWA. In this article, I will discuss some PWA features that provide access to your hardware APIs:
- Media Capture API, to take a picture (in this article called a "selfie") with your camera. https://developer.mozilla.org/en-US/search?q=Media_Streams_API
- Geolocation API, to determine the location of your selfie. https://developer.mozilla.org/en-US/docs/Web/API/Geolocation_API
- and the commonly used Background Sync API, to put the selfies in a queue or database in the meantime, so that the user can also send a selfie to the server if it is not connected. https://developers.google.com/web/updates/2015/12/background-sync
Requirements
To start with this tutorial you must install the following:
Stable node version 8.9 or higher (https://nodejs.org/en/download/)
Git
Project Setup
As a starting point for the tutorial, clone this Github repository:
xxxxxxxxxx
git clone https://github.com/petereijgermans11/progressive-web-app
Then in your terminal move to the following directory:
xxxxxxxxxx
cd pwa-article/pwa-app-native-features-init
and install the dependencies through:
xxxxxxxxxx
npm i && npm start
Open your app on: http:// localhost:8080
Public url for your mobile
There are many ways to access our localhost:8080 from a remote mobile device. You can use ngrok for this. See: https://ngrok.com/
Install ngrok using:
xxxxxxxxxx
npm install -g ngrok
And run the following command in your terminal. This command generates a public url for you.
xxxxxxxxxx
ngrok http 8080
Then browse to the generated url on your mobile in Chrome.
Media Capture API
The Media Capture API allows authorized Web applications to access the streams from the device's audio and video capturing interfaces, i.e. to use the data available from the camera and the microphone. The streams exposed by the API can be bound directly to the HTML <audio> or <video> elements or read and manipulated in the code, including further more specific processing via Image Capture API, Media Recorder API or Real-Time Communication.
 figure 1
Media Capture API explanation
navigator.mediaDevices.getUserMedia(constraints)
stream.getAudioTracks()Returns a collection of audio tracks provided by your device's microphone.
stream.getVideoTracks()Returns a collection of video tracks provided by your device's camera.
mediaElement.srcObject = stream
Adjust the Progressive Selfies app to take selfies
Add this code to your index.html (Listing 1), directly below the tag: <div id = "create-post">. In this code the "Capture button" is defined to take a snapshot (= selfie) of your video tracks.
xxxxxxxxxx
<video id="player" autoplay></video>
<canvas id="canvas" width="320px" height="240px"></canvas>
<button id="capture-btn"
class="mdl-button mdl-js-button mdl-button--raised mdl-button--colored">
Capture
</button>
listing 1
The <video> and <canvas> tag is also defined for displaying your video and your snapshot (selfie) in your web page, respectively.
Add the following code into the existing feed.js to define your required variables (Listing 2). For example, the variable videoPlayer contains the HTML element <video> with the id = “player”. Your video tracks are rendered here. The canvasElement is for rendering your selfie, the captureButton is there to take a selfie.
xxxxxxxxxx
const videoPlayer = document.querySelector('#player');
const canvasElement = document.querySelector('#canvas');
const captureButton = document.querySelector('#capture-btn');
let picture;
listing 2
Add the initializeMedia() function in feed.js to initialize your camera.
x
const initializeMedia = () => {
if (!('mediaDevices' in navigator)) {
navigator.mediaDevices = {};
}
if (!('getUserMedia' in navigator.mediaDevices)) {
navigator.mediaDevices.getUserMedia = (constraints) => {
const getUserMedia = navigator.webkitGetUserMedia ||
navigator.mozGetUserMedia;
if (!getUserMedia) {
return Promise.reject(new Error('getUserMedia is not
implemented!'));
}
return new Promise((resolve, reject) =>
getUserMedia.call(navigator, constraints, resolve, reject));
};
}
navigator.mediaDevices.getUserMedia({video: {facingMode: 'user'},
audio: false})
.then(stream => {
videoPlayer.srcObject = stream;
videoPlayer.style.display = 'block';
videoPlayer.setAttribute('autoplay', '');
videoPlayer.setAttribute('muted', '');
videoPlayer.setAttribute('playsinline', '');
})
.catch(error => {
console.log(error);
});
};
listing 3
This code initializes the camera. First, it is checked whether the API of the "mediaDevices" and "getUserMedia" is available in the navigator property of the window object. The window object represents the browser window (Javascript and the navigator property is also part of the window object). If the "mediaDevices" and "getUserMedia" are available in the navigator, the above code will prompt the user to access the camera by calling:
navigator.mediaDevices.getUserMedia(constraints)
The call: videoPlayer.srcObject = stream, sets a stream (or video tracks), which is rendered in the provided <video> HTML element.
Add listing 4 in feed.js to define your "modal" to take a selfie. It also calls the above initializeMedia() function.
xxxxxxxxxx
const openCreatePostModal = () => {
setTimeout(() => createPostArea.style.transform = 'translateY(0)', 1);
initializeMedia();
};
listing 4
Add a click event handler to the "shareImageButton" in feed.js (see listing 5). This button (see figure 2) opens the "openCreatePostModal".
xxxxxxxxxx
shareImageButton.addEventListener('click', openCreatePostModal);
Finally, add a click event handler for "Capture Button" in feed.js (listing 6).
xxxxxxxxxx
captureButton.addEventListener('click', event => {
canvasElement.style.display = 'block';
videoPlayer.style.display = 'none';
captureButton.style.display = 'none';
const context = canvasElement.getContext('2d');
context.drawImage(
videoPlayer, 0, 0, canvasElement.width,
videoPlayer.videoHeight / (videoPlayer.videoWidth / canvasElement.width)
);
videoPlayer.srcObject.getVideoTracks().forEach(track => track.stop());
picture = dataURItoBlob(canvasElement.toDataURL());
});
listing 6
With this "Capture Button" you can take a snapshot / selfie of your video tracks (see figure 3). This snapshot is rendered in the canvasElement and converted to a Blob (see listing 7) via the function: dataURItoBlob() for possible storage in a Database.

figure 3
Add this in utility.js:
xxxxxxxxxx
const dataURItoBlob= dataURI => {
const byteString = atob(dataURI.split(',')[1]);
const mimeString = dataURI.split(',')[0].split(':')[1].split(';')[0];
const ab = new ArrayBuffer(byteString.length);
const ia = new Uint8Array(ab);
for (let i = 0; i < byteString.length; i++) {
ia[i] = byteString.charCodeAt(i);
}
const blob = new Blob([ab], {type: mimeString});
return blob;
};
listing 7
If necessary, restart the server with npm and take a selfie using the Capture button (figure 4).
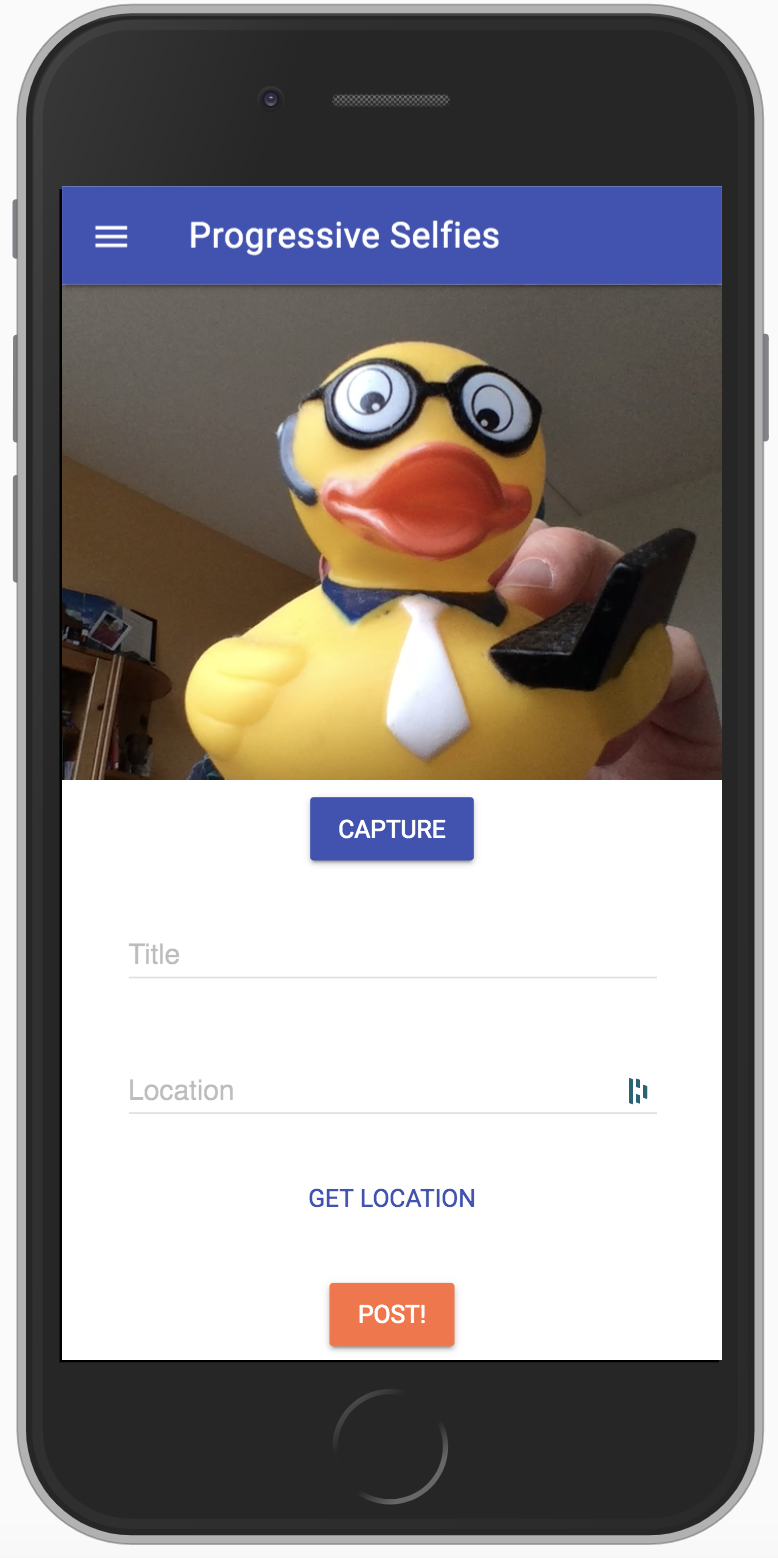
figure 4
Adjust the Progressive Selfies app to determine your location
Geolocation API
With the Geolocation API, web applications can access the location data provided by the device - obtained via GPS or through the network environment. Aside from the one-time location query, it also provides a way to notify the app of location changes.navigator.geolocation.getCurrentPosition(callback)
Performs a one-time search for the location with coordinates, accuracy, elevation and speed, if available.
navigator.geolocation.watchPosition(callback)
Location changes are observed.
Let's use the Geolocation API to determine the position of your selfie. Add the code below in your index.html, directly under the tag: div#manual-location. In this code, the "Get Location button" is defined to determine the location where you took the selfie (Listing 8).
xxxxxxxxxx
<div class="input-section">
<button
id="location-btn"
type="button"
class="mdl-button mdl-js-button mdl-button mdl-button--colored">
Get Location
</button>
<div
id="location-loader"
class="mdl-spinner mdl-js-spinner is-active">
</div>
</div>
listing 8
xxxxxxxxxx
const locationButton = document.querySelector('#location-btn');
const locationLoader = document.querySelector('#location-loader');
let fetchedLocation = {lat: 0, lng: 0};
Add this initializeLocation() function in feed.js (listing 10):
xxxxxxxxxx
const initializeLocation = () => {
if (!('geolocation' in navigator)) {
locationButton.style.display = 'none';
}
};
listing 10
And add the initializeLocation() function in openCreatePostModal, immediately after the initializeMedia() function call in feed.js (see Listing 11).
xxxxxxxxxx
const openCreatePostModal = () => {
setTimeout(() => createPostArea.style.transform = 'translateY(0)',1);
initializeMedia();
initializeLocation();
};
listing 11
Add a click event handler for the "locationButton" in feed.js. This "Location button" determines the location where you took the selfie (Listing 12).
xxxxxxxxxx
locationButton.addEventListener('click', event => {
if (!('geolocation' in navigator)) {
return;
}
let sawAlert = false;
locationButton.style.display = 'none';
locationLoader.style.display = 'block';
navigator.geolocation.getCurrentPosition(position => {
locationButton.style.display = 'inline';
locationLoader.style.display = 'none';
fetchedLocation = {lat: position.coords.latitude,
lng: position.coords.longitude};
const reverseGeocodeService =
'https://nominatim.openstreetmap.org/reverse';
fetch(`${reverseGeocodeService}?
format=jsonv2&lat=${fetchedLocation.
lat}&lon=${fetchedLocation.lng}`)
.then(response => response.json())
.then(data => {
locationInput.value = `${data.address.country},
${data.address.state}`;
document.querySelector('#manual-location').classList.
add('is-focused');
})
.catch(error => {
console.log(error);
locationButton.style.display = 'inline';
locationLoader.style.display = 'none';
if (!sawAlert) {
alert('Couldn\'t fetch location, please enter
sawAlert = true;
}
fetchedLocation = {lat: 0, lng: 0};
});
}, error => {
console.log(error);
locationButton.style.display = 'inline';
locationLoader.style.display = 'none';
if (!sawAlert) {
alert('Couldn\'t fetch location, please enter manually!');
sawAlert = true;
}
fetchedLocation = {lat: 0, lng: 0};
}, {timeout: 7000});
});
listing 12
This code checks whether the API of the "geolocation" is available in the navigator property of the window object. If so, this code performs a one-time search to determine the location (with coordinates), via the function: navigator.geolocation.getCurrentPosition(). The address is then searched for using these coordinates via the 'openstreet map'.
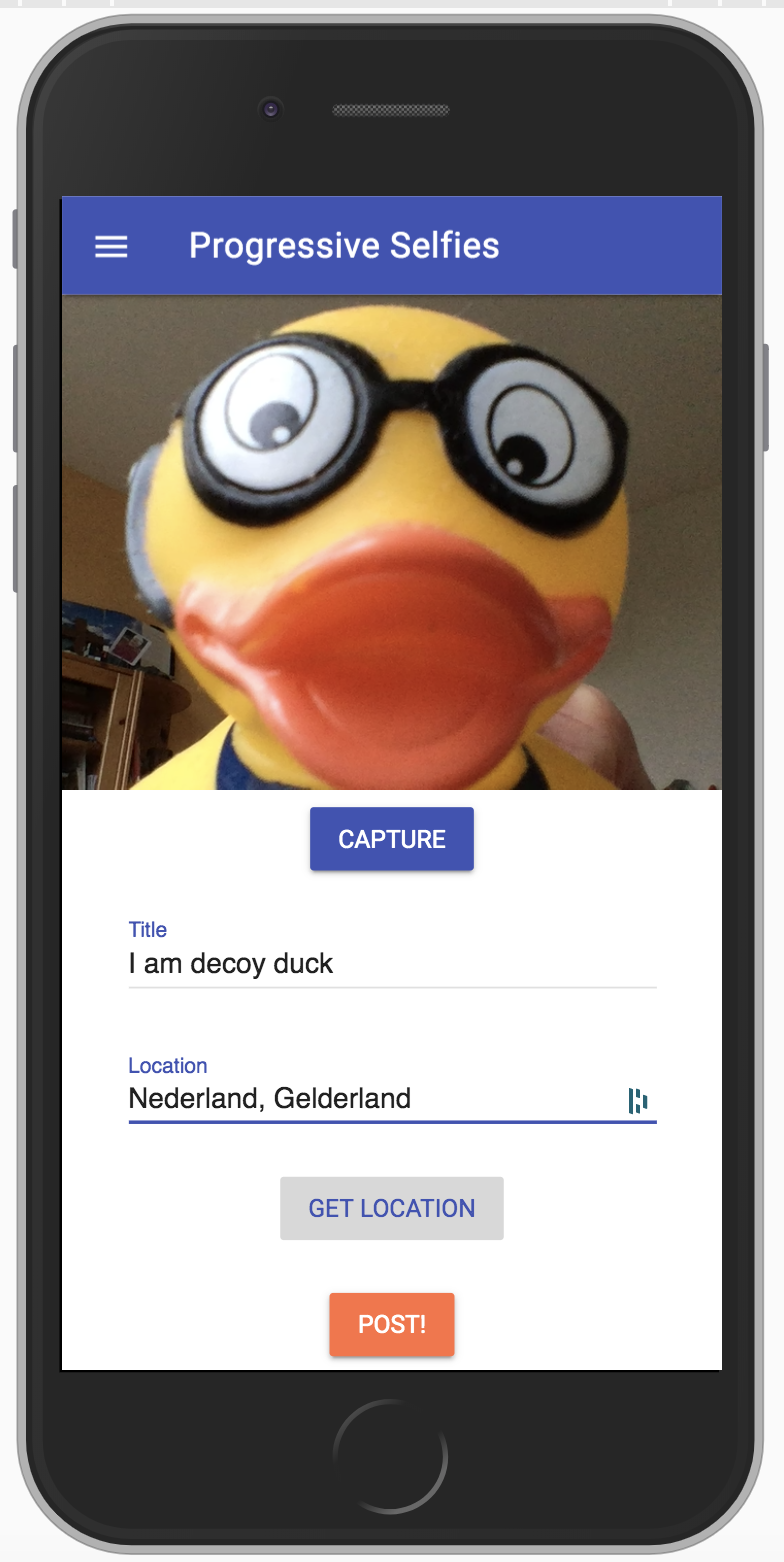
figure 5
If necessary, restart the server with npm and retrieve the location using the "GET LOCATION" button (figure 5).
Send Selfies Online with BackgroundSync API
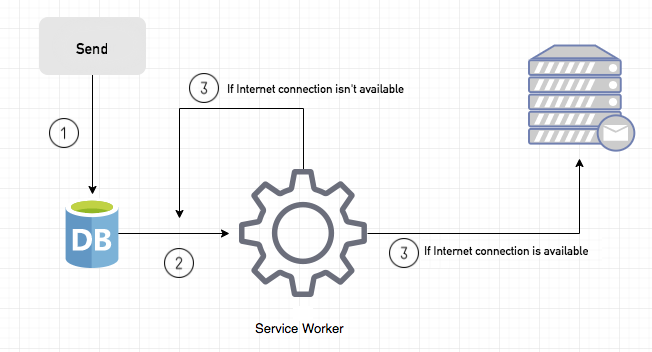
The BackgroundSync API allows users to queue data that needs to be sent to the server while a user is working offline, and then as soon as they’re online again, it sends the queued data to the server.
Example:
Let's say someone using our Progressive Selfies app wants to take and send a selfie, but the app is offline. Background-Sync API allows the user to queue a selfie while offline. As soon as it is back online, the Service Worker sends the data to the server. In our case we use an IndexedDB to store data in the meantime (figure 6). The library for this database can be found in the lib/idb.js folder. You can read about what and how a Service Worker works in my previous post about PWA.
Clone the server
First clone the PWA-server via:
xxxxxxxxxx
https://github.com/petereijgermans11/progressive-web-app-server
We will send the selfies to this server.
Install the dependencies and start this server using:
xxxxxxxxxx
npm i && npm start
The server runs on localhost: 3000
Sync selfies
To apply BackgroundSync to our app, we need to create a "store" in our Indexed-DB database to keep our "synchronized selfies" (Listing 13). We do that in utility.js. This utility.js contains the code needed for both the Service Worker and the app itself.xxxxxxxxxx
const dbPromise = idb.openDb('selfies-store', 1, upgradeDB => {
if (!upgradeDB.objectStoreNames.contains('selfies')) {
upgradeDB.createObjectStore('selfies', {keyPath: 'id'});
}
if (!upgradeDB.objectStoreNames.contains('sync-selfies')) {
upgradeDB.createObjectStore('sync-selfies', {keyPath: 'id'});
}
});
listing 13
xxxxxxxxxx
form.addEventListener('submit', event => {
event.preventDefault();
if (titleInput.value.trim() === '' || locationInput.value.trim() === '' || !picture) {
alert('Please enter valid data!');
return;
}
closeCreatePostModal();
const id = new Date().getTime();
if ('serviceWorker' in navigator && 'SyncManager' in window) {
navigator.serviceWorker.ready
.then(sw => {
const selfie = {
id: id,
title: titleInput.value,
location: locationInput.value,
selfie: picture,
};
writeData('sync-selfies', selfie)
.then(() => sw.sync.register('sync-new-selfies'))
.then(() => {
const snackbarContainer =
document.querySelector('#confirmation-toast');
const data = {message: 'Your Selfie was saved for syncing!'};
snackbarContainer.MaterialSnackbar.showSnackbar(data);
readAllData('sync-selfies')
.then(syncSelfies => {
updateUI(syncSelfies);
})
})
.catch(function (err) {
console.log(err);
});
});
}
});
listing 14
In the first part of the code, the id is generated for the selfie to be sent. First we do a simple check to see if the browser supports serviceWorker and SyncManager. If this is the case and the Service Worker is ready, register a sync with the tag 'sync-new-selfies'. This is a simple string used to recognize this sync event. You can think of these sync tags as simple labels for different actions.
Then we save the selfie in the IndexedDB using the writeData function.
Finally, all stored selfies are read using readAllData("sync selfies") and are shown in your PWA via the function: updateUI(syncSelfies). A message is also sent out: "Your Selfie was saved for syncing!"
Service Worker
For the Service Worker to work correctly, a sync event listener must be defined in sw.js (Listing 15).
x
self.addEventListener('sync', event => {
console.log('[Service Worker] Background syncing', event);
if (event.tag === 'sync-new-selfies') {
console.log('[Service Worker] Syncing new Posts');
event.waitUntil(
readAllData('sync-selfies')
.then(syncSelfies => {
for (const syncSelfie of syncSelfies) {
const postData = new FormData();
postData.append('id', syncSelfie.id);
postData.append('title', syncSelfie.title);
postData.append('location', syncSelfie.location);
postData.append('selfie', syncSelfie.selfie);
fetch(API_URL, {method: 'POST', body: postData})
.then(response => {
console.log('Sent data', response);
if (response.ok) {
response.json()
.then(resData => {
deleteItemFromData('sync-selfies',
parseInt(resData.id));
});
}
})
.catch(error =>
console.log('Error while sending data', error));
}
})
);
}
});
Testing
Believe it or not, testing all this is easier than you think: once you've visited the page and the Service Worker is up and running, all you have to do is disconnect from the network. Every Selfie that you try to send offline will now be stored in the IndexedDB (see figure 7). All saved selfies will also be shown in your main screen (see figure 8).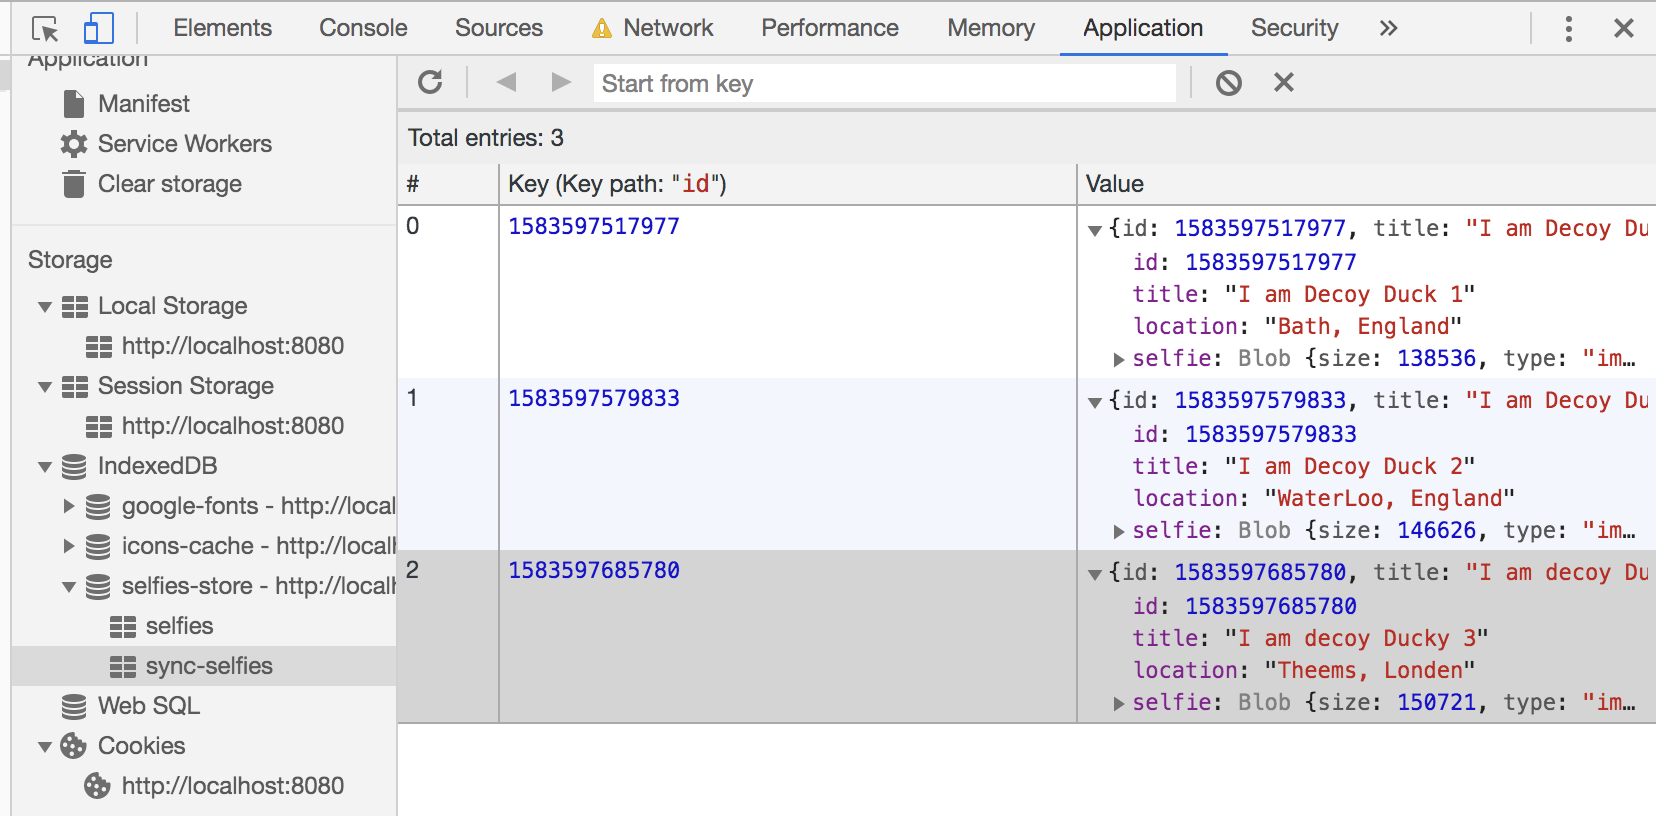
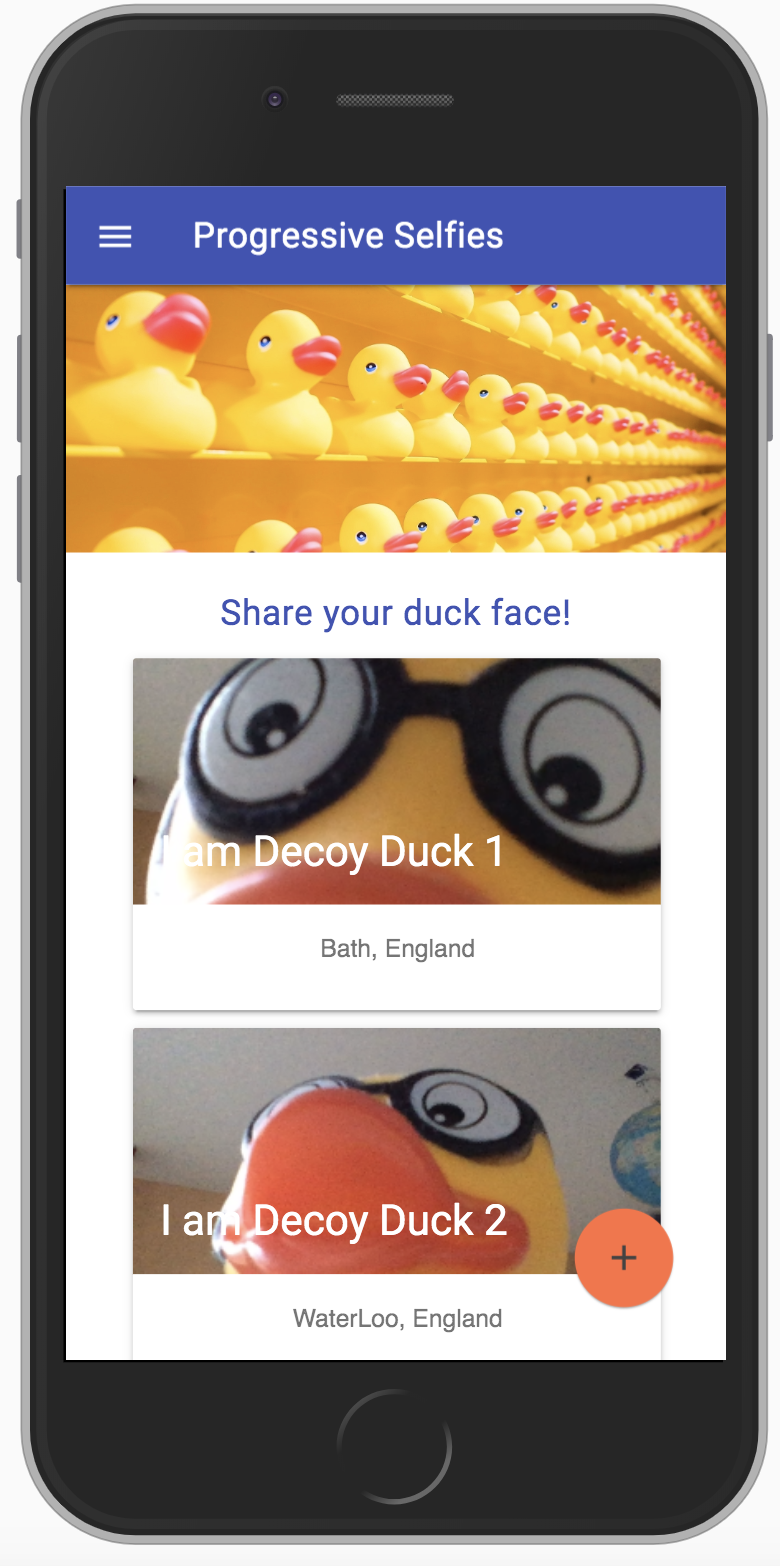
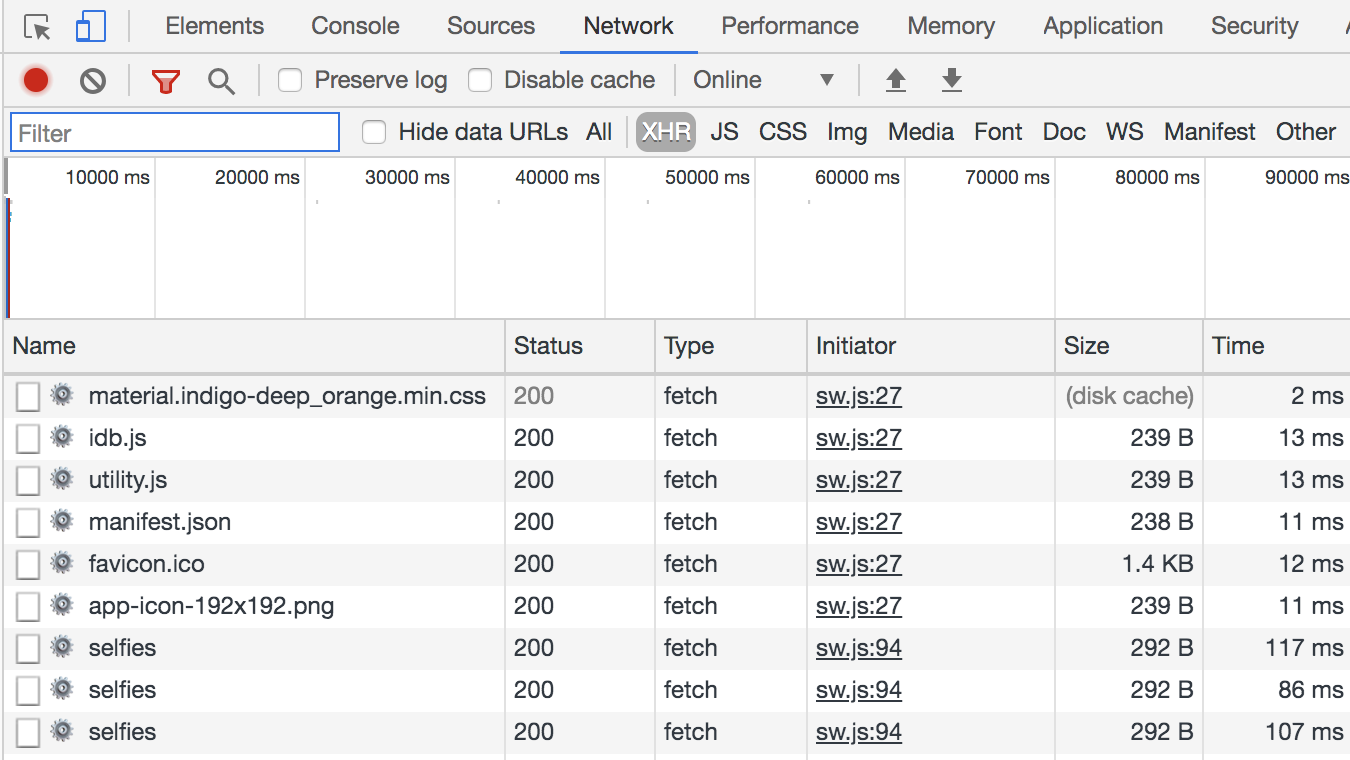
figure 9
Finally
After this introduction you can continue with an extensive tutorial that you can find in: https://github.com/petereijgermans11/progressive-web-app/tree/master/pwa-workshop. In a subsequent article I will discuss other APIs such as Web Streams API, Push API (for receiving push notifications) and the web Bluetooth API.
Follow or like me on twitter https://twitter.com/EijgermansPeter
Opinions expressed by DZone contributors are their own.
Comments