

How To Build A White-label AI Chatbot: Here's the Complete Process
Steps to build a fully white-label AI chatbot using RAG-based conversational AI, STT/TTS, and a low-code JavaScript widget.
Join the DZone community and get the full member experience.
Join For FreeOne of my brand marketing clients asked me to add an AI chatbot to their platform.
Their requirement was simple. Use any plugins, extensions or solution, but the brand needs an agent that looks and feels like their product.
They just needed a clean, capable chatbot platform that matches their business’ tone and style.
As a branding company themselves, the team was not ready to compromise on the branding even by 1%.
Overall it condensed down to 1 primary need: Build a white-label AI chatbot.
I'm documenting the full build here because I wish I'd had a post like this before I started.
In this article, I’ve divided the agent development process into 2 different phrases.
- Agent creation: steps to set up the agent, add datasets, create workflows and connect it to custom tools.
- Agent integration: Use a simple JS widget to connect the AI chatbot through an SDK.
Part I: Agent Creation
1. Create Agent
- To create an agent, you will need access to MirrorFly AI dashboard.
- Contact the team and get the credentials.
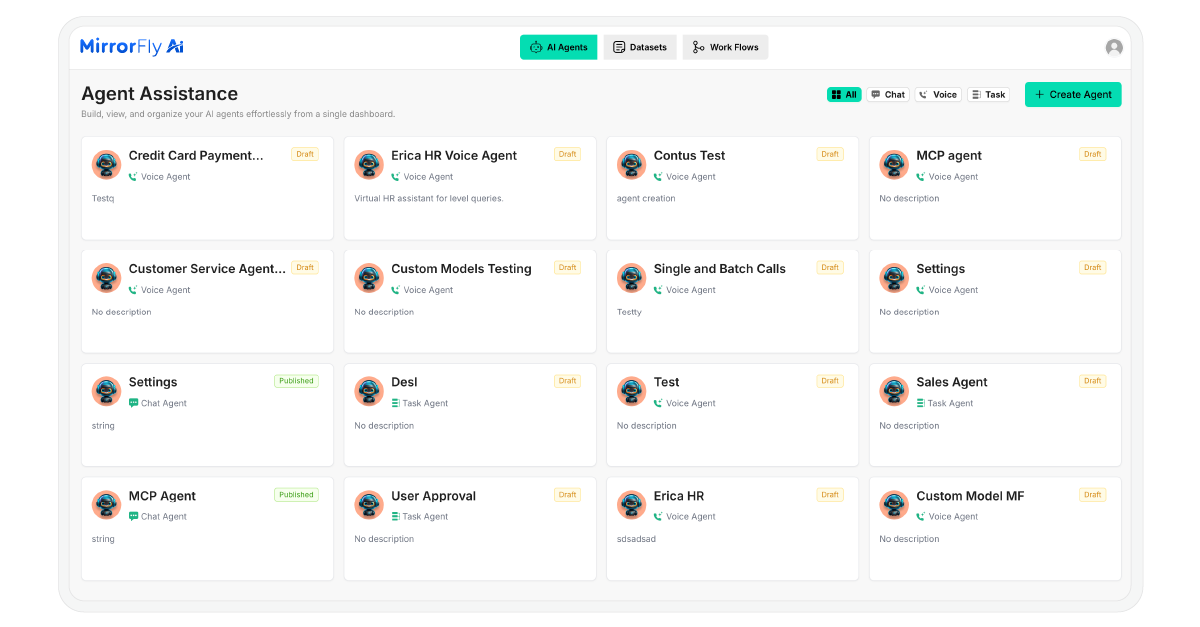
- Using the credentials, log in to the agent dashboard.
- You will have a button ‘Create Agent’ at the right top. Click on it.
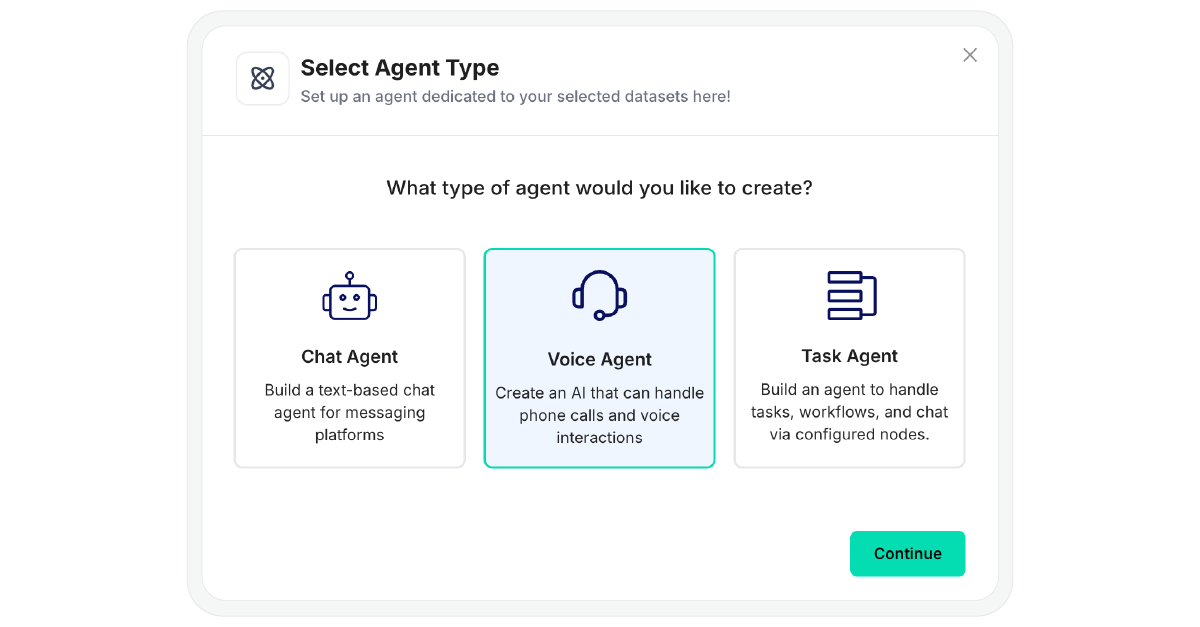
- This will open up a form to pick your agent.
- Select ‘Chat Agent’ and click on ‘Continue’
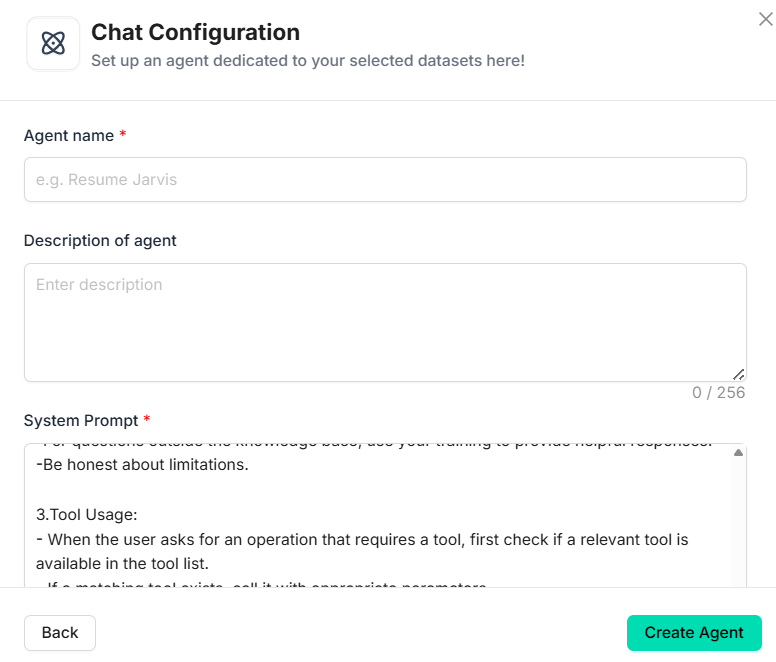
A chat configuration form will open. Give all the basic details of your chat agent and click on continue.
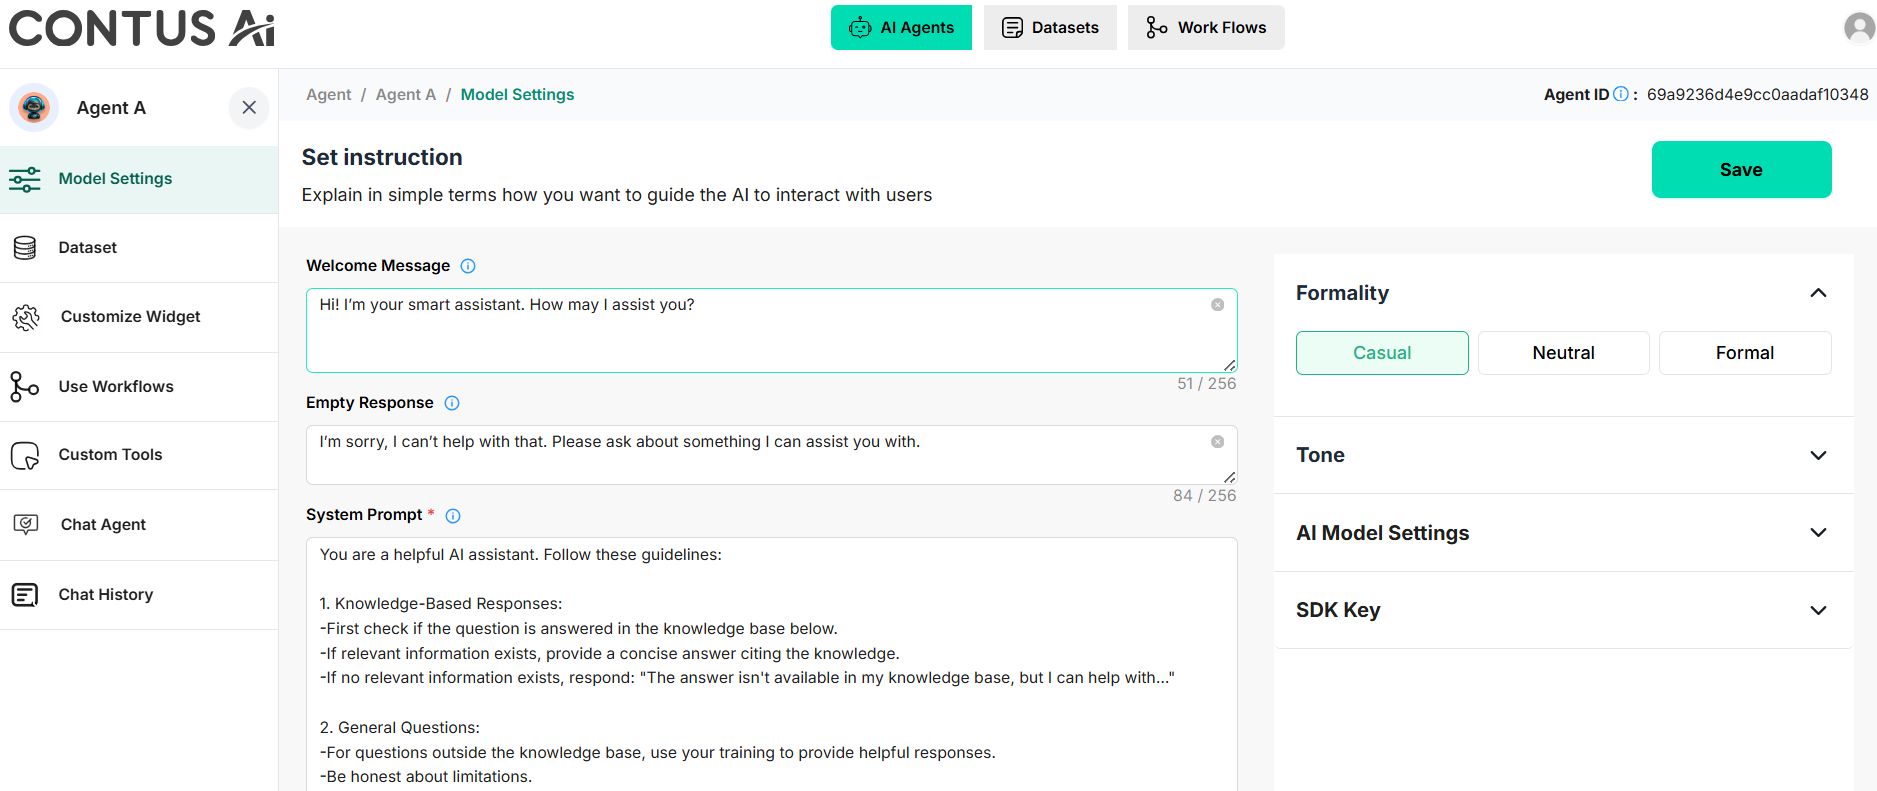
This will take you to the Chat Agent profile.
Next, let's now set how your agent will converse with your customer.
2. Personality & Model Settings
Start by customizing the agent’s welcome message, a fallback response (message the chatbot will show if it does not have a relevant answer, or the question is out of its scope).
- Set the guardrails by defining your instructions for the chatbot in the system prompt pane.
- Pick a formality and tone for your chatbot.
- Choose the AI model (OpenAI GPTs or Anthropic Claudes) based on your brand’s needs.
Next, create an SDK key. You will need this key to connect your chatbot with your business platform.
3. AI Chatbot Training
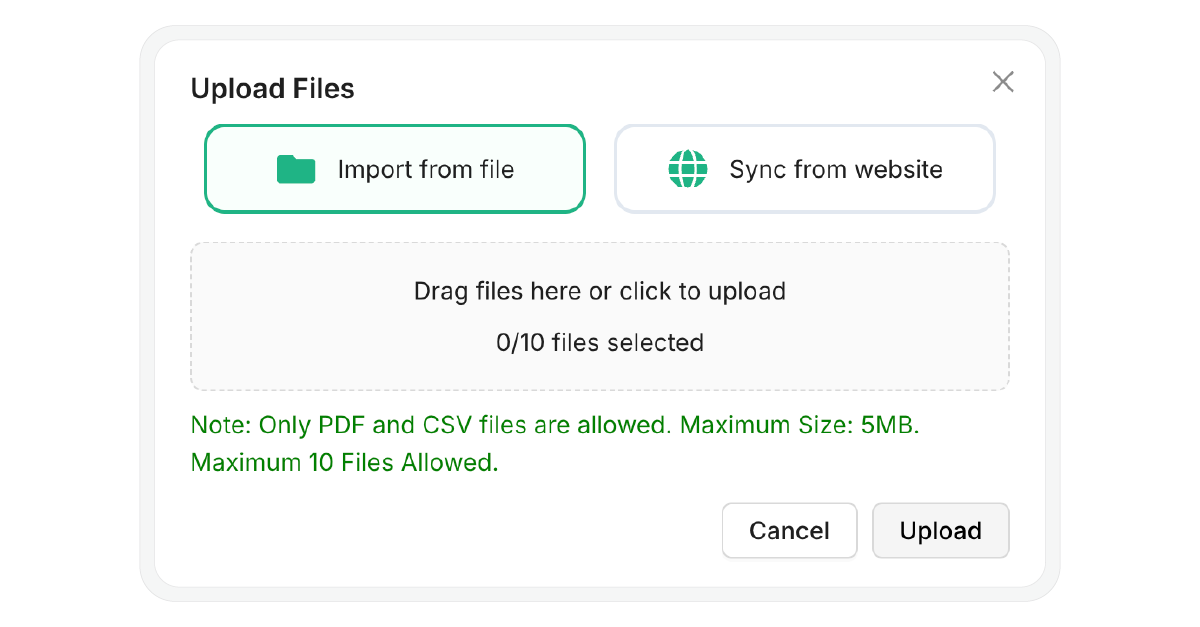
After creating the Chatbot, you will need to train it with your business knowledge.
You can do it in 2 ways:
- Upload files from your local device
- Directly sync data from your website.
The chatbot you are building supports RAG.
This means, your agent not only relies on the system prompt, but performs reasoning across your datasets. Only after this, it will deliver responses. This is very helpful to keep the bot conversations accurate, hallucinating less.
4. Workflow Builder
Now is the time to set up the conversational flow of the AI voice agent.
Once the basic set up is complete for the agent, you will now create the chat flow.
- Click on the workflows tab
- Define the conversational logic
- Drag and drop elements like APIs, forms and message nodes accordingly.
5. Custom Tool Integration
After setting up the conversational logic, you can extend the capabilities of your chatbot by connecting it to external tools.
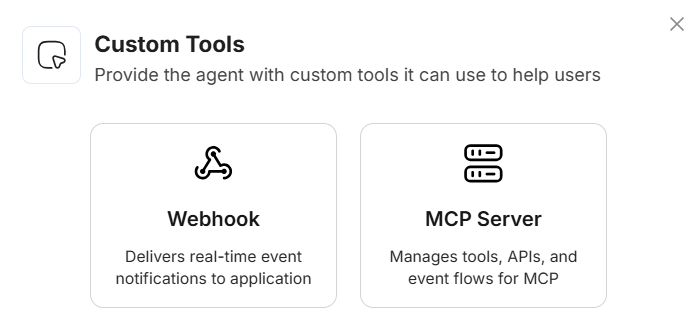
- Use webhooks to send and receive real-time data.
- Connect the MCP server to give access to the tools.
Part II: Agent Integration
- Before you begin, make sure you have a valid Agent ID from the dashboard.
- Your website should run on HTTPS to enable microphone access.
- Also, ensure you are using one of the supported browsers: Google Chrome, Microsoft Edge, or Safari with the latest updates.
1. Install the SDK
Copy the following script.
Include the SDK (you created in the agent creation step) in your HTML file.
<script src="https://d1nzh49hhug3.cloudfront.net/aiVoiceScript/uat/mirrofly/mirror-fly-ai.v1.1.1.js"></script>2. Initialize the Agent
Add a container element to your HTML file.
Next, initialize the SDK.
// HTML Container
<div id="widget"></div>

// Initialization
MirrorFlyAi.init({
  container: "#widget",
  agentId: "<YOUR_AGENT_ID>",
  title: "Voice Assistant",
  theme: "dark",
  triggerStartCall: true,
  transcriptionEnable: true,
  transcriptionInUi: true,
  chatEnable: true,
  agentConnectionTimeout: 500
});
3. Handle Callbacks
Use the following callbacks to check the agent’s connection state.
You can also collect transcription data from the conversation.
const callbacks = {
  onTranscription: (data) => console.log("Transcription:", data),
  onAgentConnectionState: (state) => console.log("Connection:", state),
  onError: (error) => console.error("SDK Error:", error)
};
4. Dynamic Agent Switching
If your platform runs multiple agents, use the function below to switch between them.
function switchAgent(newAgentId) {
  MirrorFlyAi.destroy();
  document.querySelector("#widget").innerHTML = "";
  MirrorFlyAi.init({
    container: "#widget",
    agentId: newAgentId,
    triggerStartCall: true
  });
}
Your AI Chatbot is now ready!
My Experience
Personally, I felt the final build looked completely native to the client’s platform. I used their own colors, logos and branding elements.
I particularly made sure that the UI customization, custom dataset, and a business-specific workflow - all of them combined gave a fully branded impact on the AI chatbot.
Fortunately, the team referred my AI chatbot development service to their clients and I’m building white-label chatbots for 4 teams currently.
I’m gaining a lot of learning through these projects and will share my learning here in the coming weeks. If you have any questions, drop them in the comments below.
I’ll be happy to answer them all!
Opinions expressed by DZone contributors are their own.
Comments