How To Create Progress Bar and Progress Spinner Using Prime React/ Prime Faces in React JS
In this article, we learned how to create a React project, set Prime React UI, and create React Js Progress Bar, Progress Spinner, and Prime React UI components.
Join the DZone community and get the full member experience.
Join For FreePRIMEREACT UI framework that has Over 80 React UI Components with top-notch quality to help you implement all your UI requirements in style.
PrimeReact components can be easily used/integrated with ProgressBar and ProgressSpinner. In this example, a register panel is simulated using ProgressBar and ProgressSpinner.
Preconditions
- Javascript
- Basic knowledge of ReactJS
- Node.js
- V.S. Code,Visual Studio
We cover the below things,
- Create React application
- Installation of Primeface
- ProgressBar and ProgressSpinner in ReactJS
Step 1
Run the below command to create ReactJS:
npx create-react-app prime-app
cd prime-app
npm start
Step 2
Run the below command for installing PrimeReact:
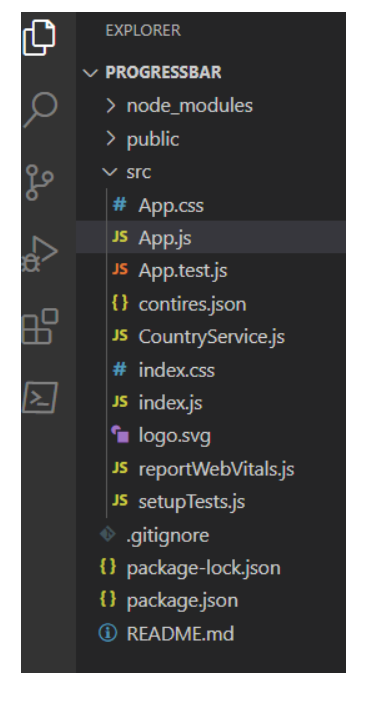
npm install primereact primeiconsCreate the files according to the below image:
![files]() Step 3
Step 3
 Step 3
Add the below code in the App.js:
import React, { useState, useEffect, useRef } from 'react';
import { ProgressBar } from 'primereact/progressbar';
import { Toast } from 'primereact/toast';
import { ProgressSpinner } from 'primereact/progressspinner';

function App() {
    const [value1, setValue1] = useState(0);
    const toast = useRef(null);
    const interval = useRef(null);
    const displayValueTemplate = (value) => {
        return (
            <React.Fragment>
                {value}/<b>100</b>
            </React.Fragment>
        );
    }
    useEffect(() => {
        let val = value1;
        interval.current = setInterval(() => {
            val += Math.floor(Math.random() * 10) + 1;
            if (val >= 100) {
                val = 100;
                toast.current.show({ severity: 'info', summary: 'Success', detail: 'Process Completed' });
                clearInterval(interval.current);
            }
            setValue1(val);
        }, 2000);

        return () => {
            if (interval.current) {
                clearInterval(interval.current);
                interval.current = null;
            }
        }
    }, []); // eslint-disable-line react-hooks/exhaustive-deps

    return (
        <div>
            <Toast ref={toast}></Toast>
            <div className="card">
                <h5>Dynamic</h5>
                <ProgressBar value={value1}></ProgressBar>
                <h5>Static</h5>
                <ProgressBar value={50}></ProgressBar>
                <h5>Custom display value</h5>
                <ProgressBar value={40} displayValueTemplate={displayValueTemplate}></ProgressBar>
                <h5>Indeterminate</h5>
                <ProgressBar mode="indeterminate" style={{ height: '6px' }}></ProgressBar>
            </div>
            <div>
            <div className="card">
                <h5>Basic</h5>
                <ProgressSpinner />
                <h5>Custom</h5>
                <ProgressSpinner style={{width: '50px', height: '50px'}} strokeWidth="8" fill="var(--surface-ground)" animationDuration=".5s"/>
            </div>
        </div>
        </div>
    );
}
export default App;
Step 4
Add the below code in index.html:
<!DOCTYPE html>
<html lang="en">
  <head>
    <meta charset="utf-8" />
    <link rel="icon" href="%PUBLIC_URL%/favicon.ico" />
    <meta name="viewport" content="width=device-width, initial-scale=1" />
    <meta name="theme-color" content="#000000" />
    <meta
      name="description"
      content="Web site created using create-react-app"
    />
    <link rel="apple-touch-icon" href="%PUBLIC_URL%/logo192.png" />

    <!-- PrimeReact -->
    <link rel="stylesheet" href="https://unpkg.com/primeicons/primeicons.css" />
    <link rel="stylesheet" href="https://unpkg.com/primereact/resources/themes/lara-light-indigo/theme.css" />
    <link rel="stylesheet" href="https://unpkg.com/primereact/resources/primereact.min.css" />
    <link rel="stylesheet" href="https://unpkg.com/[email protected]/primeflex.min.css" />

    <!-- Dependencies -->
    <script src="https://unpkg.com/react/umd/react.production.min.js"></script>
    <script src="https://unpkg.com/react-dom/umd/react-dom.production.min.js"></script>
    <script src="https://unpkg.com/@babel/standalone/babel.min.js"></script>
    <script src="https://unpkg.com/[email protected]/dist/react-transition-group.js"></script>

    <!-- Demo -->
    <script src="https://unpkg.com/primereact/core/core.min.js"></script>
    <script src="https://unpkg.com/primereact/splitter/splitter.min.js"></script>
    <!--
      manifest.json provides metadata used when your web app is installed on a
      user's mobile device or desktop. See https://developers.google.com/web/fundamentals/web-app-manifest/
    -->
    <link rel="manifest" href="%PUBLIC_URL%/manifest.json" />

    <!--
      Notice the use of %PUBLIC_URL% in the tags above.
      It will be replaced with the URL of the `public` folder during the build.
      Only files inside the `public` folder can be referenced from the HTML.

      Unlike "/favicon.ico" or "favicon.ico", "%PUBLIC_URL%/favicon.ico" will
      work correctly both with client-side routing and a non-root public URL.
      Learn how to configure a non-root public URL by running `npm run build`.
    -->
    <title>React App</title>
  </head>
  <body>
    <noscript>You need to enable JavaScript to run this app.</noscript>
    <div id="root"></div>
    <!--
      This HTML file is a template.
      If you open it directly in the browser, you will see an empty page.

      You can add webfonts, meta tags, or analytics to this file.
      The build step will place the bundled scripts into the <body> tag.

      To begin the development, run `npm start` or `yarn start`.
      To create a production bundle, use `npm run build` or `yarn build`.
    -->
  </body>
</html>
Step 5
Add the below code in App.css:
.App {
  text-align: center;
}

.App-logo {
  height: 40vmin;
  pointer-events: none;
}

@media (prefers-reduced-motion: no-preference) {
  .App-logo {
    animation: App-logo-spin infinite 20s linear;
  }
}

.App-header {
  background-color: #282c34;
  min-height: 100vh;
  display: flex;
  flex-direction: column;
  align-items: center;
  justify-content: center;
  font-size: calc(10px + 2vmin);
  color: white;
}

.App-link {
  color: #61dafb;
}

@keyframes App-logo-spin {
  from {
    transform: rotate(0deg);
  }
  to {
    transform: rotate(360deg);
  }
}
Step 6
Add the below code in the contires.json:
[{
    "name": "Afghanistan",
    "code": "AF"
}, {
    "name": "Åland Islands",
    "code": "AX"
}, {
    "name": "Albania",
    "code": "AL"
}, {
    "name": "Algeria",
    "code": "DZ"
}, {
    "name": "American Samoa",
    "code": "AS"
}, {
    "name": "Andorra",
    "code": "AD"
}, {
    "name": "Angola",
    "code": "AO"
}, {
    "name": "Anguilla",
    "code": "AI"
}, {
    "name": "Antarctica",
    "code": "AQ"
}, {
    "name": "Antigua and Barbuda",
    "code": "AG"
}, {
    "name": "Argentina",
    "code": "AR"
}, {
    "name": "Armenia",
    "code": "AM"
}, {
    "name": "Aruba",
    "code": "AW"
}, {
    "name": "Uruguay",
    "code": "UY"
}, {
    "name": "Uzbekistan",
    "code": "UZ"
}, {
    "name": "Vanuatu",
    "code": "VU"
}, {
    "name": "Venezuela",
    "code": "VE"
}, {
    "name": "Viet Nam",
    "code": "VN"
}, {
    "name": "Virgin Islands, British",
    "code": "VG"
}, {
    "name": "Virgin Islands, U.S.",
    "code": "VI"
}, {
    "name": "Wallis and Futuna",
    "code": "WF"
}, {
    "name": "Western Sahara",
    "code": "EH"
}, {
    "name": "Yemen",
    "code": "YE"
}, {
    "name": "Zambia",
    "code": "ZM"
}, {
    "name": "Zimbabwe",
    "code": "ZW"
}]
Step 7
Add the following code in package.json:
{
  "name": "prime-demo",
  "version": "0.1.0",
  "private": true,
  "dependencies": {
    "@testing-library/jest-dom": "^5.16.4",
    "@testing-library/react": "^13.3.0",
    "@testing-library/user-event": "^13.5.0",
    "primeicons": "^5.0.0",
    "primereact": "^8.1.1",
    "react": "^18.1.0",
    "react-dom": "^18.1.0",
    "react-redux": "^8.0.2",
    "react-scripts": "^2.1.3",
    "redux": "^4.2.0",
    "web-vitals": "^2.1.4",
    "primeflex": "^3.1.0",
    "react-transition-group": "^4.4.1"
  },
  "scripts": {
    "start": "react-scripts start",
    "build": "react-scripts build",
    "test": "react-scripts test",
    "eject": "react-scripts eject"
  },
  "eslintConfig": {
    "extends": [
      "react-app",
      "react-app/jest"
    ]
  },
  "browserslist": {
    "production": [
      ">0.2%",
      "not dead",
      "not op_mini all"
    ],
    "development": [
      "last 1 chrome version",
      "last 1 firefox version",
      "last 1 safari version"
    ]
  }
}
Step 8
Run the following commands:
npm i
npm start
Step 9

Summary
In this article, we learned how to create a React project, set Prime React UI, and create React Js Progress Bar, Progress Spinner, and Prime React UI components.
Published at DZone with permission of abhishek saini. See the original article here.
Opinions expressed by DZone contributors are their own.
Comments