How to Erase or Wipe Sensitive Files From Hard Drive
This is a complete do-it-yourself guide to erase sensitive files and folders from a hard disk. No expert assistance required.
Join the DZone community and get the full member experience.
Join For FreeWhen you want to erase sensitive data from your hard drive permanently, make sure it is not recoverable in any manner. You can try permanent deletion that includes, erasing or ‘wiping’ data using various overwriting techniques. In this article, we've shared the best effective methods to wipe hard drive data beyond the scope of recovery.
We all keep some personal data on our devices. But, storage devices, like hard drives, have a lifespan after which, they may fail to perform, and you may want to dispose them. You may also want to donate or share your device with your friends or family. Whatever the situation is, you must wipe the hard drive to prevent any unauthorized access.
To do so, you may delete your sensitive data either using Shift + Del key (in Windows), by emptying the recycle bin, or by running a Quick/Full format on your hard drive. Irrespective of the deletion method, your data will be restorable. When you delete a file from a hard drive, only the file pointers (entries) get deleted; the data remains there (though inaccessible) and can be recovered easily using reliable data recovery software.
Therefore, you need a secure way to not just delete but erase your sensitive files from the hard drive. But before that, understand what 'Erase' or ‘Wipe’ means.
What Does 'Erase or Wipe' Mean?
'Erase’ or ‘Wipe' refers to overwriting the existing data with 0s, 1s, or random patterns onto all sectors of the hard drive to ensure data is gone permanently without even the slightest chance of recovery. Simply put, it overwrites the data on the hard drive to such an extent that the original data becomes unreadable or inaccessible.
Best Practice:
Remember to take backup of your important data before you erase your hard drive data.
How to Erase or Wipe Hard Drive Data?
Method 1: Erase Data using SDelete
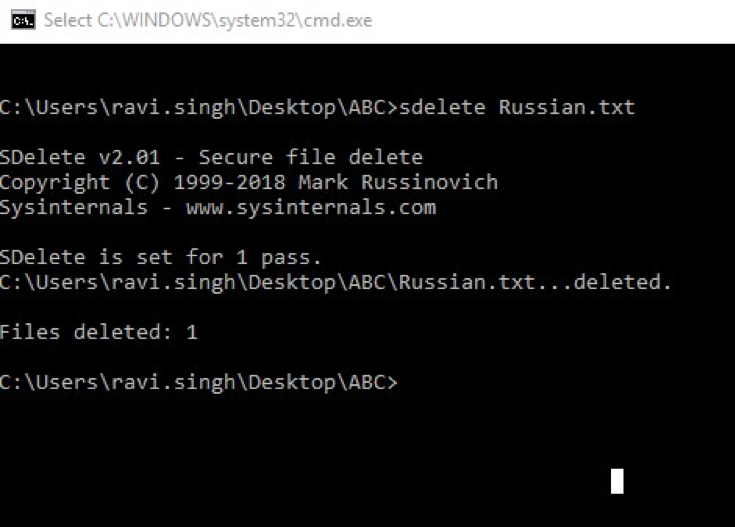
It is a command-line-based tool that lets you remove files and directories. It overwrites the free space on the drive to wipe traces of files deleted earlier with a secure delete pattern. Follow the given steps to wipe hard drive data:
- Download the SDelete tool and extract the downloaded file to a folder on the Desktop.
- Open Command Prompt and run it as administrator.
- If the SDelete file is located in D:\tools, type cd D:\tools and hit 'Enter.' (Replace the drive letter if the file is stored in a different location)
- Type Sdelete d:\tools\mytext.txt. Now, Press 'Enter' to remove the mytext.txt stored in D drive's 'tools' folder file. (See Image 1)

- Wait until the process is done. Once it’s done, you'll be prompted with a message confirming that files have been deleted completely.
Drawbacks
- No GUI is available.
- A bit difficult as it's a CMD line tool, requiring different commands to run the process.
- Being aware of the directories and file location of all browsing data, junk files, etc., is impractical.
- Technical expertise is required to use this software; else, it may lead you to permanent data loss.
Method 2: Using Cipher With Windows PowerShell
You can use Cipher with Windows PowerShell to erase hard drive data. This Windows built-in feature helps you efficiently overwrite data beyond recovery. Follow these steps to wipe hard drive data using Cipher:
- Type PowerShell in the Windows search bar to open Windows PowerShell.
- The Windows PowerShell window will open. Now, type cipher /w: folder and press Enter.
- If you want to erase C: folder, type cipher /w: C:\folder and press Enter. (See Image 2)
![Run cipher /w: folder command in Windows PowerShell]()
Image 2: Run cipher /w: folder command in Windows PowerShell - In doing so, the free space will be overwritten successfully. (However, the space where the files already exist will not be erased.)
Let the process end. It may take some time to erase files permanently.
Drawbacks:
- Time-consuming process
- No GUI is available
- A command-line tool that requires different commands to run
- Hands-on experience to use software, else you'd end up deleting your crucial data
Method 3: Erase Private Data Permanently Using DBAN
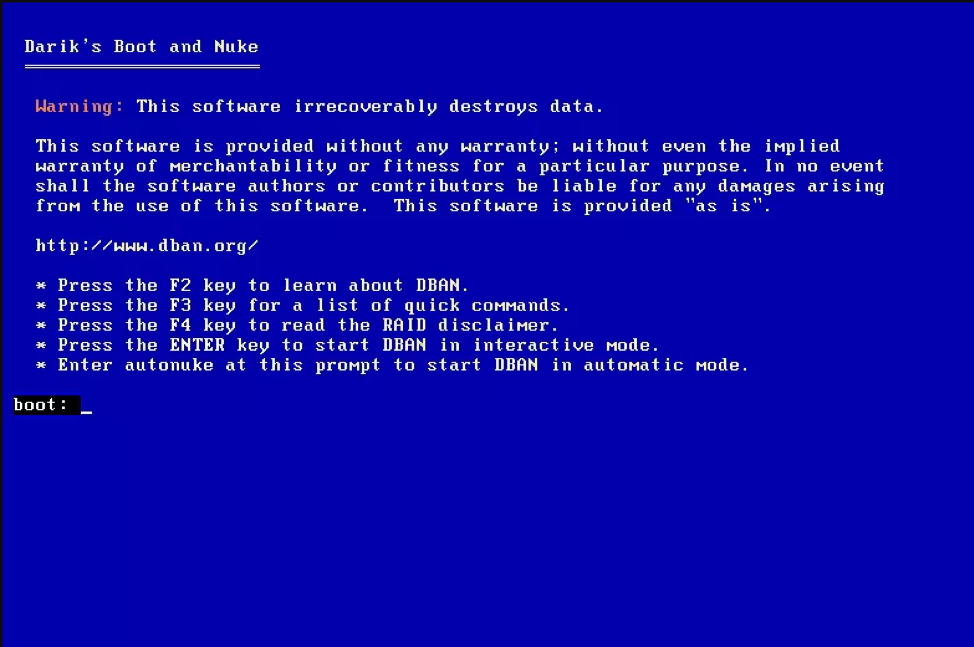
DBAN, short for Darik's Boot and Nuke, is an open-source data eraser tool designed to erase hard drive data in Windows 10 securely. This DIY tool can wipe everything on HDDs, including installed applications, system files, sensitive files, and even the operating system. Additionally, it removes spyware/viruses from your system. To erase data using DBAN, follow the given steps:
- Download the DBAN program. An ISO file will be downloaded. You can download the ISO file on the PC you want to erase data from or on a different one.
- Once downloaded, burn this ISO file to a bootable device, such as a CD drive or flash drive.
- Insert the bootable USB drive on which you burnt the file to your system and reboot it.
- Now, choose an option from DBAN main menu.
Note: DBAN is used only with the keyboard. A mouse will be useless. You'll have to follow the commands and use Keyboard keys.
- You'll see a blue screen with different instructions. Press the F3 command with the Fn key (Windows 10) to start using DBAN with Quick Commands. (See Image 3)
![Run cipher /w: folder command in Windows PowerShell]() Image 3: Press F3 to run Quick Commands
Image 3: Press F3 to run Quick Commands - Now, check the commands and choose the DBAN data sanitization method. (See Image 4)
![Dban-commands]() Image 4: Choose data sanitization method
Image 4: Choose data sanitization method - Choose the hard drive to wipe. And wait for the tool to erase the files. (See Image 5)
![Dban-commands-round-3]() Image 5: Wait for the tool to erase hard drive data
Image 5: Wait for the tool to erase hard drive data - Once done, you will see a message on the screen stating the erasure process is completed. (See Image 6)
![Dban-success]() Image 6: Erasure process completed message
Image 6: Erasure process completed message
Drawbacks:
- The software requires you to burn the ISO file on a CD or USB drive to run the software, which may be a little tricky for normal Windows users.
- Some laptops do not come with a built-in CD drive.
- It doesn’t detect or work with Solid-State Drives (SSDs).
- No assurance of data erasure across the entire drive
- No support and software updates available with the free version
Method 4: Erase Hard Drive Data With BitRaser File Eraser
BitRaser File Eraser is also a powerful data erasure tool, which can erase your data efficiently. It comes with a neat and user-friendly GUI that helps you wipe hard drive data beyond the scope of recovery. It safeguards your privacy by permanently erasing files, folders, internet history, offering you complete peace of mind within a short duration.
Unlike the tools mentioned above, BitRaser File Eraser is entirely safe to download and use. It doesn't affect your system files and programs stored in the C: drive. It uses data erasure algorithms based on US Department of Defense Standards to ensure secure file erasure. You can use this software even without any technical help or expertise.
- Download and run BitRaser File Eraser on your system.
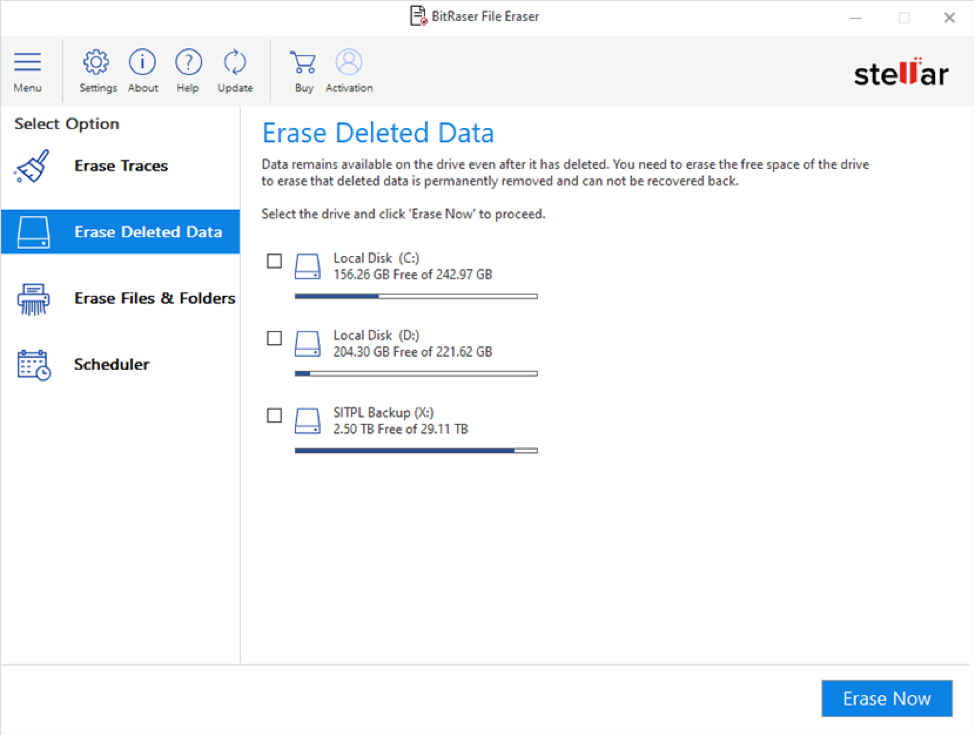
- Select Erase Deleted Data > Erase Now if you want to erase files deleted with the Shift + Del key beyond recovery. (See Image 7)
![Bitraser-file-eraser]() Image 7: Choose to delete the erased data
Image 7: Choose to delete the erased data - To securely wipe specific files or folders, choose 'Erase Files & Folders.'
- Your sensitive files from the hard drive will be erased permanently.
Pro Tip: You can run the 'Scheduler' using this software, enabling you to set a schedule and run it automatically for data erasure.
Drawback:
Requires activation after 30 days free trial.
Conclusion
We've covered the best available methods to wipe hard drive data in Windows 10. All these methods can overwrite data beyond the scope of recovery. However, they hold some drawbacks/limitations with every tool. You can review the above data erasure methods based upon their feature, ease of use, data erasure techniques, support, etc., and decide the one that fits your data erasure needs.
Opinions expressed by DZone contributors are their own.


Comments