How To Protect Node.js Apps With Jscrambler
Whether you want to protect important code logic or to prevent unauthorized access, here are the steps you should take to secure the source code of your Node.js apps.
Join the DZone community and get the full member experience.
Join For FreeNode.js is an extremely popular and open-source JavaScript runtime environment to create server-side applications.
This tutorial will explain how to integrate Jscrambler seamlessly into the build process of a typical Node.js app in just a few minutes. You'll learn how to protect your Node.js source code with the most advanced polymorphic obfuscation techniques, along with code locks and self-defensive capabilities.
Pre-Requisites
First, make sure that you have the latest version of npm installed on your local machine:
xxxxxxxxxx
npm update -g npm
Now, of course, we need a sample Node.js app to use in this tutorial. Let's go ahead and use a very simple "Hello World" Express app. First, let's install Express:
xxxxxxxxxx
npm install express --save
Then, let's create an app.js file in our project's root folder with the following code, provided in the Express website:
xxxxxxxxxx
const express = require('express')
const app = express()
const port = 3000
app.get('/', (req, res) => {
res.send('Hello World!')
})
app.listen(port, () => {
console.log(`Example app listening at http://localhost:${port}`)
})
This app starts a server and listens on port 3000 for connections. The app responds with “Hello World!” for requests to the root URL (/) or route.
If we run the app with:
xxxxxxxxxx
node app.js
We will see a "Hello World" message on localhost:3000.
Integrating Jscrambler
Let's begin by getting a ready-to-use file with our intended Jscrambler configuration.
If you haven't created a Jscrambler account yet, be sure to do so before moving forward.
Log into the Jscrambler Web App. Once there, create a new app. Now, it's time to pick the Jscrambler transformations that we want to use. We can pick them one-by-one in the Fine-Tuning tab but, in our case, let's go ahead to the Templates tab and pick the Obfuscation template. If you need help with these steps, please refer to this guide.
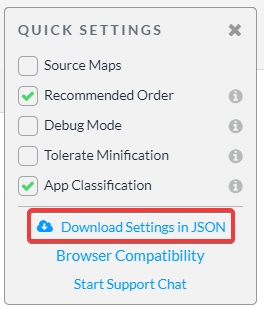
Now, we simply have to download a JSON file with all this configuration, which will be used only for quickly getting the required settings. You can do this by clicking the cogwheel next to "Protect App" on the right sidebar, which will present the following screen:
Now that you have the file with the needed configuration, you can integrate Jscrambler into your Node.js app's build process using one of two tools: Grunt or Gulp. Let's explore both approaches.
Grunt
Grunt is a JavaScript task runner with the goal of automating repetitive tasks like minification, compilation, unit testing, code protection, etc. In this case, it is a handy option to ensure that the source code of your Node.js app is always protected at build time.
To get started with Grunt, let's install it as a dev dependency:
xxxxxxxxxx
npm install grunt --save-dev
Now, we need to create a configuration file for Grunt, Gruntfile.js. This file contains our project and Grunt task configuration and loads Grunt plugins and tasks.
To keep things simple, let's set up a basic Gruntfile:
xxxxxxxxxx
module.exports = function(grunt) {
grunt.initConfig({
pkg: grunt.file.readJSON('package.json')
});
};
Next, we want to add the Jscrambler Grunt plugin:
xxxxxxxxxx
npm install grunt-jscrambler --save-dev
Now that the plugin is installed, we must enable it in our Gruntfile by adding this line at the bottom:
xxxxxxxxxx
grunt.loadNpmTasks('grunt-jscrambler');
Right after this line, we have to set the "default" Grunt task with:
xxxxxxxxxx
grunt.registerTask('default', ['jscrambler']);
Now that this is done, we also need to specify the task itself. Here, we will use some parts of the jscrambler.json file we downloaded earlier: accessKey, secretKey, applicationId, and the params array.
Our final Gruntfile.js file should look like this:
xxxxxxxxxx
module.exports = function(grunt) {
grunt.initConfig({
pkg: grunt.file.readJSON('package.json'),
jscrambler: {
main: {
options: {
keys: {
accessKey: 'YOUR_ACCESS_KEY',
secretKey: 'YOUR_SECRET_KEY'
},
applicationId: 'YOUR_APPLICATION_ID',
params: [
{
"name": "objectPropertiesSparsing"
},
{
"name": "variableMasking"
},
{
"name": "whitespaceRemoval"
},
{
"name": "identifiersRenaming",
"options": {
"mode": "SAFEST"
}
},
{
"name": "dotToBracketNotation"
},
{
"name": "stringConcealing"
},
{
"name": "functionReordering"
},
{
"options": {
"freq": 1,
"features": [
"opaqueFunctions"
]
},
"name": "functionOutlining"
},
{
"name": "propertyKeysObfuscation",
"options": {
"encoding": [
"hexadecimal"
]
}
},
{
"name": "regexObfuscation"
},
{
"name": "booleanToAnything"
}
]
},
files: [
{expand: true, src: ['app.js'], dest: 'dist/'},
]
}
}
});
grunt.loadNpmTasks('grunt-jscrambler');
grunt.registerTask('default', ['jscrambler']);
};
If we take a closer look at the files array, we'll see that Jscrambler will use the app.js file, protect it, and then place the protected version on the dist/ folder. You can change these to match your project's requirements.
Now, all that's left is to make sure that our build process is using Grunt. In our case, we must make sure that there's a script in our package.json file to build our app using Grunt:
xxxxxxxxxx
"scripts": {
"build": "grunt"
},
We're now ready to run our build:
xxxxxxxxxx
npm run build
That's it! If we check our /dist/app.js file, we will see that it has been obfuscated with Jscrambler.
Gulp
According to the 2019 State of JavaScript survey, Gulp is the second most popular build tool for JS. Similarly to Grunt, it allows you to automate repetitive workflows into efficient build pipelines.
To get started with Gulp, let's install it as a dev dependency:
xxxxxxxxxx
npm install gulp --save-dev
Let's also install the Jscrambler Gulp plugin:
xxxxxxxxxx
npm install gulp-jscrambler --save-dev
Now, we need to create a configuration file for Gulp, gulpfile.js.
Let's go right ahead and add the configurations we need to get Jscrambler working with Gulp. To do this, we will need some parts of the jscrambler.json file we downloaded earlier: accessKey, secretKey, applicationId, and the params array.
Our final gulpfile.js file should look like this:
xxxxxxxxxx
var gulp = require('gulp');
var jscrambler = require('gulp-jscrambler');
gulp.task('default', function (done) {
gulp
.src('app/**/*.js')
.pipe(jscrambler({
keys: {
accessKey: 'YOUR_ACCESS_KEY',
secretKey: 'YOUR_SECRET_KEY'
},
applicationId: 'YOUR_APPLICATION_ID',
params: [
{
"name": "objectPropertiesSparsing"
},
{
"name": "variableMasking"
},
{
"name": "whitespaceRemoval"
},
{
"name": "identifiersRenaming",
"options": {
"mode": "SAFEST"
}
},
{
"name": "dotToBracketNotation"
},
{
"name": "stringConcealing"
},
{
"name": "functionReordering"
},
{
"options": {
"freq": 1,
"features": [
"opaqueFunctions"
]
},
"name": "functionOutlining"
},
{
"name": "propertyKeysObfuscation",
"options": {
"encoding": [
"hexadecimal"
]
}
},
{
"name": "regexObfuscation"
},
{
"name": "booleanToAnything"
}
]
}))
.pipe(gulp.dest('dist/'))
.on('end', done);
});
If we take a closer look at this file, we'll see that src specified the path to the files that Jscrambler will use. At the bottom of the file, .pipe(gulp.dest('dist/')) places the protected version on the dist/ folder. You can change these to match your project's requirements.
Now, all that's left is to make sure that our build process is using Gulp. In our case, we must make sure that there's a script in our package.json file to build our app using Gulp:
xxxxxxxxxx
"scripts": {
"build": "gulp"
},
We're now ready to run our build:
xxxxxxxxxx
npm run build
That's it! If we check our /dist/app.js file, we will see that it has been obfuscated with Jscrambler.
Final Thoughts
Node.js is clearly the technology of choice to build server-side apps, especially thanks to useful frameworks like Express.
If you're building Node.js applications that have sensitive logic and want to prevent reverse-engineering, licensing violations, and tampering, hardening your source code with a resilient JavaScript protection solution is a must.
As we saw, you can easily integrate Jscrambler into Node's build process using either Grunt or Gulp.
Even though we used the Obfuscation template, feel free to try other templates and protection layers like Self-Defending for improved runtime protection.
Published at DZone with permission of . See the original article here.
Opinions expressed by DZone contributors are their own.
Comments